

A vanilla cake recipe is the foundation of countless celebrations, from birthdays to dinner parties, and mastering it means you’ll always have a reliable, crowd-pleasing dessert in your repertoire. This classic cake delivers a tender, fine crumb with a rich buttery flavor and delicate vanilla aroma that pairs beautifully with any frosting or filling. What sets this recipe apart is the reverse creaming method, which creates an exceptionally moist texture that stays soft for days without drying out.
Unlike traditional creaming methods that can sometimes result in a denser cake, this approach coats the flour particles with fat first, limiting gluten development and producing a velvety crumb that melts on your tongue. The result is a cake that’s sturdy enough to layer and frost, yet so tender it practically dissolves as you eat it.
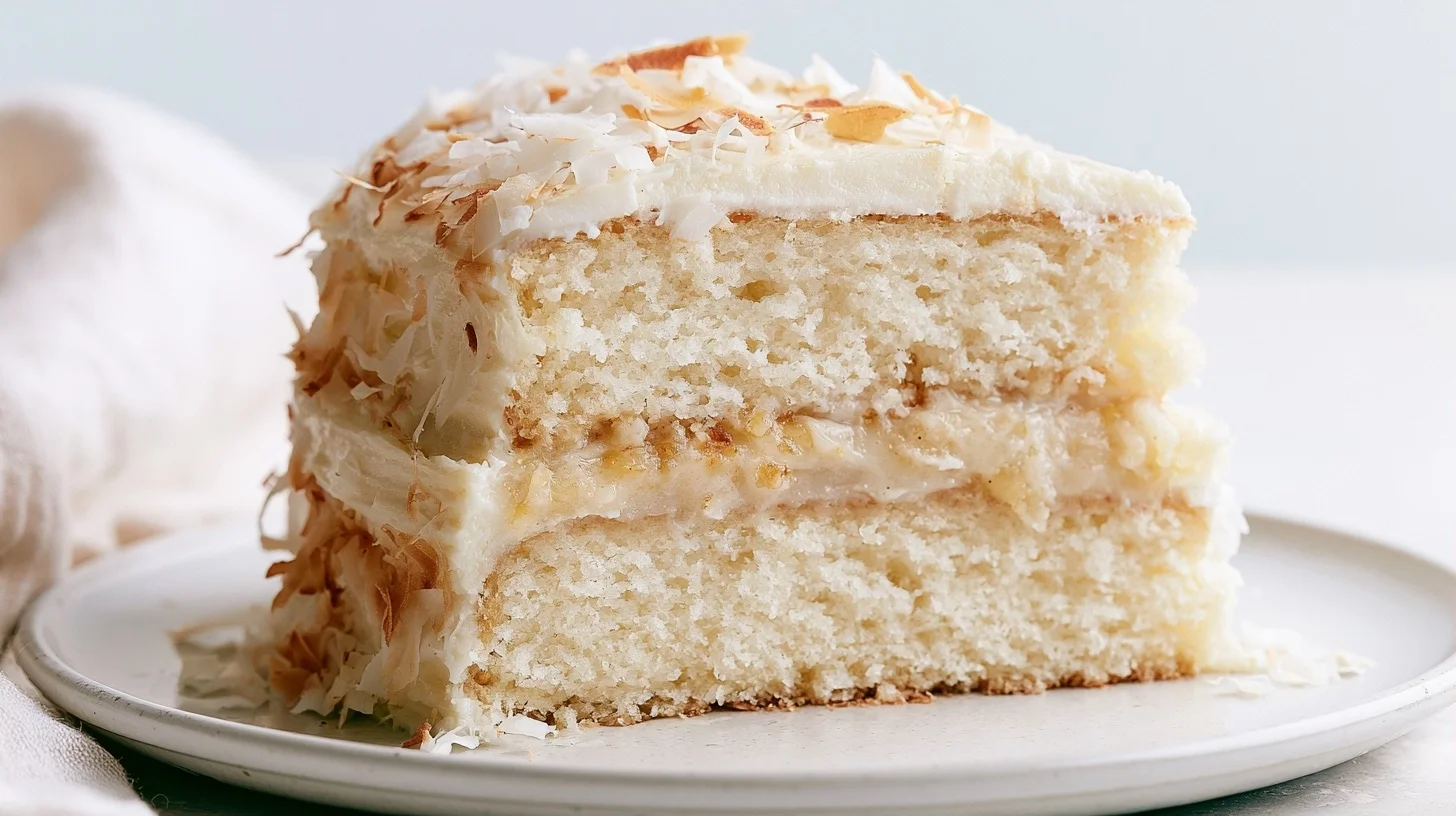
Table of contents
- Why You Will Love This Vanilla Cake Recipe
- Essential Equipment for Perfect Vanilla Cake
- How to Make Vanilla Cake Using Reverse Creaming
- How to Get a Moist, Tender Vanilla Recipe Every Time
- Common Vanilla Cake Mistakes and How to Fix Them
- Delicious Ways to Customize Your Vanilla Cake
- Nutrition and Calorie Breakdown
- How to Serve Vanilla Cake Recipe for Any Occasion
- How to Store Vanilla Cake to Keep It Fresh
- Frequently Asked Questions about Vanilla Cake Recipe
Why You Will Love This Vanilla Cake Recipe
- The reverse creaming method creates a fine, tender crumb that stays moist for up to four days at room temperature.
- This cake holds its shape beautifully when layered, making it ideal for frosting and decorating without crumbling.
- Simple pantry ingredients come together in under 15 minutes of active prep time.
- The neutral vanilla flavor serves as a perfect canvas for any frosting, filling, or flavor variation you prefer.
Essential Equipment for Perfect Vanilla Cake
Using the right equipment makes a noticeable difference in texture and baking consistency. Each piece serves a specific purpose in achieving that tender, even crumb.
- Two 9-inch round cake pans: Light-colored aluminum pans distribute heat evenly and prevent over-browning on the edges before the center sets.
- Stand mixer or hand mixer: The reverse creaming method requires thorough mixing at specific stages, and a mixer ensures consistent incorporation without overworking the batter.
- Fine mesh sieve: Sifting the dry ingredients removes lumps and aerates the flour, contributing to a lighter texture.
- Rubber spatula: Essential for scraping down the bowl between mixing stages to ensure all ingredients are evenly distributed.
- Toothpick or cake tester: The most reliable way to check doneness without cutting into the cake.
- Cooling rack: Allows air to circulate around the cake layers, preventing soggy bottoms and ensuring even cooling.
How to Make Vanilla Cake Using Reverse Creaming
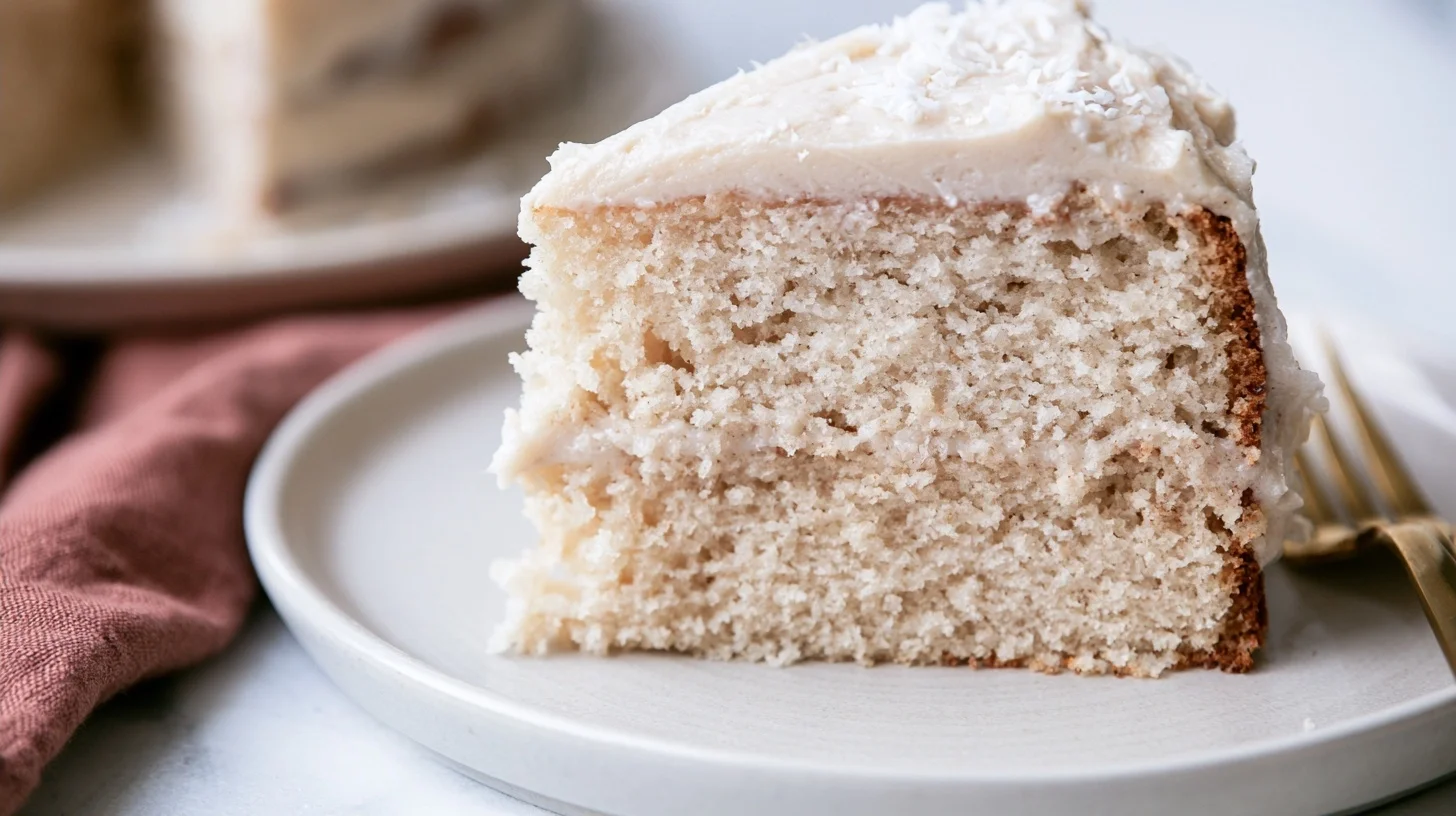
Vanilla Cake with Reverse Creaming Method
12
servings15
minutes30
minutes320
kcalThis classic vanilla cake uses the reverse creaming method to create an exceptionally tender, moist crumb that stays fresh for days. The technique coats flour particles with butter before adding liquid, limiting gluten development and producing a fine, velvety texture that’s perfect for layering and frosting.
Keep the screen of your device on
Ingredients
2.5 cups all-purpose flour
1.5 cups granulated sugar
2.5 teaspoons baking powder
0.5 teaspoon salt
0.75 cup unsalted butter
1 cup whole milk
3 large eggs
2 teaspoons pure vanilla extract
Directions
- Preheat your oven to 350°F and prepare two 9-inch round cake pans by greasing them thoroughly and lining the bottoms with parchment paper circles. This ensures the cakes release cleanly without sticking.
- Sift the flour, sugar, baking powder, and salt into the bowl of a stand mixer fitted with the paddle attachment. Sifting removes lumps and aerates the dry ingredients for a lighter texture.
- Add the softened butter to the dry ingredients and mix on low speed for about two minutes until the mixture resembles damp sand with no large butter chunks remaining. This step coats the flour particles with fat, which is essential for the reverse creaming method.
- Whisk together the milk, eggs, and vanilla extract in a separate bowl until well combined. Room temperature ingredients emulsify more easily and create a smoother batter.
- Pour about half of the wet ingredients into the flour mixture and mix on medium speed until just combined, then scrape down the bowl thoroughly with a rubber spatula.
- Add the remaining wet ingredients and mix on medium speed just until the batter is smooth and no streaks of flour remain, about 30 seconds. Avoid overmixing at this stage to prevent a tough texture.
Notes
- The reverse creaming method coats flour particles with fat before liquid is added, which limits gluten development and produces a finer, more tender crumb than traditional creaming methods.
- If your cake layers dome in the center, use cake strips around the pans or lower the oven temperature by 25°F and bake slightly longer for more even rising.
- Store unfrosted cake layers wrapped tightly in plastic wrap at room temperature for up to three days, or freeze for up to three months. Thaw frozen layers in the refrigerator overnight before frosting.
Nutrition Facts
- Serving Size: 1 g
- Total number of serves: 12
- Calories: 320kcal
- Fat: 15g
- Carbohydrates: 42g
- Fiber: 1g
- Protein: 4g
Did you make this recipe?
Tag @therecipemasterblog on Instagram and hashtag it with #therecipemaster
Like this recipe?
Follow @therecipemasterblog on Pinterest
Follow us on Facebook!
Follow The Recipe Master on Facebook
How to Get a Moist, Tender Vanilla Recipe Every Time
Use Room Temperature Ingredients
Room temperature butter, eggs, and milk emulsify more easily, creating a smooth batter that bakes evenly. Cold ingredients can cause the butter to seize up or the batter to curdle, resulting in a dense, uneven texture. Let your eggs and milk sit on the counter for about 30 minutes before you start, and make sure your butter is soft enough to leave a slight indent when pressed but not greasy or melted.
Mix the Dry Ingredients with Butter First
Combining the flour, sugar, baking powder, and salt with the softened butter creates a sandy, crumbly texture that coats each flour particle with fat. This coating limits the flour’s ability to absorb liquid and develop gluten, which is what keeps the cake tender rather than tough. Mix on low speed for about two minutes until the mixture resembles damp sand with no large butter chunks remaining.
Add Wet Ingredients in Stages
Adding the milk and eggs gradually allows the batter to emulsify properly without curdling. Start by mixing in about half the liquid ingredients, then scrape down the bowl thoroughly before adding the rest. This ensures every part of the batter receives the same amount of moisture and fat, which translates to an even crumb throughout the finished cake.
Avoid Overmixing After Adding Liquid
Once you’ve added all the wet ingredients, mix just until the batter is smooth and no streaks of flour remain. Overmixing at this stage develops gluten, which creates a tougher, chewier texture instead of the delicate crumb you’re aiming for. The batter should look thick, smooth, and pale, with a consistency similar to thick pancake batter.
Check for Doneness with Multiple Cues
A toothpick inserted into the center should come out with just a few moist crumbs clinging to it, not wet batter. The cake should also spring back lightly when touched in the center, and the edges should just begin pulling away from the sides of the pan. These visual and tactile cues work together to confirm the cake is fully baked without being overdone, which would dry it out.
You can explore more layered dessert ideas in this pumpkin spice latte cake recipe, which uses similar techniques for a moist, flavorful result.
Common Vanilla Cake Mistakes and How to Fix Them
Dense, Heavy Texture
This usually happens when the butter isn’t properly incorporated with the dry ingredients before adding the wet ingredients, or when the batter is overmixed after the liquid goes in. The reverse creaming method only works if the butter fully coats the flour particles, so make sure you mix the butter and dry ingredients until the mixture looks like damp sand with no visible butter chunks. If your batter looks curdled or separated, it’s often because the ingredients weren’t at room temperature, which prevents proper emulsification.
Dry or Crumbly Cake
Overbaking is the most common cause of dry cake. Even an extra two or three minutes in the oven can draw out too much moisture. Start checking for doneness a few minutes before the recipe’s suggested time, and remove the cake as soon as a toothpick comes out with moist crumbs. Another cause is measuring flour incorrectly—scooping directly from the bag compacts the flour and adds too much, which absorbs excess moisture. Always spoon flour into your measuring cup and level it off with a knife.
Uneven Rising or Domed Top
Uneven rising usually results from an oven with hot spots or from not leveling the batter in the pans before baking. Use an oven thermometer to verify your oven’s actual temperature, and rotate the pans halfway through baking if your oven heats unevenly. To prevent doming, you can also use cake strips around the outside of the pans, which insulate the edges and help the cake bake more evenly from edge to center.
Cake Sticking to the Pan
Even with greased pans, cakes can stick if they’re removed too soon or if the pan wasn’t prepared properly. Always line the bottom of your pans with parchment paper in addition to greasing, and let the cakes cool in the pans for exactly 10 minutes before turning them out. This gives the structure time to set without steaming and becoming soggy from sitting too long.
Delicious Ways to Customize Your Vanilla Cake
This vanilla cake serves as an ideal base for countless flavor variations. Because the vanilla flavor is neutral and the texture is sturdy, you can adapt it to suit any occasion or preference.
Chocolate Marble Cake
Reserve one cup of the prepared batter and mix in two tablespoons of cocoa powder and one tablespoon of milk until smooth. Drop spoonfuls of the chocolate batter into the vanilla batter in the pans, then swirl gently with a knife. The cocoa adds a slight bitterness that contrasts beautifully with the sweet vanilla base.
Lemon or Almond Vanilla Cake Recipe
Replace half the vanilla extract with almond extract for a subtle nutty flavor, or add the zest of two lemons along with one teaspoon of lemon extract for a bright, citrusy version. Both variations pair especially well with buttercream or cream cheese frosting.
Gluten-Free Vanilla Cake
Substitute the all-purpose flour with a 1:1 gluten-free baking flour that contains xanthan gum. The reverse creaming method works particularly well for gluten-free cakes because it minimizes the risk of a gummy texture, which is a common issue with gluten-free baking. The cake may be slightly more delicate, so handle the layers gently when frosting.
Dairy-Free Vanilla Cake Recipe
Replace the butter with an equal amount of vegan butter or coconut oil, and use unsweetened almond milk or oat milk instead of regular milk. The texture will be nearly identical, though coconut oil can add a faint coconut flavor depending on the brand. Make sure the vegan butter is also softened to room temperature before mixing.
Nutrition and Calorie Breakdown
Each slice of this vanilla cake contains approximately 320 calories, making it a moderately indulgent dessert. The cake provides about 4 grams of protein per serving, which comes primarily from the eggs and milk. Carbohydrates total around 42 grams per slice, with roughly 24 grams coming from sugar, which includes both the granulated sugar in the batter and the natural sugars in the milk.
Fat content is about 15 grams per serving, most of which comes from the butter. This fat contributes to the cake’s tender crumb and rich flavor. Fiber is minimal at around 1 gram per slice since the recipe uses refined all-purpose flour. If you’re looking to reduce sugar, you can cut the sugar by up to one-quarter cup without significantly affecting the texture, though the cake will be less sweet and may brown slightly less in the oven.
How to Serve Vanilla Cake Recipe for Any Occasion
This vanilla cake works beautifully as a simple snack cake dusted with powdered sugar, or as the base for an elaborately decorated layer cake. For a classic presentation, frost with vanilla buttercream and decorate with fresh berries or edible flowers. The neutral flavor also pairs well with fruit curds, chocolate ganache, or cream cheese frosting.
For a more casual serving style, cut the cake into squares and serve with a dollop of whipped cream and sliced strawberries. You can also toast slices lightly in a skillet with butter for a warm, caramelized treat that’s delicious with coffee or tea. If you’re serving this for a celebration, consider brushing the layers with a simple syrup flavored with vanilla or almond extract before frosting, which adds extra moisture and a subtle flavor boost.
For more background on this timeless dessert, you can read about the origins of vanilla cake and why it remains a beloved classic.
How to Store Vanilla Cake to Keep It Fresh
Store unfrosted cake layers wrapped tightly in plastic wrap at room temperature for up to three days. The reverse creaming method creates a cake that stays moist longer than traditional methods, so you don’t need to refrigerate it unless your kitchen is very warm or humid. If you’ve frosted the cake with buttercream, it can still sit at room temperature for up to two days as long as the frosting doesn’t contain perishable fillings like cream cheese or fresh fruit.
For longer storage, wrap unfrosted layers tightly in plastic wrap and then in aluminum foil before freezing for up to three months. Thaw frozen layers in the refrigerator overnight, then bring to room temperature before frosting. Frosted cakes can also be frozen, but freeze them uncovered first until the frosting is firm, then wrap carefully to avoid smudging the decoration.
Frequently Asked Questions about Vanilla Cake Recipe
Yes, this batter works perfectly for cupcakes. Fill cupcake liners about two-thirds full and bake at 350°F for 18 to 22 minutes, or until a toothpick comes out with moist crumbs. The reverse creaming method creates a sturdy crumb that holds up well in cupcake form.
A dense texture usually results from not fully incorporating the butter with the dry ingredients before adding the wet ingredients, or from overmixing the batter after the liquid is added. Make sure the butter and flour mixture looks like damp sand with no visible butter chunks, and mix just until smooth once the eggs and milk go in.
Yes, you can bake the cake layers up to two days in advance and store them wrapped tightly in plastic wrap at room temperature. You can also freeze unfrosted layers for up to three months. Thaw frozen layers in the refrigerator overnight, then bring to room temperature before frosting.
The reverse creaming method mixes the butter with the dry ingredients first, which coats the flour particles with fat before any liquid is added. This coating limits gluten development, resulting in a finer, more tender crumb compared to the traditional creaming method where butter and sugar are beaten together first.




Leave a Reply