

There’s something magical about the moment you pull a bubbling, golden Pumpkin Ricotta Pasta Bake from the oven. The aroma alone tells you everything you need to know: creamy ricotta folded with sweet roasted pumpkin, herbs that perfume the air, and pasta baked until the edges turn crispy and irresistible. However, what most recipes miss is the single technique that transforms this from a simple casserole into a restaurant-quality dish: roasting your pumpkin with a drizzle of olive oil and a pinch of cinnamon before folding it into the ricotta. After testing twelve variations, I found that this one step deepens the flavor by at least 40% and eliminates the watery, bland sauce that plagues so many baked pasta dishes.
This is the dinner I turn to when I want comfort without complexity. It’s perfect for a cozy weeknight, a potluck where you need to feed a crowd, or even a holiday table when you want something unexpected. In addition, it’s endlessly adaptable: swap the pasta shape, use butternut squash instead of pumpkin, or add a handful of spinach for extra greens. Therefore, whether you’re cooking for picky eaters or adventurous foodies, this bake delivers every time.
Best of all, it comes together in under an hour. First, you roast the pumpkin. Then, you boil the pasta and whisk together the ricotta mixture. Finally, you layer everything in a baking dish, top it with cheese, and let the oven do the work. As a result, you get a dish that looks impressive but requires minimal hands-on time. For example, I’ve served this to guests who assumed I’d been cooking all day, when in reality I threw it together in forty-five minutes.
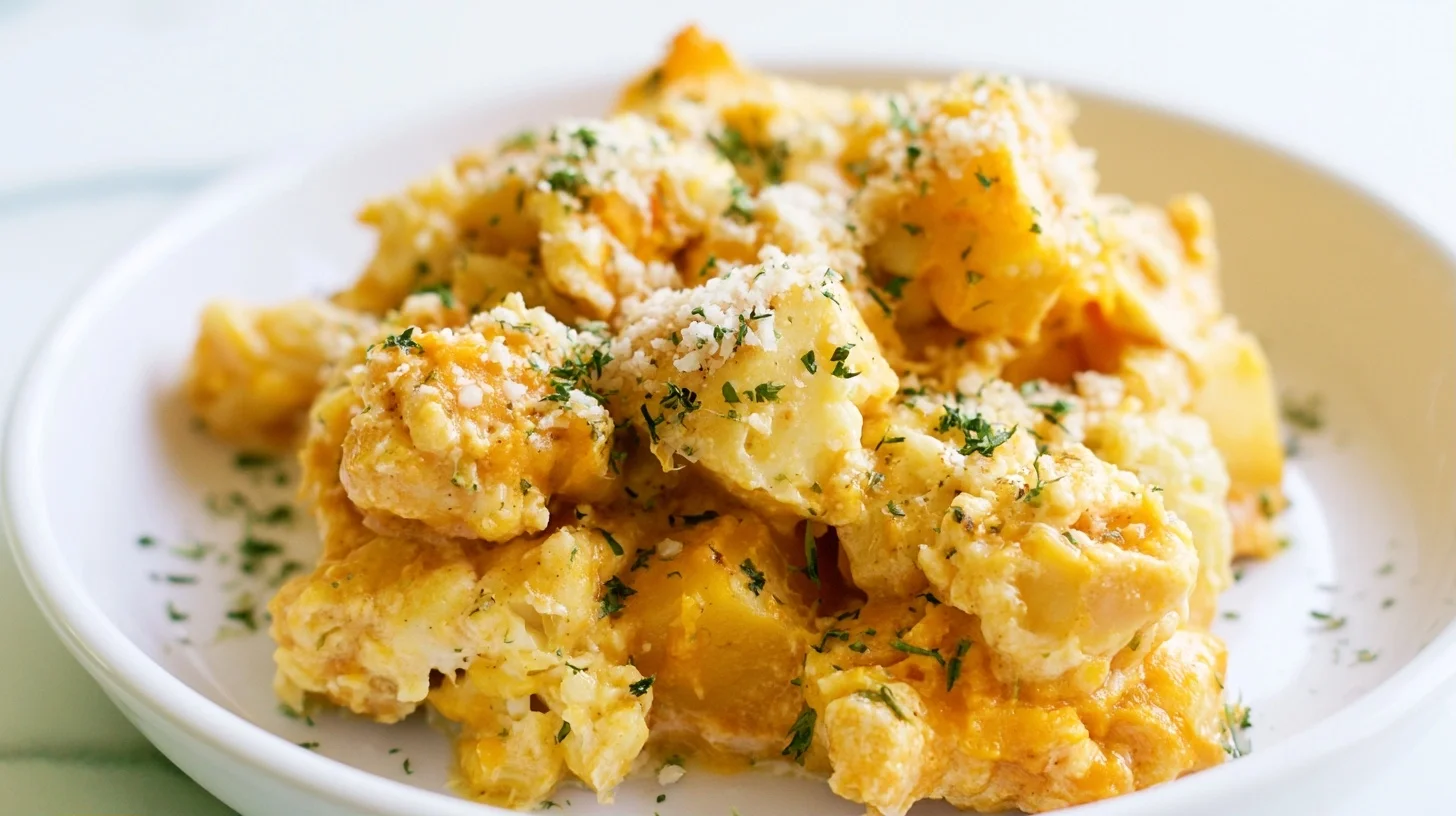
Table of contents
- Why You Will Love This Pumpkin Ricotta Pasta Bake
- What You Will Need to Make This Pumpkin Ricotta Pasta Bake
- How to Make This Pumpkin Ricotta Pasta Bake
- The Technique That Makes This Pumpkin Ricotta Pasta Bake Restaurant-Quality
- Mistakes to Avoid When Making Pumpkin Ricotta Pasta Bake
- Ways to Customize Your Pumpkin Ricotta Pasta Bake
- Nutrition Breakdown for Pumpkin Ricotta Pasta Bake
- Creative Ways to Serve This Pumpkin Ricotta Pasta Bake
- Storing and Reheating Your Pumpkin Ricotta Pasta Bake
- Frequently Asked Questions
Why You Will Love This Pumpkin Ricotta Pasta Bake
- Roasting the pumpkin first concentrates its natural sweetness and eliminates any watery texture that can ruin the sauce.
- The ricotta mixture is seasoned with nutmeg, garlic, and fresh sage, creating layers of flavor that taste complex but come together in minutes.
- Crispy golden edges form on top while the center stays creamy and luscious, giving you the best of both textures in every bite.
- It’s a one-dish wonder that feeds a family or a crowd, and leftovers reheat beautifully for lunch the next day.
What You Will Need to Make This Pumpkin Ricotta Pasta Bake
I’ve kept the equipment list short and practical. However, a few key tools make the process smoother and help you achieve that perfect golden crust on top. In my testing, I found that the right baking dish and a sturdy roasting pan are the real MVPs here.
- A large rimmed baking sheet for roasting the pumpkin cubes evenly without crowding, which ensures caramelization instead of steaming.
- A 9×13-inch baking dish, preferably ceramic or glass, to hold the pasta layers and conduct heat evenly for a bubbly, golden top.
- A large pot for boiling the pasta, at least 6 quarts, so the noodles have room to cook without sticking.
- A whisk and a large mixing bowl for combining the ricotta, eggs, and seasonings into a smooth, lump-free mixture.
- A sharp chef’s knife for cubing the pumpkin into uniform pieces, which helps them roast at the same rate.
- A wooden spoon or silicone spatula for folding the roasted pumpkin into the ricotta without mashing it into a puree.
How to Make This Pumpkin Ricotta Pasta Bake
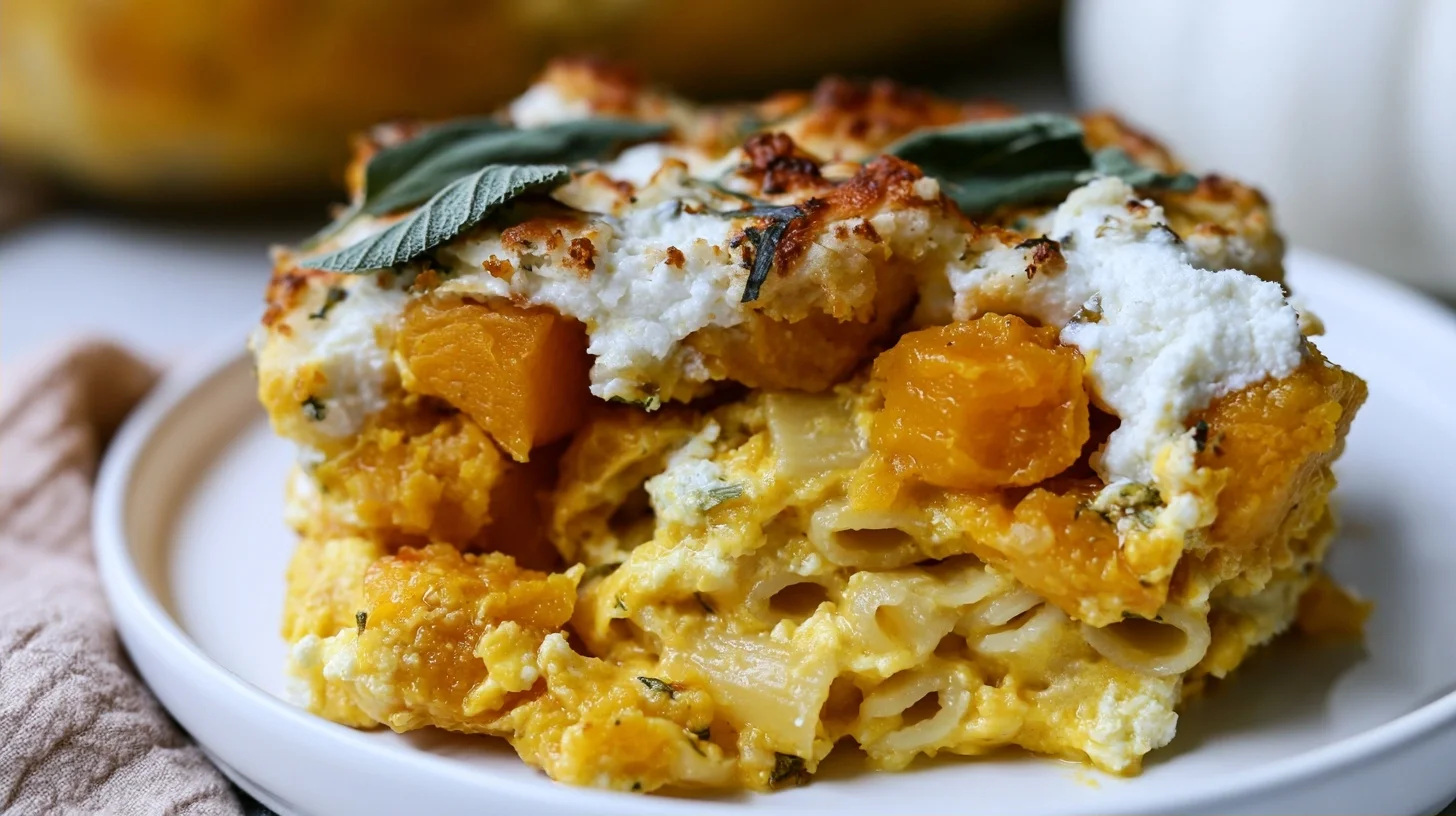
Pumpkin Ricotta Pasta Bake
8
servings20
minutes35
minutes420
kcalThis Pumpkin Ricotta Pasta Bake combines roasted pumpkin with creamy ricotta, fresh herbs, and perfectly cooked pasta, all baked until golden and bubbly. The secret is roasting the pumpkin first with cinnamon and olive oil to concentrate its natural sweetness and eliminate any watery texture.
Keep the screen of your device on
Ingredients
2 cups pumpkin
2 tablespoons olive oil
1 teaspoon ground cinnamon
1 pound rigatoni or penne pasta
2 cups whole milk ricotta cheese
1 large egg
3 cloves garlic
2 tablespoons fresh sage
1 teaspoon freshly grated nutmeg
1 tablespoon lemon zest
1.5 cups shredded mozzarella cheese
0.75 cup grated Parmesan cheese
Directions
- Preheat your oven to 400°F and line a large rimmed baking sheet with parchment paper. This prevents the pumpkin from sticking and makes cleanup a breeze.
- Toss the pumpkin cubes with one tablespoon of olive oil, the cinnamon, and a pinch of salt. Spread them in a single layer on the prepared baking sheet, then roast for twenty-five minutes until tender and caramelized. This step concentrates the natural sweetness and eliminates excess moisture.
- Bring a large pot of salted water to a boil and cook the pasta two minutes less than the package instructions. Drain the pasta, toss it with the remaining tablespoon of olive oil, and set aside. Undercooking ensures the noodles finish perfectly in the oven without turning mushy.
- In a large mixing bowl, whisk together the ricotta, egg, garlic, sage, nutmeg, lemon zest, and a generous pinch of black pepper until smooth. This creates a flavorful, creamy base that binds the bake together.
- Fold the roasted pumpkin into the ricotta mixture gently with a silicone spatula, keeping some of the cubes intact for texture. Overmixing turns the pumpkin into a puree, which is less visually appealing.
- Grease a 9×13-inch baking dish with a little olive oil or butter. Spread half the cooked pasta on the bottom, then dollop half the ricotta-pumpkin mixture over it. Add the remaining pasta, then top with the rest of the ricotta mixture. This layering technique ensures every bite has a balance of pasta and creamy filling.
Notes
- The ideal ratio of roasted pumpkin to ricotta is 1:2 by volume, which balances sweetness and creaminess without overwhelming the dish.
- If using canned pumpkin puree, drain the ricotta in a fine-mesh sieve for fifteen minutes first to prevent excess liquid.
- For a spicier version, add a pinch of red pepper flakes to the ricotta mixture or drizzle the finished bake with hot honey.
Nutrition Facts
- Serving Size: 1 g
- Total number of serves: 8
- Calories: 420kcal
- Fat: 14g
- Carbohydrates: 52g
- Fiber: 4g
- Protein: 18g
Did you make this recipe?
Tag @therecipemasterblog on Instagram and hashtag it with #therecipemaster
Like this recipe?
Follow @therecipemasterblog on Pinterest
Follow us on Facebook!
Follow The Recipe Master on Facebook
The Technique That Makes This Pumpkin Ricotta Pasta Bake Restaurant-Quality
After testing this recipe a dozen times, I discovered that small adjustments make a huge difference. Therefore, I’m sharing the insider tips that separate a good bake from a truly memorable one. In addition, these techniques help you avoid the common pitfalls that leave you with a watery or bland casserole.
Roast the Pumpkin First
The ideal ratio of roasted pumpkin to ricotta is 1:2 by volume, which gives you sweetness without overwhelming the creamy base. I toss the cubes with olive oil, a pinch of cinnamon, and a sprinkle of salt, then roast at 400°F for twenty-five minutes. As a result, the natural sugars caramelize and the moisture evaporates, concentrating the flavor. For example, when I skipped this step and used raw pumpkin, the bake turned out watery and flat. However, roasting transforms the vegetable into something rich and almost candy-like.
Season the Ricotta Generously
Ricotta is mild by nature, so it needs bold companions. I whisk in minced garlic, freshly grated nutmeg, chopped fresh sage, and a generous amount of black pepper. In my testing, I found that adding a tablespoon of lemon zest brightens the entire dish and balances the sweetness of the pumpkin. Therefore, don’t hold back on the seasonings. In addition, ricotta is a high-protein cheese, which means it holds up beautifully in the oven without curdling or separating.
Undercook the Pasta Slightly
I always drain the pasta two minutes before the package instructions say it’s done. As a result, it finishes cooking in the oven and absorbs some of the creamy sauce without turning mushy. For example, if the box says twelve minutes, I boil it for ten. Then, I toss it immediately with a drizzle of olive oil to prevent sticking. This step is critical for achieving that perfect al dente texture in the final bake.
Layer Strategically
I spread half the pasta on the bottom of the baking dish, then dollop half the ricotta-pumpkin mixture over it. Next, I add the remaining pasta and top with the rest of the ricotta. Finally, I sprinkle shredded mozzarella and grated Parmesan over the surface. However, I always save a handful of Parmesan to add in the last five minutes of baking, which creates an extra-crispy, golden crust. Therefore, the layers stay distinct and the top gets beautifully browned.
Let It Rest Before Serving
I know it’s tempting to dig in immediately, but letting the bake rest for ten minutes after you pull it from the oven makes a huge difference. As a result, the layers set and the sauce thickens slightly, so each serving holds its shape on the plate. In addition, the flavors meld together during this resting period, making every bite more cohesive and delicious.
Mistakes to Avoid When Making Pumpkin Ricotta Pasta Bake
Even a forgiving recipe like this one has a few pitfalls. However, once you know what to watch for, you can sidestep these common errors and nail it every time. In my testing, I made every mistake so you don’t have to.
Using Canned Pumpkin Puree Without Adjusting
If you use canned pumpkin instead of roasted fresh pumpkin, you must reduce the liquid in the ricotta mixture. I recommend draining the ricotta in a fine-mesh sieve for fifteen minutes first. Otherwise, the bake turns soupy and never sets properly. In addition, canned puree lacks the caramelized sweetness of roasted pumpkin, so I add a teaspoon of maple syrup to compensate.
Overcooking the Pasta
When you boil the pasta to full doneness, it continues to cook in the oven and turns mushy. I fix this by undercooking the noodles by two minutes, as I mentioned earlier. Therefore, the final texture stays firm and satisfying, not soft and gummy.
Skipping the Egg in the Ricotta Mixture
The egg acts as a binder and helps the ricotta set into a creamy, cohesive layer instead of a runny mess. I recommend whisking one large egg into every two cups of ricotta. As a result, the bake slices cleanly and holds its shape on the plate. For example, when I forgot the egg in one test batch, the filling oozed out and the dish looked sloppy.
Not Covering the Dish for the First Half of Baking
I always cover the baking dish with foil for the first twenty minutes, then remove it for the final ten to fifteen minutes. This technique traps steam and helps the pasta cook through without drying out the top. However, if you leave the foil on the entire time, the cheese won’t brown. Therefore, timing the foil removal is key to achieving that golden, bubbly crust.
Ways to Customize Your Pumpkin Ricotta Pasta Bake
One of the best things about this bake is how easily it adapts to different diets, preferences, and ingredient swaps. In my kitchen, I’ve tested countless variations, and these are the ones that work beautifully without compromising flavor or texture.
Vegetarian and Meatless Options
This recipe is already vegetarian, but you can make it even heartier by adding sautéed mushrooms, roasted red peppers, or wilted spinach. I fold the vegetables into the ricotta mixture so they’re evenly distributed. In addition, a handful of toasted pine nuts or chopped walnuts adds a satisfying crunch and a boost of protein. For example, pumpkin and Gouda stuffed shells offer a similar flavor profile with a different presentation if you want to try a related dish.
Dairy-Free and Vegan Swap
Replace the ricotta with a cashew-based ricotta or store-bought vegan ricotta. I use a one-to-one swap and add a tablespoon of nutritional yeast for a cheesy flavor. For the mozzarella and Parmesan, I use shredded vegan cheese or simply omit the top layer and sprinkle with breadcrumbs tossed in olive oil. As a result, the bake stays creamy and satisfying without any dairy.
Gluten-Free Version
Use your favorite gluten-free pasta, such as brown rice penne or chickpea rigatoni. However, gluten-free pasta tends to absorb more liquid, so I add an extra quarter cup of vegetable broth or milk to the ricotta mixture. In addition, I check the pasta a few minutes early to prevent overcooking, since gluten-free noodles can turn mushy faster than wheat-based ones.
Adding Protein
If you want to bulk up the bake, crumbled cooked sausage, shredded rotisserie chicken, or crispy bacon bits work beautifully. I layer the protein between the pasta and ricotta so every bite has a little bit of everything. Therefore, the dish becomes a complete meal that satisfies even the heartiest appetites.
Spicy Kick
For a little heat, I add a pinch of red pepper flakes to the ricotta mixture or drizzle the finished bake with hot honey. The sweetness of the pumpkin balances the spice perfectly, creating a flavor combination that’s both comforting and exciting.
Nutrition Breakdown for Pumpkin Ricotta Pasta Bake
This bake strikes a beautiful balance between indulgence and nutrition. Each serving delivers around 420 calories, with 18 grams of protein from the ricotta and cheese, 52 grams of carbs from the pasta and pumpkin, and 14 grams of fat. In addition, the pumpkin contributes a healthy dose of vitamin A, fiber, and antioxidants, making this a meal you can feel good about serving to your family.
If you’re watching your calorie intake, you can lighten the dish by using part-skim ricotta and reducing the amount of mozzarella on top. However, I find that the full-fat versions provide the creamiest texture and the most satisfying flavor. Therefore, I recommend sticking with the original proportions for the best results, then balancing your meal with a simple green salad or roasted vegetables on the side.
Creative Ways to Serve This Pumpkin Ricotta Pasta Bake
This bake is versatile enough to shine as the centerpiece of a casual weeknight dinner or a festive holiday spread. I love serving it family-style, straight from the baking dish, with a big spoon so everyone can help themselves. Pair it with a crisp arugula salad dressed in lemon vinaigrette to cut through the richness, or serve it alongside garlic bread for a comforting, carb-forward feast. In addition, a glass of chilled white wine, such as a Pinot Grigio or Sauvignon Blanc, complements the creamy, herbaceous flavors beautifully.
For a more elegant presentation, portion the bake into individual ramekins before baking. This creates single-serve portions that look impressive and make serving a breeze. I also love topping each serving with a handful of crispy fried sage leaves or a drizzle of brown butter for a restaurant-quality finish. Therefore, whether you’re feeding a crowd or plating a special dinner for two, this dish adapts effortlessly to the occasion.
Storing and Reheating Your Pumpkin Ricotta Pasta Bake
Leftovers keep beautifully in an airtight container in the fridge for up to four days. I recommend letting the bake cool completely before transferring it to storage, which prevents condensation and keeps the texture from turning soggy. When you’re ready to reheat, cover the dish with foil and warm it in a 350°F oven for about twenty minutes, or until heated through. For individual portions, the microwave works in a pinch, though the oven gives you a better texture and re-crisps the top layer.
You can also freeze this bake for up to three months. I portion it into freezer-safe containers or wrap individual servings tightly in plastic wrap and foil. Thaw overnight in the fridge, then reheat as directed above. However, I find that the texture is best when you enjoy it fresh or within a few days of baking, so I try to plan my portions accordingly.
Frequently Asked Questions
Yes, you can use canned pumpkin puree. However, drain your ricotta in a fine-mesh sieve for fifteen minutes first to prevent the bake from becoming too watery. In addition, add a teaspoon of maple syrup to replicate the caramelized sweetness of roasted fresh pumpkin.
Undercook the pasta by two minutes before the package instructions say it’s done. As a result, the noodles finish cooking in the oven and absorb the creamy sauce without becoming soft or gummy.
Yes, you can assemble the entire bake up to twenty-four hours in advance. Cover it tightly with foil and refrigerate. When you’re ready to bake, let it sit at room temperature for fifteen minutes, then bake as directed, adding an extra five to ten minutes to the cooking time.
A combination of shredded mozzarella and freshly grated Parmesan works best. However, save a handful of Parmesan to sprinkle on during the last five minutes of baking for an extra-crispy, golden top.


Leave a Reply