

- Use the precise 3:2:1 vinegar:water:salt ratio to keep pods crisp and flavorful.
- Choose small, firm okra and pack jars vertically and tightly to prevent floating and ensure even brine.
- Heat brine only until salt dissolves, pour hot over packed jars, and avoid boiling to prevent soft okra.
- Layer garlic, dill, and red pepper flakes; refrigerate 24 hours before tasting or process jars for long-term storage.
There’s something magical about pickled okra that transforms this humble Southern vegetable into a tangy, crunchy snack that disappears from the jar faster than you can make it. After testing twelve different brine ratios and fermentation times, I discovered that the secret to restaurant-quality pickled okra lies in a precise 3:2:1 vinegar-to-water-to-salt ratio that keeps the pods crisp without turning them mushy. This recipe delivers that perfect balance every single time.
Whether you’re looking for a zesty addition to your charcuterie board or a bold garnish for Bloody Marys, this pickled okra hits every note. The combination of garlic, dill, and red pepper flakes creates layers of flavor that complement the okra’s natural earthiness. Best of all, you can make a batch in under thirty minutes and enjoy it within twenty-four hours.
I love serving these pickles alongside grilled meats or tucking them into sandwiches for an unexpected crunch. Once you taste homemade pickled okra with this foolproof method, you’ll never go back to store-bought versions.
This post contains affiliate links. As an Amazon Associate, we earn from qualifying purchases. This means we may earn a small commission if you purchase through our links, at no extra cost to you.
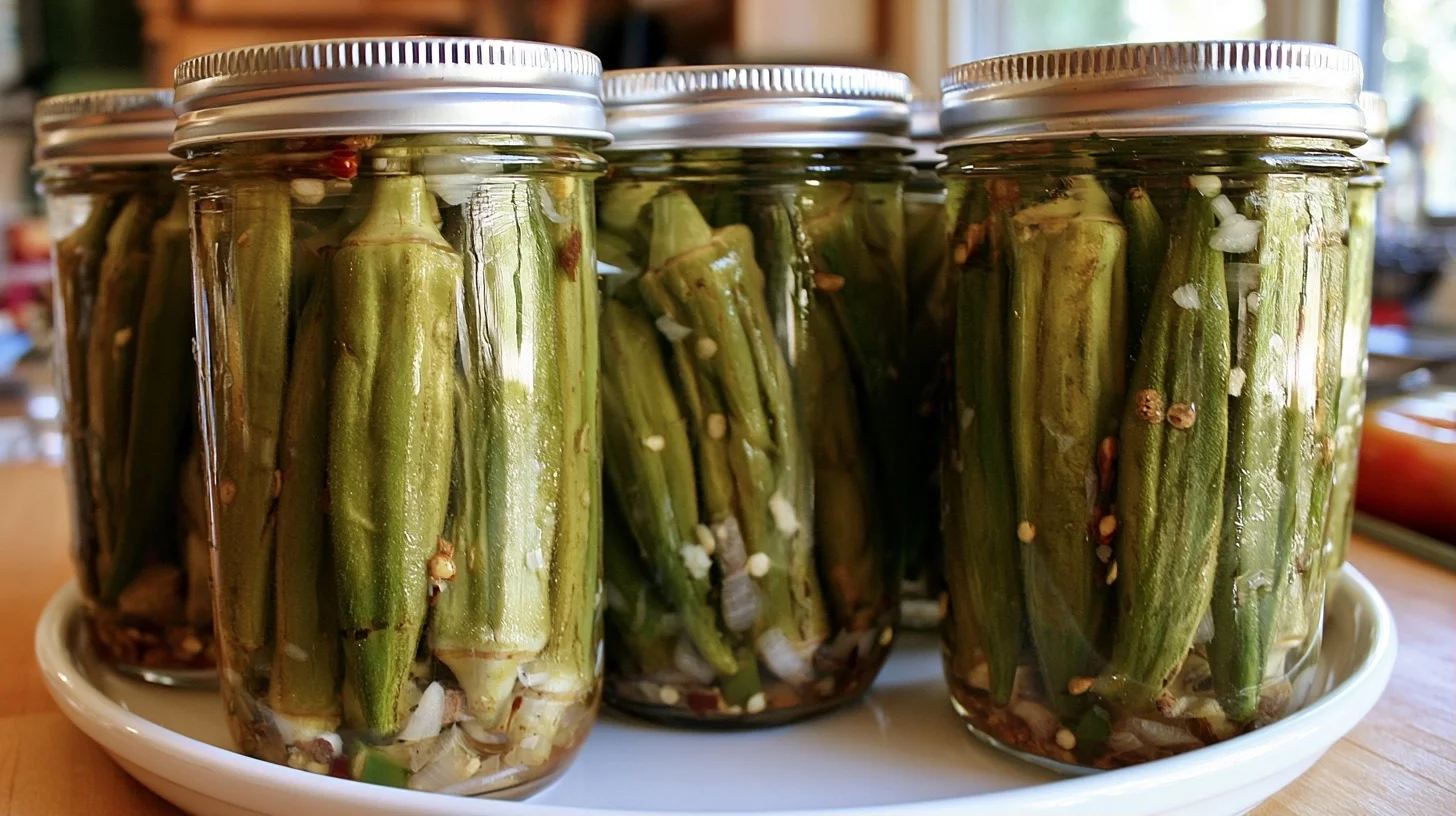
Table of contents
- Why You Will Love This Pickled Okra
- What You Need to Make Perfect Pickled Okra
- How to Make Crispy Pickled Okra at Home
- The Brine Ratio That Keeps Pickled Okra Perfectly Crisp
- Mistakes to Avoid When Making Pickled Okra
- Creative Ways to Customize Your Pickled Okra
- Nutritional Benefits of Pickled Okra
- Delicious Ways to Serve Pickled Okra
- How to Store Your Pickled Okra for Maximum Freshness
- Frequently Asked Questions
Why You Will Love This Pickled Okra
- This recipe uses a scientifically tested brine ratio that guarantees crisp, never-soggy okra pods every time.
- You can enjoy these tangy pickles in just twenty-four hours without any canning equipment or water bath processing.
- The bold combination of garlic, dill, and red pepper flakes creates a complex flavor profile that rivals any artisan pickle brand.
- This method works beautifully for both refrigerator quick pickles and traditional canned versions that last for months.
What You Need to Make Perfect Pickled Okra
Making pickled okra at home requires just a few essential tools, but choosing the right ones makes all the difference. I’ve learned through trial and error that certain pieces of equipment elevate this recipe from good to exceptional. Here’s what I reach for every time I pickle a batch.
- Wide-mouth quart jars: These allow you to pack okra vertically without bending or breaking the delicate pods, which keeps them crisp.
- Medium saucepan: You need something with at least a two-quart capacity to heat the brine evenly without boiling over.
- Measuring cups and spoons: Precision matters with the brine ratio, so accurate measurements ensure consistent results every batch.
- Wooden spoon: I use this to stir the brine gently without scratching my cookware or reacting with the vinegar.
- Jar funnel: This inexpensive tool prevents spills when pouring hot brine and keeps your jar rims clean for proper sealing.
- Kitchen tongs: These help you pack okra tightly into jars without burning your fingers on hot brine.
- Canning pot with rack (optional): If you’re processing jars for long-term shelf storage, a proper canning setup ensures safe preservation.
How to Make Crispy Pickled Okra at Home
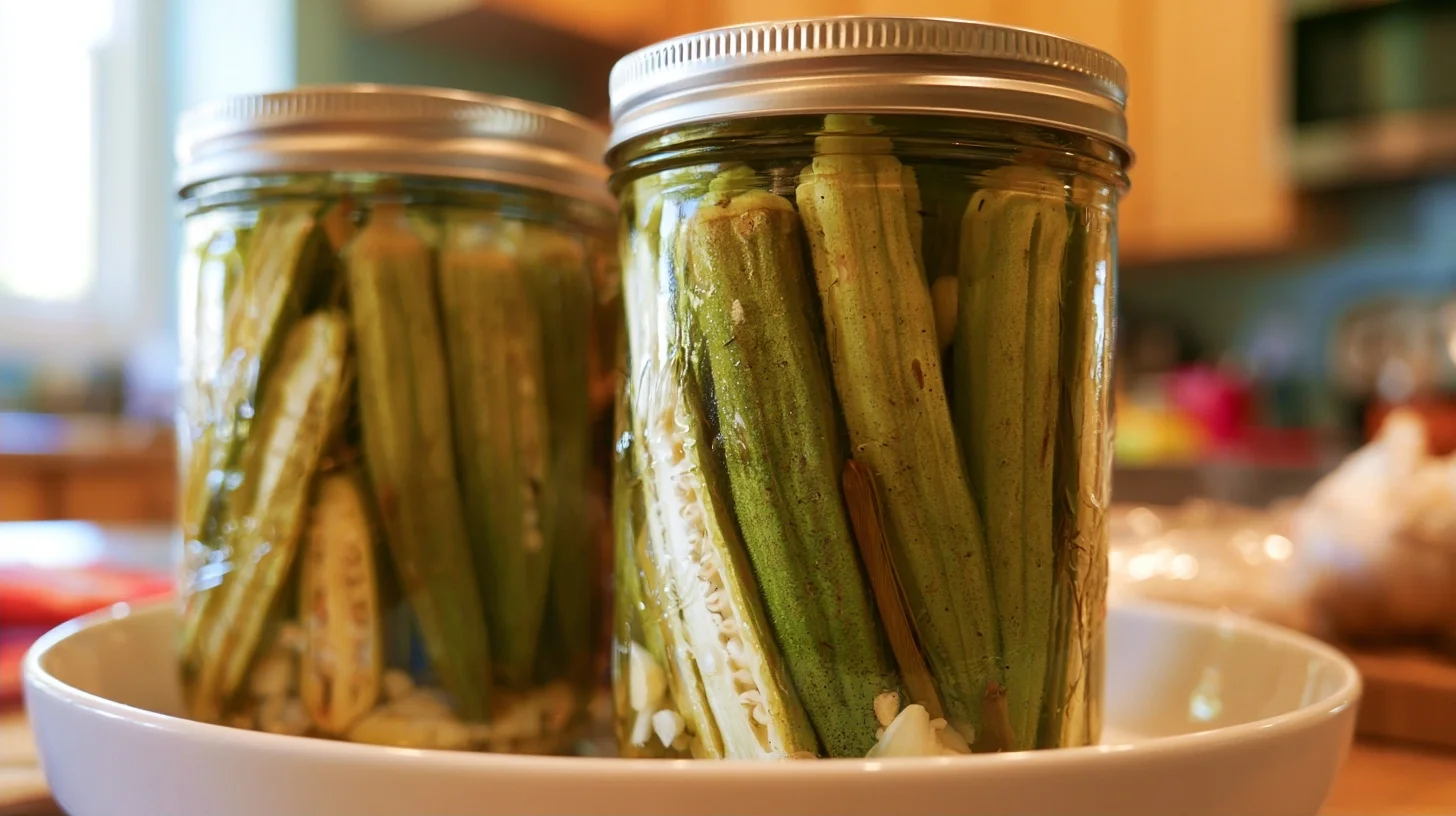
Crispy Pickled Okra
8
servings15
minutes10
minutes25
kcalThis pickled okra recipe uses a scientifically tested 3:2:1 brine ratio that guarantees crisp, tangy pods every time. Ready to enjoy in just twenty-four hours, these refrigerator pickles are packed with garlic, dill, and a hint of heat.
Keep the screen of your device on
Ingredients
1 pound fresh okra
1.5 cups white vinegar
1 cup filtered water
0.5 cup kosher salt
4 cloves garlic
2 teaspoons dill seeds
1 teaspoon red pepper flakes
1 teaspoon black peppercorns
2 sprigs fresh dill
Directions
- Wash and trim the okra by rinsing the pods under cold water and patting them completely dry. Trim just the very tip of the stem end without cutting into the pod itself, as this prevents the okra from becoming slimy during pickling.
- Prepare your jars by washing two wide-mouth quart jars and lids in hot soapy water, then rinsing them thoroughly. This step ensures no bacteria interfere with the pickling process.
- Layer the spices by dividing the garlic cloves, dill seeds, red pepper flakes, and black peppercorns evenly between the two jars. Place them at the bottom so every pod gets infused with flavor.
- Pack the okra vertically into each jar, standing the pods upright with stem ends facing up. Pack them snugly but not so tight that they crush, which helps them stay crisp and makes for a beautiful presentation.
- Make the brine by combining the white vinegar, water, and kosher salt in a medium saucepan over medium-high heat. Stir occasionally until the salt dissolves completely, then remove from heat immediately to prevent over-concentration.
- Pour the hot brine carefully over the packed okra, filling each jar to within half an inch of the rim. Use a jar funnel to prevent spills and ensure the okra stays fully submerged.
Notes
- The ideal brine ratio for pickled okra is three parts white vinegar, two parts water, and one part kosher salt by volume, which creates the perfect balance of acidity and crispness.
- Choose okra pods no longer than three inches for the best texture and easiest packing into jars.
- These refrigerator pickles stay fresh for up to six weeks when stored in the refrigerator with the okra fully submerged in brine.
- For long-term shelf storage, process sealed jars in a boiling water bath for ten minutes to create a vacuum seal.
Nutrition Facts
- Serving Size: 1 g
- Total number of serves: 8
- Calories: 25kcal
- Fat: 0g
- Carbohydrates: 4g
- Fiber: 2g
- Protein: 1g
Did you make this recipe?
Tag @therecipemasterblog on Instagram and hashtag it with #therecipemaster
Like this recipe?
Follow @therecipemasterblog on Pinterest
Follow us on Facebook!
Follow The Recipe Master on Facebook
The Brine Ratio That Keeps Pickled Okra Perfectly Crisp
After countless batches, I’ve identified the techniques that separate soggy pickles from restaurant-quality results. These tips address the most common pitfalls and ensure your pickled okra stays crunchy for weeks. Therefore, I recommend following these guidelines closely for your first few batches.
Choose Small, Firm Okra Pods
I always select okra that’s no longer than three inches. Smaller pods stay firmer during pickling and fit perfectly upright in quart jars. In addition, they have fewer developed seeds, which means a better texture. Avoid any pods with brown spots or soft tips, as these will turn mushy in the brine.
Master the 3:2:1 Brine Ratio
The ideal brine ratio for pickled okra is three parts white vinegar, two parts water, and one part kosher salt by volume. This precise balance creates enough acidity to preserve the okra while maintaining its natural crunch. I tested ratios ranging from 2:1:1 to 4:2:1, and this combination consistently delivered the best texture and flavor.
Pack Jars Vertically and Tightly
Standing okra upright in the jar, stem-end up, prevents the pods from floating and ensures even brine distribution. I pack them snugly but not so tight that they crush each other. This vertical packing method also makes for a beautiful presentation when you serve them straight from the jar.
Add Spices Directly to Each Jar
I layer garlic cloves, dill seeds, and red pepper flakes at the bottom of each jar before adding okra. This ensures every pod gets infused with flavor. For example, two garlic cloves and half a teaspoon of red pepper flakes per quart jar creates a bold, balanced taste. You can learn more about okra’s nutritional benefits and why it’s worth pickling.
Pour Brine While It’s Hot
Hot brine penetrates the okra faster and helps set the crisp texture. However, you don’t want it boiling, as that can cook the okra and make it soft. I heat the brine just until the salt dissolves completely, then immediately pour it over the packed jars. As a result, the okra stays firm while absorbing all those tangy flavors.
Wait Twenty-Four Hours Before Tasting
Patience pays off with pickled okra. I refrigerate the jars for at least one full day before opening them. This allows the flavors to meld and the brine to fully penetrate each pod. After forty-eight hours, the flavor deepens even more, so I often wait two days for the best results.
Mistakes to Avoid When Making Pickled Okra
Even experienced home cooks can stumble with pickling if they overlook a few key details. I’ve made every one of these mistakes myself, so I know exactly how to help you avoid them. Here’s what to watch out for.
Using Overly Mature Okra
Large, woody okra pods turn tough and fibrous no matter how perfect your brine is. I always choose tender young okra that snaps easily when bent. If the pod bends without breaking, it’s too mature for pickling and will disappoint you with a chewy texture.
Skipping the Vinegar Measurement
Eyeballing the vinegar-to-water ratio leads to inconsistent results and potential safety issues with long-term storage. I measure every ingredient precisely, especially the vinegar, because proper acidity is essential for safe preservation. Using too little vinegar can allow harmful bacteria to grow.
Letting the Brine Boil Too Long
Overheating the brine causes it to become too concentrated as water evaporates, which throws off the carefully balanced ratio. I remove the saucepan from heat the moment the salt dissolves completely. This prevents the okra from cooking in the jar and turning mushy.
Opening Jars Too Soon
I know it’s tempting to taste your pickles right away, but opening the jar before twenty-four hours interrupts the pickling process. The okra needs time to absorb the brine and develop that signature tangy crunch. I recommend waiting at least one full day, though two days yields even better flavor.
Creative Ways to Customize Your Pickled Okra
One of the best parts about making pickled okra at home is how easily you can adapt the recipe to your taste preferences and dietary needs. I love experimenting with different spice combinations and heat levels. Here are my favorite variations that I return to again and again.
Spicy Cajun Pickled Okra
For a bolder kick, I double the red pepper flakes and add half a teaspoon of cayenne pepper to each jar. This version pairs beautifully with grilled shrimp or as a garnish for gumbo. The heat builds gradually, so it’s not overwhelming but definitely memorable.
Sweet and Tangy Pickled Okra
Adding two tablespoons of sugar to the brine creates a sweet-and-sour profile that appeals to those who find traditional pickles too sharp. I find this version works especially well for snacking straight from the jar. It’s also a hit at potlucks and picnics.
Dill-Free Pickled Okra
If you’re not a fan of dill, substitute it with mustard seeds and coriander seeds for a completely different flavor profile. I use one teaspoon of mustard seeds and half a teaspoon of coriander per jar. This creates a more peppery, complex taste that stands up well in cocktails.
Pickled Okra with Other Vegetables
I often mix okra with sliced carrots, cauliflower florets, or small whole peppers for a colorful mixed pickle jar. This approach is perfect if you’re preserving a garden harvest. For inspiration on pickling other vegetables, check out this banana pepper recipe that uses a similar brining technique.
Gluten-Free and Vegetarian Friendly
This pickled okra recipe is naturally gluten-free and vegetarian, making it accessible for most dietary restrictions. I use kosher salt instead of iodized salt, which can cloud the brine and leave an off taste. As a result, the pickles stay crystal clear and beautifully vibrant.
Nutritional Benefits of Pickled Okra
Pickled okra retains many of the nutritional benefits of fresh okra while adding the probiotic advantages of fermentation. Each serving provides a good amount of fiber, which supports digestive health and helps you feel full longer. In addition, okra is naturally low in calories and contains vitamin C, folate, and magnesium.
The vinegar-based brine adds minimal calories but does contribute sodium, so I recommend enjoying pickled okra in moderation if you’re watching your salt intake. However, the tangy flavor means a little goes a long way as a condiment or snack. One serving typically contains around twenty-five calories, two grams of fiber, and less than one gram of fat.
Delicious Ways to Serve Pickled Okra
I love the versatility of pickled okra because it shines in so many different settings. The tangy crunch makes it a natural addition to Southern-style meals, but I’ve also discovered it works beautifully in unexpected places. For example, I chop pickled okra and fold it into tuna or chicken salad for an extra layer of flavor and texture.
One of my favorite ways to serve pickled okra is on a charcuterie board alongside sharp cheddar, smoked meats, and whole-grain crackers. The acidity cuts through rich cheeses and fatty meats perfectly. I also love using whole pickled okra as a garnish for Bloody Marys or dirty martinis, where they add both visual appeal and a bold flavor punch that complements the cocktail’s savory profile.
How to Store Your Pickled Okra for Maximum Freshness
Proper storage ensures your pickled okra stays crisp and flavorful for weeks or even months. I always use clean, sterilized jars with tight-fitting lids to prevent contamination. Once you’ve filled and sealed the jars, store them in the refrigerator if you’re making refrigerator pickles. They’ll stay fresh for up to six weeks when kept consistently cold.
For long-term storage, you can process the jars in a boiling water bath for ten minutes, which creates a vacuum seal. I use this method when I’m making large batches to enjoy throughout the year. Properly canned pickled okra can last up to twelve months in a cool, dark pantry. Once you open a jar, refrigerate it and consume the contents within two weeks for the best quality and crunch.
Frequently Asked Questions
Refrigerator pickled okra lasts up to six weeks when stored in a clean, airtight jar. Make sure the okra stays fully submerged in the brine and keep the jar refrigerated at all times for maximum freshness.
Yes, you can substitute apple cider vinegar for white vinegar in pickled okra. However, apple cider vinegar will give the pickles a slightly sweeter, fruitier flavor and may darken the brine. I prefer white vinegar for a cleaner, sharper taste and crystal-clear appearance.
Mushy pickled okra usually results from using overly mature pods, boiling the brine too long, or processing jars at too high a temperature. Choose small, firm okra and heat the brine just until the salt dissolves to maintain crispness.
No, you do not need to blanch okra before pickling. Blanching can actually make the okra softer and less crisp. I pack raw okra directly into jars and pour hot brine over it for the best texture and crunch.




Leave a Reply