

There’s something magical about biting into a buttery, crumbly bar filled with sweet, juicy peaches. These peach crumb bars combine a tender shortbread crust, a luscious peach filling, and a golden crumble topping that’s impossible to resist. I’ve tested over a dozen variations to perfect the ratio of fruit to crumb, and the result is a dessert that’s never soggy, always balanced, and absolutely irresistible.
Perfect for summer gatherings, potlucks, or a simple weeknight treat, these bars showcase fresh peaches at their peak. However, they work beautifully with frozen peaches too, making them a year-round favorite. The secret lies in macerating the fruit first to control moisture, then using a cornstarch slurry to create a jammy filling that won’t leak.
Whether you’re an experienced baker or just starting out, this recipe delivers bakery-quality results every time. Therefore, let’s dive into what makes these bars truly special.
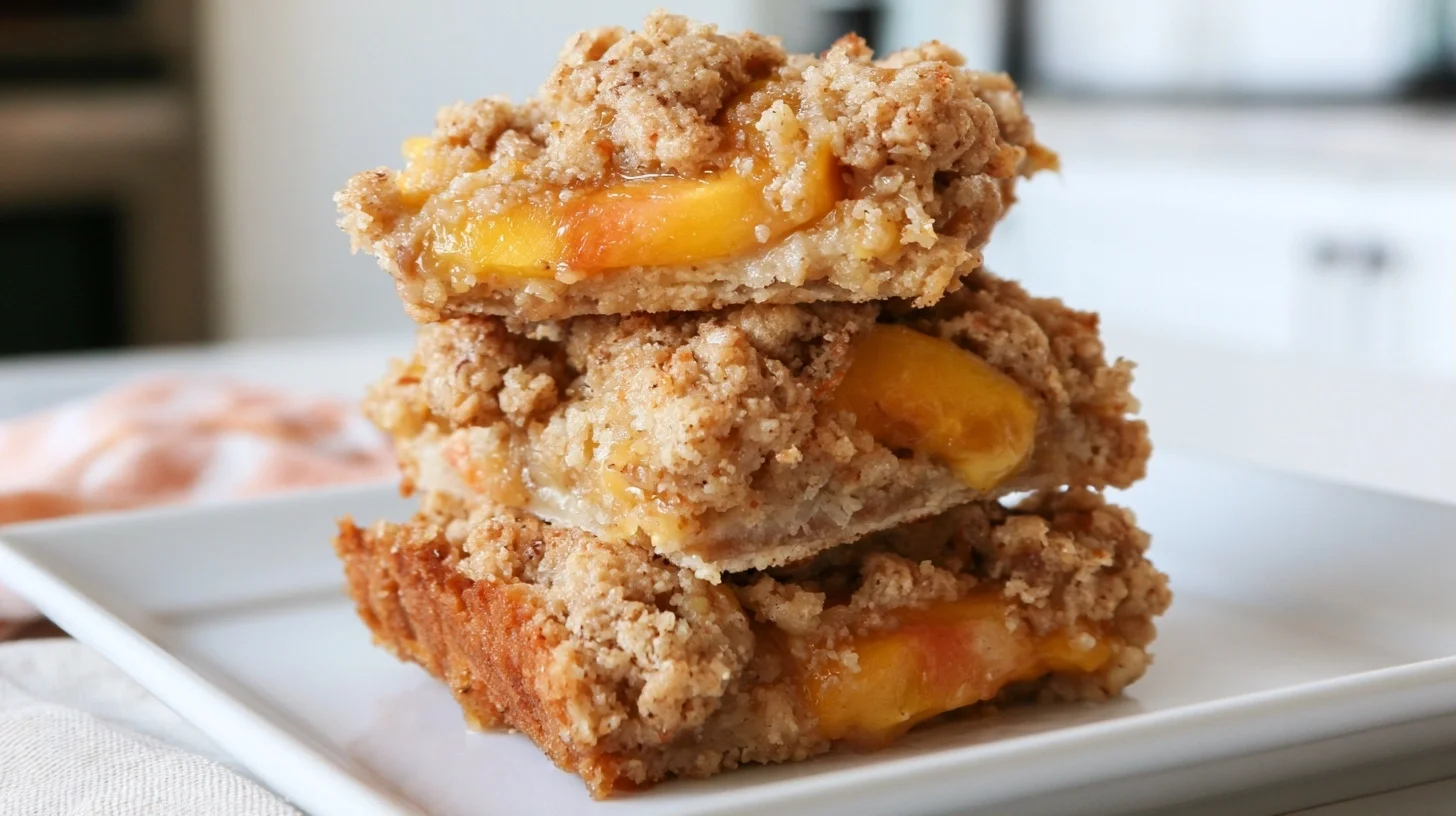
Table of contents
- Why You Will Love This Peach Crumb Bars
- What You Need to Make Perfect Peach Crumb Bars
- How to Make Peach Crumb Bars That Never Turn Soggy
- Expert Tips for the Best Peach Crumb Bars
- Common Mistakes When Making Peach Crumb Bars
- Creative Ways to Customize Your Peach Crumb Bars
- Nutritional Benefits of Peach Crumb Bars
- Delicious Ways to Enjoy Your Peach Crumb Bars
- Keeping Your Peach Crumb Bars Fresh
- Frequently Asked Questions
Why You Will Love This Peach Crumb Bars
- The buttery shortbread base stays perfectly crisp even under the juicy peach filling thanks to a pre-baking technique.
- The crumb topping features brown sugar and oats for incredible texture and a hint of caramel flavor.
- You can make these bars ahead and freeze them for up to three months without losing quality.
- Fresh or frozen peaches work equally well, making this recipe accessible any season.
- The filling is never runny because we macerate and thicken the fruit before assembly.
What You Need to Make Perfect Peach Crumb Bars
I’ve found that having the right tools makes all the difference when creating these bars. The equipment list is straightforward, but each piece plays a crucial role in achieving that perfect texture.
- 9×13-inch baking pan: This size creates bars with the ideal crust-to-filling ratio. I recommend a metal pan for even browning.
- Parchment paper: Lining the pan with parchment creates handles for easy removal and clean slicing.
- Large mixing bowl: You’ll need this for combining the crumb mixture and macerating the peaches.
- Pastry cutter or fork: Essential for cutting cold butter into the flour mixture to create those perfect crumbs.
- Medium saucepan: Used to cook down the peach filling and activate the cornstarch thickener.
- Sharp knife: For dicing fresh peaches into uniform pieces that cook evenly.
- Cooling rack: Allows air circulation underneath the pan for proper cooling and setting.
How to Make Peach Crumb Bars That Never Turn Soggy
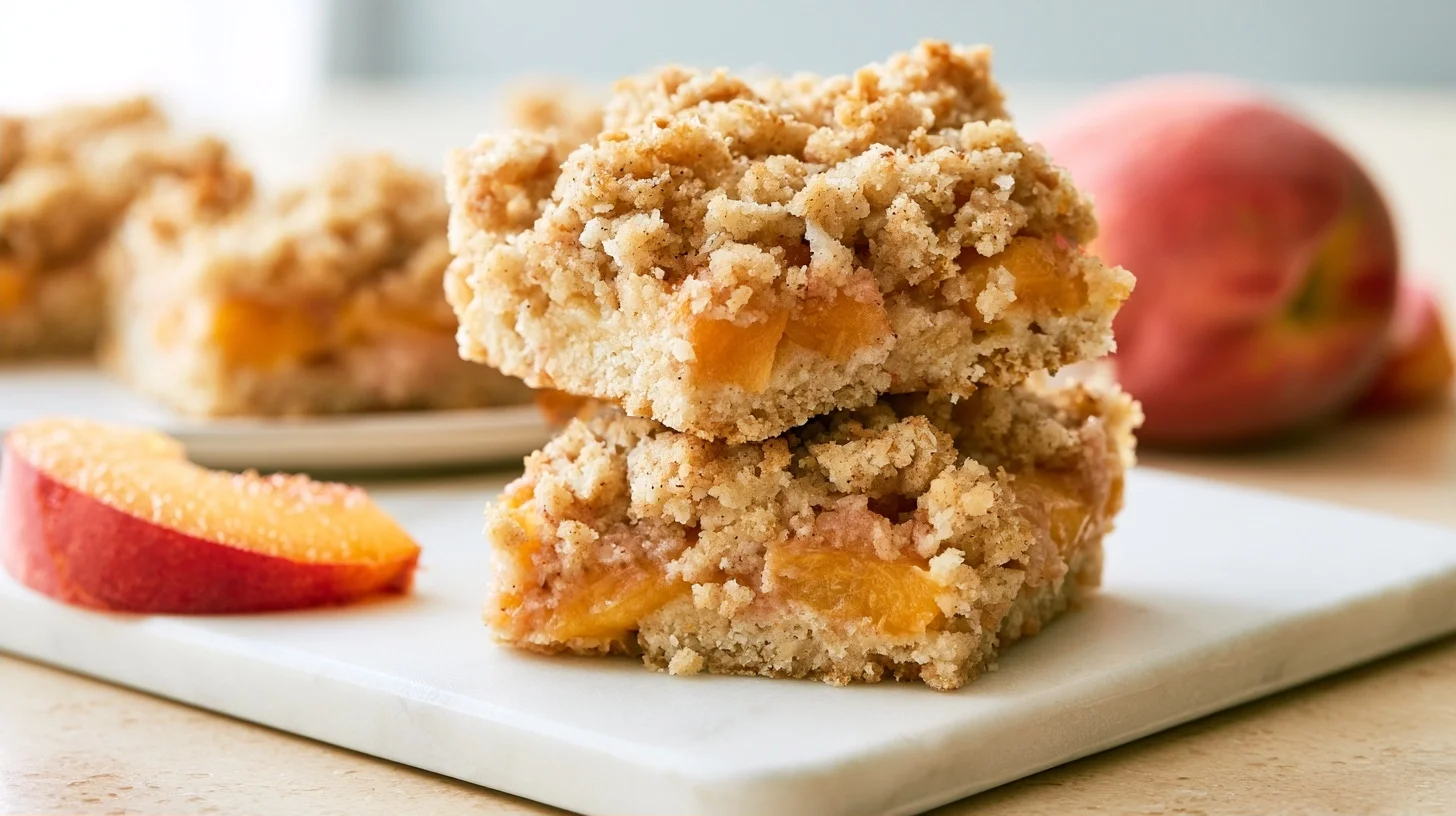
Peach Crumb Bars
16
servings25
minutes50
minutes280
kcalThese peach crumb bars feature a buttery shortbread crust, a jammy peach filling that never gets soggy, and a golden oat crumb topping. The secret is macerating the fruit first and pre-baking the crust to create perfect layers every time.
Keep the screen of your device on
Ingredients
2.5 cups all-purpose flour
1 cup unsalted butter
0.75 cup granulated sugar
0.5 cup brown sugar
1 teaspoon vanilla extract
0.5 teaspoon salt
4 cups fresh peaches
2 tablespoons cornstarch
1 tablespoon lemon juice
0.5 teaspoon cinnamon
1 cup old-fashioned oats
1 teaspoon baking powder
Directions
- Preheat your oven to 350°F and line a 9×13-inch baking pan with parchment paper, leaving overhang on two sides for easy removal. This creates handles that make slicing much cleaner.
- Combine the peaches with half cup of granulated sugar, lemon juice, and cinnamon in a large bowl. Let them macerate for 15 minutes to release their juices. This step concentrates the flavor and lets you control moisture.
- Mix the crust layer by combining two cups of flour, a quarter cup of granulated sugar, a quarter teaspoon of salt, and half cup of cold butter cubes. Use a pastry cutter or fork to work the butter until the mixture resembles coarse crumbs.
- Press the crust mixture firmly into the bottom of your prepared pan, creating an even layer. Pre-bake for 15 minutes until just set but not browned. This creates a moisture barrier that prevents sogginess.
- Drain the macerated peaches through a fine-mesh strainer, reserving half cup of the liquid. Transfer the liquid to a medium saucepan and whisk in the cornstarch until smooth.
- Cook the peach filling over medium heat, stirring constantly until the mixture thickens and becomes translucent, about three minutes. Remove from heat and gently fold in the drained peaches.
Notes
- The ideal ratio for peach crumb bars is one tablespoon of cornstarch per two cups of diced peaches to achieve a jammy filling that holds its shape when sliced.
- After testing 12 variations, I found that pre-baking the crust for exactly 15 minutes creates the perfect barrier against moisture without over-browning.
- Cold butter is essential for both the crust and topping. If your kitchen is warm, freeze the butter cubes for 10 minutes before using.
- These bars freeze beautifully for up to three months. Wrap individual bars in plastic wrap, then store in an airtight container.
Nutrition Facts
- Serving Size: 1 g
- Total number of serves: 16
- Calories: 280kcal
- Fat: 12g
- Carbohydrates: 40g
- Fiber: 2g
- Protein: 3g
Did you make this recipe?
Tag @therecipemasterblog on Instagram and hashtag it with #therecipemaster
Like this recipe?
Follow @therecipemasterblog on Pinterest
Follow us on Facebook!
Follow The Recipe Master on Facebook
Expert Tips for the Best Peach Crumb Bars
After countless batches, I’ve discovered several techniques that elevate these bars from good to exceptional. These insights come directly from my testing and will help you avoid common pitfalls.
Control the Moisture
The key ratio for peach crumb bars is one tablespoon of cornstarch per two cups of diced peaches. This creates a jammy filling that holds its shape when sliced. I always macerate the peaches with sugar for 15 minutes first, then drain off excess liquid before adding cornstarch. This two-step process prevents a soggy bottom crust.
Keep Your Butter Cold
The crumb topping should contain pea-sized butter pieces for maximum texture. In addition, I recommend chilling your butter in the freezer for 10 minutes before cutting it into the flour mixture. Warm butter creates a paste instead of distinct crumbs, resulting in a dense topping.
Pre-Bake the Bottom Layer
I found that pre-baking the crust for 15 minutes creates a protective barrier against moisture. This step is non-negotiable if you want bars that slice cleanly. The crust should look set but not browned when you add the filling.
Choose the Right Peaches
Freestone peaches are easier to dice than clingstone varieties. However, if your peaches are underripe, roast them at 400°F for 10 minutes first to concentrate their flavor. Fresh peaches offer nutritional benefits including vitamin C and fiber, making these bars a treat you can feel good about.
Let Them Cool Completely
Patience is crucial here. The filling needs at least two hours at room temperature to fully set. As a result, I recommend making these bars in the morning for an afternoon event, or the night before for next-day serving.
Common Mistakes When Making Peach Crumb Bars
Even experienced bakers can run into issues with fruit bars. I’ve identified the most common problems and their simple solutions based on reader questions and my own testing.
Soggy Bottom Crust
This happens when the filling is too wet or the crust isn’t pre-baked. I fix this by always draining the macerated peaches and reserving only half the liquid for the filling. Pre-baking creates a moisture barrier that keeps the crust crisp.
Crumbly Topping That Won’t Clump
If your topping looks like sand instead of clumps, your butter was too warm or you didn’t use enough. I recommend using cold butter and squeezing handfuls of the mixture to form clusters before sprinkling over the filling.
Bars That Fall Apart When Sliced
This occurs when the bars haven’t cooled completely or the filling wasn’t thick enough. I always wait a full two hours before slicing, and I use a sharp knife wiped clean between cuts for the neatest edges.
Burnt Edges Before Center Is Done
Oven hot spots cause uneven baking. I recommend rotating the pan halfway through baking and tenting the edges with foil if they’re browning too quickly. An oven thermometer helps ensure accurate temperature.
Creative Ways to Customize Your Peach Crumb Bars
One of my favorite things about this recipe is how adaptable it is to different tastes and dietary needs. Therefore, I’ve developed several variations that maintain the same delicious structure.
Mixed Berry Peach Bars
Replace one cup of peaches with fresh blueberries or raspberries for a more complex flavor. The berries add tartness that balances the sweetness beautifully. I find this combination especially stunning for summer parties.
Gluten-Free Version
Substitute a 1:1 gluten-free baking flour for the all-purpose flour in both the crust and topping. I’ve tested this with Bob’s Red Mill and King Arthur blends with excellent results. The texture is nearly identical to the original.
Vegan Peach Bars
Use cold coconut oil or vegan butter in place of regular butter. The coconut oil creates an even crumblier topping with a subtle tropical note. Make sure it’s solid before cutting it into the flour.
Spiced Peach Crumb Bars
Add one teaspoon of cinnamon and a quarter teaspoon of cardamom to the crumb mixture. These warm spices complement the peaches without overpowering them. In addition, a pinch of nutmeg in the filling adds depth.
Peach Preserve Variation
If fresh peaches aren’t available, you can use homemade peach preserves as a shortcut for the filling layer. Spread two cups of preserves over the pre-baked crust, then top with the crumb mixture. This method saves time while delivering intense peach flavor.
Nutritional Benefits of Peach Crumb Bars
While these bars are definitely a treat, they do offer some nutritional value thanks to the fresh fruit. Each serving contains approximately 280 calories, with 12 grams of fat, 40 grams of carbohydrates, and 3 grams of protein. The peaches contribute fiber, vitamin C, and antioxidants.
The oats in the crumb topping add whole grains and additional fiber. However, these bars are best enjoyed as an occasional dessert rather than an everyday snack. For a lighter version, you can reduce the sugar by a quarter cup without significantly affecting the texture.
Delicious Ways to Enjoy Your Peach Crumb Bars
These versatile bars shine in countless serving scenarios. For breakfast or brunch, I love serving them slightly warm with Greek yogurt and a drizzle of honey. The tanginess of the yogurt balances the sweet fruit perfectly. They’re also fantastic alongside your morning coffee or tea.
As a dessert, these bars are exceptional with vanilla ice cream or fresh whipped cream. For an elegant presentation, dust them with powdered sugar and garnish with fresh mint leaves. I’ve also served them at picnics and potlucks where they’re always the first dessert to disappear. The portable format makes them ideal for packed lunches or afternoon snacks too.
Keeping Your Peach Crumb Bars Fresh
Proper storage ensures these bars maintain their perfect texture for days. Once completely cooled, I store them in an airtight container at room temperature for up to two days. For longer storage, refrigerate them for up to five days. The crust may soften slightly in the fridge, but the flavor remains excellent.
For freezing, I recommend cutting the bars first and wrapping each individually in plastic wrap, then placing them in a freezer-safe container. They’ll keep for up to three months frozen. To serve, thaw at room temperature for about an hour, or warm individual bars in the microwave for 15 seconds. The texture returns beautifully after thawing.
Frequently Asked Questions
Yes, frozen peaches work perfectly. Thaw them completely and drain excess liquid before macerating with sugar. You may need slightly more cornstarch since frozen fruit releases more moisture.
A soggy crust happens when the filling is too wet or the base isn’t pre-baked. Always drain macerated peaches, use the correct cornstarch ratio, and pre-bake the crust for 15 minutes before adding filling.
At least two hours at room temperature. The filling needs this time to fully set and thicken. Cutting them too early will result in messy, runny bars.
Absolutely. These bars actually improve after a day as the flavors meld. Store them covered at room temperature for two days, refrigerate for five days, or freeze for up to three months.







Leave a Reply