

If you’ve been buying store-bought hummus, it’s time to discover how easy and rewarding it is to make hummus recipe at home. This classic Middle Eastern dip comes together in just minutes with a handful of pantry ingredients, and the result is smoother, creamier, and more flavorful than anything you’ll find in a plastic tub. The secret lies in a few simple techniques that transform ordinary chickpeas into a silky, luxurious spread that tastes like it came from a Mediterranean kitchen.
Making hummus from scratch gives you complete control over texture and flavor. You can adjust the garlic intensity, the lemon brightness, and the tahini richness to suit your taste. Plus, you’ll avoid the preservatives and excess sodium that sneak into commercial versions. Whether you’re serving it as an appetizer with warm pita, spreading it on sandwiches, or using it as a veggie dip, fresh hummus elevates any meal with its rich, nutty flavor and velvety consistency.
This recipe focuses on achieving that restaurant-quality smoothness that makes hummus irresistible. The technique involves removing the chickpea skins and blending the ingredients in the right order, which creates a dip so creamy you won’t believe it’s made without dairy. Once you master this basic version, you’ll have a foundation for endless variations.
Table of contents
- Why You Will Love This Homemade Hummus Recipe
- Essential Equipment for Ultra-Smooth Hummus
- How to Make the Creamiest Hummus Every Time
- Expert Tips for Restaurant-Quality Hummus
- Common Hummus Mistakes and How to Fix Them
- Delicious Hummus Recipe Variations to Try
- Nutrition Benefits of Homemade Hummus
- Perfect Ways to Serve Fresh Hummus
- How to Store Hummus Recipe for Maximum Freshness
- Frequently Asked Questions about Hummus Recipe
Why You Will Love This Homemade Hummus Recipe
- Ready in under 10 minutes with ingredients you probably already have in your pantry.
- Silky smooth texture that rivals any restaurant version thanks to a simple blending technique.
- Completely customizable with garlic, lemon, and tahini levels adjusted to your personal taste.
- Healthier and more economical than store-bought versions with no preservatives or unnecessary additives.
Essential Equipment for Ultra-Smooth Hummus
The right equipment makes achieving that signature creamy texture much easier. While you can make hummus with basic tools, investing in quality equipment improves both the process and the final result.
- Food processor or high-speed blender: A food processor works well for traditional hummus texture, while a high-speed blender creates an even silkier consistency by breaking down the chickpeas more thoroughly.
- Fine mesh strainer: Essential for draining chickpeas and removing excess liquid, which prevents watery hummus and helps you control the final consistency.
- Measuring cups and spoons: Precise measurements ensure consistent results, especially when balancing the tahini, lemon juice, and garlic ratios.
- Rubber spatula: Helps scrape down the sides of your processor or blender to ensure all ingredients are fully incorporated into the smooth mixture.
- Serving bowl: A shallow, wide bowl works best for serving hummus because it allows you to create the traditional well in the center for olive oil and toppings.
How to Make the Creamiest Hummus Every Time
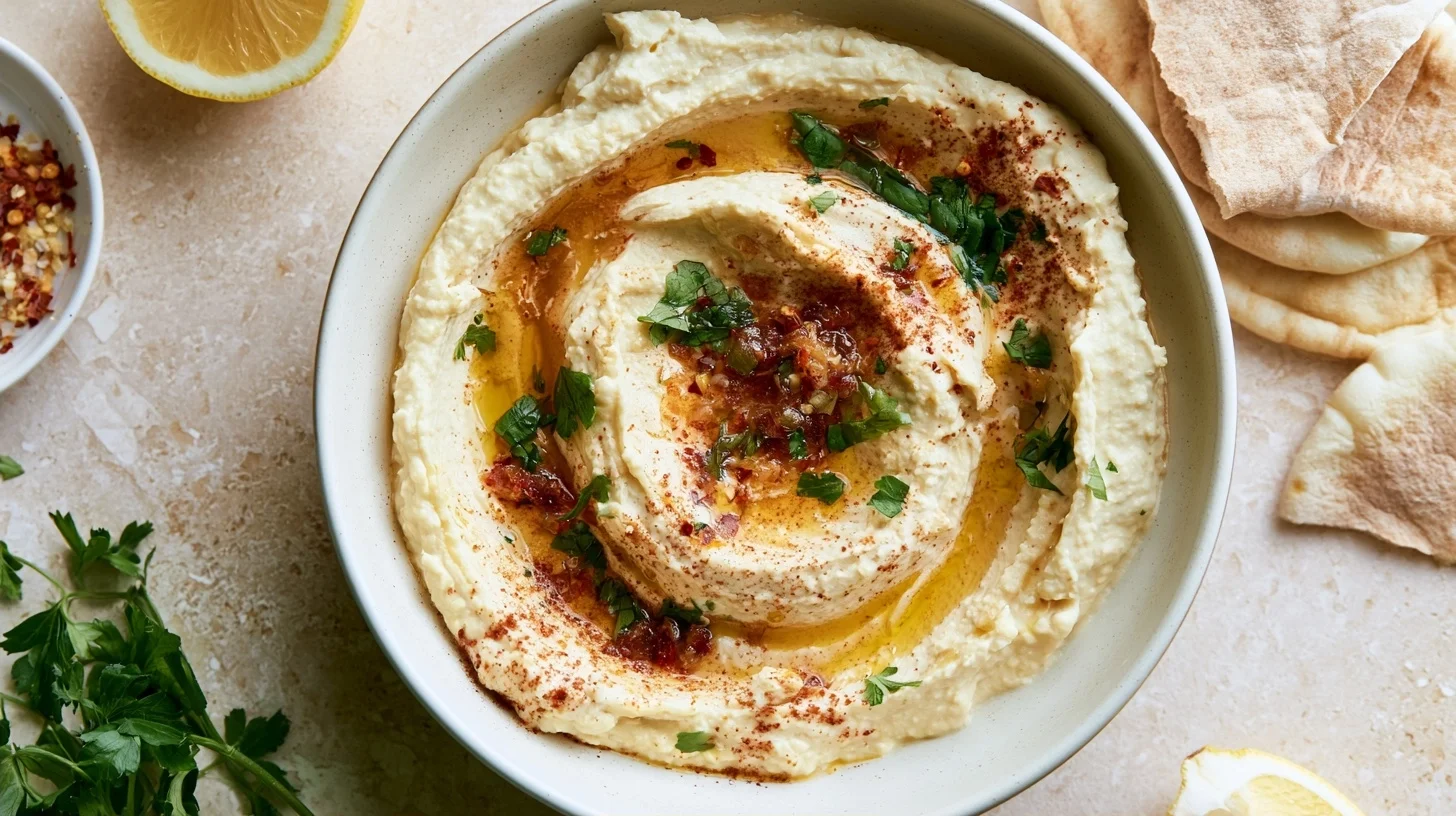
Classic Creamy Hummus
8
servings10
minutes0
minutes166
kcalThis classic hummus recipe creates an ultra-smooth, restaurant-quality dip in just 10 minutes. The secret is removing most of the chickpea skins and blending the tahini with lemon juice first, which creates a light, fluffy base that transforms into silky hummus when combined with the chickpeas.
Keep the screen of your device on
Ingredients
1 can chickpeas
0.25 cup tahini
3 tablespoons fresh lemon juice
1 clove garlic
0.5 teaspoon ground cumin
0.5 teaspoon salt
3 tablespoons ice water
2 tablespoons extra virgin olive oil
1 pinch paprika
1 tablespoon fresh parsley
Directions
- Drain and rinse the chickpeas in a fine mesh strainer under cold water. Gently rub the chickpeas between your hands or in a clean kitchen towel to loosen and remove most of the skins, which will float away when you rinse them again. Removing the skins is what creates that ultra-smooth texture, so spend a few minutes on this step.
- Combine the tahini and lemon juice in your food processor and blend for 1 minute. The mixture will seize and thicken at first, then become smooth and lighter in color as it emulsifies. This creates the fluffy base that makes the hummus creamy.
- Add the garlic, cumin, and salt to the tahini mixture and process for 30 seconds until well combined and fragrant.
- Add half of the chickpeas and process for 1 minute, scraping down the sides as needed. The mixture will be quite thick at this point.
- Add the remaining chickpeas and the olive oil and process for 1 to 2 minutes until the mixture is thick and fairly smooth.
- With the processor running, slowly drizzle in the ice water one tablespoon at a time. Continue blending for 3 to 4 minutes total, scraping down the sides every minute. The hummus will suddenly transform from thick to smooth and creamy. Add more water if needed to reach your desired consistency—it should be thick enough to hold its shape but loose enough to spread easily.
Notes
- Removing chickpea skins before blending reduces surface fiber and creates a noticeably smoother, more velvety texture that distinguishes homemade hummus from grainy store-bought versions.
- The hummus will thicken slightly as it chills, so aim for a consistency that’s slightly looser than your target texture. You can always stir in more water after refrigerating.
- Store hummus in an airtight container with a thin layer of olive oil on top to prevent drying. It keeps for up to 7 days refrigerated or up to 3 months frozen.
Nutrition Facts
- Serving Size: 1 g
- Total number of serves: 8
- Calories: 166kcal
- Fat: 10g
- Carbohydrates: 14g
- Fiber: 6g
- Protein: 8g
Did you make this recipe?
Tag @therecipemasterblog on Instagram and hashtag it with #therecipemaster
Like this recipe?
Follow @therecipemasterblog on Pinterest
Follow us on Facebook!
Follow The Recipe Master on Facebook
Expert Tips for Restaurant-Quality Hummus
The difference between good hummus and exceptional hummus comes down to a few key techniques that professional chefs use consistently. These methods address the most common texture and flavor issues home cooks encounter.
Remove the Chickpea Skins for Ultimate Smoothness
Removing chickpea skins is the single most effective way to achieve ultra-smooth hummus. The skins create a slightly grainy texture that prevents the dip from becoming truly velvety. After draining your chickpeas, gently rub them between your hands or in a clean kitchen towel to loosen the skins, then rinse them away under cold water. This step takes only a few extra minutes but transforms the final texture dramatically. While you don’t need to remove every single skin, getting most of them makes a noticeable difference.
Blend Tahini and Lemon Juice First
Starting by blending tahini and lemon juice together before adding other ingredients creates a lighter, fluffier base. The acid in the lemon juice causes the tahini to seize and thicken initially, then become smooth and almost whipped in texture after a minute of processing. This technique, used throughout the Middle East, incorporates air into the mixture and creates a foundation that helps the final hummus achieve its characteristic light, creamy consistency. Once this base is smooth and pale, you can add garlic, chickpeas, and other ingredients.
Add Ice Water for Silky Texture
Adding ice-cold water while blending serves two purposes: it loosens the mixture to your desired consistency and keeps the hummus cool during processing, which prevents the natural oils from separating. Add the water gradually, one tablespoon at a time, while the processor runs. The hummus will appear too thick at first, but as you add water and continue blending, it will suddenly transform into a smooth, pourable consistency. The exact amount of water needed varies based on your chickpeas and tahini, so add it slowly until you reach the texture you prefer.
Use Quality Tahini
Tahini quality varies dramatically between brands, and it directly affects your hummus flavor. Look for tahini made from hulled sesame seeds with a smooth, pourable consistency and a mild, nutty flavor rather than a bitter aftertaste. Store tahini in the refrigerator after opening to prevent the oils from going rancid, and always stir it thoroughly before using since the oil naturally separates. If you’re exploring variations, you might also enjoy hummus made without tahini for a different flavor profile.
Let Hummus Rest Before Serving
Allowing hummus to rest for at least 30 minutes before serving gives the flavors time to meld and develop. The garlic mellows slightly, the lemon brightens without overwhelming, and the overall taste becomes more balanced and complex. If possible, refrigerate the hummus for an hour or two, then let it come to cool room temperature before serving. Cold hummus straight from the refrigerator tastes muted and the texture feels firmer, while hummus at cool room temperature showcases its full flavor and creamy consistency.
Common Hummus Mistakes and How to Fix Them
Grainy or Gritty Texture
Grainy hummus results from either leaving the chickpea skins on or not blending long enough. The chickpea skins contain more fiber and create a texture that never fully smooths out, no matter how long you blend. If your hummus feels grainy, you likely skipped the skin-removal step. To fix already-made grainy hummus, add a tablespoon of ice water and blend for an additional 2 to 3 minutes, scraping down the sides frequently. For your next batch, remove most of the skins before blending and process the mixture for at least 3 to 4 minutes total, which gives the food processor time to fully break down the chickpeas.
Too Thick or Paste-Like Consistency
Hummus that’s too thick usually needs more liquid. This happens when chickpeas are very dry, when tahini is particularly thick, or when not enough water was added during blending. The solution is simple: with the processor running, drizzle in ice water one tablespoon at a time until the hummus reaches a smooth, spreadable consistency. The hummus should be thick enough to hold its shape on a spoon but loose enough to spread easily. Remember that hummus thickens slightly as it chills, so aim for a consistency that’s slightly looser than your target texture.
Bitter or Harsh Flavor
Bitter hummus typically comes from low-quality tahini, too much raw garlic, or over-processing that releases bitter compounds from the chickpea skins. If your hummus tastes bitter, first evaluate your tahini by tasting it separately—if it’s bitter on its own, that’s your culprit. For overly garlicky hummus, balance the flavor by blending in an additional quarter cup of chickpeas and a tablespoon of lemon juice. You can also reduce garlic intensity by using roasted garlic instead of raw, which provides garlic flavor without the harsh bite. For future batches, start with less garlic than you think you need, then adjust upward to taste.
Separated or Oily Surface
When hummus develops a layer of oil on top or appears separated, it usually means the mixture became too warm during blending or wasn’t emulsified properly. The tahini and chickpea oils separate when they heat up from extended processing. To prevent this, use ice-cold water during blending and avoid over-processing once the mixture is smooth. If your hummus has already separated, stir in a tablespoon of ice water and refrigerate for 30 minutes, which often brings the mixture back together. Before serving, give it a good stir to reincorporate any surface oil.
Delicious Hummus Recipe Variations to Try
Once you’ve mastered the basic recipe, hummus becomes an incredibly versatile canvas for different flavors and ingredients. These variations follow the same base technique with simple additions that create entirely new taste experiences.
Roasted Red Pepper Hummus Recipe
Add half a cup of drained roasted red peppers from a jar along with the chickpeas. The peppers contribute a sweet, smoky flavor and turn the hummus a beautiful coral color. You may need slightly less water since the peppers add moisture. This variation pairs especially well with grilled vegetables and Mediterranean dishes.
Roasted Garlic Hummus Recipe
Replace the raw garlic with a whole head of roasted garlic. Roasting transforms garlic’s sharp bite into a sweet, mellow, almost caramelized flavor that adds depth without harshness. Simply slice the top off a garlic head, drizzle with olive oil, wrap in foil, and roast at 400°F for 40 minutes until the cloves are soft and golden. Squeeze the roasted cloves directly into your food processor with the other ingredients.
Spicy Harissa Hummus Recipe
Stir in one to two tablespoons of harissa paste after blending for a North African-inspired version with complex heat and spice. Harissa brings smoky paprika, cumin, and chili flavors that complement the creamy chickpeas beautifully. Start with one tablespoon and adjust based on your heat preference and the intensity of your harissa brand.
Herb and Lemon Hummus Recipe
Blend in a cup of fresh herbs—parsley, cilantro, dill, or a combination—along with extra lemon zest for a bright, green hummus that tastes like spring. The fresh herbs add a layer of flavor that makes this version particularly good with raw vegetables or as a sandwich spread. Add the herbs during the final minute of blending to keep their color vibrant.
Nutrition Benefits of Homemade Hummus
Hummus offers impressive nutritional value as a plant-based protein source that’s rich in fiber, healthy fats, and essential minerals. A typical serving provides around 166 calories with 8 grams of protein, 6 grams of fiber, and 10 grams of fat—most of which comes from heart-healthy monounsaturated and polyunsaturated fats in the tahini and olive oil. The chickpeas contribute complex carbohydrates that provide steady energy without spiking blood sugar, making hummus an excellent choice for sustained fullness between meals.
The tahini in hummus adds calcium, iron, magnesium, and zinc, while chickpeas provide folate and B vitamins that support energy metabolism. The combination of protein and fiber makes hummus particularly satisfying as a snack or meal component. When you make hummus at home, you control the sodium content, which is typically much lower than commercial versions that can contain 200 to 300 milligrams per serving. You also avoid preservatives and stabilizers like potassium sorbate and citric acid that extend shelf life in store-bought hummus but aren’t necessary in fresh versions.
For those following specific dietary patterns, hummus naturally fits into vegan, vegetarian, gluten-free, and dairy-free eating plans. The cultural significance of hummus in Mediterranean and Middle Eastern cuisines has been celebrated for centuries, as explored in this fascinating look at hummus history and tradition.
Perfect Ways to Serve Fresh Hummus
Hummus shines as both a centerpiece dip and a versatile ingredient in countless dishes. For traditional serving, spread the hummus in a shallow bowl and use the back of a spoon to create a well in the center, then drizzle with high-quality extra virgin olive oil and sprinkle with paprika, za’atar, or sumac. Serve alongside warm pita bread, pita chips, or a colorful array of raw vegetables like carrots, cucumbers, bell peppers, and radishes.
Beyond dipping, hummus works beautifully as a spread on sandwiches and wraps, where it adds creaminess and protein without mayonnaise. It makes an excellent base for grain bowls—spread a generous layer on the bottom of the bowl, then top with roasted vegetables, grains, and your protein of choice. Hummus also serves as a flavorful sauce for grilled meats or fish, a creamy dressing when thinned with extra lemon juice and water, or a unique pizza sauce base. For breakfast, spread it on toast and top with a fried egg, cherry tomatoes, and fresh herbs for a protein-rich start to your day.
How to Store Hummus Recipe for Maximum Freshness
Proper storage keeps homemade hummus fresh and flavorful for up to one week in the refrigerator. Transfer the hummus to an airtight container and smooth the top surface, then drizzle a thin layer of olive oil over the entire surface before sealing. This oil layer prevents the hummus from drying out and oxidizing, which can cause discoloration and off flavors. Store the container in the main body of your refrigerator rather than the door, where temperature fluctuations are more common.
Hummus freezes surprisingly well for up to three months. Portion it into smaller containers or freezer bags, leaving a half-inch of headspace since it expands slightly when frozen. To thaw, transfer the container to the refrigerator overnight, then let it come to room temperature and stir vigorously before serving. You may need to stir in a tablespoon of water or olive oil to restore the creamy consistency, as freezing can cause slight separation. The texture may be slightly less silky than fresh hummus, but the flavor remains excellent, making freezing a practical option when you’ve made a large batch.
Always check hummus before eating if it’s been stored for more than a few days. Signs of spoilage include a sour smell, visible mold, or a watery layer that won’t reincorporate when stirred. When in doubt, discard it and make a fresh batch—the recipe is quick enough that you can easily prepare hummus as needed.
Frequently Asked Questions about Hummus Recipe
Yes, you can use a high-speed blender or even a potato masher for a chunkier texture. A blender actually creates an even smoother consistency than a food processor, though you may need to stop and scrape down the sides more frequently. A potato masher or fork will give you a more rustic, textured hummus that’s still delicious but won’t be as creamy.
Both work well, though canned chickpeas are more convenient. If using canned, drain and rinse them thoroughly to remove excess sodium. If using dried chickpeas, cook them until very soft—almost falling apart—which creates a smoother final texture. Dried chickpeas require soaking overnight and cooking for 1 to 2 hours, but they often produce slightly better flavor.
Bitterness usually comes from low-quality tahini or too much raw garlic. Taste your tahini separately—if it’s bitter on its own, that’s the problem. Switch to a different brand made from hulled sesame seeds. If the garlic is too strong, reduce the amount or use roasted garlic instead, which provides flavor without the harsh bite.
You can substitute Greek yogurt, cashew butter, or sunflower seed butter for tahini, though the flavor will be different. Greek yogurt creates a tangier, lighter hummus, while nut or seed butters provide richness similar to tahini. Use the same amount as the tahini called for in the recipe and adjust the consistency with water as needed.






Leave a Reply