

If you’ve ever tasted a perfectly roasted Hatch chile—smoky, slightly sweet, with just the right amount of heat—you know there’s nothing quite like it. Hatch chili rellenos take that incredible flavor and elevate it by stuffing whole roasted chiles with melted cheese, coating them in a light batter, and frying them until golden and crisp. The result is a dish that balances rich, creamy filling with a delicate, airy crust and the unmistakable flavor of New Mexico’s most famous pepper.
What sets this recipe apart is the attention to roasting and peeling technique. Properly charred and peeled Hatch chiles have tender flesh that holds its shape during stuffing and frying, while poorly prepped chiles can tear or become soggy. This recipe walks you through each step to ensure your rellenos turn out restaurant-quality every time.
Whether you’re cooking with fresh Hatch chiles during the late summer season or using frozen ones year-round, this recipe delivers a crispy exterior, gooey cheese center, and that signature smoky chile flavor that makes every bite worth the effort.
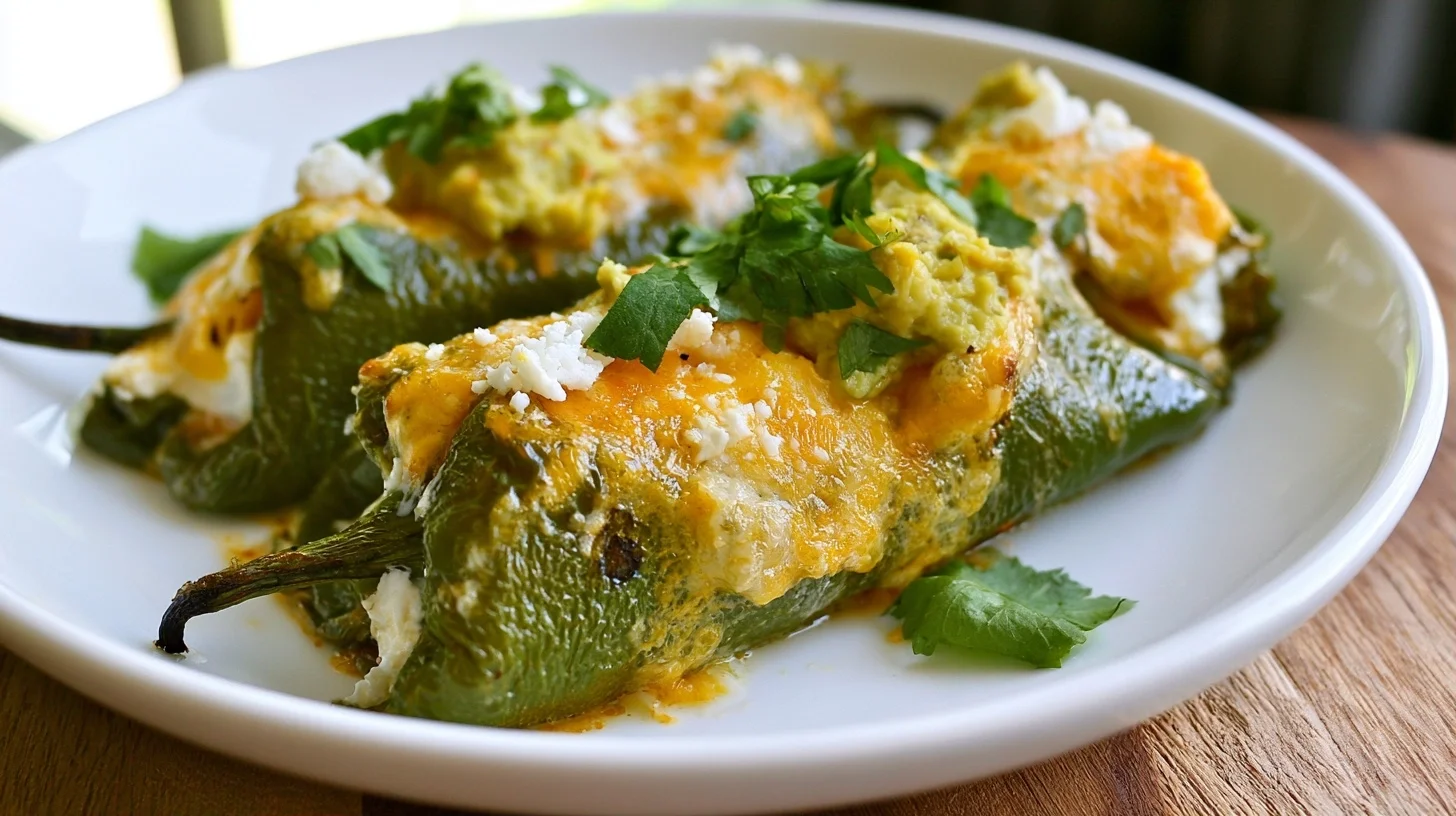
Table of contents
- Why You Will Love This Hatch Chili Rellenos
- Essential Equipment for Perfect Hatch Chili Rellenos
- How to Make Hatch Chili Rellenos That Stay Crispy
- Expert Tips for the Best Hatch Chili Rellenos
- Common Mistakes and How to Avoid Them
- Delicious Variations to Try
- Nutrition Information and What to Expect
- How to Serve Hatch Chili Rellenos
- How to Store and Reheat Hatch Chili Rellenos
- Frequently Asked Questions about Hatch Chili Rellenos Recipe
Why You Will Love This Hatch Chili Rellenos
- The roasted Hatch chiles bring a smoky, earthy flavor that you can’t replicate with any other pepper variety.
- The light egg batter creates an airy, golden crust that stays crisp even after a few minutes on the plate.
- Monterey Jack cheese melts beautifully inside the chile, creating a creamy contrast to the crispy coating.
- This recipe works with both fresh and frozen Hatch chiles, so you can enjoy it any time of year.
Essential Equipment for Perfect Hatch Chili Rellenos
You don’t need a lot of specialty tools, but a few key pieces of equipment will make the process smoother and help you achieve the best texture.
- Gas burner or broiler: Direct flame or high broiler heat is essential for charring the chile skins evenly, which makes peeling much easier and adds smoky flavor.
- Heavy-bottomed skillet or cast iron pan: A pan that holds heat evenly prevents hot spots and ensures the batter crisps uniformly without burning.
- Tongs: Long tongs allow you to turn the chiles safely during roasting and frying without tearing the delicate flesh.
- Paper towels or clean kitchen towels: Patting the peeled chiles dry before stuffing prevents excess moisture from making the batter soggy.
- Mixing bowls: Separate bowls for egg whites and yolks are necessary if you’re making the traditional fluffy batter that requires whipped egg whites.
- Wire rack: Draining the fried rellenos on a wire rack instead of paper towels keeps the bottom from steaming and losing crispness.
How to Make Hatch Chili Rellenos That Stay Crispy
Hatch Chili Rellenos
6
servings30
minutes20
minutes320
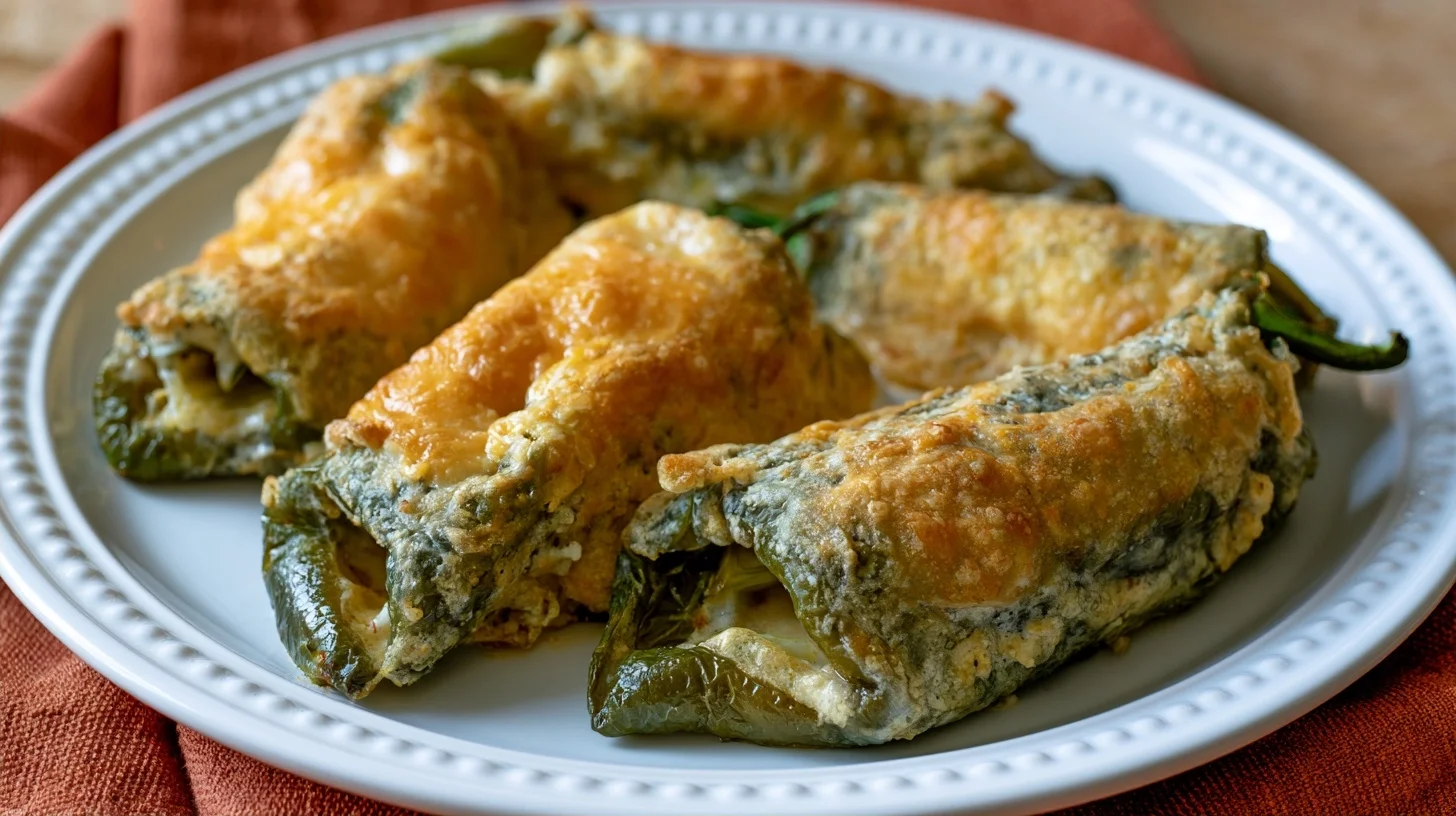
kcalThese Hatch chili rellenos feature roasted New Mexico chiles stuffed with Monterey Jack cheese and coated in a light, fluffy egg batter before frying. The key to success is roasting the chiles until the skins blister completely, then drying them thoroughly before stuffing to ensure the batter adheres properly and crisps up beautifully.
Keep the screen of your device on
Ingredients
6 whole Hatch green chiles
8 oz Monterey Jack cheese
4 large eggs
0.25 cup all-purpose flour
0.5 cup all-purpose flour
1 tsp baking powder
0.5 tsp salt
2 cups vegetable oil
0.25 cup sour cream
0.25 cup fresh salsa
2 tbsp fresh cilantro
Directions
- Roast the Hatch chiles directly over a gas flame or under a broiler set to high, turning frequently with tongs, until the skin is blistered and charred all over, about 8 to 10 minutes. The flesh should remain firm underneath.
- Transfer the roasted chiles to a bowl, cover tightly with plastic wrap or a lid, and let them steam for 10 to 15 minutes. This loosens the skin and makes peeling much easier.
- Peel the chiles gently, starting from the stem end, and remove as much charred skin as possible without tearing the flesh. Make a small lengthwise slit and carefully remove the seeds, keeping the chile as intact as possible.
- Pat the chiles dry inside and out with paper towels to remove all excess moisture. This step is essential for the batter to adhere properly.
- Stuff each chile with a stick of cold Monterey Jack cheese, making sure the cheese is completely tucked inside and does not extend past the edges of the slit.
- Dust each stuffed chile lightly with the 0.5 cup of flour, shaking off any excess. This coating helps the egg batter stick to the chile surface.
Notes
- Patting the chiles dry before stuffing removes surface moisture, which helps the batter crisp instead of steaming.
- If the chile tears during peeling, overlap the edges slightly and press gently to seal before battering.
- Store leftover rellenos in an airtight container in the refrigerator for up to 3 days. Reheat in a 375°F oven for 10 to 12 minutes to restore crispness.
Nutrition Facts
- Serving Size: 1 g
- Total number of serves: 6
- Calories: 320kcal
- Fat: 18g
- Carbohydrates: 22g
- Fiber: 2g
- Protein: 14g
Did you make this recipe?
Tag @therecipemasterblog on Instagram and hashtag it with #therecipemaster
Like this recipe?
Follow @therecipemasterblog on Pinterest
Follow us on Facebook!
Follow The Recipe Master on Facebook
Expert Tips for the Best Hatch Chili Rellenos
The difference between a soggy relleno and a perfectly crispy one often comes down to a few small but important details. These tips will help you get the texture, flavor, and structure just right.
Roast the Chiles Until the Skin Blisters Completely
The skin should be charred and blistered all over, but the flesh underneath should remain firm. If you under-roast, the skin won’t peel cleanly. If you over-roast, the chile will become too soft and tear when you try to stuff it. Turn the chiles frequently and remove them as soon as the skin lifts away from the flesh.
Steam the Chiles in a Covered Bowl Before Peeling
After roasting, place the chiles in a bowl and cover it tightly with plastic wrap or a lid. Let them steam for 10 to 15 minutes. The trapped moisture loosens the skin, making it much easier to peel without tearing the chile. This step is especially important if you’re working with thinner-walled chiles.
Dry the Chiles Thoroughly Before Stuffing
Excess moisture on the surface of the chile will prevent the batter from adhering properly. After peeling, gently pat each chile dry with paper towels, inside and out. This simple step makes a noticeable difference in how well the batter clings and crisps during frying.
Use Cold Cheese for Easier Stuffing
Chilled cheese is firmer and easier to insert into the chile without tearing the flesh. Cut the cheese into thick sticks that fit snugly inside the chile cavity. If the cheese is too soft, it will start melting before you finish battering and frying, which can cause leaks.
Whip the Egg Whites to Stiff Peaks for a Lighter Batter
Separating the eggs and whipping the whites until stiff peaks form creates a batter that puffs up beautifully during frying. Gently fold the yolks and a small amount of flour into the whipped whites just before coating the chiles. Overmixing will deflate the batter, so use a light hand.
Maintain Oil Temperature Between 350°F and 375°F
If the oil is too cool, the batter absorbs oil and becomes greasy. If it’s too hot, the outside burns before the cheese melts. Use a thermometer to monitor the temperature, and fry only one or two rellenos at a time to avoid dropping the oil temperature too much.
Drain on a Wire Rack, Not Paper Towels
A wire rack allows air to circulate around the relleno, keeping the bottom crisp. Paper towels trap steam underneath, which softens the crust. Set the rack over a baking sheet to catch drips, and serve the rellenos as soon as possible after frying.
For a complete meal, serve these alongside Mexican rice for a traditional pairing that balances the richness of the fried chiles. If you’re interested in the cultural significance of this dish, this history of the chile relleno offers fascinating insight into its origins and regional variations.
Common Mistakes and How to Avoid Them
The Batter Slides Off During Frying
This happens when the chile is too wet or the batter is too thin. After peeling, pat the chiles completely dry. If you’re using a flour coating before the egg batter, make sure it adheres evenly. The flour layer helps the egg batter grip the chile surface and prevents it from sliding off in the oil.
The Cheese Leaks Out During Frying
Cheese leaks when the slit in the chile is too large or the cheese extends past the edges. Make the smallest slit necessary to remove the seeds, and tuck the cheese completely inside. If the chile has a tear, overlap the edges slightly and press gently to seal before battering.
The Rellenos Turn Out Greasy
Greasy rellenos are usually the result of frying at too low a temperature. The batter absorbs oil instead of crisping quickly. Use a thermometer to confirm the oil is between 350°F and 375°F before adding the chiles, and avoid crowding the pan, which lowers the oil temperature.
The Chiles Tear During Peeling
Tearing usually happens when the chiles aren’t roasted or steamed enough. Make sure the skin is fully blistered and the chiles have steamed in a covered bowl for at least 10 minutes. Peel gently, starting from the stem end, and use your fingers rather than a knife to avoid cutting into the flesh.
Delicious Variations to Try
Add Cooked Ground Beef or Shredded Chicken
Mix seasoned cooked ground beef or shredded chicken with the cheese before stuffing. This turns the rellenos into a more substantial main dish. Season the meat with cumin, garlic powder, and a pinch of oregano to complement the smoky chile flavor.
Use a Blend of Cheeses
Combine Monterey Jack with sharp cheddar, queso Oaxaca, or pepper jack for more complex flavor. Queso Oaxaca melts beautifully and adds a mild, creamy taste, while pepper jack adds extra heat.
Make a Baked Version
For a lighter option, skip the batter and bake the stuffed chiles at 375°F for 20 to 25 minutes until the cheese melts and bubbles. You won’t get the crispy coating, but the flavor is still excellent and the preparation is simpler.
Top with Red or Green Chile Sauce
Serve the fried rellenos with a warm red or green chile sauce spooned over the top. The sauce adds moisture and a tangy, slightly spicy contrast to the rich cheese and crispy batter.
Nutrition Information and What to Expect
Each Hatch chili relleno contains approximately 320 calories, with 18 grams of fat, 22 grams of carbohydrates, and 14 grams of protein. The cheese and frying oil contribute most of the fat, while the egg batter and any flour coating add the carbohydrates. Fiber content is around 2 grams per serving, and sugar is minimal at about 3 grams.
This dish is relatively high in protein thanks to the cheese and eggs, making it more filling than many other fried appetizers. If you’re looking to reduce calories, baking the rellenos instead of frying them cuts the fat content significantly without sacrificing the core flavors.
How to Serve Hatch Chili Rellenos
Serve the rellenos hot, straight from the frying pan, with a dollop of sour cream, a spoonful of fresh salsa, and a sprinkle of chopped cilantro. The cool, tangy sour cream balances the richness of the fried batter and melted cheese.
Pair them with Mexican rice, refried beans, or a simple green salad with lime vinaigrette. For a heartier meal, serve them alongside warm flour tortillas and guacamole. Hatch chili rellenos also work well as an appetizer for a larger spread, especially during late summer when fresh Hatch chiles are in season.
How to Store and Reheat Hatch Chili Rellenos
Store leftover rellenos in an airtight container in the refrigerator for up to 3 days. The batter will soften as it sits, but the flavor remains good.
To reheat, place the rellenos on a wire rack set over a baking sheet and bake at 375°F for 10 to 12 minutes until heated through and the exterior crisps up again. Avoid microwaving, as it will make the batter soggy.
Freezing is not recommended for fried rellenos, as the batter texture deteriorates significantly when thawed. However, you can freeze the roasted, peeled, and stuffed chiles before battering and frying. Wrap each one tightly in plastic wrap, freeze for up to 2 months, and thaw in the refrigerator before battering and frying as usual.
Frequently Asked Questions about Hatch Chili Rellenos Recipe
Yes, poblano chiles work well as a substitute. They have a milder flavor and slightly thicker walls, which makes them easier to stuff, but you’ll lose the distinctive smoky, earthy taste that Hatch chiles provide.
Separating the eggs and whipping the whites creates a lighter, fluffier batter that puffs up during frying. If you skip this step and use whole beaten eggs, the batter will be thinner and less airy, but it will still crisp up.
You can roast, peel, and stuff the chiles up to a day in advance. Store them covered in the refrigerator, then batter and fry them just before serving for the best texture.
The oil should be between 350°F and 375°F. If you don’t have a thermometer, drop a small spoonful of batter into the oil. It should sizzle immediately and float to the surface without sinking or browning too quickly.







Leave a Reply