

If you’ve been lucky enough to experience the smoky, earthy flavor of fresh hatch chili salsa, you already know it’s in a league of its own. Hatch chiles, grown exclusively in the Hatch Valley of New Mexico, have a short harvest season from late summer to early fall, making this salsa a seasonal treasure worth celebrating. The roasting process transforms the chiles’ bright heat into something deeper and more complex, with a subtle sweetness that balances perfectly with tangy tomatoes and fresh cilantro.
This recipe walks you through every step of making authentic hatch chili salsa at home, from roasting and peeling the chiles to achieving the perfect chunky texture. Whether you’re new to working with fresh Hatch chiles or you’ve been making this salsa for years, you’ll find practical tips for controlling heat levels, preventing watery salsa, and storing your batch so it stays fresh for weeks.
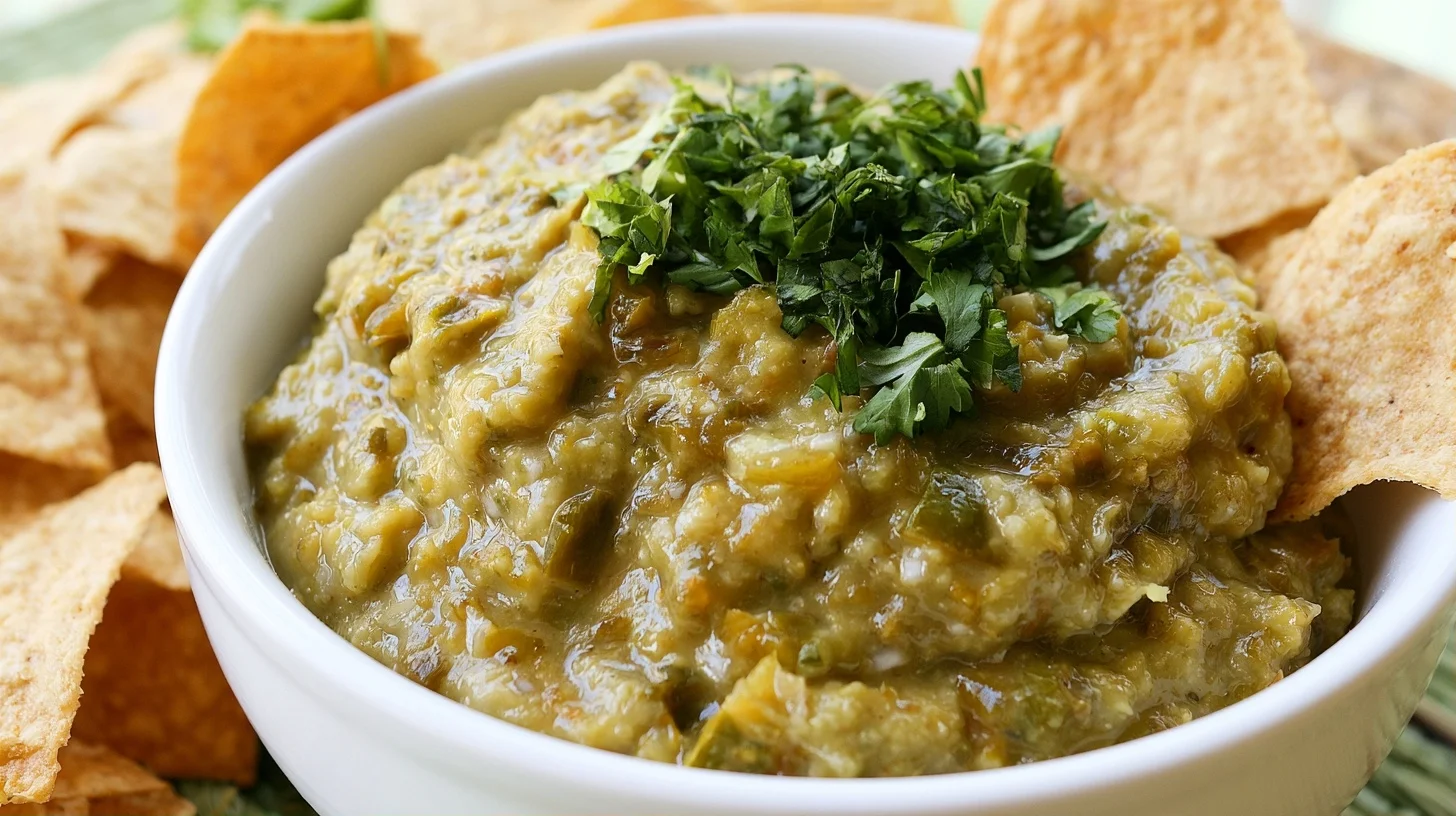
Table of contents
- Why You Will Love This Hatch Chili Salsa
- What You Need to Make Hatch Chili Salsa
- How to Make the Best Hatch Chili Salsa
- How to Roast Hatch Chiles for Maximum Flavor
- Common Mistakes When Making Hatch Chili Salsa
- Ways to Customize Your Hatch Chili Salsa
- Nutrition and Health Benefits
- Serving Ideas for Hatch Chili Salsa
- How to Store Hatch Chili Salsa
- Frequently Asked Questions
Why You Will Love This Hatch Chili Salsa
- The roasted Hatch chiles deliver a smoky, complex flavor that canned green chiles simply can’t match.
- You control the heat level by choosing mild, medium, or hot Hatch chiles and adjusting how many seeds you leave in.
- This salsa stays fresh in the refrigerator for up to two weeks and freezes beautifully for up to three months.
- The chunky texture makes it perfect for scooping with tortilla chips, topping grilled meats, or spooning over scrambled eggs.
What You Need to Make Hatch Chili Salsa
This recipe doesn’t require any specialized equipment, but a few key tools will make the roasting and chopping process much easier and safer.
- Gas stove, grill, or broiler: Roasting the Hatch chiles over an open flame or under high heat creates the charred skin and smoky flavor that define this salsa.
- Metal tongs: You’ll need these to turn the chiles as they roast so they blister evenly on all sides.
- Large bowl with lid or plastic wrap: Steaming the roasted chiles in a covered bowl loosens the skins, making them much easier to peel.
- Sharp knife and cutting board: A sharp chef’s knife makes it easier to dice the chiles and tomatoes into uniform pieces for better texture.
- Food processor (optional): If you prefer a smoother salsa, pulse the ingredients briefly in a food processor instead of chopping by hand.
How to Make the Best Hatch Chili Salsa
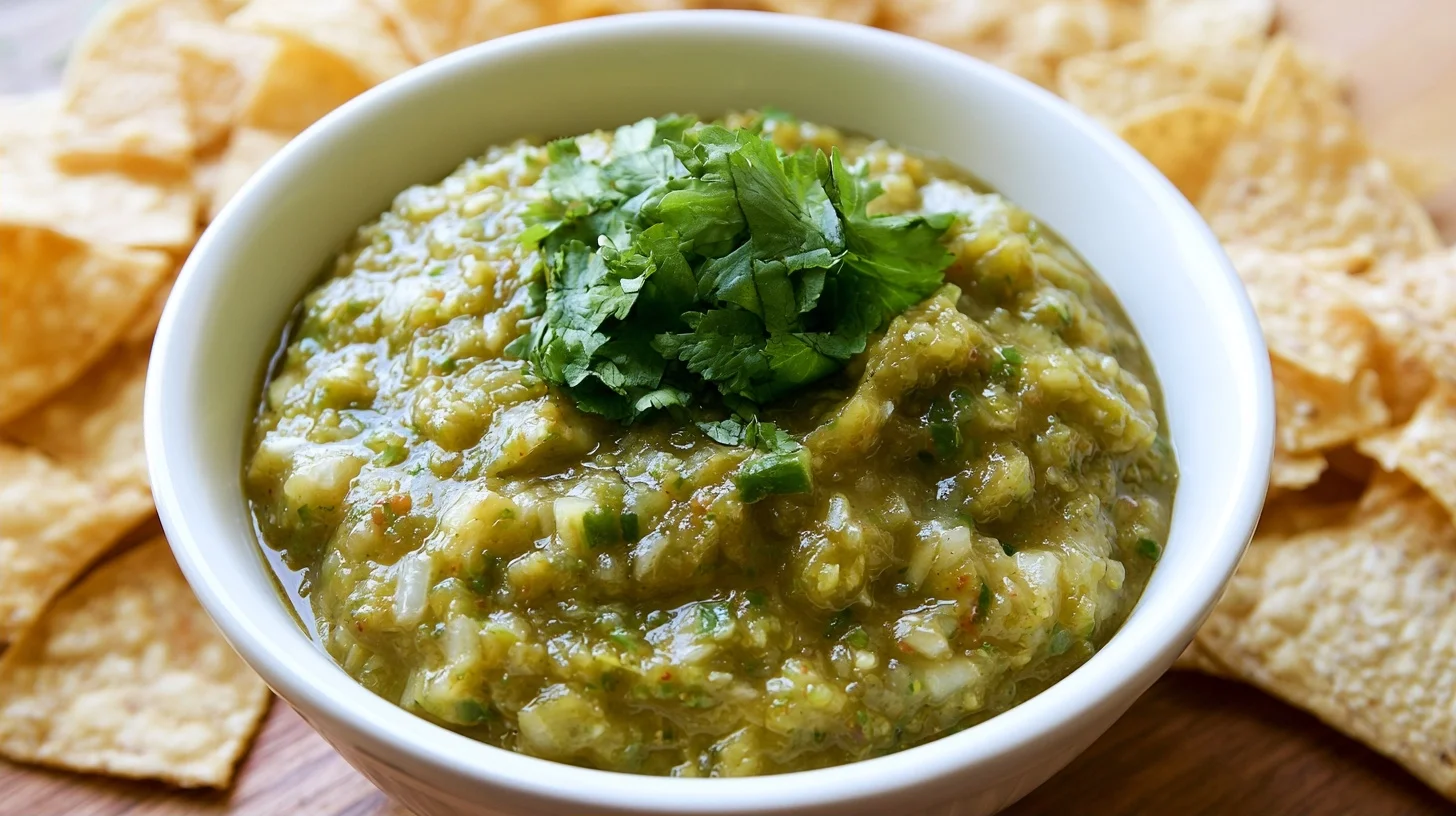
Hatch Chili Salsa
8
servings15
minutes20
minutes25
kcalThis hatch chili salsa combines roasted Hatch chiles with fresh tomatoes, cilantro, and lime juice for a smoky, tangy salsa with just the right amount of heat. The key is roasting the chiles until the skin blisters completely, then steaming them to make peeling easy. The result is a chunky, flavorful salsa that tastes far better than anything you can buy at the store.
Keep the screen of your device on
Ingredients
8 fresh Hatch chiles
4 Roma tomatoes
0.5 cup white onion
0.25 cup fresh cilantro
2 tablespoons fresh lime juice
1 clove garlic
0.5 teaspoon salt
0.25 teaspoon ground cumin
Directions
- Roast the Hatch chiles by placing them directly over a gas flame, on a hot grill, or under a broiler set to high. Turn the chiles every 2 to 3 minutes using tongs until the skin is blistered and blackened on all sides. This usually takes 8 to 12 minutes total. Watch them closely to prevent the flesh from becoming too soft.
- Transfer the roasted chiles to a large bowl and cover tightly with a lid or plastic wrap. Let them steam for 10 to 15 minutes. The steam loosens the charred skin, making it easy to peel without tearing the flesh.
- Peel the chiles by rubbing off the blistered skin with your fingers or a paper towel. Avoid rinsing them under water, as this washes away the smoky flavor. Remove the stems and seeds if you want a milder salsa, or leave some seeds in for more heat.
- Dice the roasted chiles into small pieces and place them in a medium mixing bowl. The pieces should be roughly the same size as the diced tomatoes for even texture.
- Dice the Roma tomatoes and place them in a fine mesh strainer for 10 minutes to drain off excess liquid. This prevents the salsa from becoming watery. After draining, add the tomatoes to the bowl with the chiles.
- Add the diced onion, chopped cilantro, minced garlic, lime juice, salt, and cumin to the bowl. Stir everything together until the ingredients are evenly distributed.
Notes
- Draining the diced tomatoes in a fine mesh strainer for 10 minutes removes excess liquid and prevents the salsa from becoming watery.
- If the chiles are too spicy, remove all the seeds and membranes after roasting, as this is where most of the heat is concentrated.
- Store the salsa in an airtight container in the refrigerator for up to two weeks, or freeze it for up to three months. The flavor improves after the first day as the ingredients continue to meld.
Nutrition Facts
- Serving Size: 1 g
- Total number of serves: 8
- Calories: 25kcal
- Fat: 0g
- Carbohydrates: 6g
- Fiber: 2g
- Protein: 1g
Did you make this recipe?
Tag @therecipemasterblog on Instagram and hashtag it with #therecipemaster
Like this recipe?
Follow @therecipemasterblog on Pinterest
Follow us on Facebook!
Follow The Recipe Master on Facebook
How to Roast Hatch Chiles for Maximum Flavor
Roasting the chiles properly is the single most important step in making great hatch chili salsa. The goal is to char the skin completely without cooking the flesh so much that it turns mushy. Place the chiles directly over a gas flame, on a hot grill, or under a broiler set to high, positioning them about 3 inches from the heat source. Turn the chiles every 2 to 3 minutes using tongs, allowing each side to blister and blacken evenly.
Once the skin is completely blistered, immediately transfer the chiles to a large bowl and cover it tightly with a lid or plastic wrap. Let them steam for 10 to 15 minutes. This steaming step loosens the charred skin, making it peel away easily without tearing the flesh underneath. When the chiles are cool enough to handle, use your fingers or a paper towel to rub off the skin. Avoid rinsing the chiles under water, as this washes away the smoky flavor you just worked to develop.
Why Steaming Matters
Steaming the roasted chiles in a covered bowl traps moisture and heat, which causes the skin to separate from the flesh. If you skip this step and try to peel the chiles immediately, the skin will stick and tear, leaving you with uneven pieces and wasted chile flesh.
Controlling the Heat Level
Hatch chiles range from mild to extra hot depending on the variety and growing conditions. If you want a milder salsa, choose mild or medium Hatch chiles and remove all the seeds and membranes after roasting. For more heat, leave some or all of the seeds in, or use hot Hatch chiles. The heat level can vary even within the same batch, so taste a small piece of each chile before adding it to the salsa.
How to Prevent Watery Salsa
Tomatoes release a lot of juice, which can make your salsa too thin and watery. To prevent this, use Roma tomatoes instead of beefsteak varieties because they contain less water and more flesh. After dicing the tomatoes, place them in a fine mesh strainer for 10 minutes to drain off excess liquid before mixing them with the roasted chiles. This simple step keeps the salsa thick and chunky without diluting the flavor.
The Role of Fresh Lime Juice
Fresh lime juice does more than add tanginess. The acidity brightens the smoky flavors of the roasted chiles and helps preserve the salsa by lowering its pH. Bottled lime juice works in a pinch, but fresh lime juice provides a cleaner, more vibrant flavor that makes the salsa taste brighter and more balanced.
Common Mistakes When Making Hatch Chili Salsa
Over-Roasting the Chiles
Leaving the chiles over the flame or under the broiler for too long cooks the flesh until it becomes soft and mushy, which makes the salsa lose its structure. The goal is to char only the skin while keeping the flesh firm. Watch the chiles closely and turn them frequently. As soon as the skin is blistered and blackened all over, remove them from the heat immediately.
Rinsing the Chiles After Roasting
Rinsing roasted chiles under running water washes away the smoky oils and charred bits that give the salsa its depth. Instead, peel the skin off by hand or with a paper towel. If a few small bits of charred skin remain, leave them. They add flavor and won’t affect the texture.
Adding Too Much Liquid
Many cooks add water or tomato juice to thin the salsa, but this dilutes the flavor and makes the salsa watery. If your salsa seems too thick, add a tablespoon of lime juice or a small amount of the drained tomato liquid instead. This keeps the flavor concentrated while adjusting the consistency.
Not Letting the Salsa Rest
Freshly made salsa tastes sharp and unbalanced because the flavors haven’t had time to meld. Letting the salsa rest in the refrigerator for at least 30 minutes, or ideally a few hours, allows the lime juice, salt, and chile flavors to blend together. The salsa will taste noticeably better after resting than it does immediately after mixing.
Ways to Customize Your Hatch Chili Salsa
Roasted Tomatillo Version
Replace the tomatoes with roasted tomatillos for a tangier, more herbaceous salsa verde. Roast the tomatillos alongside the chiles until they soften and blister, then dice them and mix with the roasted chiles, cilantro, onion, and lime juice. The tomatillos add a bright, citrusy acidity that pairs beautifully with the smoky chiles.
Smoky Chipotle Addition
For a deeper, smokier flavor, add one or two minced chipotle peppers in adobo sauce along with the roasted Hatch chiles. The chipotle adds heat and a rich, smoky sweetness that complements the Hatch chiles without overpowering them. Start with one chipotle and taste before adding more.
Chunky Avocado Salsa
Fold in one diced avocado just before serving for a creamy, chunky salsa that works beautifully as a topping for grilled chicken or fish. Add the avocado at the last minute to prevent it from browning and turning the salsa gray.
Charred Corn and Black Bean Salsa
Stir in one cup of charred corn kernels and one cup of rinsed black beans for a heartier salsa that works as a side dish or a topping for tacos and burritos. The sweetness of the corn balances the heat of the chiles, and the black beans add protein and texture.
Nutrition and Health Benefits
Hatch chili salsa is naturally low in calories and packed with vitamins and antioxidants. Each serving provides a good amount of vitamin C from the fresh chiles and tomatoes, which supports immune function and skin health. The capsaicin in the chiles has anti-inflammatory properties and may boost metabolism. Because this salsa is made with fresh vegetables and contains no added sugar or preservatives, it’s a healthier alternative to store-bought salsas that often contain high amounts of sodium and artificial ingredients.
If you’re watching your sodium intake, you can reduce the salt to a quarter teaspoon or omit it entirely, as the lime juice and chiles provide plenty of flavor on their own. The salsa is naturally gluten-free, dairy-free, and vegan, making it suitable for most dietary preferences.
Serving Ideas for Hatch Chili Salsa
This salsa is incredibly versatile and works well beyond the typical chips and dip pairing. Spoon it over scrambled eggs or a breakfast burrito for a smoky, spicy start to the day. Use it as a topping for grilled chicken, steak, or fish to add brightness and heat without heavy sauces. Stir a few spoonfuls into black beans or pinto beans for a quick side dish with depth. Layer it into quesadillas, tacos, or nachos for extra flavor, or mix it with sour cream or Greek yogurt to make a quick creamy dip.
For a simple appetizer, serve the salsa alongside a fresh chimichurri sauce and warm tortilla chips for a duo of bright, herbaceous flavors. The salsa also pairs beautifully with grilled corn on the cob, roasted sweet potatoes, or a simple green salad.
How to Store Hatch Chili Salsa
Store the salsa in an airtight container in the refrigerator for up to two weeks. The flavor actually improves after the first day as the ingredients continue to meld. If you notice any liquid separating at the bottom of the container, simply stir it back in before serving.
To freeze the salsa, transfer it to freezer-safe containers or heavy-duty freezer bags, leaving about half an inch of headspace to allow for expansion. Label the containers with the date and freeze for up to three months. Thaw the salsa overnight in the refrigerator before serving. The texture may be slightly softer after freezing, but the flavor will remain strong. Avoid freezing salsa that contains avocado, as it will turn brown and mushy.
Frequently Asked Questions
Yes, you can use canned Hatch chiles if fresh ones are unavailable, but the salsa will lack the smoky depth that comes from roasting fresh chiles. Drain the canned chiles well and add a pinch of smoked paprika to mimic some of the roasted flavor.
Poblano chiles are the closest substitute because they have a similar mild heat and earthy flavor. Anaheim chiles also work well, though they are slightly sweeter. Roast and peel them the same way you would Hatch chiles.
Choose mild Hatch chiles and remove all the seeds and membranes after roasting, as this is where most of the heat is concentrated. You can also add an extra tomato or a tablespoon of honey to balance the heat.
Yes, but pulse the ingredients in short bursts to avoid over-blending. A food processor gives you more control over the texture, but a blender works if you want a smoother salsa. Add the ingredients in batches to prevent the salsa from becoming too thin.







Leave a Reply