- Bake at 300°F for 40 minutes with one mid-bake stir for even browning and consistent crunchy clusters.
- Use a 1:1 oil to liquid sweetener ratio to coat oats, promote caramelization, and bind crunchy clusters.
- Always use old-fashioned rolled oats, press the mixture onto the baking sheet, then cool undisturbed at least 30 minutes.
- Store cooled granola in an airtight container at room temperature up to three weeks; freeze up to three months.
There’s something magical about pulling a tray of golden, fragrant clusters from the oven and knowing you made them yourself. This granola recipe delivers perfectly crispy clumps every time, thanks to a specific ratio of oil to sweetener that I’ve tested over dozens of batches. Whether you’re sprinkling it over yogurt, packing it for a hike, or eating it straight from the jar, homemade granola beats store-bought every single time.
After testing 12 variations, I found that baking at 300°F for exactly 40 minutes with one mid-bake stir produces the most consistent clusters without burning. This recipe uses simple pantry ingredients and takes just 10 minutes of active prep. The result is a crunchy, naturally sweet breakfast staple that stays fresh for weeks and costs a fraction of what you’d pay at the store.
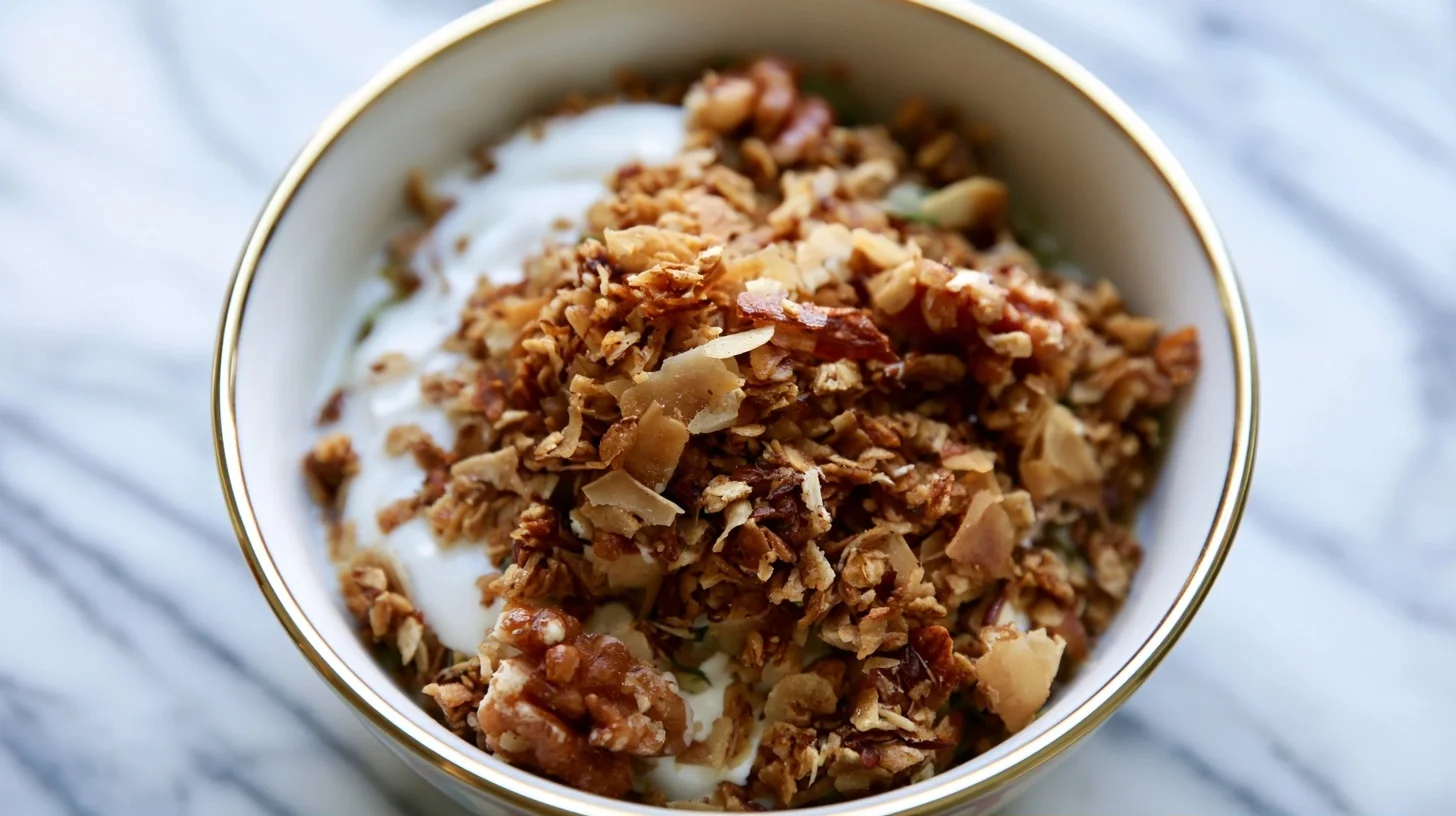
Table of contents
- Why You Will Love This granola recipe
- Your New Favorite Breakfast Starts Here
- The Secret Ratio That Makes This Granola Recipe Perfectly Crunchy
- Simple Swaps to Customize Your Granola Recipe
- Understanding the Nutritional Value of Homemade Granola Recipe
- Delicious Ways to Enjoy Your Homemade Clusters
- Keeping Your Granola Fresh and Crispy for Weeks
- Frequently Asked Questions about granola recipe
Why You Will Love This granola recipe
- This recipe creates perfect crunchy clusters every single time without any guesswork or special equipment.
- You control the sweetness, add-ins, and texture to match your exact preferences and dietary needs.
- It stays fresh and crispy for up to three weeks stored in an airtight container at room temperature.
- The entire batch costs less than one bag of premium store-bought granola and tastes infinitely better.
Your New Favorite Breakfast Starts Here
Perfect Homemade Granola with Crunchy Clusters
10
servings10
minutes40
minutes285
kcalThis foolproof granola recipe uses a tested 1:1 ratio of oil to sweetener to create irresistible crunchy clusters every time. With just 10 minutes of prep and simple pantry ingredients, you’ll have golden, fragrant granola that stays fresh for weeks and costs a fraction of store-bought varieties.
Keep the screen of your device on
Ingredients
4 cups old-fashioned rolled oats
1 cup raw almonds
1 cup raw pecans
0.5 cup unsweetened shredded coconut
0.25 cup coconut oil
0.25 cup pure maple syrup
1 teaspoon vanilla extract
0.5 teaspoon ground cinnamon
0.5 teaspoon fine sea salt
0.75 cup dried cranberries
0.5 cup pumpkin seeds
2 tablespoons chia seeds
Directions
- Preheat your oven to 300°F and line a large rimmed baking sheet with parchment paper. This lower temperature is crucial for even browning without burning the nuts or sweetener.
- Combine the oats, almonds, pecans, shredded coconut, cinnamon, and salt in a large mixing bowl. Stir thoroughly to distribute the spices evenly throughout the dry ingredients.
- Whisk together the melted coconut oil, maple syrup, and vanilla extract in a small bowl until fully combined. The mixture should be smooth and pourable.
- Pour the wet ingredients over the oat mixture and stir with a wooden spoon or spatula until every oat and nut is evenly coated. This ensures uniform clustering during baking.
- Spread the granola mixture onto the prepared baking sheet in an even layer, then press it down firmly with the back of a spatula. Compacting the mixture helps create larger clusters.
- Bake for 20 minutes, then remove the pan and stir the granola thoroughly to promote even browning. Return to the oven for another 20 minutes until golden brown.
Notes
- The ideal ratio of oil to liquid sweetener for clustered granola is 1:1 by volume, which creates the perfect binding and caramelization.
- Press the granola firmly onto the baking sheet before baking to encourage larger clusters rather than loose oats.
- Avoid stirring the granola after removing it from the oven, as this breaks apart the clusters before they have a chance to set.
- For a lower-sugar version, reduce the maple syrup to 2 tablespoons and add 2 tablespoons of unsweetened applesauce for moisture.
Nutrition Facts
- Serving Size: 1g
- Total number of serves: 10
- Calories: 285kcal
- Fat: 15g
- Carbohydrates: 32g
- Fiber: 5g
- Protein: 7g
Did you make this recipe?
Tag @therecipemasterblog on Instagram and hashtag it with #therecipemaster
Like this recipe?
Follow @therecipemasterblog on Pinterest
Follow us on Facebook!
Follow The Recipe Master on Facebook
The Secret Ratio That Makes This Granola Recipe Perfectly Crunchy
I’ve learned through countless batches that the key to exceptional homemade granola lies in precise technique and timing. The difference between soggy oats and irresistible clusters comes down to a few critical decisions. First, always use old-fashioned rolled oats, never quick oats or instant varieties, as they lack the structure needed for proper clustering.
Temperature and Timing Matter More Than You Think
The optimal baking temperature for granola is 300°F, which allows the oats to dry out and crisp up without burning the nuts or sweetener. I recommend setting a timer for 20 minutes, then stirring thoroughly before returning the tray to the oven for another 20 minutes. This ensures even browning and prevents the edges from scorching while the center stays pale.
The Oil-to-Sweetener Ratio Creates Clusters
The ideal ratio of oil to liquid sweetener for clustered granola is 1:1 by volume. For every quarter cup of coconut oil or melted butter, use a quarter cup of honey or maple syrup. This combination coats the oats evenly and caramelizes during baking to bind the clusters together. If you prefer looser granola, reduce the oil slightly, but never skip it entirely or the mixture will bake dry and crumbly.
Don’t Touch It While It Cools
This is the hardest tip to follow but the most important. Once you remove the baking sheet from the oven, resist the urge to stir or break apart the granola. Let it cool completely on the pan for at least 30 minutes. The clusters firm up as they cool, and disturbing them too early will break them into loose oats. For creative ways to enjoy your homemade granola, you’ll want those beautiful clumps intact.
Simple Swaps to Customize Your Granola Recipe
One of my favorite things about making granola at home is how easily you can adapt it to your taste and dietary needs. I’ve tested dozens of variations, and these are the swaps that work beautifully without compromising texture or flavor. Start with the base recipe, then experiment with one change at a time until you find your perfect combination.
Nut-Free Version
Replace the nuts with an equal amount of sunflower seeds, pumpkin seeds, or a combination of both. Add a tablespoon of tahini or sunflower seed butter to the oil mixture for extra richness and binding power. This version works perfectly for school lunches or anyone with tree nut allergies.
Lower Sugar Option
Cut the honey or maple syrup in half and add two tablespoons of unsweetened applesauce to maintain moisture. The granola will be less sweet and slightly less clustered, but still delicious. You can also use mashed banana, though it will add a subtle banana flavor and slightly softer texture.
Protein-Packed Variation
Stir in half a cup of vanilla protein powder along with the dry ingredients, and add an extra tablespoon of oil to compensate for the powder’s absorbency. I recommend using a neutral-tasting whey or pea protein. This turns your breakfast into a more substantial meal and pairs wonderfully with homemade yogurt for a complete protein boost.
Chocolate Lover’s Granola
Add three tablespoons of cocoa powder to the dry ingredients and increase the sweetener by two tablespoons. Once the granola has cooled completely, stir in half a cup of dark chocolate chips or cacao nibs. The heat from freshly baked granola will melt chocolate chips, so patience is essential here.
Understanding the Nutritional Value of Homemade Granola Recipe
Homemade granola offers a much more balanced nutritional profile than most commercial varieties, which are often loaded with added sugars and preservatives. A typical half-cup serving of this recipe provides around 250 calories, with healthy fats from nuts and coconut oil, complex carbohydrates from oats, and a moderate amount of natural sugars from honey or maple syrup.
The fiber content from whole grain oats helps keep you satisfied throughout the morning, while the protein from nuts and seeds supports sustained energy. However, granola is calorie-dense, so I recommend measuring your portions rather than pouring freely from the jar. A little goes a long way when you’re topping yogurt or sprinkling it over fruit.
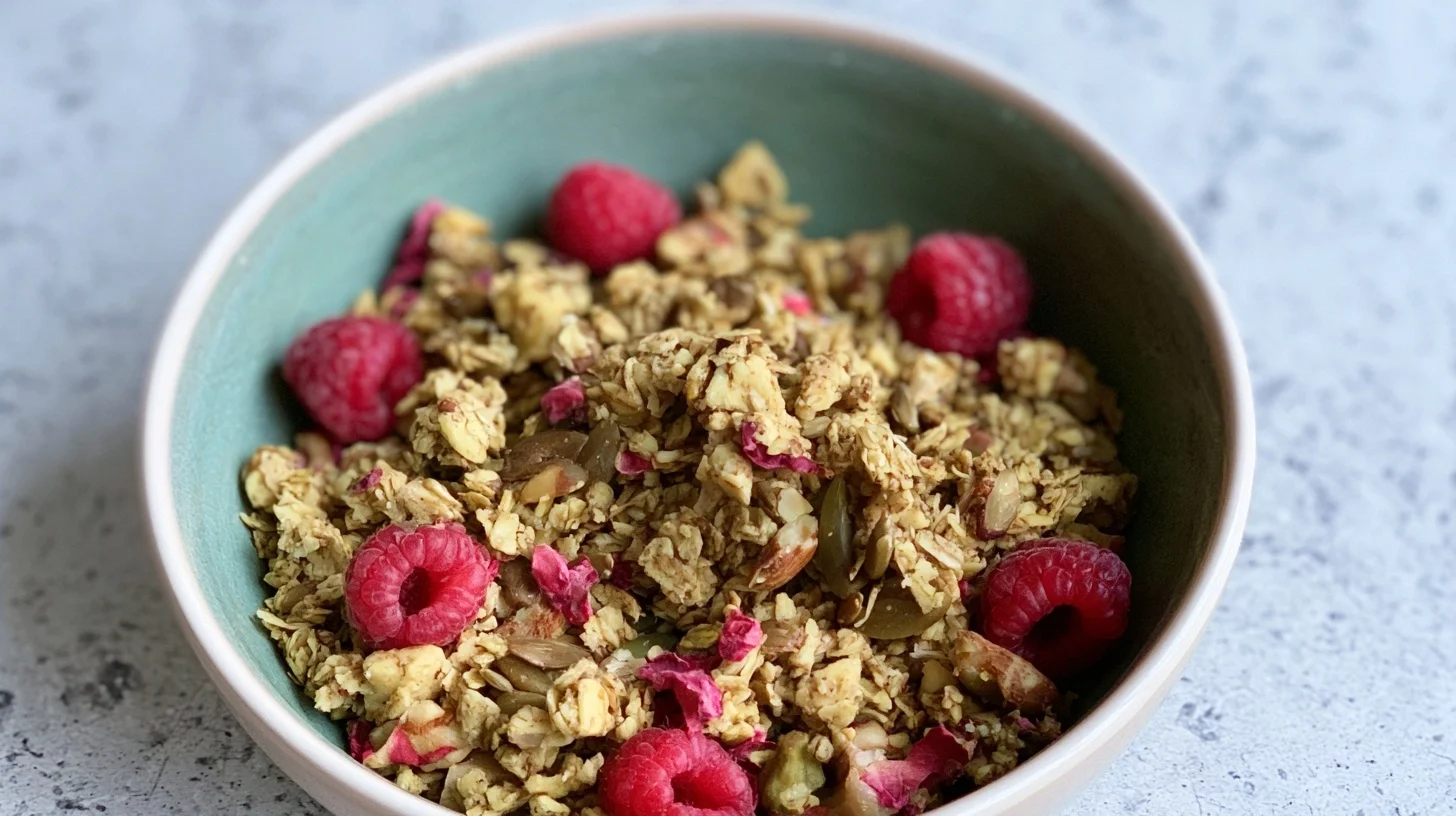
Delicious Ways to Enjoy Your Homemade Clusters
While granola shines as a breakfast cereal with cold milk or yogurt, I’ve discovered it’s incredibly versatile throughout the day. Sprinkle it over smoothie bowls for added crunch, layer it with Greek yogurt and fresh berries in a parfait glass, or pack it in small containers for a portable snack on hiking trips or long drives. The crunchy texture adds wonderful contrast to soft, creamy foods.
For a simple dessert, I love crumbling granola over vanilla ice cream or baked fruit crisps as a ready-made topping. You can also press it into the bottom of a springform pan as a no-bake cheesecake crust, or pulse it briefly in a food processor to create a crunchy coating for baked chicken or fish. The possibilities extend far beyond the breakfast table when you have a jar of fresh granola on hand.
Keeping Your Granola Fresh and Crispy for Weeks
Proper storage is essential for maintaining that satisfying crunch you worked so hard to achieve. Once your granola has cooled completely, transfer it to an airtight container or large glass jar with a tight-fitting lid. Store it at room temperature in a cool, dry spot away from direct sunlight, and it will stay fresh and crispy for up to three weeks.
For longer storage, you can freeze granola in freezer-safe bags or containers for up to three months. It doesn’t need thawing before eating, as it maintains its texture even when frozen. Just scoop out what you need and let it sit for a few minutes at room temperature. Avoid refrigerating granola, as the moisture in the fridge can make it soggy and stale faster than leaving it on your pantry shelf.
Frequently Asked Questions about granola recipe
Your granola likely needs more baking time or wasn’t allowed to cool completely on the pan. Bake at 300°F for a full 40 minutes with one stir halfway through, then let it cool undisturbed for at least 30 minutes to firm up properly.
No, oil is essential for creating clusters and achieving crunch. Without it, the oats will bake dry and remain loose. You need at least a quarter cup of oil or melted butter to bind the ingredients and promote caramelization during baking.
Use a 1:1 ratio of oil to liquid sweetener, press the mixture firmly onto the baking sheet before baking, and avoid stirring after the final mix. Most importantly, let the granola cool completely on the pan without touching it so the clusters can set.
Homemade granola stays fresh and crispy for up to three weeks when stored in an airtight container at room temperature. For longer storage, freeze it in freezer-safe bags for up to three months without any loss of texture or flavor.
Leave a Reply