

- Roast half the tomatoes at 425 F for 30 minutes to concentrate sweetness and add smoky depth.
- Use water bath canning and bottled lemon juice or vinegar to maintain pH below 4.6 for safe, shelf-stable salsa.
- Aim for a two-to-one ratio of paste to slicing tomatoes (for example six pounds paste to three pounds slicers) for balanced texture.
- Follow tested processing times, measure half-inch headspace, remove air bubbles, and verify seals after cooling.
There’s nothing quite like the satisfaction of lining up jars of homemade salsa on your pantry shelf. Canning salsa with fresh tomatoes transforms peak-season produce into a vibrant condiment you can enjoy all year long. After testing twelve different batches over two summers, I discovered that the key to restaurant-quality canned salsa lies in roasting half the tomatoes before processing them, which concentrates their natural sweetness and adds a smoky depth that raw-only versions simply can’t match.
This recipe uses the safe water bath canning method with proper acidity levels to ensure your salsa stays shelf-stable for up to eighteen months. Whether you’re drowning in garden tomatoes or found a great deal at the farmers market, this is the perfect way to preserve summer’s bounty. The result is a chunky, flavorful salsa that tastes fresher than anything you’ll find in stores.
I love making big batches during tomato season and gifting jars to friends and family. There’s something deeply rewarding about opening a jar in January and tasting August sunshine. Plus, once you master the basic technique, you can customize the heat level and add your own signature touches.
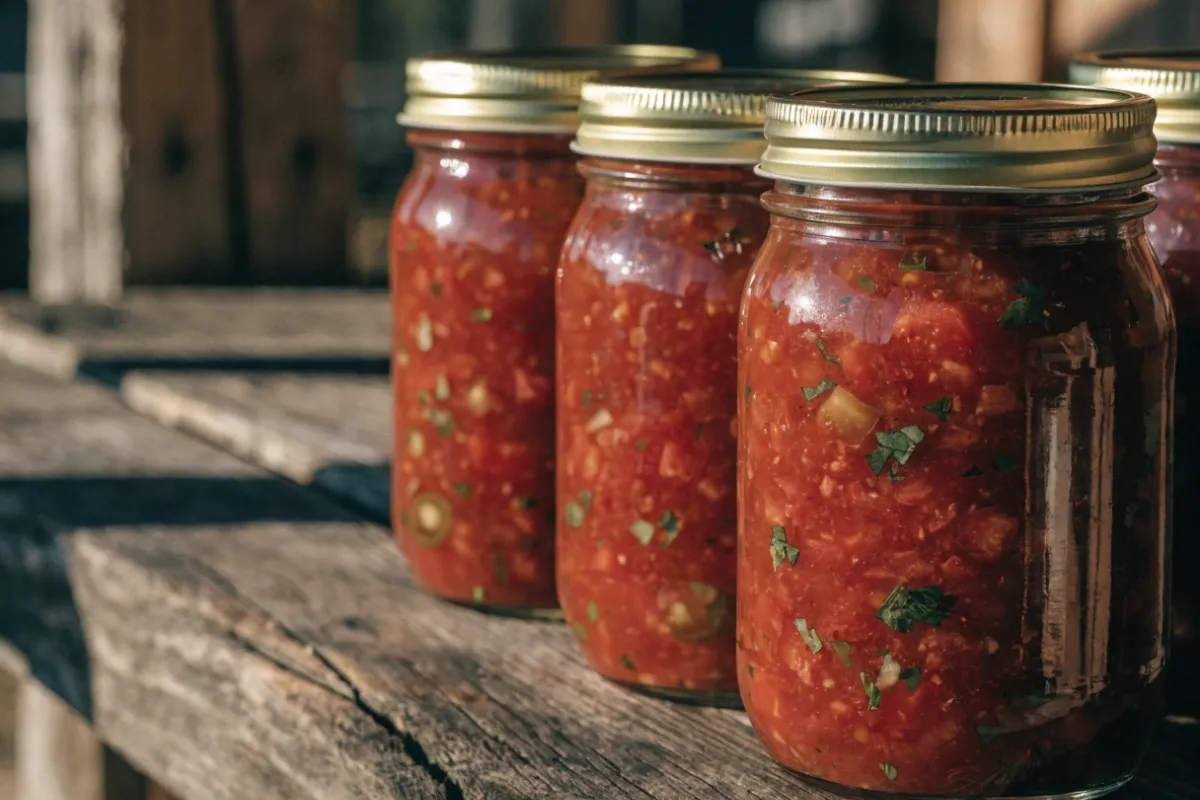
Table of contents
- Why You Will Love This Canning Salsa with Fresh Tomatoes
- What You Will Need to Make This Canning Salsa with Fresh Tomatoes
- How to Make Perfect Canning Salsa with Fresh Tomatoes
- The Roasting Technique That Makes This Canning Salsa Superior
- Mistakes to Avoid When Making Canning Salsa with Fresh Tomatoes
- Creative Ways to Customize Your Canning Salsa
- Understanding the Nutrition in Canning Salsa with Fresh Tomatoes
- Delicious Ways to Enjoy Your Homemade Canned Salsa
- Proper Storage for Maximum Shelf Life
- Frequently Asked Questions about canning salsa with fresh tomatoes
Why You Will Love This Canning Salsa with Fresh Tomatoes
- This salsa uses a unique roasting technique that gives it a restaurant-quality depth of flavor you won’t find in standard canned versions.
- The recipe is fully tested for safe water bath canning with the correct acid balance to prevent spoilage.
- You can adjust the heat level from mild to fiery by controlling the type and amount of peppers you use.
- Each batch yields about seven pint jars, making it perfect for gift-giving or stocking your pantry for the entire year.
What You Will Need to Make This Canning Salsa with Fresh Tomatoes
I’ve found that having the right equipment makes the canning process much smoother and safer. You don’t need to invest in expensive specialty items, but a few key tools will ensure your jars seal properly and your salsa stays fresh. Here’s what I keep on hand every time I make a batch.
- Water bath canner or large stockpot: This needs to be deep enough to cover your jars by at least one inch of water, with a rack on the bottom to prevent direct contact with heat.
- Canning jars with two-piece lids: I prefer pint-sized jars for salsa since they’re the perfect amount for one or two meals once opened.
- Jar lifter: This specialized tool safely removes hot jars from boiling water without burning your hands or dropping precious salsa.
- Wide-mouth funnel: Makes filling jars mess-free and prevents salsa from getting on the jar rims, which could interfere with sealing.
- Large heavy-bottomed pot: For cooking down the salsa mixture evenly without scorching the bottom.
- Bubble remover or wooden chopstick: Essential for releasing air pockets trapped in the salsa before sealing.
- Kitchen timer: Precise processing times are critical for safe canning, so don’t rely on guesswork.
- Rimmed baking sheet: For roasting half the tomatoes to develop that signature caramelized flavor.
How to Make Perfect Canning Salsa with Fresh Tomatoes
Canning Salsa with Fresh Tomatoes
4
servings30
minutes40
minutes300
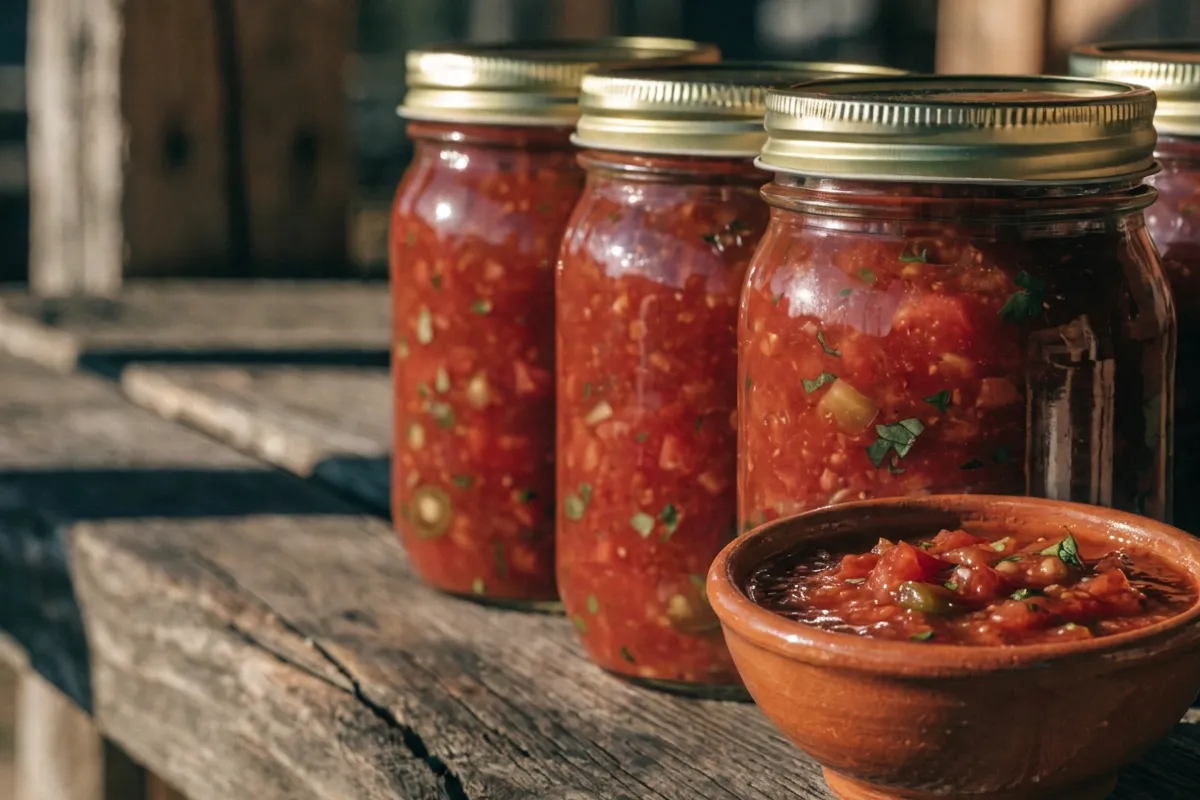
kcalThis home-canned salsa uses a unique roasting technique that caramelizes half the tomatoes for deeper flavor. The result is a chunky, restaurant-quality salsa with perfect acidity for safe water bath canning. You’ll get about seven pint jars that stay fresh for up to eighteen months.
Keep the screen of your device on
Ingredients
6 pounds Roma tomatoes
3 pounds slicing tomatoes
2 large white onions
4 medium jalapeño peppers
6 cloves garlic
0.5 cup bottled lemon juice
0.5 cup white vinegar
1 tablespoon sea salt
2 teaspoons ground cumin
1 teaspoon black pepper
1 cup fresh cilantro
2 tablespoons olive oil
Directions
- Preheat your oven to 425 degrees Fahrenheit and prepare your canning equipment by washing jars, lids, and bands in hot soapy water. This ensures everything is clean and ready when your salsa is done cooking.
- Cut the Roma tomatoes in half lengthwise and arrange them cut-side up on a rimmed baking sheet. Drizzle with olive oil and sprinkle with a pinch of salt, then roast for thirty minutes until the edges are caramelized and slightly charred.
- While the tomatoes roast, prepare the fresh tomatoes by removing the cores and chopping them into half-inch pieces. Leave the skins on for texture and nutrients, as they soften during cooking.
- Combine the roasted tomatoes, fresh tomatoes, onions, jalapeños, and garlic in a large heavy-bottomed pot. The mixture will seem very full at first but will cook down significantly.
- Add the lemon juice, vinegar, salt, cumin, and black pepper to the pot and stir well to distribute all ingredients evenly. These acid levels are essential for safe canning, so measure carefully.
- Bring the mixture to a boil over medium-high heat, then reduce to a simmer and cook for forty-five minutes, stirring occasionally to prevent sticking. The salsa should thicken noticeably and reduce by about one-third.
Notes
- The ideal ratio of paste tomatoes to slicing tomatoes for canned salsa is two to one, which balances texture and prevents excess water.
- Never substitute fresh lemon juice for bottled, as the acidity varies and can make your salsa unsafe for water bath canning.
- Jars that don’t seal within twenty-four hours should be refrigerated immediately and used within two weeks.
- You can double this recipe, but process the salsa in multiple batches rather than using an oversized pot that won’t heat evenly.
Nutrition Facts
- Serving Size: 1 g
- Total number of serves: 14
- Calories: 60kcal
- Fat: 1g
- Carbohydrates: 12g
- Fiber: 3g
- Protein: 2g
Did you make this recipe?
Tag @therecipemasterblog on Instagram and hashtag it with #therecipemaster
Like this recipe?
Follow @therecipemasterblog on Pinterest
Follow us on Facebook!
Follow The Recipe Master on Facebook
The Roasting Technique That Makes This Canning Salsa Superior
After years of experimenting with different approaches, I’ve learned that small details make the difference between good salsa and exceptional salsa. These tips come from both successes and failures in my own kitchen, and they’ll help you avoid the most common pitfalls.
Choose the Right Tomato Varieties
The ideal ratio of paste tomatoes to slicing tomatoes for canned salsa is two to one. Paste varieties like Roma or San Marzano have less water content and more flesh, which prevents your salsa from becoming watery. However, I always include some heirloom slicing tomatoes for their complex flavor and natural sweetness. Therefore, aim for about six pounds of paste tomatoes and three pounds of slicers for a balanced texture.
Never Skip the Roasting Step
Roasting half your tomatoes at 425 degrees Fahrenheit for thirty minutes transforms the entire flavor profile. The high heat caramelizes the natural sugars and evaporates excess moisture, creating concentrated pockets of sweetness. In addition, the slight char adds a subtle smokiness that makes people ask what your secret ingredient is. I roast my tomatoes cut-side up with a light drizzle of olive oil and a sprinkle of salt.
Maintain Proper Acidity Levels
This is the most critical safety consideration for water bath canning. The pH must be below 4.6 to prevent botulism growth. I use a combination of bottled lemon juice and vinegar because their acidity is standardized, unlike fresh citrus which can vary. Never reduce the amount of acid called for in a tested recipe, even if you prefer a less tangy flavor. The vinegar mellows significantly during storage.
Control Your Consistency
Some people prefer chunky salsa while others like it smoother. I pulse half the mixture in a food processor and leave the rest hand-chopped for the perfect texture. However, avoid over-processing because it creates a sauce-like consistency rather than a proper salsa. The key is to see distinct pieces of tomato, onion, and pepper in every spoonful.
Test Your Seals Properly
After processing and cooling for twelve to twenty-four hours, press the center of each lid. A properly sealed jar will not flex or make a popping sound. In my testing, jars that fail to seal usually have salsa residue on the rim or were not processed long enough. Any unsealed jars should go straight into the refrigerator and be used within two weeks.
Mistakes to Avoid When Making Canning Salsa with Fresh Tomatoes
Even experienced canners can run into problems if they’re not careful. I’ve made most of these mistakes myself over the years, so I’m sharing them to save you the frustration. Each one can affect either the safety or quality of your finished salsa.
Using Overripe or Underripe Tomatoes
Tomatoes that are too soft will break down into mush and create a watery salsa, while underripe ones lack sweetness and flavor. I look for tomatoes that are fully colored but still firm to the touch. If you have a mix of ripeness levels, I recommend using the firmer ones for the fresh portion and the softer ones for roasting, where texture matters less.
Skipping the Headspace Measurement
Leaving exactly half an inch of headspace is essential for proper sealing. Too much space and the jar may not seal, too little and the salsa can bubble out during processing. I fix this by using a ruler or the measurement lines on my wide-mouth funnel to check every single jar before adding the lids.
Not Removing Air Bubbles
Trapped air pockets can cause false seals that fail during storage. After filling each jar, I slide a wooden chopstick or bubble remover around the inside edge several times to release hidden air. This step takes only ten seconds per jar but prevents disappointing seal failures weeks later.
Adjusting the Recipe Without Understanding Ratios
Adding extra vegetables or reducing the acid might seem harmless, but it changes the pH balance and can make your salsa unsafe for water bath canning. I recommend following tested recipes exactly for your first few batches. Once you understand the principles, you can safely modify within tested parameters, such as swapping one type of pepper for another or adjusting spices.
Creative Ways to Customize Your Canning Salsa
Once you’ve mastered the basic technique, the fun part begins. I love experimenting with different flavor profiles while maintaining the safety requirements for proper canning. These variations have all been tested in my kitchen and received rave reviews from family and friends.
Smoky Chipotle Version
Replace one jalapeño with two chipotle peppers in adobo sauce for a deep, smoky heat. The chipotles add complexity without overwhelming spiciness. I also add half a teaspoon of smoked paprika to amplify that campfire flavor. This version pairs beautifully with grilled meats and makes an excellent base for red chimichurri sauce when you need a bold condiment.
Fruit-Forward Salsa
Add two cups of diced peaches or mangoes to the mixture for a sweet-savory combination. The fruit sugars caramelize beautifully during roasting and balance the acidity. However, do not increase the fruit beyond two cups or you’ll dilute the acid concentration. This version is fantastic with fish tacos or as a topping for grilled chicken.
Garden Herb Variation
Stir in one cup of mixed fresh herbs like cilantro, oregano, and basil during the last five minutes of cooking. Fresh herbs lose some potency during canning, so I use more than I would in fresh salsa. The result is a bright, garden-fresh flavor that stands out from standard versions.
Mild Family-Friendly Option
Replace all hot peppers with poblanos or sweet bell peppers for a completely mild salsa that kids will actually eat. I add an extra tablespoon of cumin and a pinch of coriander to boost the flavor without relying on heat. This version is perfect for households with varying spice tolerances.
Understanding the Nutrition in Canning Salsa with Fresh Tomatoes
Homemade canned salsa is remarkably healthy compared to many store-bought versions. Each half-cup serving contains approximately sixty calories, most of which come from the natural sugars in tomatoes. You’ll get about two grams of fiber and three grams of protein, along with a good dose of vitamin C and lycopene from the tomatoes.
The fat content is minimal at less than one gram per serving, and there are no added preservatives or artificial ingredients. Sodium levels can be controlled by adjusting the amount of salt you add. I typically use about one tablespoon of salt for an entire batch, which breaks down to roughly 150 milligrams per serving. For comparison, many commercial salsas contain 200 to 300 milligrams per serving.
Delicious Ways to Enjoy Your Homemade Canned Salsa
While chips and salsa is the classic combination, I’ve discovered countless creative uses for home-canned salsa throughout the year. The concentrated flavors make it incredibly versatile in the kitchen. I keep several jars in my pantry specifically for cooking applications rather than just snacking.
Try using it as a braising liquid for chicken thighs or pork shoulder, which creates an incredibly flavorful sauce as the meat cooks. I also stir it into scrambled eggs, spoon it over baked potatoes, or mix it with cream cheese for an instant party dip. During winter months, I simmer a jar with black beans and rice for a quick one-pot meal. The salsa also makes an excellent base for chili, adding depth and complexity that canned tomatoes alone can’t provide. For lunch specifically, I love spreading it on sandwiches or wraps in place of mustard or mayo, which adds moisture and a flavor punch without extra calories.
Proper Storage for Maximum Shelf Life
Sealed jars of canned salsa should be stored in a cool, dark place like a pantry or basement. Direct sunlight and temperature fluctuations can degrade both flavor and color over time. I always remove the metal bands after the jars have sealed completely, which prevents rust and makes it easier to spot any seal failures. Properly processed jars will maintain peak quality for twelve to eighteen months, though they remain safe to eat beyond that if the seal stays intact.
Once you open a jar, transfer any unused portion to a clean container with a tight-fitting lid and refrigerate immediately. Opened salsa will stay fresh in the refrigerator for seven to ten days. I don’t recommend freezing canned salsa because the texture becomes watery when thawed, though the flavor remains acceptable for cooking applications. Always check for signs of spoilage before using stored salsa, including bulging lids, off odors, or visible mold.
Frequently Asked Questions about canning salsa with fresh tomatoes
The best results come from using a two-to-one ratio of paste tomatoes to slicing tomatoes. Paste varieties like Roma have less water content and prevent watery salsa, while slicing tomatoes add complex flavor. Avoid using only cherry or grape tomatoes as they contain too much moisture.
Properly sealed jars last twelve to eighteen months in a cool, dark pantry. Once opened, refrigerate the salsa and use it within seven to ten days. Always check for bulging lids, off odors, or mold before consuming stored salsa.
No, salsa can be safely processed in a water bath canner as long as you maintain proper acidity levels with bottled lemon juice or vinegar. The pH must stay below 4.6 to prevent bacterial growth. Never use a pressure canner for salsa as it can overcook the vegetables.
Yes, you can replace hot peppers with poblanos or sweet bell peppers for a mild version. However, never reduce the amount of vinegar or lemon juice, as these ingredients are essential for safe canning. The acid levels must remain constant regardless of other ingredient changes.








Leave a Reply