

There’s something deeply comforting about a warm apple crumble recipe fresh from the oven, with its golden, buttery topping and tender spiced apples beneath. This classic dessert delivers the perfect balance of soft fruit and crisp topping without requiring any special skills or equipment. The secret to getting it right lies in choosing apples that hold their shape during baking and creating a topping that stays crumbly rather than turning dense or greasy.
Unlike apple pie, which demands pastry skills and careful lattice work, apple crumble comes together in minutes and forgives minor variations in technique. The topping forms its signature texture through a simple rubbing method that coats flour particles in fat, creating pockets that crisp beautifully in the oven. When the apples release their juices, those juices bubble up around the edges while the topping stays crisp on top, creating the textural contrast that makes this dessert so satisfying.
This recipe uses a higher ratio of butter to flour than many versions, which produces a richer, more cohesive topping that holds together in clusters rather than scattering into sandy bits. The result is a crumble that tastes indulgent but never feels heavy, with each spoonful delivering both crisp edges and tender apple filling.
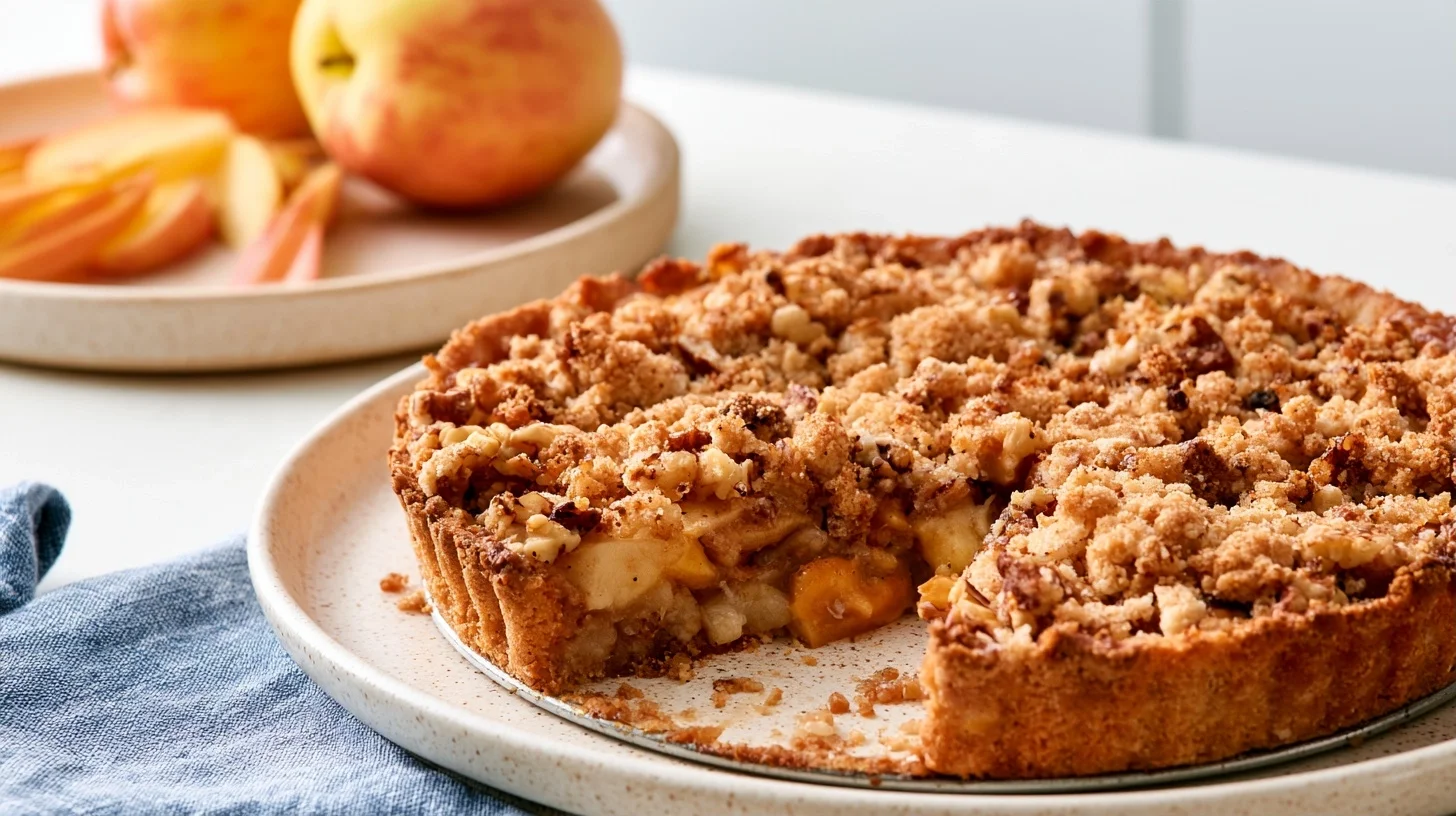
Table of contents
- Why You Will Love This Apple Crumble Recipe
- Essential Equipment for Apple Crumble
- How to Make Apple Crumble That Stays Crisp
- Tips for Perfect Apple Crumble Recipe Every Time
- Common Apple Crumble Mistakes and How to Fix Them
- Ways to Customize Your Apple Crumble
- What Makes Apple Crumble Nutritionally Balanced
- How to Serve Apple Crumble Recipe
- How to Store and Reheat Apple Crumble
- Frequently Asked Questions about Apple Crumble Recipe
Why You Will Love This Apple Crumble Recipe
- The topping stays crisp on top while the apples soften into a lightly spiced filling without turning mushy.
- No mixer or food processor required—the entire recipe comes together with just a bowl and your hands.
- The higher butter ratio creates clusters of topping that hold together rather than crumbling into dust.
- The recipe works equally well with a mix of apple varieties, allowing you to use what you have on hand.
If you want to read more about the Apple crumble recipe, i suggest reading this article about its origins.
Essential Equipment for Apple Crumble
This recipe requires minimal equipment, but each piece plays a role in the final texture. A shallow baking dish allows the topping to spread evenly and crisp properly, while a large bowl gives you room to rub the butter into the flour without making a mess.
- 9×13 inch baking dish or similar shallow dish: The shallow depth ensures the topping crisps rather than steams, and the surface area allows the apples to cook evenly.
- Large mixing bowl: Provides enough space to rub the butter into the flour using your fingertips without spilling dry ingredients.
- Sharp knife or apple peeler: A sharp blade makes peeling and slicing apples faster and safer, especially when working through several pounds of fruit.
- Measuring cups and spoons: Accurate measurements ensure the topping holds together properly and the filling isn’t too sweet or too tart.
How to Make Apple Crumble That Stays Crisp
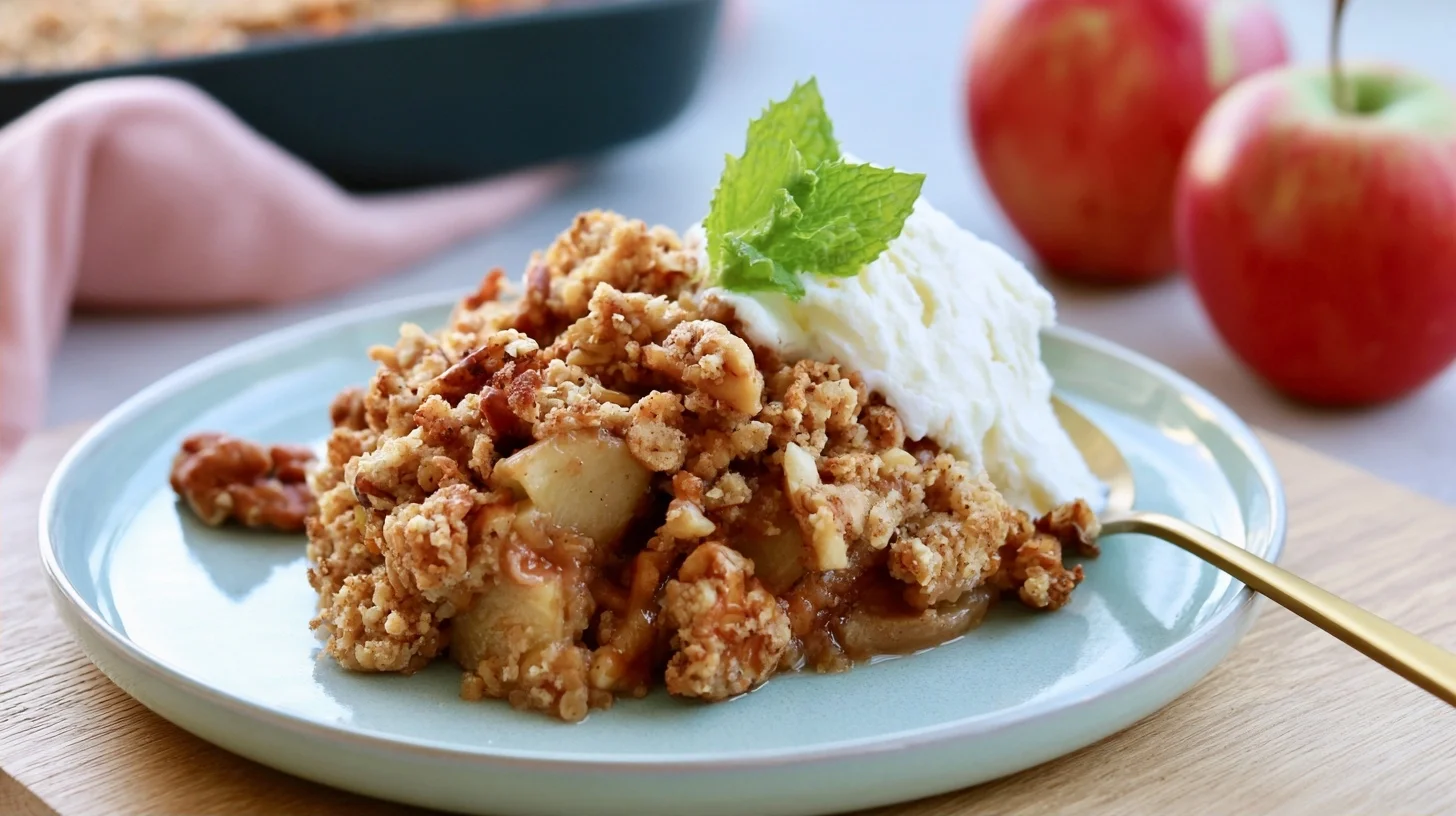
Apple Crumble
8
servings20
minutes45
minutes320
kcalThis apple crumble features a buttery, crisp topping over tender cinnamon-spiced apples. The higher butter ratio creates clusters that hold together rather than scattering into dust, while cornstarch prevents the filling from becoming watery.
Keep the screen of your device on
Ingredients
6 cups apples
0.5 cup granulated sugar
1 tablespoon cornstarch
1 teaspoon ground cinnamon
0.25 teaspoon ground nutmeg
1 cup all-purpose flour
0.75 cup light brown sugar
0.5 cup unsalted butter
0.25 teaspoon salt
1 teaspoon vanilla extract
Directions
- Preheat your oven to 350°F and lightly grease a 9×13 inch baking dish with butter or cooking spray. Preheating ensures the oven reaches the correct temperature before the crumble goes in, which helps the topping crisp properly.
- Combine the sliced apples, granulated sugar, cornstarch, cinnamon, and nutmeg in a large bowl and toss until the apples are evenly coated. The cornstarch will thicken the juices that release during baking, preventing the filling from becoming watery.
- Spread the apple mixture evenly in the prepared baking dish, making sure the apples form a relatively level layer. This helps them cook at the same rate and prevents some pieces from overbaking while others stay hard.
- Mix the flour, brown sugar, and salt in a separate bowl, then add the cold butter cubes. Use your fingertips to rub the butter into the flour mixture until it resembles coarse breadcrumbs with visible butter pieces. The mixture should hold together when squeezed but still look crumbly.
- Scatter the topping evenly over the apples, covering the entire surface but avoiding pressing it down. Leaving the topping loose allows air to circulate and helps it crisp during baking.
- Bake for 45 to 50 minutes, until the topping turns deep golden brown and the apple juices bubble around the edges. The color indicates that the sugars have caramelized and the topping has crisped fully.
Notes
- Using cold butter and rubbing it into the flour with your fingertips creates the signature crumbly texture by coating flour particles in fat, which traps air pockets that expand during baking.
- If the topping is browning too quickly before the apples soften, cover the dish loosely with aluminum foil and continue baking until the apples reach the right texture.
- Store leftover apple crumble in an airtight container in the refrigerator for up to four days, or freeze unbaked crumble for up to three months and bake from frozen, adding 15 to 20 extra minutes to the baking time.
Nutrition Facts
- Serving Size: 1 g
- Total number of serves: 8
- Calories: 320kcal
- Fat: 13g
- Carbohydrates: 52g
- Fiber: 4g
- Protein: 3g
Did you make this recipe?
Tag @therecipemasterblog on Instagram and hashtag it with #therecipemaster
Like this recipe?
Follow @therecipemasterblog on Pinterest
Follow us on Facebook!
Follow The Recipe Master on Facebook
Tips for Perfect Apple Crumble Recipe Every Time
Choose Apples That Hold Their Shape
Granny Smith apples are the most reliable choice because they hold their structure during baking and provide tartness that balances the sweet topping. Honeycrisp and Braeburn also work well, offering a slightly sweeter flavor while maintaining texture. Avoid Red Delicious or McIntosh, which break down into applesauce during baking and release excess liquid that can make the topping soggy.
Rub the Butter Until the Mixture Resembles Coarse Crumbs
Using cold butter and rubbing it into the flour with your fingertips creates the signature crumbly texture. The butter should coat the flour in small irregular pieces rather than forming a smooth paste. This method traps air pockets that expand during baking, creating the crisp clusters that define a proper crumble topping. If the butter warms up too much during mixing, the topping will turn dense and greasy instead of light and crisp.
Toss Apples with Cornstarch to Control Moisture
Adding a tablespoon of cornstarch to the apple mixture thickens the juices that release during baking, preventing them from pooling at the bottom of the dish or soaking into the topping. The cornstarch absorbs excess liquid and creates a lightly thickened sauce that clings to the apples rather than running off. This step is especially important if you’re using apples that release more moisture, such as Gala or Fuji.
Bake Until the Topping Turns Golden Brown
The topping should develop a deep golden color across the entire surface, not just at the edges. This color indicates that the butter has fully melted and the sugars have caramelized, creating the crisp texture and rich flavor that make the topping worth eating. If you pull the crumble out too early, the topping will taste raw and feel soft rather than crisp. Check out this apple brownies recipe for another way to enjoy baked apples in dessert form.
Common Apple Crumble Mistakes and How to Fix Them
Soggy Topping That Won’t Crisp
This happens when the apples release too much liquid or the topping sits directly on top of wet fruit without any barrier. The moisture steams the topping instead of allowing it to crisp. To fix this, make sure you toss the apples with cornstarch before adding the topping, and avoid piling the apples too high in the dish. If the topping is already on and looks wet, increase the oven temperature by 25°F for the last 10 minutes to help evaporate excess moisture and crisp the surface.
Topping That Turns Hard Instead of Crumbly
This occurs when the butter is worked into the flour too thoroughly, creating a dense paste rather than a crumbly mixture. The topping bakes into a hard sheet instead of forming crisp clusters. To prevent this, stop rubbing the butter into the flour as soon as the mixture resembles coarse breadcrumbs with visible butter pieces. If the topping is already too dense, break it up with a fork halfway through baking to create more surface area for crisping.
Apples That Stay Hard or Turn Mushy
Hard apples indicate underbaking or slicing the apples too thick, while mushy apples suggest overbaking or using a variety that breaks down easily. Slice apples to a consistent quarter-inch thickness so they cook evenly, and test for doneness by inserting a knife into the center, the apples should feel tender but still hold their shape. If the topping is browning too quickly before the apples soften, cover the dish loosely with foil and continue baking until the apples reach the right texture.
Topping That Slides Off When Serving
This happens when the topping doesn’t have enough butter to bind the flour and sugar together, or when the crumble is served before it has time to set. The topping should contain enough fat to form clusters that hold together when scooped. Let the crumble cool for at least 15 minutes after baking so the filling thickens and the topping firms up slightly, making it easier to serve neat portions.
Ways to Customize Your Apple Crumble
Add Oats for Extra Texture
Replacing half the flour in the topping with rolled oats creates a chewier, more textured crumble with a nuttier flavor. The oats absorb butter and sugar differently than flour, producing clusters that stay distinct rather than melting together. Use old-fashioned rolled oats rather than quick oats, which turn mushy during baking.
Make Apple Crumble Recipe Gluten-Free
Substitute the all-purpose flour with a 1:1 gluten-free baking blend, and add a quarter teaspoon of xanthan gum if your blend doesn’t already include it. The xanthan gum helps the topping hold together and prevents it from turning sandy. The texture will be slightly less tender than the original but still crisp and satisfying.
Reduce Sugar for a Less Sweet Version
Cut the sugar in both the filling and topping by a third if you prefer a dessert that highlights the natural tartness of the apples. This works especially well with Granny Smith apples, which provide enough acidity to balance the reduced sweetness. The topping will still crisp properly because the butter and flour create structure independent of the sugar content.
Add Nuts for Crunch
Fold a half cup of chopped pecans or walnuts into the topping mixture for added crunch and a richer flavor. The nuts toast during baking, developing a deeper flavor that complements the spiced apples. Chop the nuts finely so they distribute evenly and don’t create large hard pieces that make serving difficult.
What Makes Apple Crumble Nutritionally Balanced
Apple crumble provides a good amount of fiber from the apples, along with carbohydrates and fat from the topping. A typical serving contains around 320 calories, with most of the calories coming from the butter and sugar in the topping. The apples contribute natural sugars and fiber, which slow digestion and provide a more gradual energy release than refined sugar alone.
Each serving delivers approximately 4 grams of fiber, which supports digestive health and helps you feel satisfied after eating. The fat content, primarily from butter, provides richness and helps your body absorb the fat-soluble vitamins present in the apples. While this dessert is not low in sugar or fat, it offers more nutritional value than many other baked desserts because of the fruit content and the absence of processed ingredients.
How to Serve Apple Crumble Recipe
Apple crumble tastes best served warm, about 15 minutes after it comes out of the oven. This resting time allows the filling to thicken slightly and the topping to firm up, making it easier to scoop clean portions. Serve it in shallow bowls to contain the juices, and add a scoop of vanilla ice cream or a dollop of lightly sweetened whipped cream for contrast. The cold dairy melts into the warm crumble, creating a creamy sauce that ties the dessert together.
For a less traditional pairing, try serving apple crumble with sharp cheddar cheese, a classic combination in some regions that balances the sweetness with salty, tangy richness. You can also serve it alongside custard or crème anglaise for a more elegant presentation. Leftovers work well for breakfast, either reheated or served cold with yogurt.
How to Store and Reheat Apple Crumble
Store leftover apple crumble in an airtight container in the refrigerator for up to four days. The topping will soften as it sits, but reheating restores much of the original texture. To reheat, spread individual portions on a baking sheet and warm in a 350°F oven for 10 to 15 minutes, or microwave single servings for 30 to 60 seconds if you’re not concerned about maintaining crispness.
Apple crumble freezes well for up to three months. Assemble the crumble but don’t bake it, then wrap the dish tightly in plastic wrap and aluminum foil. Bake from frozen, adding an extra 15 to 20 minutes to the baking time. Alternatively, freeze baked crumble and reheat individual portions as needed. The texture won’t be quite as crisp as fresh, but the flavor remains excellent.
Frequently Asked Questions about Apple Crumble Recipe
Yes, frozen apples work, but thaw and drain them first to remove excess moisture. Frozen apples release more liquid than fresh, which can make the topping soggy if not drained. Pat them dry with paper towels before tossing with sugar and spices.
Yes, peeling the apples creates a smoother, more tender filling. Apple peels can turn tough and chewy during baking, and they don’t break down the way the flesh does. Peeling also improves the overall texture and makes the dessert easier to eat.
The oven temperature may be too low, or the crumble may need more time. The topping should reach a deep golden brown across the entire surface, not just at the edges. Increase the temperature by 25°F for the last 10 minutes if the topping looks pale, and make sure your oven is fully preheated before baking.
Yes, assemble the crumble up to 24 hours in advance and refrigerate it unbaked. Bring it to room temperature for 20 minutes before baking, then bake as directed. The topping may need a few extra minutes to crisp fully since it starts cold.




Leave a Reply