

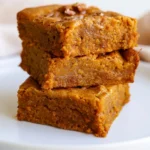
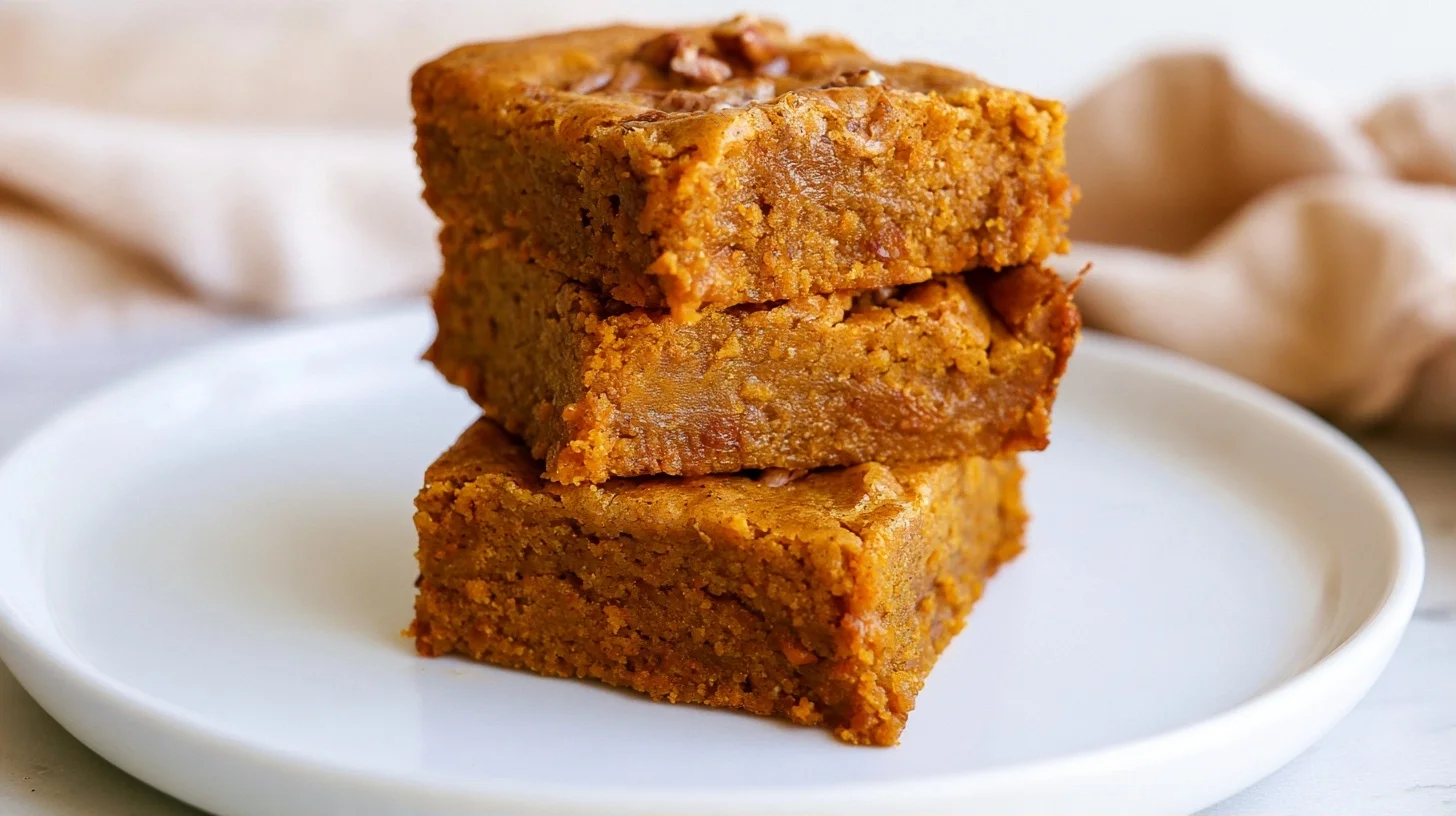
There’s something magical about baking with apples in the fall. The warm spice of cinnamon, the natural sweetness of tender fruit, and the comforting aroma that fills your kitchen all come together in these apple brownies. Unlike traditional chocolate brownies, this recipe leans into the blondie family with a buttery, caramel-like base that lets the apples shine. After testing twelve variations, I found that using a mix of tart and sweet apples creates the perfect balance of flavor and moisture without making the bars soggy.
These bars are incredibly versatile. Serve them warm with vanilla ice cream for dessert, pack them in lunchboxes for a sweet treat, or enjoy them with your morning coffee. They hold their shape beautifully, making them ideal for potlucks and bake sales. The texture sits somewhere between a dense cake and a chewy blondie, with pockets of soft apple throughout.
What sets this version apart is the technique of tossing the diced apples in a small amount of flour before folding them into the batter. This simple step prevents the fruit from sinking to the bottom and creates an even distribution throughout the bars. The result is a perfectly balanced bite every time, with apple in every forkful.
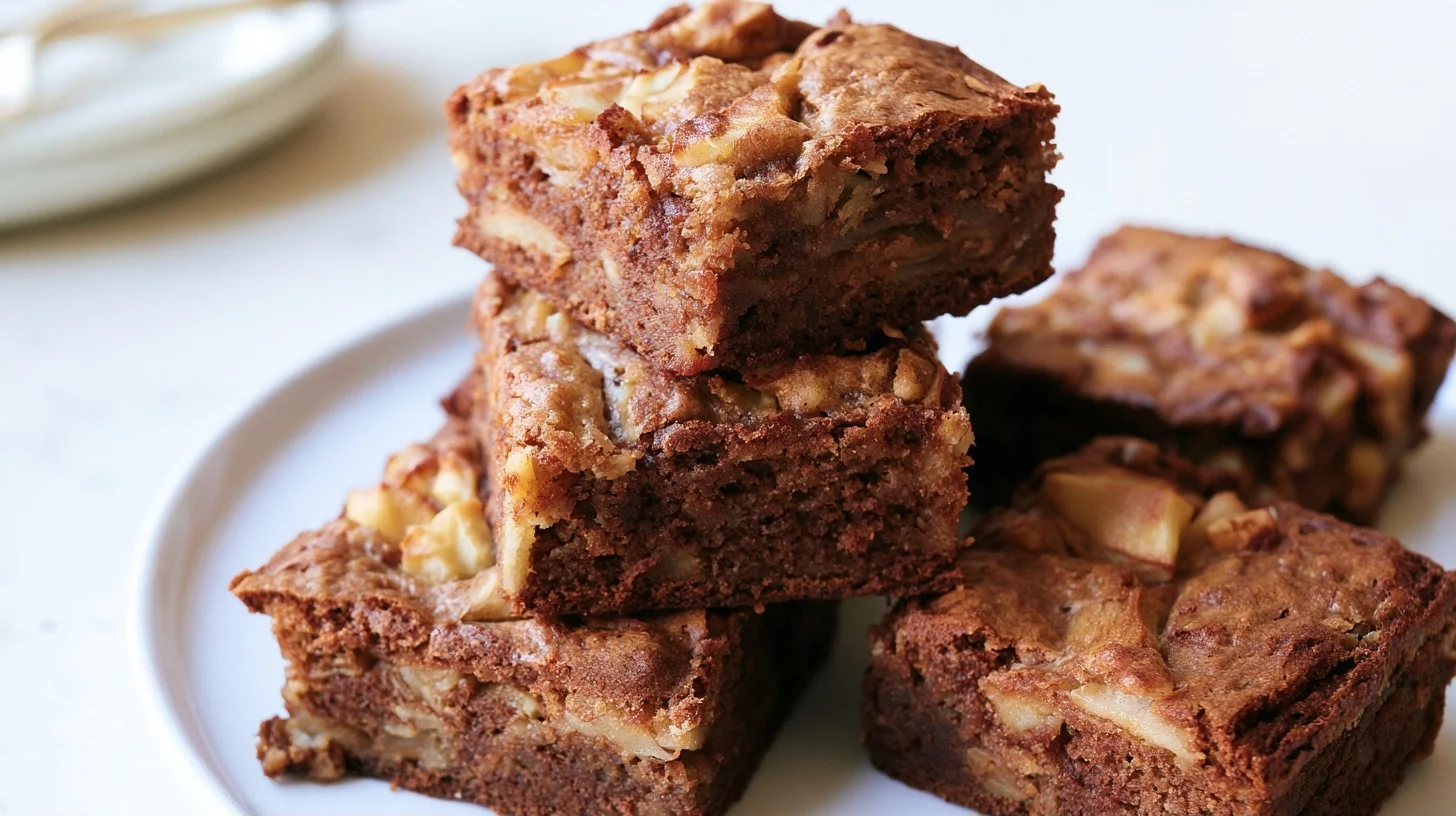
Table of contents
- Why You Will Love This apple brownies
- What You Will Need to Make These apple brownies
- How to Make apple brownies That Stay Moist and Flavorful
- My Best Tips for Perfect apple brownies Every Time
- Mistakes to Avoid When Making apple brownies
- Creative Ways to Customize Your apple brownies
- Understanding the Nutrition in apple brownies
- Delicious Ways to Serve These Autumn Bars
- Keeping Your apple brownies Fresh and Delicious
- Frequently Asked Questions
Why You Will Love This apple brownies
- These bars come together in one bowl with no mixer required, making cleanup incredibly easy.
- The combination of brown sugar and cinnamon creates a warm, caramel-like flavor that complements the fresh apples perfectly.
- They stay moist for days thanks to the natural moisture from the apples, making them perfect for meal prep.
- The recipe is endlessly adaptable with different apple varieties, nuts, and spice combinations.
What You Will Need to Make These apple brownies
I keep my equipment list simple for this recipe because these bars are all about ease and comfort. You likely have everything you need already in your kitchen. The key is using the right size pan to achieve the perfect thickness and texture.
- 9×13-inch baking pan: This size creates bars with the ideal thickness, not too thin or cakey. I recommend lining it with parchment paper for easy removal.
- Large mixing bowl: You’ll mix everything by hand in one bowl, so make sure it’s big enough to fold in the apples without spilling.
- Sharp knife and cutting board: For dicing the apples into uniform pieces. Consistent size ensures even baking and distribution.
- Whisk and rubber spatula: The whisk helps incorporate the eggs and sugar smoothly, while the spatula is perfect for folding in the flour-coated apples.
- Parchment paper: Lining your pan makes lifting the bars out effortless and prevents any sticking, especially important with the sticky apple pieces.
How to Make apple brownies That Stay Moist and Flavorful
Apple Brownies
16
servings15
minutes40
minutes220
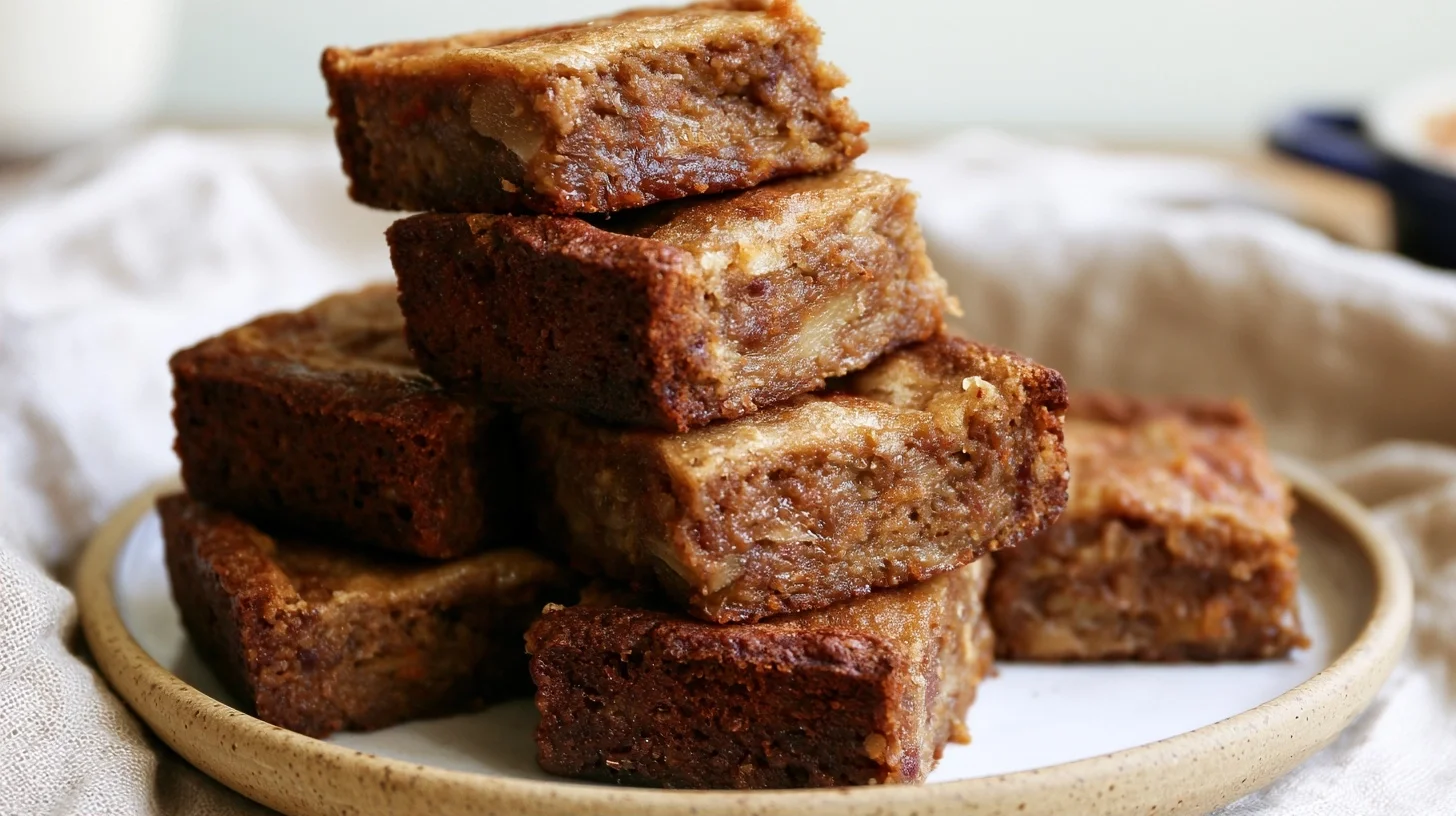
kcalThese apple brownies combine the buttery richness of blondies with tender chunks of fresh apples and warm cinnamon. The secret technique of coating the apples in flour ensures even distribution and prevents soggy spots, creating perfectly balanced bars every time.
Keep the screen of your device on
Ingredients
0.5 cup unsalted butter
1 cup light brown sugar
2 large eggs
1 teaspoon vanilla extract
1.5 cups all-purpose flour
1 teaspoon ground cinnamon
0.5 teaspoon baking powder
0.25 teaspoon salt
2 cups apples
0.5 cup chopped walnuts
0.25 cup powdered sugar
Directions
- Preheat your oven to 350°F and line a 9×13-inch baking pan with parchment paper, leaving a two-inch overhang on two sides. This creates handles for easy removal later and prevents sticking.
- Whisk together the melted butter and brown sugar in a large bowl until smooth and well combined. The mixture should look glossy and uniform, which takes about one minute of whisking.
- Add the eggs and vanilla extract to the butter mixture and whisk vigorously for about 30 seconds until the mixture is smooth and slightly thickened. This step incorporates air for a lighter texture.
- Combine 1.5 cups flour, cinnamon, baking powder, and salt in a separate bowl, then add to the wet ingredients. Fold gently with a rubber spatula just until no dry streaks remain, being careful not to overmix.
- Toss the diced apples with 2 tablespoons of flour in a medium bowl until all pieces are lightly coated. This prevents the apples from sinking and absorbs excess moisture during baking.
- Fold the flour-coated apples and walnuts into the batter using broad, gentle strokes until evenly distributed. The batter will be very thick, which is exactly what you want.
Notes
- The ideal ratio for apple brownies is 2 cups of diced apples to 1.5 cups of flour, which creates the perfect balance of fruit to batter without making the bars soggy or too dry.
- For best results, use a combination of tart apples like Granny Smith and sweet apples like Honeycrisp or Gala. The contrast in flavors creates a more complex, interesting taste.
- These bars can be stored at room temperature for up to three days, refrigerated for up to one week, or frozen for up to three months. They actually taste better the next day after the flavors meld together.
Nutrition Facts
- Serving Size: 1 g
- Total number of serves: 16
- Calories: 220kcal
- Fat: 10g
- Carbohydrates: 28g
- Fiber: 2g
- Protein: 3g
Did you make this recipe?
Tag @therecipemasterblog on Instagram and hashtag it with #therecipemaster
Like this recipe?
Follow @therecipemasterblog on Pinterest
Follow us on Facebook!
Follow The Recipe Master on Facebook
My Best Tips for Perfect apple brownies Every Time
After making these bars countless times, I’ve learned exactly what makes the difference between good and exceptional results. These tips will help you avoid common pitfalls and achieve bakery-quality bars at home. The key ratio for apple brownies is 2 cups of diced apples to 1.5 cups of flour, which creates the perfect balance of fruit to batter.
Choose the Right Apple Variety
I recommend using a combination of tart and sweet apples for the best flavor complexity. Granny Smith apples provide tartness and hold their shape well during baking, while Honeycrisp or Gala apples add natural sweetness. Avoid Red Delicious, as they become mealy when baked. Different apple varieties offer distinct nutritional benefits, so mixing types also boosts the overall nutrition profile.
Coat Your Apples in Flour First
This is the technique that changed everything for me. Toss your diced apples in two tablespoons of flour before folding them into the batter. The flour coating helps suspend the fruit pieces throughout the batter instead of letting them sink to the bottom. It also absorbs excess moisture from the apples, preventing soggy spots in your finished bars.
Don’t Overmix the Batter
Once you add the flour to your wet ingredients, mix just until you no longer see dry streaks. Overmixing develops the gluten in the flour, which results in tough, dense bars instead of tender ones. I use a rubber spatula and fold gently with broad strokes. The batter should be thick and slightly lumpy, which is exactly what you want.
Test for Doneness Carefully
These bars are done when a toothpick inserted into the center comes out with just a few moist crumbs, not wet batter. However, because of the apples, the toothpick may pick up some fruit moisture, which is fine. The edges should be golden brown and pulling away slightly from the pan. I typically bake mine for 35 to 40 minutes at 350°F.
Mistakes to Avoid When Making apple brownies
I’ve made every mistake possible with this recipe over the years, so let me help you skip the learning curve. These are the most common issues home bakers encounter and exactly how to prevent them. Each mistake has a simple fix that makes a dramatic difference in your final result.
Cutting the Apples Too Large
Large apple chunks create uneven texture and make the bars difficult to cut cleanly. I dice my apples into half-inch pieces, which are small enough to distribute evenly but large enough to provide distinct apple flavor. Uniform sizing also ensures all pieces cook at the same rate, preventing some from staying too firm while others turn mushy.
Skipping the Parchment Paper
These bars can stick stubbornly to an unlined pan, especially around the edges where the sugar caramelizes. I always line my pan with parchment paper, leaving an overhang on two sides. This creates handles that let me lift the entire slab out of the pan in one piece, making cutting into perfect squares incredibly easy.
Cutting the Bars While Still Warm
I know it’s tempting to dig in right away, but warm bars will crumble and fall apart when you try to cut them. Let them cool completely in the pan, at least two hours or even overnight. The texture firms up as they cool, and you’ll get clean, bakery-perfect squares. If you’re in a hurry, refrigerate them for 30 minutes to speed up the process.
Using Only Sweet Apples
Bars made with only sweet apples like Fuji or Gala can taste one-dimensional and overly sugary. The tartness from Granny Smith or Pink Lady apples provides essential balance and complexity. I recommend a 50/50 mix of tart and sweet varieties for the most interesting flavor profile that keeps people coming back for another bite.
Creative Ways to Customize Your apple brownies
One of my favorite things about this recipe is how easily it adapts to different dietary needs and flavor preferences. I’ve tested dozens of variations over the years, and these are the ones that work beautifully without compromising texture or taste. Each variation maintains the core appeal of the original while offering something new.
Gluten-Free apple brownies
Replace the all-purpose flour with a 1:1 gluten-free baking blend that contains xanthan gum. I’ve had excellent results with Bob’s Red Mill and King Arthur brands. The texture is nearly identical to the original, perhaps slightly more tender. Make sure all other ingredients, especially your baking powder, are certified gluten-free.
Dairy-Free Version
Substitute the butter with an equal amount of coconut oil or vegan butter. I prefer refined coconut oil because it doesn’t add coconut flavor. The bars turn out just as moist and rich. If you’re serving these to someone with dairy allergies, double-check that your chocolate chips or other mix-ins are also dairy-free.
Caramel Apple Blondies
Drizzle caramel sauce over the cooled bars and sprinkle with flaky sea salt for an elevated dessert. I also like to swirl two tablespoons of caramel into the batter before baking for pockets of gooey sweetness. This variation pairs beautifully with vanilla ice cream and turns the bars into a show-stopping dessert.
Spiced Apple Bars with Walnuts
Add half a teaspoon of nutmeg and a quarter teaspoon of ground cloves along with the cinnamon for a more complex spice profile. Fold in three-quarters cup of chopped walnuts or pecans for crunch. This version reminds me of apple pie and is perfect for holiday gatherings. For more apple-based treats, try this moist applesauce bread that uses similar warm spices.
Understanding the Nutrition in apple brownies
These bars offer a more wholesome dessert option compared to traditional chocolate brownies. Each serving provides natural fruit, fiber from the apples, and moderate amounts of sugar. One bar contains approximately 220 calories, with 28 grams of carbohydrates, 10 grams of fat, and 3 grams of protein. The apples contribute about 2 grams of dietary fiber per serving.
Because these bars use real fruit, they provide vitamins and minerals that typical brownies lack. Apples contribute vitamin C, potassium, and various antioxidants. You can reduce the sugar by up to one-quarter cup if you prefer a less sweet version, especially if you’re using naturally sweet apple varieties. The bars will still have excellent flavor and texture with less added sugar.
Delicious Ways to Serve These Autumn Bars
I love serving these bars warm from the oven with a scoop of vanilla ice cream melting over the top. The contrast between the warm, spiced bars and cold, creamy ice cream is absolutely heavenly. For a more elegant presentation, dust them with powdered sugar and serve alongside freshly whipped cream flavored with a touch of vanilla and cinnamon.
These bars are also wonderful at room temperature as a portable snack or lunchbox treat. I often pack them for picnics and hiking trips because they travel well and don’t require refrigeration for several hours. For breakfast, warm a bar in the microwave for 15 seconds and spread with a thin layer of cream cheese or almond butter for a satisfying morning treat that feels indulgent but includes real fruit.
Keeping Your apple brownies Fresh and Delicious
Store these bars in an airtight container at room temperature for up to three days. I find they actually taste better on day two after the flavors have had time to meld together. The apples keep the bars naturally moist, so you don’t need to worry about them drying out quickly like some baked goods.
For longer storage, refrigerate them in an airtight container for up to one week. The cold firms up the texture slightly, which some people prefer. You can also freeze these bars for up to three months. I wrap individual bars in plastic wrap, then place them all in a freezer bag. Thaw at room temperature for about an hour, or warm in the microwave for 20 seconds for a just-baked taste.
Frequently Asked Questions
No, I don’t recommend it. Fresh diced apples provide essential texture and distinct fruit pieces throughout the bars, while applesauce would make the batter too wet and create a cake-like texture instead of the desired dense, chewy consistency.
It’s optional, but I usually leave the peels on. The peels add extra fiber, nutrients, and a slight textural contrast. They soften during baking and aren’t noticeable in the final bars. However, if you prefer a completely smooth texture, go ahead and peel them.
This usually happens when the apples release too much moisture or the bars are underbaked. Make sure to coat your diced apples in flour before adding them to the batter, as this absorbs excess moisture. Also, bake until a toothpick comes out with just moist crumbs, not wet batter, which typically takes 35 to 40 minutes.
Yes, absolutely. These bars actually taste better the next day after the flavors have melded together. Bake them, let them cool completely, then store in an airtight container at room temperature for up to three days or refrigerate for up to one week. You can also freeze them for up to three months.


Leave a Reply