

If you’ve never made homemade herb butter, you’re missing out on one of the easiest ways to add instant flavor to just about any dish. This compound butter comes together in minutes with softened butter and a handful of fresh herbs, and it transforms everything from grilled steak and roasted vegetables to warm bread and baked potatoes. The key is using room temperature butter so the herbs distribute evenly without clumping, and choosing herbs that complement the dishes you plan to serve it with.
What makes this recipe especially useful is its versatility. You can customize the herb blend to match your meal, store it in the fridge for up to two weeks, or freeze it in logs for months. Once you see how much flavor a simple pat of herb butter adds, you’ll wonder why you ever settled for plain butter.
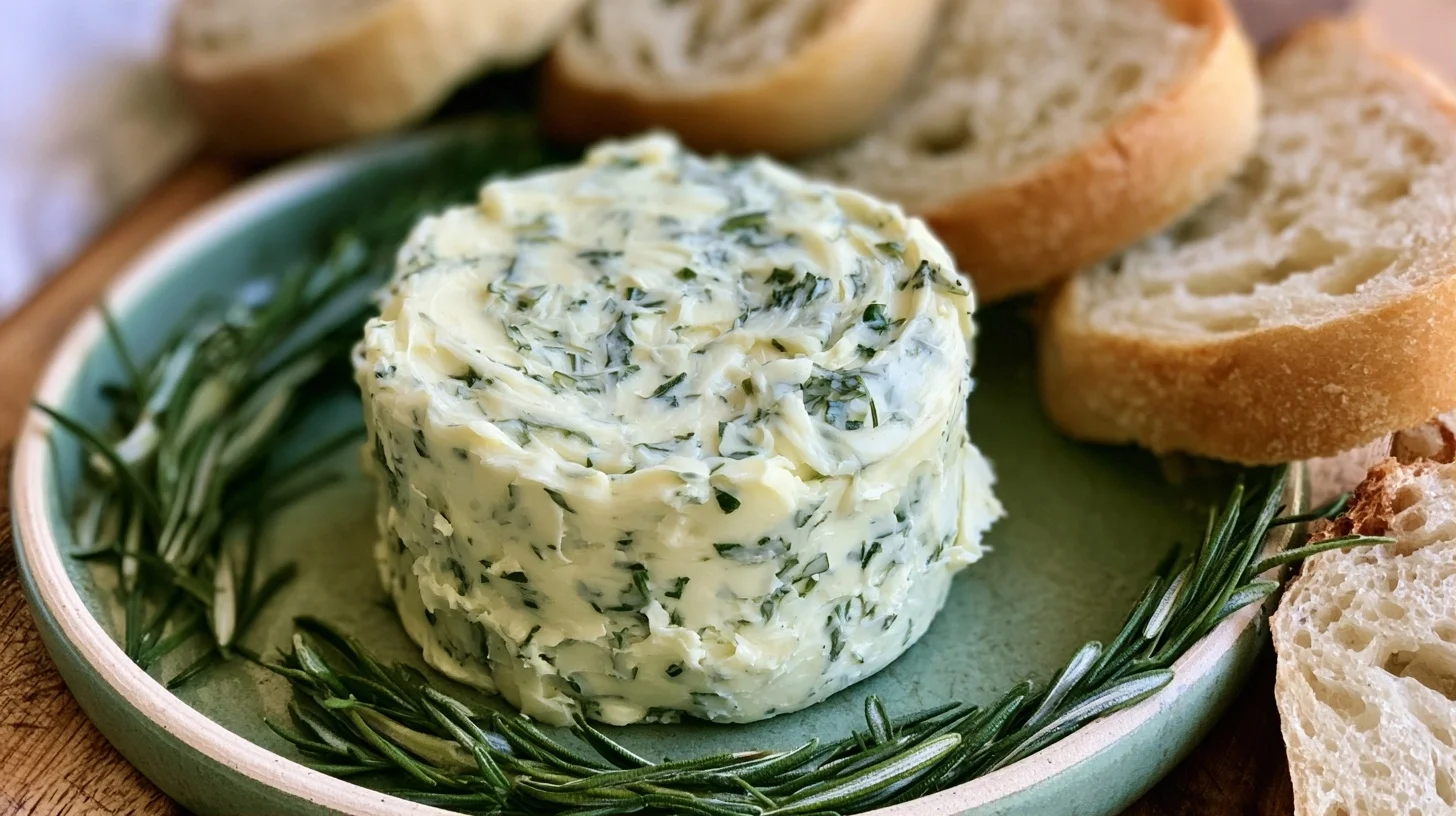
Table of contents
- Why You Will Love This Homemade Herb Butter
- What You Need to Make Homemade Herb Butter
- How to Make Perfect Homemade Herb Butter Every Time
- Tips for the Best Homemade Herb Butter
- Common Mistakes When Making Herb Butter
- Ways to Customize Your Herb Butter
- Nutrition and Health Benefits
- How to Serve Herb Butter
- How to Store Herb Butter
- Frequently Asked Questions
Why You Will Love This Homemade Herb Butter
- Ready in under 10 minutes with just a few fresh ingredients and no cooking required.
- Works beautifully on grilled meats, seafood, vegetables, bread, and pasta.
- Stores well in the refrigerator or freezer, so you can make it ahead and slice off portions as needed.
- Fully customizable with your favorite herb combinations and optional add-ins like garlic or lemon zest.
What You Need to Make Homemade Herb Butter
This recipe requires very little equipment, which is part of what makes it so accessible. You’ll want to make sure your butter is fully softened before you start, as this makes mixing much easier and ensures the herbs distribute evenly throughout.
- Mixing bowl: A medium bowl gives you enough room to blend the butter and herbs without making a mess.
- Fork or spatula: Either tool works well for mashing and mixing the softened butter with the herbs until everything is evenly combined.
- Parchment paper or plastic wrap: Essential for shaping the butter into a log, which makes slicing and storing much easier.
- Sharp knife: A clean, sharp knife ensures neat slices when you’re ready to use the butter.
How to Make Perfect Homemade Herb Butter Every Time
Homemade Herb Butter
16
servings10
minutes0
minutes100
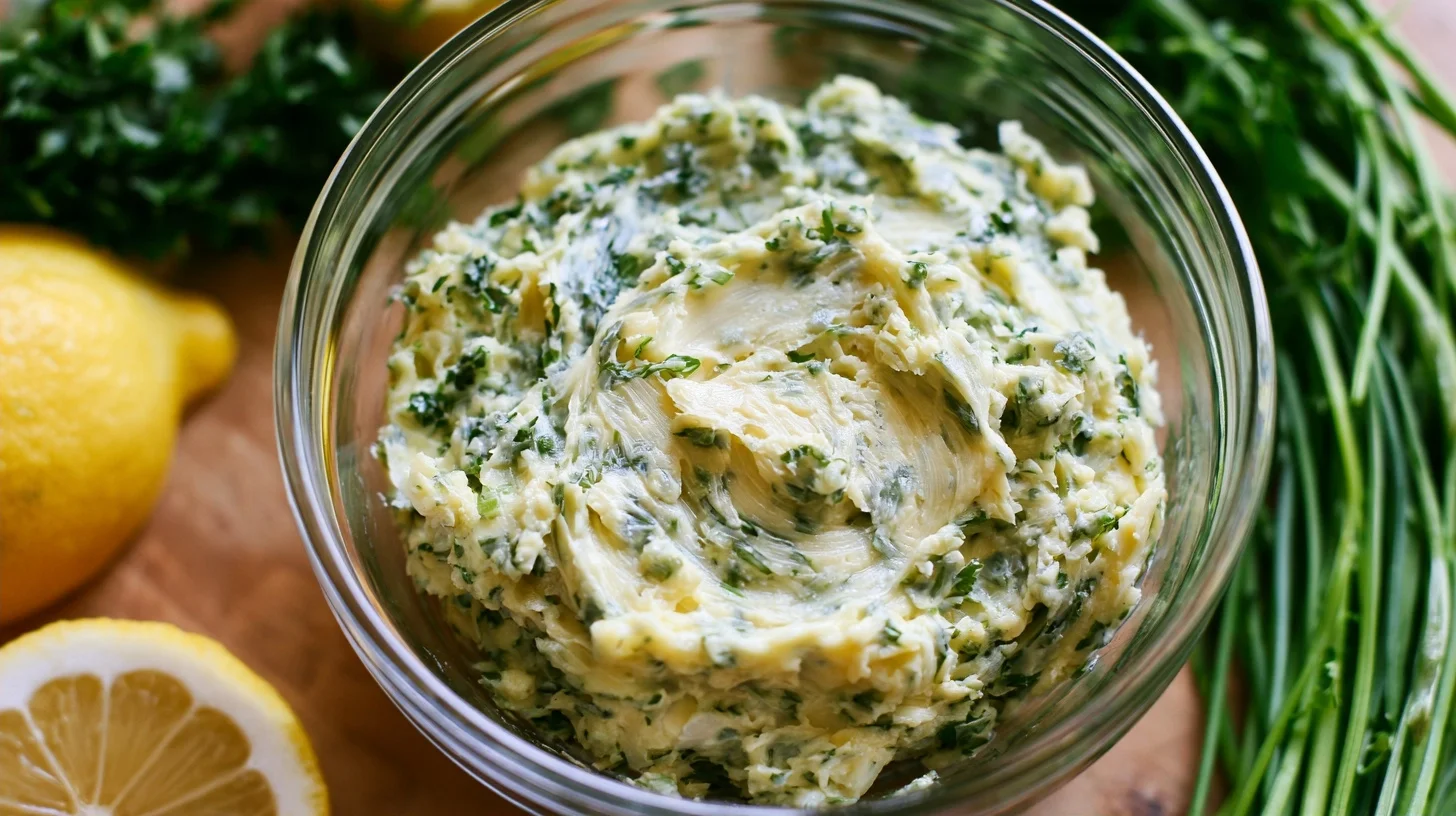
kcalThis homemade herb butter combines softened butter with fresh herbs, garlic, and lemon zest for a flavorful compound butter that elevates any dish. The key to success is using room temperature butter so the herbs mix evenly, and chilling the butter log before slicing ensures clean, uniform rounds.
Keep the screen of your device on
Ingredients
1 cup unsalted butter
3 tablespoons fresh parsley
2 tablespoons fresh chives
1 tablespoon fresh thyme leaves
2 cloves garlic
1 teaspoon lemon zest
0.5 teaspoon sea salt
0.25 teaspoon black pepper
1 teaspoon lemon juice
Directions
- Place the softened butter in a medium mixing bowl. Make sure the butter is at room temperature and soft enough to press easily with your finger, but not melted or greasy. This ensures the herbs will mix evenly without clumping.
- Add the chopped parsley, chives, thyme, minced garlic, lemon zest, salt, and pepper to the butter. If using lemon juice, add it now as well. The fresh herbs should be completely dry to prevent the butter from becoming watery.
- Use a fork or spatula to mix the ingredients together until the herbs and garlic are evenly distributed throughout the butter. Mash and fold the butter repeatedly until you see a consistent green color with no large clumps of herbs.
- Lay a sheet of parchment paper or plastic wrap on your work surface and transfer the butter mixture onto the center. Use the paper to shape the butter into a log about 1.5 inches in diameter, rolling it tightly and twisting the ends to compact the butter and remove air pockets.
- Refrigerate the wrapped butter log for at least one hour, or until firm enough to slice cleanly. For faster results, place the log in the freezer for 30 minutes. Once firm, you can slice off rounds as needed or store the entire log.
Notes
- Softening butter to room temperature is essential for smooth mixing and even herb distribution throughout the butter.
- If you prefer a milder garlic flavor, reduce the garlic to one clove or roast the garlic before adding it.
- Herb butter can be stored in the refrigerator for up to two weeks or frozen for up to three months. Slice directly from the freezer or thaw overnight in the fridge.
Nutrition Facts
- Serving Size: 1g
- Total number of serves: 16
- Calories: 100kcal
- Fat: 11g
- Carbohydrates: 0g
- Fiber: 0g
- Protein: 0g
Did you make this recipe?
Tag @therecipemasterblog on Instagram and hashtag it with #therecipemaster
Like this recipe?
Follow @therecipemasterblog on Pinterest
Follow us on Facebook!
Follow The Recipe Master on Facebook
Tips for the Best Homemade Herb Butter
The most important factor in making smooth, evenly flavored herb butter is starting with butter that’s truly softened to room temperature. Cold butter won’t mix well, and you’ll end up with clumps of herbs instead of a cohesive blend.
Use Fresh Herbs for the Brightest Flavor
Fresh herbs deliver a brighter, more vibrant flavor than dried herbs, and they blend more smoothly into the butter. Parsley, chives, thyme, rosemary, and dill are all excellent choices. If you do use dried herbs, reduce the amount by half, as dried herbs are more concentrated.
Chop Herbs Finely for Even Distribution
Finely chopping the herbs ensures they distribute evenly throughout the butter, so every slice has balanced flavor. Large herb pieces can clump together and create uneven pockets of flavor.
Add Garlic or Lemon Zest for Extra Depth
Minced garlic adds a savory punch that pairs beautifully with grilled meats and roasted chicken, while lemon zest brightens the butter and works especially well with seafood and vegetables. Start with one clove of garlic or the zest of half a lemon, then adjust to taste.
Shape the Butter into a Log for Easy Slicing
Rolling the mixed butter into a log using parchment paper or plastic wrap makes it easy to slice uniform rounds when you need them. Twist the ends tightly to compact the butter and prevent air pockets.
Let the Butter Chill Before Slicing
Chilling the butter log for at least one hour firms it up enough to slice cleanly without smearing. If you’re in a hurry, 30 minutes in the freezer will also work.
Common Mistakes When Making Herb Butter
Using Cold Butter
Cold butter is too firm to mix properly, and you’ll end up with uneven herb distribution and a lumpy texture. Let the butter sit at room temperature for at least 30 minutes before you start. It should be soft enough to press easily with a finger but not melted or greasy.
Adding Too Much Salt
If you’re using salted butter, be cautious when adding extra salt. Taste the mixture before adding more, as it’s easy to over-salt and difficult to fix. Unsalted butter gives you more control over the final seasoning.
Not Drying the Herbs
Wet herbs can make the butter watery and cause it to separate. After washing fresh herbs, pat them completely dry with a paper towel or use a salad spinner before chopping.
Skipping the Resting Time
Letting the butter rest in the fridge for at least an hour allows the flavors to meld and develop. The butter will taste noticeably better after resting than it does immediately after mixing.
Ways to Customize Your Herb Butter
Garlic Homemade Herb Butter
Add two cloves of minced garlic along with parsley and chives for a classic combination that works with steak, chicken, and crusty bread.
Lemon Dill Butter
Combine fresh dill with lemon zest and a squeeze of lemon juice for a bright, fresh butter that’s perfect for salmon, shrimp, and roasted asparagus.
Rosemary Thyme Butter
Use finely chopped rosemary and thyme for a woodsy, aromatic butter that pairs beautifully with lamb, pork chops, and roasted root vegetables.
Spicy Herb Butter
Add a pinch of red pepper flakes or a dash of cayenne pepper along with cilantro and lime zest for a butter that brings heat and brightness to grilled corn, chicken, and tacos.
Dairy-Free Herb Butter
Substitute plant-based butter or softened coconut oil for regular butter. The texture will be slightly different, and coconut oil will add a subtle sweetness, but the herb flavor will still come through clearly.
Nutrition and Health Benefits
Herb butter is calorie-dense due to the butter base, with each tablespoon containing approximately 100 calories and 11 grams of fat. However, because a little goes a long way in adding flavor, you typically don’t need much per serving. Fresh herbs contribute small amounts of vitamins A, C, and K, along with antioxidants. Using unsalted butter and controlling the amount of added salt can help manage sodium intake. For more information on butter’s nutritional profile, you can refer to this detailed guide.
How to Serve Herb Butter
Herb butter is incredibly versatile and can be used in dozens of ways. Place a pat on top of a hot grilled steak, pork chop, or chicken breast and let it melt into a flavorful sauce. Toss it with hot pasta, steamed vegetables, or roasted potatoes for an instant flavor boost. Spread it on warm bread, rolls, or biscuits, or melt it over corn on the cob. You can also use it to finish sauces, soups, and risottos, or slip a slice under the skin of a whole chicken before roasting for extra moisture and flavor.
How to Store Herb Butter
Store herb butter tightly wrapped in parchment paper or plastic wrap in the refrigerator for up to two weeks. For longer storage, wrap the log in plastic wrap and then in aluminum foil, and freeze for up to three months. Slice off rounds as needed directly from the freezer, or let the log thaw in the fridge overnight before slicing. Frozen herb butter retains its flavor well and is just as useful as fresh.
Frequently Asked Questions
Yes, you can use dried herbs, but reduce the amount by half since dried herbs are more concentrated. Fresh herbs provide a brighter, more vibrant flavor and blend more smoothly into the butter.
Herb butter lasts up to two weeks in the refrigerator when tightly wrapped, or up to three months in the freezer. Store it in parchment paper or plastic wrap, and add aluminum foil for freezer storage.
Unsalted butter is recommended because it gives you full control over the seasoning. If you use salted butter, taste the mixture before adding extra salt to avoid over-salting.
Yes, you can slice the chilled butter log into rounds and freeze them individually on a parchment-lined tray, then transfer to a freezer bag. This makes it easy to grab single portions as needed.







Leave a Reply