

- Extract juice gently through cheesecloth or fine mesh without pressing for crystal-clear jelly.
- Heat to 220°F on a candy thermometer (subtract for altitude) to reach the gel point.
- Measure pectin and sugar exactly; follow package directions for powdered versus liquid pectin.
- Skim foam during boiling and process jars in a boiling water bath for safe, shelf-stable preserves.
- Use Concord or green grapes, fresh or frozen; store properly sealed jars up to one year.
Making grape jelly recipe from scratch transforms fresh or frozen grapes into a sweet, spreadable preserve with bright, concentrated flavor. Unlike store-bought versions that often rely on artificial colors and excessive sugar, homemade grape jelly lets you control sweetness while capturing the natural essence of the fruit. The process involves cooking down grapes with sugar and pectin until the mixture reaches a gel-like consistency that sets beautifully in jars.
This recipe works equally well with Concord grapes for that classic deep purple jelly or green grapes for a lighter, more delicate spread. The key to success lies in extracting enough natural juice from the grapes and achieving the proper gel point, which happens when the mixture reaches 220°F on a candy thermometer. Once you understand these fundamentals, you’ll find grape jelly surprisingly straightforward to make at home.
The finished jelly should have a clear, jewel-like appearance with a firm but spreadable texture that doesn’t weep or run off toast. Proper canning technique ensures your jelly stays shelf-stable for up to a year, making this an excellent way to preserve grape season or create thoughtful homemade gifts.
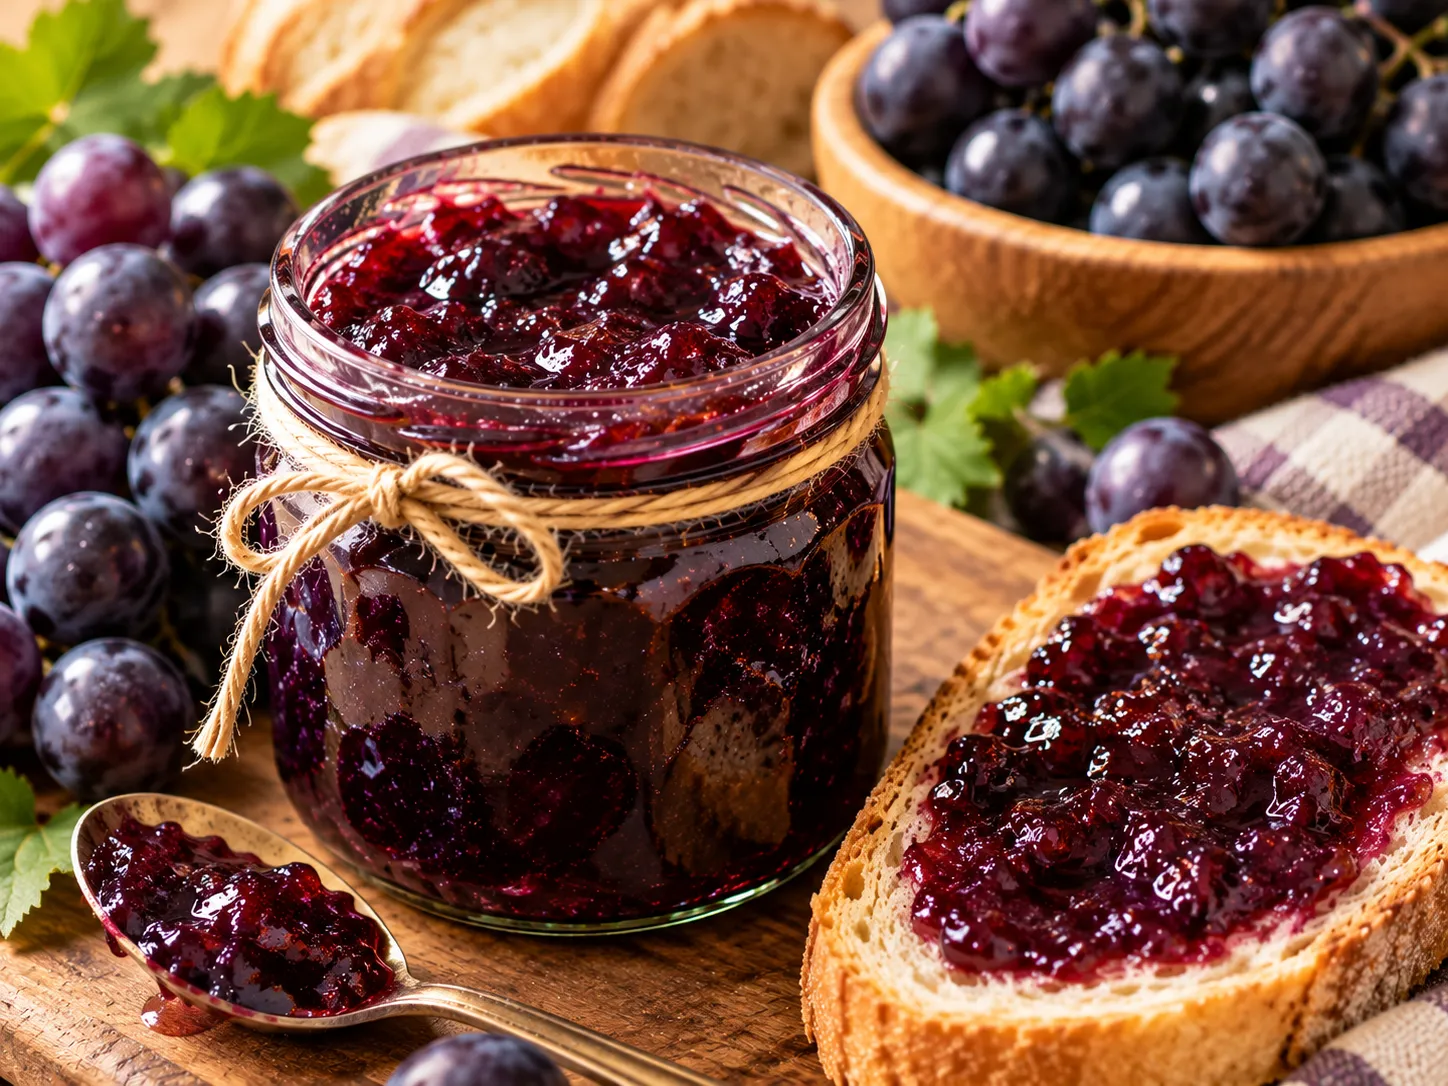
Table of contents
- Why You Will Love This Grape Jelly Recipe
- Essential Equipment for Making Grape Jelly Recipe
- How to Make Perfect Grape Jelly Every Time
- Expert Tips for Clear, Firm Grape Jelly Recipe
- Common Grape Jelly Mistakes and How to Fix Them
- Grape Jelly Variations to Try
- Nutritional Benefits of Homemade Grape Jelly
- Best Ways to Serve Grape Jelly Recipe
- How to Store Grape Jelly Properly
- Frequently Asked Questions about Grape Jelly Recipe
Why You Will Love This Grape Jelly Recipe
- Uses simple ingredients without artificial colors or high-fructose corn syrup found in commercial jellies.
- Produces a clear, jewel-toned jelly with pure grape flavor that spreads beautifully on toast or biscuits.
- Makes enough jars to stock your pantry and share with friends throughout the year.
- Requires only basic canning equipment and straightforward technique that even beginners can master.
Essential Equipment for Making Grape Jelly Recipe
Having the right tools makes jelly-making safer and more reliable. While you don’t need specialized equipment for every step, a few key items ensure proper consistency and safe preservation.
- Large heavy-bottomed pot: A 6 to 8-quart pot prevents scorching and provides enough room for the jelly to boil without overflowing.
- Candy or instant-read thermometer: Reaching exactly 220°F ensures the jelly sets properly without guessing.
- Fine-mesh strainer or cheesecloth: Straining the cooked grape pulp removes seeds and skins, creating that clear, smooth jelly texture.
- Canning jars with lids and bands: Half-pint or pint jars work best for jelly, and proper two-piece lids create the vacuum seal needed for shelf storage.
- Water bath canner or large stockpot: Processing jars in boiling water kills bacteria and creates the seal that keeps jelly safe at room temperature.
- Jar lifter: This specialized tong safely removes hot jars from boiling water without risk of dropping or burning yourself.
- Ladle and wide-mouth funnel: These tools help pour hot jelly into jars cleanly, keeping jar rims free of drips that could prevent proper sealing.
How to Make Perfect Grape Jelly Every Time
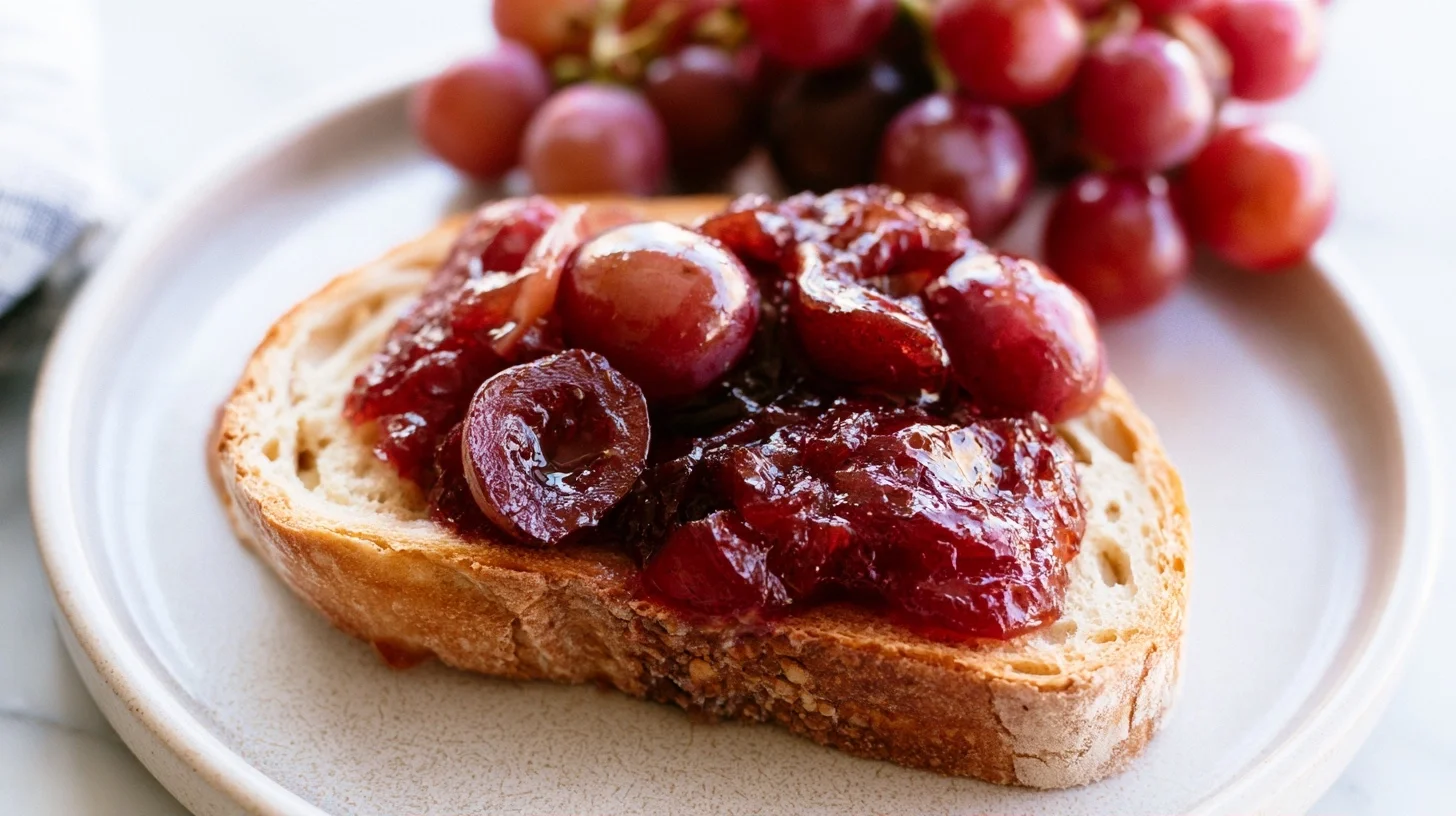
Homemade Grape Jelly
8
servings20
minutes40
minutes840
kcalThis homemade grape jelly recipe produces clear, jewel-toned preserves with pure grape flavor and perfect spreadable texture. The key is cooking the mixture to exactly 220°F to achieve proper gel point, then processing jars in a water bath for safe shelf storage.
Keep the screen of your device on
Ingredients
4 pounds Concord grapes or table grapes
0.5 cup water
1 package powdered fruit pectin
7 cups granulated sugar
1 tablespoon fresh lemon juice
1 tablespoon unsalted butter
8 half-pint canning jars with lids and bands
1 pinch salt
Directions
- Prepare the grapes by placing them in a large heavy-bottomed pot with the water. Crush the grapes slightly with a potato masher to help them release juice, then bring to a boil over medium-high heat. Reduce heat and simmer for 10 minutes until the grapes have burst and released their juice.
- Strain the grape mixture through a fine-mesh strainer lined with cheesecloth set over a large bowl. Let the juice drip naturally without pressing the pulp, which takes about 30 minutes. This patience ensures crystal-clear jelly without cloudiness. You should have about 4 cups of grape juice.
- Combine the grape juice, lemon juice, and pectin in a clean large pot. Add the butter if using to reduce foam. Bring the mixture to a full rolling boil over high heat, stirring constantly to prevent scorching.
- Add all the sugar at once and stir vigorously until completely dissolved. Return the mixture to a full rolling boil that cannot be stirred down, then boil hard for exactly 1 minute while stirring constantly.
- Test the temperature with a candy thermometer to confirm it has reached 220°F, which is the gel point. If you don’t have a thermometer, place a small amount on a chilled plate and put it in the freezer for 30 seconds—the jelly should wrinkle when pushed with your finger.
- Remove from heat and skim off any foam from the surface using a large metal spoon. This step creates a clearer finished product and helps prevent sealing issues.
Notes
- Reaching exactly 220°F ensures the jelly sets properly, as this temperature indicates the correct sugar concentration for pectin to form a gel.
- Straining the cooked grapes without pressing the pulp is essential for achieving clear, jewel-like jelly rather than cloudy preserves.
- Store unopened jars in a cool, dark place for up to one year. Once opened, refrigerate and use within one month for best quality and food safety.
Nutrition Facts
- Serving Size: 1 g
- Total number of serves: 8
- Calories: 840kcal
- Fat: 0g
- Carbohydrates: 217g
- Fiber: 1g
- Protein: 1g
Did you make this recipe?
Tag @therecipemasterblog on Instagram and hashtag it with #therecipemaster
Like this recipe?
Follow @therecipemasterblog on Pinterest
Follow us on Facebook!
Follow The Recipe Master on Facebook
Expert Tips for Clear, Firm Grape Jelly Recipe
The difference between runny grape syrup and properly set jelly comes down to a few critical techniques. Understanding these points before you start prevents the most common frustrations.
Extract Maximum Juice Without Cloudiness
After cooking the grapes until they burst and release their juice, strain the mixture through cheesecloth or a fine-mesh strainer without pressing or squeezing the pulp. Pressing forces tiny particles through the strainer, which clouds the finished jelly. Let gravity do the work, even if it takes 30 minutes or longer. The result is crystal-clear jelly with that characteristic jewel-like appearance.
Use the Temperature Test for Gel Point
Reaching 220°F on a candy thermometer is the most reliable indicator that your jelly will set properly once cooled. This temperature is 8 degrees above the boiling point of water at sea level, which is when the sugar concentration is high enough for pectin to form a gel. If you live at high altitude, subtract 2 degrees for every 1,000 feet above sea level. You can also test by placing a small amount of jelly on a chilled plate—if it wrinkles when you push it with your finger after 30 seconds in the freezer, it’s ready.
Don’t Skip the Skimming Step
As the jelly boils, foam rises to the surface. This foam contains impurities and air bubbles that can create a cloudy appearance or prevent proper sealing. Use a large metal spoon to skim off the foam just before ladling the jelly into jars. Some recipes suggest adding a small pat of butter to reduce foaming, which works by breaking surface tension, though skimming remains necessary for the clearest results.
Measure Pectin and Sugar Accurately
Pectin and sugar work together to create the gel structure. Too little pectin or sugar results in runny jelly, while too much creates a stiff, rubbery texture. Use the exact amounts specified in your recipe and measure carefully. If using liquid pectin instead of powdered, follow the package directions precisely, as the two types are added at different stages and are not interchangeable without adjusting the entire recipe. You can explore similar preservation techniques in this strawberry preserves guide that demonstrates related fruit-setting methods.
Process Jars for Safe Storage
Water bath canning is essential for shelf-stable jelly. After filling hot jars with hot jelly and applying lids, process them in boiling water for 5 to 10 minutes depending on jar size and altitude. This heat treatment kills any bacteria or mold spores and creates the vacuum seal that keeps jelly safe at room temperature for up to a year. Jars that don’t seal properly should be refrigerated and used within three weeks.
Common Grape Jelly Mistakes and How to Fix Them
Jelly Doesn’t Set and Stays Runny
This happens when the mixture doesn’t reach the proper gel point, either because it didn’t cook long enough or the ratio of pectin to sugar to juice was off. The jelly needs to reach 220°F and hold that temperature for at least one minute while boiling hard. If your jelly didn’t set after cooling overnight, you can reprocess it by pouring the jelly back into a pot, adding more pectin according to package directions, bringing it back to a full boil, and recanning it in clean jars.
Jelly Turns Out Cloudy Instead of Clear
Cloudy jelly results from forcing pulp through the strainer or from not skimming the foam before jarring. The tiny particles suspended in the liquid scatter light, creating that murky appearance. To prevent this, strain the cooked grape mixture gently without pressing, and always skim foam from the surface before ladling jelly into jars. While cloudy jelly tastes just as good, it lacks the visual appeal of crystal-clear preserves.
Jelly Develops Mold on the Surface
Mold growth indicates that jars weren’t processed properly or that the seal failed, allowing air and microorganisms inside. Always process filled jars in a boiling water bath for the full recommended time, and check that lids have sealed by pressing the center—it should not flex up and down. If you find mold on jelly, discard the entire jar, as mold roots can penetrate deeper than what’s visible on the surface.
Jelly Weeps or Separates in the Jar
Weeping happens when liquid separates from the gel, usually because the jelly was stored in a location with fluctuating temperatures or because it was moved or shaken before it fully set. Let jars sit undisturbed for 24 hours after processing to allow the gel structure to stabilize completely. Store finished jelly in a cool, dark place with consistent temperature to maintain texture and prevent separation.
Grape Jelly Variations to Try
Concord Grape Jelly Recipe
Concord grapes create the classic deep purple jelly with bold, sweet-tart flavor that most people associate with traditional grape jelly. These grapes have thicker skins and more pronounced flavor than table grapes, resulting in a more intense finished product. Use the same technique but expect a richer color and stronger grape taste.
White Grape Jelly
Green or white grapes produce a lighter, more delicate jelly with pale golden color and subtle sweetness. This variation pairs beautifully with mild cheeses on a cheese board and has a more refined appearance than the traditional purple version. The flavor is less assertive, making it versatile for both sweet and savory applications.
Spiced Grape Jelly
Adding warm spices like cinnamon, cloves, or star anise during the initial grape cooking stage infuses the jelly with complexity. Use one cinnamon stick and two whole cloves per four cups of grapes, then remove the spices before straining. The subtle spice notes complement the grape flavor without overwhelming it, creating a more sophisticated preserve perfect for holiday gift-giving.
Reduced Sugar Grape Jelly Recipe
Special low-sugar or no-sugar-needed pectin allows you to make jelly with less sweetener while still achieving proper set. These pectins work differently than regular pectin and require following package directions precisely. The finished jelly will have a softer set and more pronounced grape flavor since sugar isn’t masking the fruit’s natural taste. Keep in mind that sugar acts as a preservative, so reduced-sugar versions may have shorter shelf life.
Nutritional Benefits of Homemade Grape Jelly
While grape jelly is primarily a source of simple carbohydrates from natural fruit sugars and added sugar, it does retain some beneficial compounds from the grapes themselves. Grapes contain antioxidants called polyphenols, particularly in the skins, which have anti-inflammatory properties. Concord grapes are especially rich in resveratrol, the same compound found in red wine.
A typical serving of grape jelly contains about 50 calories per tablespoon, with most of those calories coming from the 13 grams of sugar. There’s minimal protein or fat, and while grapes naturally contain small amounts of vitamin C and vitamin K, much of the vitamin C breaks down during the cooking process. The fiber from grape skins is removed during straining, so jelly doesn’t provide the fiber benefits of whole grapes.
Homemade grape jelly offers the advantage of controlling sugar content and avoiding artificial ingredients, high-fructose corn syrup, and artificial colors commonly found in commercial versions. If you’re watching sugar intake, use the jelly sparingly as a condiment rather than a primary spread, or experiment with low-sugar pectin formulations that significantly reduce the total sugar content while maintaining spreadable texture.
Best Ways to Serve Grape Jelly Recipe
The most traditional use for grape jelly is spreading it on warm toast, English muffins, or fresh biscuits for breakfast. The sweet, fruity flavor pairs especially well with butter, creating a classic combination that highlights the jelly’s pure grape taste. Grape jelly also works beautifully on peanut butter sandwiches, where the sweetness balances the nutty richness.
Beyond breakfast, grape jelly serves as a versatile ingredient in savory cooking. It’s a key component in classic grape jelly meatballs, where it combines with chili sauce to create a sweet-tangy glaze. The jelly also makes an excellent glaze for roasted pork or ham, brushed on during the last 15 minutes of cooking to create a glossy, caramelized finish. Some cooks use it as a base for barbecue sauce or stir a spoonful into vinaigrettes for fruit salads.
For entertaining, serve grape jelly alongside a cheese board. It pairs particularly well with sharp cheddar, creamy brie, or tangy goat cheese. The sweet jelly provides contrast to salty, savory cheeses and adds visual appeal with its jewel-like color. Provide small spreaders or spoons so guests can add jelly to crackers or bread alongside their cheese selections.
How to Store Grape Jelly Properly
Properly processed and sealed jars of grape jelly remain shelf-stable for up to one year when stored in a cool, dark place like a pantry or basement. The ideal storage temperature is between 50°F and 70°F, as temperatures above 70°F can cause jelly to darken and lose quality faster. Avoid storing jars in direct sunlight or near heat sources like stoves or dishwashers, as heat exposure degrades both color and flavor.
Before storing, check that each jar has sealed properly by pressing the center of the lid. A properly sealed lid will not flex up and down when pressed. If a jar didn’t seal, refrigerate it immediately and use the jelly within three weeks. Once you open a jar, refrigerate it and use the jelly within one month for best quality. The cold temperature slows any microbial growth and helps maintain the jelly’s texture and flavor.
Always use clean utensils when scooping jelly from the jar to prevent introducing bacteria that could cause spoilage. If you notice any mold, off odors, or changes in texture or color, discard the entire jar. While properly made and stored grape jelly rarely spoils, it’s better to err on the side of caution if anything seems questionable.
Frequently Asked Questions about Grape Jelly Recipe
Yes, but the jelly will require significantly longer cooking time and may not set as firmly. Grapes contain natural pectin, especially in the skins and seeds, but the amount varies by variety and ripeness. Without added pectin, you’ll need to cook the grape juice and sugar mixture for 30 to 45 minutes or longer until it reaches the gel point, and the final texture may be softer than jelly made with commercial pectin.
Jelly becomes too stiff when it’s cooked beyond the gel point or when too much pectin is used. If the mixture reaches temperatures above 222°F, excess moisture evaporates and the pectin concentration becomes too high, creating a rubbery texture. Using more pectin than the recipe calls for has the same effect. Unfortunately, overset jelly cannot be fixed, though you can use it melted as a glaze or sauce.
Yes, frozen grapes work perfectly for jelly-making and sometimes even better than fresh. Freezing breaks down cell walls, which helps the grapes release their juice more readily when cooked. Use the same quantities as fresh grapes and cook them from frozen without thawing first. The final jelly will have the same flavor and texture as jelly made from fresh grapes.
Properly canned and sealed grape jelly stays shelf-stable for up to one year when stored in a cool, dark place. Once opened, refrigerate the jar and use the jelly within one month for best quality. Jars that didn’t seal properly during processing should be refrigerated immediately and used within three weeks. Always discard jelly that shows any signs of mold, off odors, or texture changes.



Leave a Reply