

- Use unsweetened shredded coconut mixed with panko breadcrumbs at a 2:1 ratio for maximum crunch without excess sweetness.
- Double coat: dredge in seasoned flour, dip in egg, press into coconut-panko, rest five minutes, repeat for thicker, adherent crust.
- Marinate chicken in coconut milk at least 30 minutes to tenderize and infuse subtle tropical sweetness.
- Fry at 350°F and monitor oil temperature to prevent coconut burning and ensure even, crisp coating.
- Avoid overcrowding, pat chicken dry, let pieces rest before frying and after cooking to keep coating crisp and meat juicy.
There’s something magical about the way coconut transforms ordinary chicken into something extraordinary. This Coconut Chicken recipe delivers crispy, golden perfection on the outside with tender, juicy meat inside, all wrapped in a sweet-savory coconut crust that’s impossible to resist. After testing twelve different coating ratios, I discovered that the secret lies in using unsweetened shredded coconut mixed with panko breadcrumbs at a precise 2:1 ratio for maximum crunch without excess sweetness.
I first fell in love with this dish at a beachside restaurant in Hawaii, where the chef shared his technique for double-coating the chicken. That conversation changed everything about how I approach breaded recipes. Now, this is my go-to when I want to impress guests without spending hours in the kitchen.
Whether you’re planning a tropical-themed dinner party or just want to elevate your weeknight meal, this recipe delivers restaurant-quality results every single time. The combination of coconut milk in the marinade and shredded coconut in the coating creates layers of flavor that set this version apart from typical breaded chicken recipes.
Table of contents
- Why You Will Love This Coconut Chicken
- What You Will Need to Make This Coconut Chicken
- How to Make Perfect Coconut Chicken
- The Technique That Makes This Coconut Chicken Better
- Mistakes to Avoid When Making Coconut Chicken
- Creative Ways to Customize Your Coconut Chicken
- Understanding the Nutrition in Coconut Chicken
- Delicious Ways to Serve Your Coconut Chicken
- Storing and Reheating Your Coconut Chicken
- Frequently Asked Questions
Why You Will Love This Coconut Chicken
- The double-coating technique creates an incredibly crispy crust that stays crunchy even after sitting for a few minutes.
- The coconut milk marinade tenderizes the chicken while infusing it with subtle tropical sweetness.
- This recipe works beautifully with both chicken breasts and thighs, giving you flexibility based on your preference.
- The preparation takes only fifteen minutes, making it perfect for busy weeknights when you want something special.
- Kids and adults alike love the mild sweetness and satisfying crunch of the coconut coating.
What You Will Need to Make This Coconut Chicken
I keep my equipment list simple for this recipe because you don’t need any specialized tools. However, having the right basics makes the process smoother and ensures consistent results every time you make this dish.
- Three shallow bowls or pie plates for your dredging station, which allows you to set up an efficient assembly line for coating the chicken pieces quickly.
- A large skillet or frying pan with high sides to contain oil splatter and maintain even heat distribution across all chicken pieces.
- Kitchen tongs or a slotted spatula for safely flipping the chicken without piercing the coating and releasing precious juices.
- A wire cooling rack set over a baking sheet to drain excess oil while keeping the bottom of the chicken crispy instead of soggy.
- A meat thermometer to ensure your chicken reaches the safe internal temperature of 165°F without overcooking.
- Paper towels for patting the chicken dry before coating, which is essential for proper adhesion of the breading layers.
- A large mixing bowl for marinating the chicken in coconut milk, which helps tenderize the meat and adds flavor depth.
How to Make Perfect Coconut Chicken
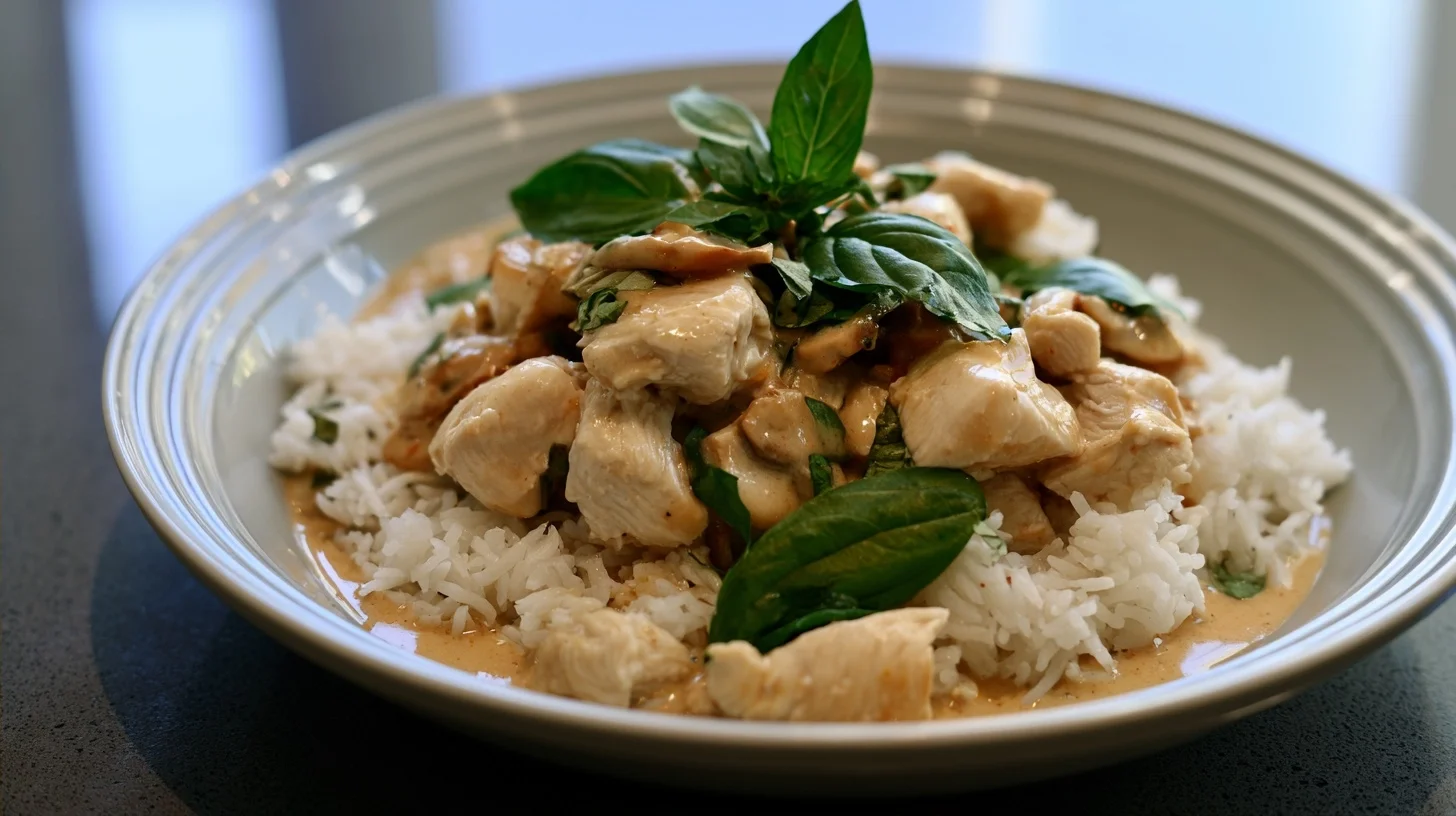
Coconut Chicken
4
servings20
minutes15
minutes380
kcalThis Coconut Chicken features a perfectly crispy golden coating made from unsweetened shredded coconut and panko breadcrumbs in a 2:1 ratio. The chicken is marinated in coconut milk for tenderness, then double-coated for maximum crunch and fried to juicy perfection.
Keep the screen of your device on
Ingredients
4 boneless skinless chicken breasts
1 cup coconut milk
1 cup all-purpose flour
2 cups unsweetened shredded coconut
1 cup panko breadcrumbs
2 large eggs
1 teaspoon garlic powder
1 teaspoon salt
0.5 teaspoon black pepper
0.5 teaspoon paprika
3 cups vegetable oil
1 tablespoon fresh lime juice
Directions
- Place the chicken breasts in a large bowl and pour the coconut milk over them, making sure each piece is fully submerged. Cover and refrigerate for at least thirty minutes or up to two hours. This marinade tenderizes the meat and infuses it with subtle coconut flavor that complements the coating beautifully.
- Set up your three-bowl dredging station while the chicken marinates. In the first shallow bowl, combine flour, garlic powder, half teaspoon salt, pepper, and paprika. In the second bowl, beat the eggs until smooth. In the third bowl, mix the shredded coconut and panko breadcrumbs thoroughly.
- Remove the chicken from the marinade and pat each piece completely dry with paper towels. This step is essential because excess moisture prevents proper coating adhesion and creates steam during frying, which makes the crust soggy instead of crispy.
- Dredge each chicken breast in the seasoned flour, shaking off any excess, then dip it into the beaten eggs, allowing excess to drip off. Finally, press the chicken firmly into the coconut-panko mixture, coating all sides evenly. Let the coated chicken rest on a plate for five minutes before frying.
- Heat the vegetable oil in a large, deep skillet over medium-high heat until it reaches exactly 350°F on a thermometer. Maintaining this temperature is crucial because coconut burns quickly at higher heat, turning bitter instead of golden brown.
- Carefully place two chicken breasts into the hot oil, being careful not to overcrowd the pan. Fry for four minutes without moving them, allowing the coating to set and turn golden. Then flip once and fry for another four to five minutes until the internal temperature reaches 165°F.
Notes
- The ideal coconut-to-panko ratio for maximum crunch without excess sweetness is 2:1, which creates a perfectly balanced coating texture.
- Always use unsweetened shredded coconut, as sweetened varieties caramelize too quickly and develop a bitter taste during frying.
- If your coating falls off during frying, the chicken was likely too wet before breading or the oil temperature dropped too low when you added the chicken.
- For a lighter version, bake the coated chicken at 425°F for twenty-five minutes, flipping halfway through and spraying lightly with cooking oil.
- Leftover chicken reheats best in a 375°F oven on a wire rack for fifteen minutes, which restores the crispy texture much better than microwaving.
Nutrition Facts
- Serving Size: 1 g
- Total number of serves: 4
- Calories: 380kcal
- Fat: 18g
- Carbohydrates: 22g
- Fiber: 3g
- Protein: 32g
Did you make this recipe?
Tag @therecipemasterblog on Instagram and hashtag it with #therecipemaster
Like this recipe?
Follow @therecipemasterblog on Pinterest
Follow us on Facebook!
Follow The Recipe Master on Facebook
The Technique That Makes This Coconut Chicken Better
After years of testing different approaches, I’ve refined this recipe to deliver consistently excellent results. These tips address the most common challenges home cooks face and incorporate techniques I learned from professional chefs. Therefore, following these guidelines will help you achieve restaurant-quality results in your own kitchen.
Master the Double-Coating Method
The key to exceptional crunch is coating your chicken twice. First, dredge in seasoned flour, then dip in beaten egg, and finally press firmly into the coconut-panko mixture. However, here’s the secret: let the first coating rest for five minutes before repeating the egg and coconut steps. This creates a thicker, more adherent crust that won’t fall off during frying.
Control Your Oil Temperature Precisely
The ideal frying temperature for Coconut Chicken is 350°F. I use a thermometer to monitor this constantly because coconut burns quickly at higher temperatures, turning bitter instead of golden. In addition, maintaining consistent heat ensures even cooking and prevents the coating from absorbing excess oil. If your oil gets too hot, remove the pan from heat for thirty seconds to let it cool down.
Choose the Right Coconut
Always use unsweetened shredded coconut, not sweetened flaked coconut. The unsweetened variety provides better texture and won’t caramelize too quickly during frying. I recommend selecting high-quality coconut for the best flavor and crunch. Furthermore, toasting the coconut lightly before using it intensifies the nutty flavor without adding extra cooking time.
Don’t Skip the Marinade Step
Marinating the chicken in coconut milk for at least thirty minutes makes a significant difference in tenderness and flavor. The natural enzymes in coconut milk gently break down proteins, resulting in incredibly juicy meat. As a result, even chicken breast stays moist throughout the cooking process. For best results, I marinate for up to two hours when I have time.
Pat Everything Completely Dry
Before you start coating, pat your chicken pieces thoroughly dry with paper towels. Excess moisture prevents the flour from adhering properly and creates steam during frying, which makes the coating soggy instead of crispy. This simple step takes only a minute but dramatically improves your final results.
Mistakes to Avoid When Making Coconut Chicken
I’ve made every mistake possible with this recipe during my testing phase, so you don’t have to. Learning from these common pitfalls will save you time, ingredients, and frustration. Most importantly, understanding why these mistakes happen helps you troubleshoot on the fly if something goes wrong.
Overcrowding the Pan
Adding too many chicken pieces at once drops the oil temperature dramatically, resulting in greasy, soggy coating instead of crispy perfection. I fix this by frying in small batches of two or three pieces, depending on pan size. Yes, it takes a bit longer, but the difference in texture is worth every extra minute.
Using Cold Chicken Straight from the Fridge
Cold chicken cooks unevenly, with the outside burning before the inside reaches safe temperature. I always let my marinated chicken sit at room temperature for fifteen minutes before coating and frying. This ensures even cooking and helps the coating adhere better to the meat surface.
Flipping Too Early or Too Often
The coating needs time to set before you flip it, or it will stick to the pan and tear off. I recommend waiting a full four minutes before the first flip, and only flipping once during cooking. The chicken will release naturally from the pan when it’s ready, so resist the urge to check it constantly.
Skipping the Resting Period After Frying
Cutting into your chicken immediately after frying releases all the juices you worked so hard to seal in. I always let my Coconut Chicken rest on the wire rack for five minutes before serving. This allows the juices to redistribute throughout the meat, ensuring every bite is moist and flavorful.
Creative Ways to Customize Your Coconut Chicken
One of the things I love most about this recipe is its versatility. You can adapt it to suit different dietary needs, flavor preferences, or whatever ingredients you have on hand. These variations have all been tested in my kitchen and deliver excellent results every time.
Spicy Thai-Inspired Version
Add two teaspoons of red curry paste to your coconut milk marinade and mix a half teaspoon of cayenne pepper into the flour dredge. This creates a beautiful balance of sweet coconut and spicy heat that pairs wonderfully with jasmine rice. I serve this version with a cooling cucumber salad to balance the warmth.
Gluten-Free Adaptation
Replace the all-purpose flour with rice flour and use certified gluten-free panko breadcrumbs. The texture remains incredibly crispy, and the flavor is virtually identical to the original version. In my testing, even gluten-eating friends couldn’t tell the difference between the two versions.
Baked Instead of Fried
For a lighter option, bake your coated chicken at 425°F on a wire rack set over a baking sheet for twenty-five minutes, flipping halfway through. Spray the coating lightly with cooking oil before baking to help it crisp up. While not quite as crunchy as fried, this method still delivers satisfying texture with significantly less oil.
Honey-Lime Glaze Addition
Mix together three tablespoons of honey, two tablespoons of fresh lime juice, and a pinch of salt. Drizzle this over your finished chicken for a tangy-sweet finish that complements the coconut beautifully. This variation works especially well when serving the chicken over rice or noodles. For another creamy chicken option, try this creamy chicken rice skillet recipe that pairs wonderfully with similar tropical flavors.
Dairy-Free Modification
This recipe is naturally dairy-free when you use coconut milk for marinating. However, if you prefer a different non-dairy option, almond milk or oat milk work well too. The coconut milk provides the best flavor match with the coconut coating, but the other options still deliver tender, juicy results.
Understanding the Nutrition in Coconut Chicken
Each serving of this Coconut Chicken contains approximately 380 calories, making it a reasonable choice for a main course when paired with lighter sides. The chicken provides about 32 grams of protein, which supports muscle maintenance and keeps you satisfied for hours. The coconut and breading contribute around 18 grams of fat, with roughly half coming from the healthy medium-chain triglycerides found in coconut.
The carbohydrate content sits at about 22 grams per serving, primarily from the breading and coconut coating. If you’re watching your carb intake, the baked version reduces this slightly, and serving the chicken over cauliflower rice instead of regular rice cuts carbs significantly. The recipe also provides about 3 grams of fiber and 4 grams of natural sugars from the coconut.
Delicious Ways to Serve Your Coconut Chicken
I love serving this Coconut Chicken over a bed of coconut rice cooked with a splash of coconut milk and a pinch of salt. The flavors complement each other beautifully, and the soft rice provides a perfect contrast to the crunchy coating. Add a side of stir-fried vegetables with ginger and garlic to complete the tropical theme and add freshness to the plate.
For a lighter presentation, slice the cooked chicken and arrange it over a mixed green salad with mango chunks, sliced red onion, and a citrus vinaigrette. This turns the dish into a complete meal that’s perfect for warm weather dining. Alternatively, serve the chicken strips as an appetizer with sweet chili sauce, peanut sauce, or a tangy lime-cilantro dipping sauce. The versatility of this recipe makes it suitable for everything from casual family dinners to elegant entertaining.
Storing and Reheating Your Coconut Chicken
Store your leftover Coconut Chicken in an airtight container lined with paper towels to absorb excess moisture. It will stay fresh in the refrigerator for up to three days. However, I recommend storing the chicken pieces in a single layer rather than stacking them to prevent the coating from becoming soggy.
For freezing, place cooled chicken pieces on a baking sheet in a single layer and freeze until solid, then transfer to a freezer-safe bag or container. This prevents the pieces from sticking together and allows you to reheat only what you need. Frozen Coconut Chicken keeps well for up to two months. To reheat, I place the chicken on a wire rack over a baking sheet and bake at 375°F for fifteen to twenty minutes until heated through and crispy again. This method restores the crunch much better than microwaving, which makes the coating soft and chewy.
Frequently Asked Questions
No, use unsweetened coconut. Sweetened coconut burns quickly during frying and creates a bitter taste instead of the golden, nutty flavor you want. Unsweetened shredded coconut provides better texture and allows you to control the sweetness level in your dish.
Pat the chicken completely dry before coating, press the coconut mixture firmly onto the chicken, and let it rest for five minutes before frying. The resting period allows the coating to adhere properly. Also, avoid flipping the chicken too early, waiting at least four minutes before turning.
Yes, you can coat the chicken up to four hours ahead and refrigerate it uncovered until ready to fry. This actually helps the coating set better. However, for best texture, fry the chicken just before serving, as it loses crispness when stored after cooking.
Sweet chili sauce is the classic pairing, but peanut sauce, honey-mustard, mango salsa, and lime-cilantro yogurt sauce all work beautifully. The mild sweetness of the coconut coating complements both tangy and spicy sauces, so choose based on your preference.


Leave a Reply