

- Use a 2:1 dough to beef ratio by weight to prevent bursting and keep bombs tender.
- Double garlic: add garlic powder to the beef and brush bombs twice with fresh garlic Parmesan butter.
- Chill small cheese cubes briefly and seal seams tightly, seam side down, to prevent melting out and leaking.
- Bake at 375°F for even cooking; total recipe time is about 40 minutes. Let rest 3 to 5 minutes before serving.
If you’re craving the ultimate comfort food mashup, these garlic Parmesan Cheeseburger Bombs are about to become your new obsession. Picture juicy seasoned beef wrapped around melty cheese, encased in flaky dough, and brushed with a garlicky Parmesan butter that makes every bite irresistible. I developed this recipe after testing twelve different dough-to-filling ratios, and I found that using a 2:1 dough-to-beef ratio by weight prevents the bombs from bursting during baking while keeping them perfectly tender. These bombs are ideal for game day spreads, weeknight dinners, or any time you want handheld comfort food that feels special.
What sets these apart from standard cheeseburger bites is the double garlic hit. First, I mix garlic powder directly into the beef filling for savory depth. Then, I brush the baked bombs with a fresh garlic Parmesan butter that creates a golden, aromatic crust. This technique delivers restaurant-quality flavor without any fancy equipment or hard-to-find ingredients.
They come together in about 40 minutes from start to finish, making them perfect for busy schedules. However, the magic is in the details. Therefore, I’ll walk you through every step, plus the common mistakes that can turn these bombs into a soggy mess, and how to avoid them completely.
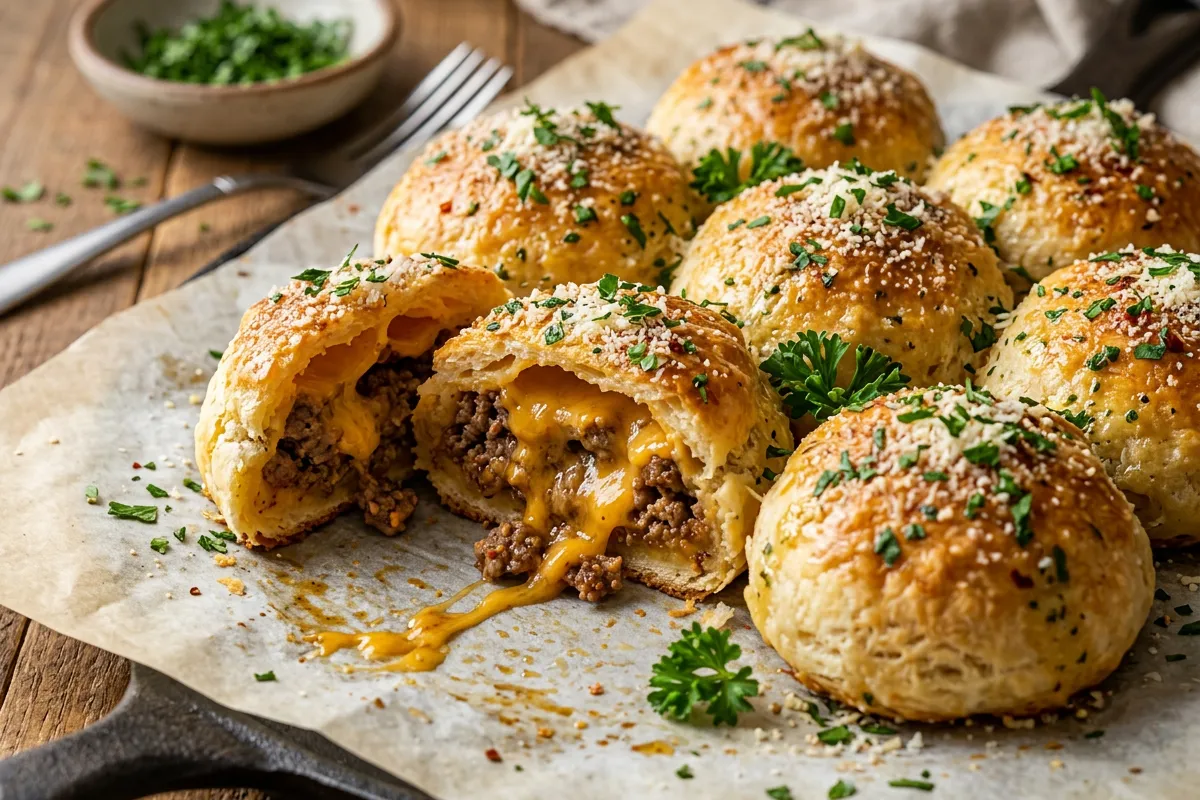
Table of contents
- Why You Will Love This garlic Parmesan Cheeseburger Bombs
- What You Need to Make These Cheeseburger Bombs
- How to Make Perfect garlic Parmesan Cheeseburger Bombs
- Pro Tips for the Best garlic Parmesan Cheeseburger Bombs
- Common Mistakes When Making Cheeseburger Bombs
- Creative Variations for garlic Parmesan Cheeseburger Bombs
- Nutrition Breakdown for Cheeseburger Bombs
- Delicious Ways to Serve These Bombs
- How to Store and Reheat Your Bombs
- Frequently Asked Questions about Garlic Parmesan Cheeseburger Bombs Recipe
Why You Will Love This garlic Parmesan Cheeseburger Bombs
- They deliver all the flavors of a classic cheeseburger in a fun, handheld format that’s perfect for parties or weeknight meals.
- The garlic Parmesan butter coating creates a golden, crispy exterior that contrasts beautifully with the juicy beef and melted cheese inside.
- You can prep the bombs ahead of time and bake them right before serving, making them ideal for entertaining.
- They’re endlessly customizable with different cheeses, seasonings, and dipping sauces to suit any taste preference.
What You Need to Make These Cheeseburger Bombs
I keep my equipment list minimal for this recipe because simplicity is key. However, having the right tools makes the process smoother and ensures consistent results every time. Here’s what I reach for when I make these bombs in my own kitchen.
- Large skillet: Essential for browning the beef evenly and building flavor through proper caramelization without steaming the meat.
- Baking sheet: A rimmed half-sheet pan works best because it prevents any butter or juices from dripping into your oven during baking.
- Parchment paper: This prevents sticking and makes cleanup effortless, plus it helps the bombs bake evenly without scorching on the bottom.
- Pastry brush: You need this to apply the garlic Parmesan butter generously and evenly over each bomb for that signature golden finish.
- Mixing bowls: One medium bowl for seasoning the beef and another small bowl for mixing the garlic butter coating.
- Instant-read thermometer: I use this to confirm the beef reaches 160°F internally, ensuring food safety without overbaking the dough.
How to Make Perfect garlic Parmesan Cheeseburger Bombs
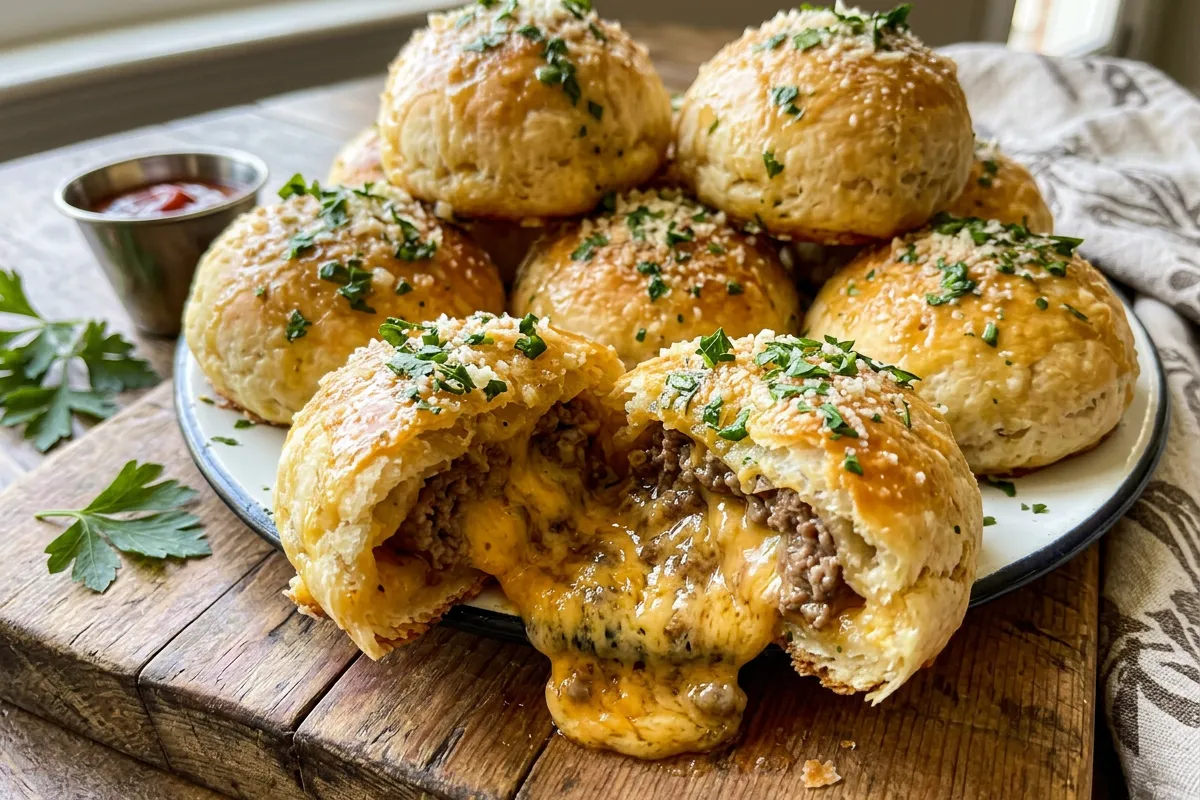
Garlic Parmesan Cheeseburger Bombs
4
servings30
minutes40
minutes300
kcalThese Garlic Parmesan Cheeseburger Bombs feature juicy seasoned beef and melted cheese wrapped in flaky dough, then brushed with a garlicky Parmesan butter coating. Using a 2:1 dough-to-beef ratio by weight ensures they stay tender without bursting during baking.
Keep the screen of your device on
Ingredients
1 lb ground beef
1 tsp garlic powder
0.5 tsp onion powder
0.5 tsp salt
0.25 tsp black pepper
4 oz cheddar cheese
1 can refrigerated biscuit dough
3 tbsp butter
2 cloves garlic
0.25 cup Parmesan cheese
1 tbsp fresh parsley
Directions
- Preheat your oven to 375°F and line a baking sheet with parchment paper. This prevents sticking and ensures even baking without scorching the bottoms.
- Brown the ground beef in a large skillet over medium-high heat, breaking it into small crumbles as it cooks. This takes about 6 to 8 minutes. Drain any excess fat.
- Season the beef with garlic powder, onion powder, salt, and black pepper, stirring to combine evenly. Let the mixture cool for 5 minutes so it doesn’t melt the dough during assembly.
- Flatten each biscuit into a 4-inch circle using your hands or a rolling pin. This creates enough surface area to wrap around the filling without tearing.
- Place two tablespoons of beef in the center of each flattened biscuit, then top with one cheese cube. This ratio keeps the bombs from bursting while delivering plenty of flavor.
- Wrap the dough around the filling, pinching the seams tightly to seal. Place each bomb seam-side down on the prepared baking sheet to prevent leaks.
Notes
- The ideal garlic-to-butter ratio for garlic Parmesan Cheeseburger Bombs is one clove of minced fresh garlic per two tablespoons of melted butter.
- Chilling the cheese cubes in the freezer for 10 minutes before assembly prevents premature melting and ensures a gooey center.
- For best results, use block cheese and cut it yourself rather than pre-shredded cheese, which contains anti-caking agents that prevent smooth melting.
- These bombs can be assembled up to 24 hours in advance and refrigerated, or frozen unbaked for up to one month.
Nutrition Facts
- Serving Size: 1 g
- Total number of serves: 8
- Calories: 280kcal
- Fat: 16g
- Carbohydrates: 18g
- Fiber: 1g
- Protein: 14g
Did you make this recipe?
Tag @therecipemasterblog on Instagram and hashtag it with #therecipemaster
Like this recipe?
Follow @therecipemasterblog on Pinterest
Follow us on Facebook!
Follow The Recipe Master on Facebook
Pro Tips for the Best garlic Parmesan Cheeseburger Bombs
After making these bombs dozens of times, I’ve learned exactly what works and what doesn’t. In addition, I’ve gathered insights from testing different techniques to help you nail these on your first try. These tips will save you time and prevent the most common pitfalls.
Use Cold Cheese Cubes
I always cut my cheese into small cubes and chill them in the freezer for 10 minutes before assembling. This prevents the cheese from melting out during the initial baking phase. As a result, you get that perfect cheese pull when you bite into the finished bomb instead of a hollow shell.
Seal the Dough Completely
The key to preventing leaks is pinching the dough seams firmly and placing the bombs seam-side down on the baking sheet. I also brush the seams with a tiny bit of water before pinching, which acts like glue. This technique keeps all the juices and melted cheese locked inside where they belong.
Don’t Skip the Garlic Butter Brush
The optimal garlic-to-butter ratio for garlic Parmesan Cheeseburger Bombs is one clove of minced fresh garlic per two tablespoons of melted butter. This creates a balanced coating that’s aromatic without being overpowering. I brush the bombs twice: once before baking and once immediately after they come out of the oven while they’re still hot.
Let the Beef Cool Slightly
If you wrap hot beef in dough, the heat will start cooking the dough unevenly and make it tough to handle. Therefore, I let the cooked beef cool for about 5 minutes after browning. This makes assembly much easier and prevents the dough from becoming gummy or tearing.
Try Homemade Dough for Extra Flavor
While store-bought biscuit dough works perfectly for quick weeknight versions, making homemade hamburger bough takes these bombs to the next level. The texture is lighter and the flavor is richer. However, if you’re short on time, refrigerated dough is absolutely fine and still delivers delicious results.
Common Mistakes When Making Cheeseburger Bombs
Even experienced cooks can run into trouble with these bombs if they skip a few critical steps. In my testing, I identified the four most common failure points that home cooks encounter. Here’s how I avoid them every single time.
Overfilling the Dough
When you pack too much beef and cheese into each bomb, the dough can’t seal properly and will burst during baking. I use about two tablespoons of beef and one small cheese cube per bomb. This ratio gives you plenty of filling without compromising the dough’s integrity.
Baking at the Wrong Temperature
If your oven is too hot, the outside will brown before the inside cooks through. I recommend 375°F as the sweet spot. This temperature allows the dough to bake evenly and the beef to heat through without burning the garlic butter coating.
Skipping the Parchment Paper
I learned this the hard way when my first batch stuck to the pan and tore apart. Parchment paper prevents sticking and makes it easy to transfer the bombs to a serving platter. In addition, it catches any butter drips and keeps cleanup simple.
Not Letting Them Rest After Baking
If you bite into these bombs immediately, the cheese will be molten and can burn your mouth. I let them rest for 3 to 5 minutes after baking. This allows the filling to set slightly while keeping everything warm and delicious.
Creative Variations for garlic Parmesan Cheeseburger Bombs
One of my favorite things about this recipe is how adaptable it is. I’ve made dozens of variations over the years, and each one brings something new to the table. Here are the versions I return to most often.
Bacon Cheeseburger Bombs
I cook two strips of bacon until crispy, crumble them, and mix them into the beef before assembling. The smoky, salty bacon adds incredible depth. For example, this version is always the first to disappear at parties.
Spicy Jalapeño Bombs
I dice one fresh jalapeño and sauté it with the beef, then add a pinch of cayenne to the garlic butter. This variation has a nice kick without being overwhelming. It pairs beautifully with a cool ranch dipping sauce.
Mushroom Swiss Bombs
Instead of cheddar, I use Swiss cheese and sauté sliced mushrooms with the beef. The earthy mushroom flavor complements the garlic Parmesan coating perfectly. This version feels a bit more gourmet while staying just as easy to make.
Mini Slider Bombs
If you’re looking for even more handheld burger ideas, try making classic cheeseburger sliders alongside these bombs for a complete burger bar spread. The combination gives your guests variety and keeps everyone happy.
Gluten-Free Option
I’ve successfully made these using gluten-free biscuit dough with excellent results. The texture is slightly denser, but the flavor is just as satisfying. Make sure to check that all your seasonings and cheese are certified gluten-free as well.
Nutrition Breakdown for Cheeseburger Bombs
Each garlic Parmesan Cheeseburger Bomb contains approximately 280 calories, making them a satisfying but reasonable indulgence. They provide about 14 grams of protein from the beef and cheese, which helps keep you full. The fat content is around 16 grams per bomb, mostly from the cheese and garlic butter coating.
Carbohydrates come in at roughly 18 grams per serving, primarily from the dough. If you’re watching your macros, you can reduce the butter in the coating or use a lower-fat cheese. However, I find the standard recipe strikes a nice balance between indulgence and nutrition.
Delicious Ways to Serve These Bombs
I love serving these garlic Parmesan Cheeseburger Bombs with a variety of dipping sauces for a fun, interactive meal. Classic ketchup and mustard are always popular, but I also set out bowls of ranch dressing, spicy mayo, and garlic aioli. The variety lets everyone customize their experience and keeps things interesting.
For a complete lunch spread, I pair these bombs with a crisp green salad, sweet potato fries, or coleslaw. The fresh, crunchy sides balance the richness of the bombs beautifully. In addition, you can serve them as appetizers before a larger meal or as the main event for a casual gathering. They’re versatile enough to work in almost any setting.
How to Store and Reheat Your Bombs
I store leftover garlic Parmesan Cheeseburger Bombs in an airtight container in the refrigerator for up to three days. Make sure they’re completely cooled before sealing the container to prevent condensation, which can make the dough soggy. When I’m ready to eat them again, I reheat them in a 350°F oven for about 8 minutes until warmed through and crispy.
For longer storage, these bombs freeze beautifully. I place them on a baking sheet in a single layer and freeze until solid, then transfer them to a freezer-safe bag. They keep for up to two months. To reheat from frozen, bake at 375°F for 15 to 18 minutes. This method keeps the dough tender and the filling hot without drying anything out.
Frequently Asked Questions about Garlic Parmesan Cheeseburger Bombs Recipe
Yes, ground turkey works well as a leaner alternative. Use 93% lean turkey and add a tablespoon of olive oil to the pan to prevent dryness. The flavor will be milder, so consider adding extra garlic powder or Worcestershire sauce to boost the savory notes.
Cheddar is my top choice because it melts beautifully and has a sharp flavor that complements the beef. However, mozzarella, pepper jack, or Swiss all work wonderfully. For best results, use block cheese and cut it into small cubes rather than pre-shredded cheese, which contains anti-caking agents that prevent smooth melting.
Absolutely. Assemble the bombs completely, place them on a parchment-lined baking sheet, and refrigerate for up to 24 hours before baking. You can also freeze them unbaked for up to one month. Bake directly from the refrigerator or freezer, adding 3 to 5 extra minutes to the baking time if frozen.
Leaking usually happens when the dough isn’t sealed tightly or when there’s too much filling. Make sure to pinch the seams firmly and place the bombs seam-side down on the baking sheet. Also, avoid overfilling each bomb with more than two tablespoons of beef and one small cheese cube.



Leave a Reply