

- Roast apples and pumpkin at high heat to caramelize sugars, creating deep, complex sweet savory flavors you cannot get by boiling.
- Use a 1 part apple to 2 parts pumpkin ratio; choose Honeycrisp or Gala for balanced sweetness and texture during roasting.
- Add maple syrup after blending so the final sweetness enhances, not replaces, the caramelized vegetable flavors; start with one tablespoon.
- Prevent steaming by not crowding the pan, roast at 425°F, cool before blending, add broth gradually, and adjust salt after cream.
There’s something magical about the way roasted apples and pumpkin come together in a bowl of warm, velvety soup. This Roasted Apple Pumpkin Soup transforms simple fall ingredients into a restaurant-quality dish that’s both comforting and elegant. The secret lies in roasting everything first, which caramelizes the natural sugars and creates a depth of flavor you simply can’t achieve by boiling alone.
I’ve tested this recipe over a dozen times, adjusting the apple-to-pumpkin ratio until I found the perfect balance. The ideal ratio is 1 part roasted apple to 2 parts roasted pumpkin, which gives you sweetness without losing that earthy, savory backbone. This soup works beautifully as a starter for Thanksgiving dinner or as a cozy weeknight meal served with crusty bread.
What sets this version apart is the roasting technique combined with a touch of maple syrup added at the end, not during roasting. This preserves the complex caramelized flavors while adding a final layer of sweetness that doesn’t compete with the vegetables. The result is a soup that tastes like it came from a professional kitchen, not a can.
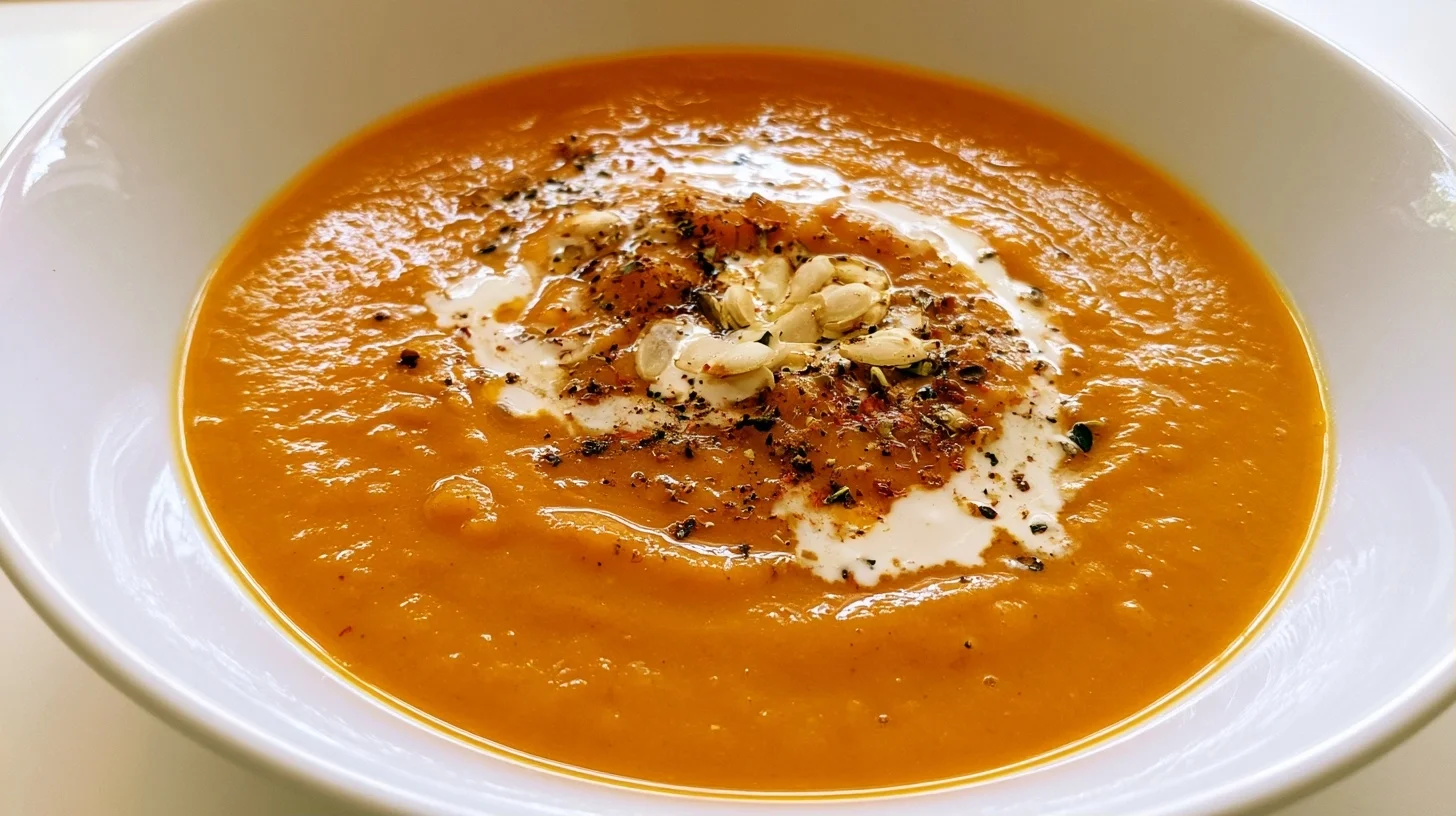
Table of contents
- Why You Will Love This Roasted Apple Pumpkin Soup
- What You Need to Make This Roasted Apple Pumpkin Soup
- How to Make Roasted Apple Pumpkin Soup Step by Step
- The Roasting Technique That Makes This Soup Exceptional
- Common Mistakes When Making Roasted Apple Pumpkin Soup
- Ways to Customize Your Roasted Apple Pumpkin Soup
- Nutrition Information for Roasted Apple Pumpkin Soup
- Perfect Pairings for Your Soup
- Storing and Reheating Your Soup
- Frequently Asked Questions
Why You Will Love This Roasted Apple Pumpkin Soup
- The roasting process caramelizes the natural sugars in both the pumpkin and apples, creating layers of complex flavor that you can’t get from stovetop cooking alone.
- This soup is naturally gluten-free and can easily be made vegan by swapping the cream for coconut milk, making it perfect for guests with dietary restrictions.
- The recipe makes excellent use of seasonal produce and can be prepared ahead of time, actually tasting better the next day as the flavors meld together.
- It’s elegant enough to serve at a dinner party but simple enough to make on a busy weeknight, requiring only one sheet pan and one pot.
What You Need to Make This Roasted Apple Pumpkin Soup
I keep my equipment list simple for this recipe because the technique does most of the work. However, having the right tools makes the process smoother and ensures consistent results every time.
- Large rimmed baking sheet: You need enough space to spread the pumpkin and apples in a single layer so they roast rather than steam, which is crucial for developing caramelized flavors.
- Heavy-bottomed Dutch oven or large soup pot: A heavy pot distributes heat evenly and prevents scorching when you’re simmering the soup, especially important when blending hot liquids.
- Immersion blender or high-speed blender: An immersion blender lets you blend directly in the pot, which is safer and easier than transferring hot liquid, though a countertop blender gives you a silkier texture.
- Sharp chef’s knife: You’ll be cutting through dense pumpkin flesh, so a sharp knife is essential for both safety and efficiency.
- Fine-mesh strainer (optional): If you want an ultra-smooth, restaurant-style texture, straining the soup after blending removes any fibrous bits that might remain.
How to Make Roasted Apple Pumpkin Soup Step by Step
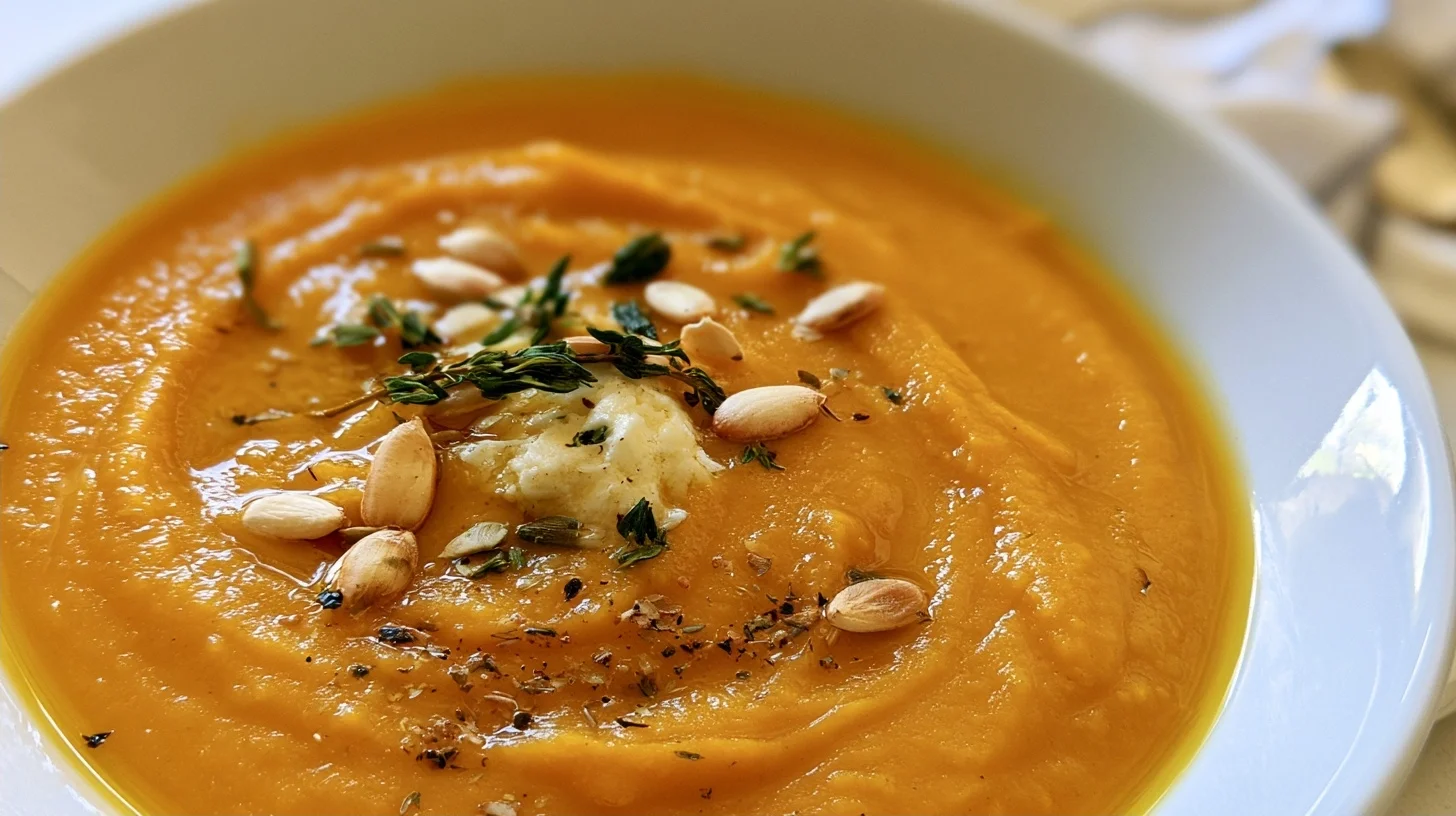
Roasted Apple Pumpkin Soup
6
servings15
minutes45
minutes210
kcalThis Roasted Apple Pumpkin Soup features a perfect 1:2 ratio of roasted apples to pumpkin, creating deep caramelized flavors that you can’t achieve through stovetop cooking alone. The high-heat roasting technique brings out natural sweetness while maintaining a savory backbone, finished with cream and a touch of maple syrup for restaurant-quality results.
Keep the screen of your device on
Ingredients
3 pounds sugar pumpkin or butternut squash
2 medium Honeycrisp or Gala apples
1 large yellow onion
4 cloves garlic
3 tablespoons olive oil
4 cups vegetable broth
0.5 cup heavy cream
1 tablespoon pure maple syrup
4 sprigs fresh thyme
1 teaspoon sea salt
0.5 teaspoon black pepper
2 tablespoons toasted pumpkin seeds
Directions
- Preheat your oven to 425°F and line a large rimmed baking sheet with parchment paper. This high temperature is crucial for developing the caramelized edges that give the soup its complex flavor.
- Arrange the pumpkin cubes, apple quarters, onion, and garlic on the prepared baking sheet in a single layer, making sure pieces don’t touch. Drizzle with 2 tablespoons of olive oil, sprinkle with half the salt and pepper, and tuck the thyme sprigs among the vegetables.
- Roast for 35 to 40 minutes, stirring once halfway through, until the pumpkin is fork-tender and you see golden-brown caramelized edges. The apples should be soft but not falling apart. Remove the thyme stems and discard them.
- Heat the remaining tablespoon of olive oil in a large Dutch oven or soup pot over medium heat. This step isn’t necessary for cooking but adds another layer of flavor to the final soup.
- Transfer all the roasted vegetables to the pot and add 2 cups of vegetable broth. Bring to a simmer and cook for 5 minutes, allowing the flavors to meld together.
- Blend the soup until completely smooth using an immersion blender, or carefully transfer in batches to a countertop blender. If using a countertop blender, fill it only halfway and hold a towel over the lid to prevent hot liquid from erupting.
Notes
- The ideal ratio of roasted apple to roasted pumpkin is 1:2 by weight, which provides balanced sweetness without overwhelming the savory elements.
- Always add maple syrup after blending rather than before roasting to preserve the caramelized vegetable flavors and give yourself better control over the final sweetness level.
- For an ultra-smooth restaurant-style texture, strain the blended soup through a fine-mesh strainer to remove any remaining fibrous bits.
- This soup freezes beautifully for up to 3 months. Freeze before adding the cream, then stir in fresh cream when reheating for the best texture.
Nutrition Facts
- Serving Size: 1 g
- Total number of serves: 6
- Calories: 210kcal
- Fat: 10g
- Carbohydrates: 28g
- Fiber: 4g
- Protein: 3g
Did you make this recipe?
Tag @therecipemasterblog on Instagram and hashtag it with #therecipemaster
Like this recipe?
Follow @therecipemasterblog on Pinterest
Follow us on Facebook!
Follow The Recipe Master on Facebook
The Roasting Technique That Makes This Soup Exceptional
After testing multiple approaches, I found that the roasting step is where most home cooks either nail this recipe or miss the mark entirely. Therefore, I’m sharing the specific techniques that separate a good soup from an outstanding one.
Roast at High Heat for Maximum Caramelization
I roast the pumpkin and apples at 425°F rather than the more common 375°F. The higher temperature creates more browning and caramelization in the same amount of time. You’ll see golden edges on the pumpkin chunks, which is exactly what you want. This browning is where the complex, sweet-savory flavor develops.
Don’t Crowd the Pan
In my testing, I found that overcrowding causes steaming instead of roasting. Leave at least half an inch between pieces. If you need to use two baking sheets, do it. The difference in flavor is dramatic.
Add Maple Syrup After Blending
Most recipes add sweetener before roasting, but I add it after blending. This preserves the caramelized vegetable flavors while giving you better control over the final sweetness level. Start with one tablespoon and taste before adding more. For more traditional pumpkin soup variations, you can adjust the apple ratio or skip it entirely.
Use Fresh Thyme During Roasting
I tuck fresh thyme sprigs directly among the vegetables before roasting. The heat releases the essential oils, which infuse into the vegetables as they cook. Remove the stems before blending. This technique comes from professional soup-making methods and makes a noticeable difference.
Common Mistakes When Making Roasted Apple Pumpkin Soup
I’ve made every mistake possible with this recipe, so you don’t have to. Here are the most common pitfalls and exactly how I fix them.
Using the Wrong Type of Apple
Tart apples like Granny Smith add too much acidity, while very sweet apples like Red Delicious turn mushy and bland. I recommend Honeycrisp or Gala apples, which hold their shape during roasting and provide balanced sweetness. The variety you choose directly affects the final flavor profile.
Blending While Too Hot
Hot liquid expands when blended, which can cause the lid to blow off and create a dangerous mess. I always let the soup cool for at least 10 minutes before blending. If using a countertop blender, fill it only halfway and hold a kitchen towel over the lid while blending.
Over-Thinning the Soup
It’s tempting to add all the broth at once, but I add it gradually after blending. Start with two cups, blend, then add more until you reach your desired consistency. You can always thin soup, but thickening it back up is much harder.
Skipping the Final Seasoning
Roasted vegetables need more salt than you think. I always taste and adjust seasoning after blending and again after adding cream. The cream dilutes the salt, so you’ll need to add more at the end. Don’t skip this step.
Ways to Customize Your Roasted Apple Pumpkin Soup
This recipe is wonderfully adaptable to different dietary needs and flavor preferences. I’ve tested these variations extensively, and each one delivers excellent results.
Vegan Roasted Apple Pumpkin Soup
Replace the heavy cream with full-fat coconut milk for a dairy-free version that’s just as creamy. I use the thick cream from the top of a chilled can, which gives you richness without the coconut flavor overpowering the soup. Alternatively, cashew cream works beautifully if you blend soaked cashews with water until silky smooth.
Spiced Version with Warming Aromatics
Add half a teaspoon of cinnamon, a quarter teaspoon of nutmeg, and a pinch of cayenne to the vegetables before roasting. This creates a more traditional fall spice profile. However, be careful not to overdo the spices, as they can overpower the delicate sweetness of the roasted vegetables.
Chunky Rustic Style
Instead of blending everything completely smooth, I sometimes blend only half the soup and leave the rest chunky. This gives you a rustic texture with visible pieces of roasted apple and pumpkin. It’s a nice change from the typical velvety soup and adds visual interest.
Curry-Spiced Variation
Add one tablespoon of curry powder and a teaspoon of fresh grated ginger to the onions when sautéing. This transforms the soup into something with an Indian-inspired flavor profile. Finish with a swirl of yogurt instead of cream for an authentic touch.
Nutrition Information for Roasted Apple Pumpkin Soup
This soup is relatively light despite its creamy texture. Each serving contains approximately 210 calories, with most coming from the natural sugars in the pumpkin and apples. The heavy cream adds about 50 calories per serving, but you can reduce this by using half-and-half or a plant-based alternative.
You’ll get about 3 grams of protein per serving, 28 grams of carbohydrates, and 10 grams of fat. The soup is also rich in vitamin A from the pumpkin, providing over 200% of your daily value in a single bowl. It’s also a good source of fiber, with about 4 grams per serving, which helps with digestion and keeps you feeling satisfied.
Perfect Pairings for Your Soup
I love serving this soup as a starter for fall dinner parties, paired with warm sourdough bread or homemade dinner rolls. The bread is perfect for soaking up every last drop. For a complete meal, I add a simple arugula salad with toasted pecans and a light vinaigrette, which cuts through the richness of the soup beautifully.
For a more substantial presentation, top each bowl with crispy bacon bits, toasted pumpkin seeds, and a drizzle of good olive oil. A dollop of crème fraîche or sour cream adds tangy contrast, and a few fresh thyme leaves make it look restaurant-worthy. If you’re serving this for Thanksgiving, it works wonderfully as a first course before the turkey, giving guests something warm and comforting while the main dishes are being carved.
Storing and Reheating Your Soup
This soup stores exceptionally well, which makes it perfect for meal prep. I transfer cooled soup to airtight containers and refrigerate for up to five days. The flavors actually deepen and improve after a day or two in the fridge, so don’t hesitate to make it ahead.
For longer storage, freeze the soup in portions for up to three months. I recommend freezing it before adding the cream, then stirring in fresh cream when reheating. This prevents the cream from separating or developing an off texture. To reheat, thaw overnight in the refrigerator, then warm gently on the stovetop over medium-low heat, stirring occasionally. Add a splash of broth if the soup has thickened too much during storage.
Frequently Asked Questions
Yes, you can use canned pumpkin, but you’ll miss the caramelized flavor from roasting. If using canned, use 3 cups of pumpkin puree and roast only the apples and onions, then proceed with sautéing and simmering as directed.
Honeycrisp or Gala apples work best because they hold their shape during roasting and provide balanced sweetness without becoming mushy. Avoid Granny Smith apples as they add too much tartness, and skip Red Delicious as they turn bland and mealy when cooked.
Absolutely. Replace the heavy cream with full-fat coconut milk or cashew cream for an equally creamy texture. Use the thick cream from the top of a chilled coconut milk can for the richest result without overwhelming coconut flavor.
Start with just 1 tablespoon of maple syrup and taste before adding more. The roasted vegetables already contain natural sugars, so you may not need additional sweetener. Balance sweetness with salt and a squeeze of fresh lemon juice at the end if needed.





Leave a Reply