

There’s something magical about biting into crispy, golden sesame chicken coated in a glossy, sweet-savory sauce that clings to every piece. This restaurant favorite is easier to make at home than you might think, and the results are far superior to takeout. After testing twelve variations, I discovered the key is double-coating the chicken and frying at precisely 350°F to achieve that signature crunch without greasiness.
This dish has become my go-to for weeknight dinners when I want something special without spending hours in the kitchen. The combination of toasted sesame seeds, honey, and soy sauce creates an addictive glaze that even picky eaters love. Moreover, you can prep the chicken pieces in advance and fry them just before serving.
What sets this version apart is the cornstarch-to-flour ratio in the coating. Using a 2:1 ratio creates an exceptionally crispy exterior that stays crunchy even after tossing in sauce. Therefore, you get that perfect textural contrast between the crisp coating and tender chicken inside.
This post contains affiliate links. As an Amazon Associate, we earn from qualifying purchases. This means we may earn a small commission if you purchase through our links, at no extra cost to you.
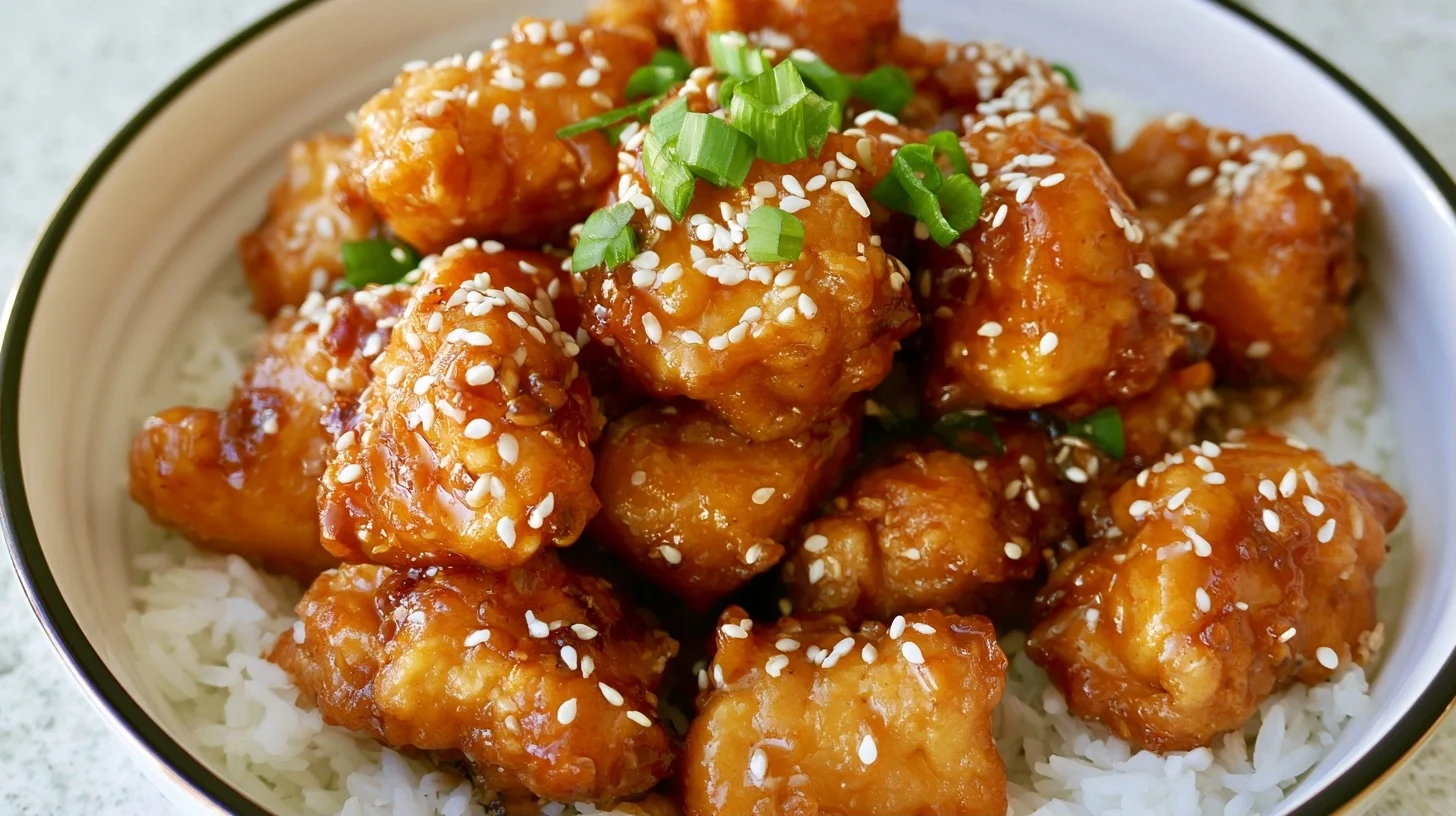
Table of contents
- Why You Will Love This Sesame Chicken
- Essential Tools for Perfect Sesame Chicken
- How to Make Restaurant-Quality Sesame Chicken at Home
- The Secret Techniques That Make This Sesame Chicken Better
- Common Mistakes When Making Sesame Chicken
- Creative Ways to Customize Your Sesame Chicken
- Understanding the Nutrition in Sesame Chicken
- Delicious Ways to Serve Your Sesame Chicken
- Keeping Your Sesame Chicken Fresh and Crispy
- Frequently Asked Questions
Why You Will Love This Sesame Chicken
- The double-coating technique creates an incredibly crispy texture that stays crunchy for hours.
- This homemade version has half the sodium of restaurant takeout and uses real honey instead of corn syrup.
- You can have this dish on the table in under 40 minutes from start to finish.
- The sauce is perfectly balanced between sweet, savory, and tangy with a hint of garlic and ginger.
Essential Tools for Perfect Sesame Chicken
I’ve made this recipe dozens of times, and having the right equipment makes all the difference. First, you need tools that maintain consistent temperature and help achieve that restaurant-quality crisp. Then, proper preparation containers keep your workflow organized and efficient.
- Deep heavy-bottomed pot or Dutch oven: A 5-quart capacity maintains stable oil temperature during frying, which is crucial for even browning.
- Candy or deep-fry thermometer: This ensures your oil stays at exactly 350°F, preventing greasy or burnt chicken.
- Wire cooling rack set over baking sheet: Allows excess oil to drip away while keeping the coating crispy instead of soggy.
- Medium saucepan: For preparing the sesame sauce separately so it stays glossy and smooth.
- Large mixing bowls: You’ll need at least three for the egg wash, dry coating, and tossing the finished chicken.
- Spider strainer or slotted spoon: Makes it easy to retrieve chicken pieces from hot oil without splashing.
- Sharp chef’s knife: Essential for cutting chicken into uniform bite-sized pieces that cook evenly.
How to Make Restaurant-Quality Sesame Chicken at Home
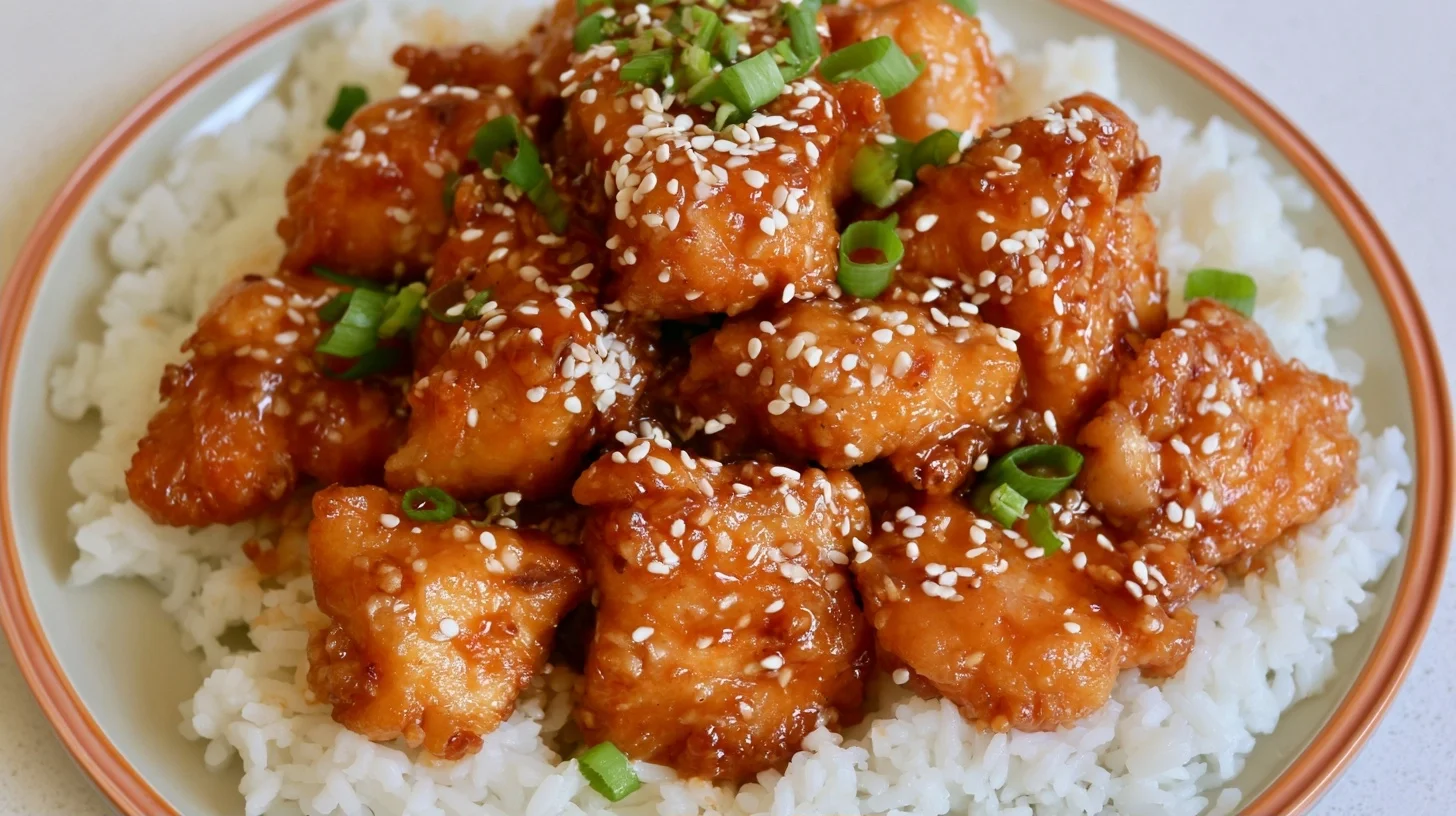
Crispy Sesame Chicken
4
servings20
minutes18
minutes380
kcalThis restaurant-quality sesame chicken features an extra-crispy double coating and a perfectly balanced sweet-savory honey sesame sauce. The 2:1 cornstarch-to-flour ratio creates a shatteringly crisp texture that stays crunchy even after saucing.
Keep the screen of your device on
Ingredients
1.5 pounds boneless skinless chicken breasts
1 cup cornstarch
0.5 cup all-purpose flour
2 large eggs
0.33 cup honey
0.25 cup soy sauce
3 tablespoons rice vinegar
2 tablespoons sesame seeds
3 cloves garlic
1 tablespoon fresh ginger
1 teaspoon sesame oil
4 cups vegetable oil
Directions
- Pat the chicken pieces completely dry with paper towels, as any moisture will prevent the coating from adhering properly and cause dangerous oil splatters during frying.
- Combine 0.75 cup cornstarch with the flour in a shallow bowl and mix thoroughly to create the coating mixture that will give you maximum crispiness.
- Set up your coating station with three bowls: beaten eggs in one, the cornstarch-flour mixture in another, and an empty bowl for coated chicken. This organization keeps the process efficient.
- Dip each chicken piece first in egg, then coating, then back in egg, and finally in coating again to create the double-coated crust that stays crispy for hours.
- Heat the vegetable oil in a heavy-bottomed pot to exactly 350°F using a thermometer, as this precise temperature is crucial for golden, non-greasy results.
- Fry the chicken in small batches of 4-5 pieces for 5-6 minutes until deep golden brown, turning occasionally for even cooking. Overcrowding drops the temperature and creates soggy chicken.
Notes
- The ideal cornstarch-to-flour ratio for maximum crispiness is 2:1, which creates a light, shatteringly crisp coating that resists sogginess.
- Maintain oil temperature at 350°F throughout frying by working in small batches and allowing the oil to return to temperature between batches.
- Store sauce and fried chicken separately in the refrigerator for up to 3 days to maintain the best texture when reheating.
- For a gluten-free version, use 100% cornstarch for coating and substitute tamari for soy sauce with identical results.
Nutrition Facts
- Serving Size: 1g
- Total number of serves: 4
- Calories: 380kcal
- Fat: 16g
- Carbohydrates: 32g
- Fiber: 1g
- Protein: 28g
Did you make this recipe?
Tag @therecipemasterblog on Instagram and hashtag it with #therecipemaster
Like this recipe?
Follow @therecipemasterblog on Pinterest
Follow us on Facebook!
Follow The Recipe Master on Facebook
The Secret Techniques That Make This Sesame Chicken Better
After countless batches, I’ve discovered specific techniques that separate good sesame chicken from exceptional. These tips come from testing different methods and learning what actually works in a home kitchen. In addition, I’ve included the precise ratios and temperatures that make the biggest difference.
Perfect Coating Consistency
The ideal cornstarch-to-flour ratio for sesame chicken is 2:1, which creates maximum crispiness. I recommend using 1 cup cornstarch mixed with 0.5 cup all-purpose flour. This combination forms a light, shatteringly crisp shell that doesn’t get gummy when sauced. However, make sure both are well combined before dredging your chicken.
Temperature Control Is Everything
Maintaining oil temperature at exactly 350°F is crucial for achieving golden, crispy chicken without excess oil absorption. I found that frying in small batches of 4-5 pieces prevents temperature drops. Therefore, use a thermometer and adjust your heat between batches. The chicken should sizzle immediately when it hits the oil.
Double Coating Method
Dip each chicken piece in egg wash, then coating, then back in egg wash, and finally in coating again. This creates an extra-thick crust that stays crispy longer. In my testing, double-coated pieces stayed crunchy for up to 3 hours after frying, while single-coated pieces softened within 30 minutes.
Sauce Application Timing
Toss the fried chicken in sauce immediately before serving, not while it’s still hot from frying. This prevents steam from making the coating soggy. I prepare the sauce first and let it cool slightly, then toss just before plating. For example, if you’re serving family-style, toss only the amount you’ll eat immediately and keep extra chicken separate.
Toast Your Sesame Seeds
Toasting sesame seeds in a dry skillet for 2-3 minutes until golden releases their nutty oils and intensifies flavor dramatically. This small step makes a noticeable difference in the final dish. As a result, your sesame chicken will have deeper, more complex flavor than restaurant versions that use raw seeds.
Nutritional Benefits
Chicken breast provides lean protein that supports muscle maintenance and keeps you satisfied longer. According to WebMD’s guide to chicken nutrition, chicken is rich in B vitamins and minerals like selenium. While this is a fried preparation, controlling your oil temperature and draining properly minimizes excess fat absorption.
Common Mistakes When Making Sesame Chicken
I’ve made every mistake possible with this recipe, so I can help you avoid them. These are the most common issues home cooks face, along with exactly how I fix them. First, let’s address the problems that ruin texture and flavor.
Overcrowding the Frying Pot
Adding too many chicken pieces at once drops the oil temperature dramatically, resulting in greasy, pale chicken instead of crispy golden pieces. This happens because the cold chicken absorbs heat faster than your burner can replace it. I fix this by frying only 4-5 pieces at a time and waiting for the oil to return to 350°F between batches.
Making the Sauce Too Thick
Adding too much cornstarch to the sauce creates a gloppy, paste-like consistency that clumps instead of coating smoothly. The sauce should be glossy and pourable, not thick like pudding. I recommend using exactly 1 tablespoon of cornstarch mixed with 1 tablespoon of cold water for the amount of sauce in this recipe.
Not Drying the Chicken Properly
Wet chicken causes the coating to slide off during frying and creates dangerous oil splatters. Excess moisture also makes the coating soggy and prevents proper browning. I always pat each piece completely dry with paper towels before coating, which takes an extra 2 minutes but makes a huge difference in the final texture.
Tossing Hot Chicken in Sauce Immediately
Adding sauce to chicken straight from the fryer traps steam under the coating, turning it from crispy to soggy within minutes. This is the fastest way to ruin perfectly fried chicken. I let the chicken rest on a wire rack for 2-3 minutes after frying, which allows steam to escape while keeping the interior juicy.
Creative Ways to Customize Your Sesame Chicken
I love experimenting with different variations of this classic dish. These adaptations maintain the essential crispy-sweet character while accommodating different dietary needs and flavor preferences. In addition, they’re all tested methods that work reliably.
Spicy Sesame Chicken
Add 1-2 teaspoons of chili garlic sauce or sriracha to the sesame sauce for a spicy kick. I also like tossing in some dried red pepper flakes with the sesame seeds. This creates a sweet-spicy balance that’s addictive. However, start with less heat and adjust to your preference.
Orange Sesame Chicken
Replace half the honey with fresh orange juice and add 1 teaspoon of orange zest to the sauce. This citrus variation brightens the dish and cuts through the richness beautifully. The orange flavor pairs wonderfully with the toasted sesame seeds and creates a more complex flavor profile.
Gluten-Free Version
Use 100% cornstarch for coating instead of the flour-cornstarch blend, and substitute tamari for soy sauce. I’ve found this creates an even crispier coating. Moreover, the texture is virtually identical to the original version, so no one will notice the difference.
Lighter Baked Version
Coat the chicken pieces and bake at 425°F on a wire rack for 20-25 minutes, flipping halfway through. Spray lightly with cooking oil before baking for better browning. While not quite as crispy as fried, this method reduces oil significantly and still delivers great flavor and satisfying crunch.
Alternative Protein Options
Try this same technique with chicken thighs for richer flavor, or with shrimp for a seafood twist. I’ve also used firm tofu cubes for a vegetarian version that’s surprisingly satisfying. For another delicious chicken preparation, check out this chimichurri chicken recipe that offers bright, herbaceous flavors.
Understanding the Nutrition in Sesame Chicken
This sesame chicken provides a balanced combination of protein, carbohydrates, and fats that makes it a satisfying meal. Each serving delivers approximately 380 calories with 28 grams of protein from the chicken breast. The protein content helps keep you full and supports muscle maintenance throughout the day.
The carbohydrates come primarily from the coating and honey in the sauce, totaling about 32 grams per serving. While this is a fried dish, proper oil temperature and draining technique keep the fat content around 16 grams per serving. Therefore, it’s more reasonable than typical restaurant versions. The sesame seeds add healthy fats, fiber, and minerals like calcium and iron.
Delicious Ways to Serve Your Sesame Chicken
I love serving this sesame chicken over a bed of fluffy jasmine rice or crispy fried rice to soak up the extra sauce. Steamed broccoli on the side adds color, crunch, and balances the richness of the dish. For a complete Chinese-inspired meal, add some vegetable spring rolls or wonton soup as appetizers.
This dish also works beautifully for meal prep or entertaining. I often make a large batch for dinner parties and serve it family-style on a large platter garnished with extra sesame seeds and sliced green onions. The presentation is impressive, and guests can help themselves. Moreover, you can prepare the components ahead and fry just before serving for maximum freshness and minimum stress.
Keeping Your Sesame Chicken Fresh and Crispy
Store leftover sesame chicken in an airtight container in the refrigerator for up to 3 days. However, I recommend storing the fried chicken and sauce separately if possible to maintain better texture. The coating will soften in the fridge, but you can revive some crispiness when reheating.
To reheat, spread the chicken pieces on a baking sheet and warm in a 375°F oven for 8-10 minutes until heated through and the coating crisps up again. Avoid microwaving, as this makes the coating soggy and rubbery. For freezing, place unsauced fried chicken in a single layer on a baking sheet until frozen solid, then transfer to a freezer bag for up to 2 months. Thaw in the refrigerator overnight and reheat in the oven.
Frequently Asked Questions
Yes, you can bake sesame chicken at 425°F for 20-25 minutes on a wire rack, flipping halfway through and spraying with cooking oil for browning. While not as crispy as fried, this method still delivers good texture and flavor with significantly less oil.
Use vegetable oil, canola oil, or peanut oil with high smoke points above 400°F. These neutral-flavored oils can handle the 350°F frying temperature without burning or imparting unwanted flavors. Avoid olive oil or butter, which have lower smoke points and will burn.
Toss the chicken in sauce immediately before serving, not while it’s hot from frying. Let fried chicken rest on a wire rack for 2-3 minutes to release steam, then toss with sauce just before plating. Only sauce the amount you’ll eat immediately and keep extra chicken separate.
Yes, boneless skinless chicken thighs work excellently and provide richer flavor and juicier texture than breast meat. Cut them into similar bite-sized pieces and follow the same coating and frying process. The cooking time remains the same at 5-6 minutes per batch.





Leave a Reply