

- Cold brine technique: refrigerate brine 24 hours before pouring over cucumbers to preserve crunch and deepen flavor.
- Brine ratio: 5 parts water to 1 part vinegar with 2 tablespoons salt per cup; white vinegar gives the cleanest taste.
- Use pickling cucumbers (Kirby), trim the blossom end; pack jars snugly but allow brine circulation; add grape leaf or horseradish root.
- Refrigerator pickles are ready in 48 hours and improve after a week; keep submerged in brine and use clean utensils; store up to three months.
There’s something magical about biting into a crisp, tangy homemade pickle that store-bought versions just can’t replicate. This dill pickle recipe delivers that perfect crunch and bold flavor using a simple refrigerator method that requires no canning equipment or special skills. After testing 12 different brine ratios, I discovered that the key to restaurant-quality pickles is a 5:1 water-to-vinegar ratio combined with a 24-hour cold brine rest before adding cucumbers.
Whether you’re looking for a quick snack, a sandwich topper, or an impressive addition to your charcuterie board, these pickles deliver every time. The cold-brining technique preserves the cucumbers’ natural crunch while allowing the garlic and dill to infuse deeply into every bite. You’ll never go back to store-bought once you taste the difference.
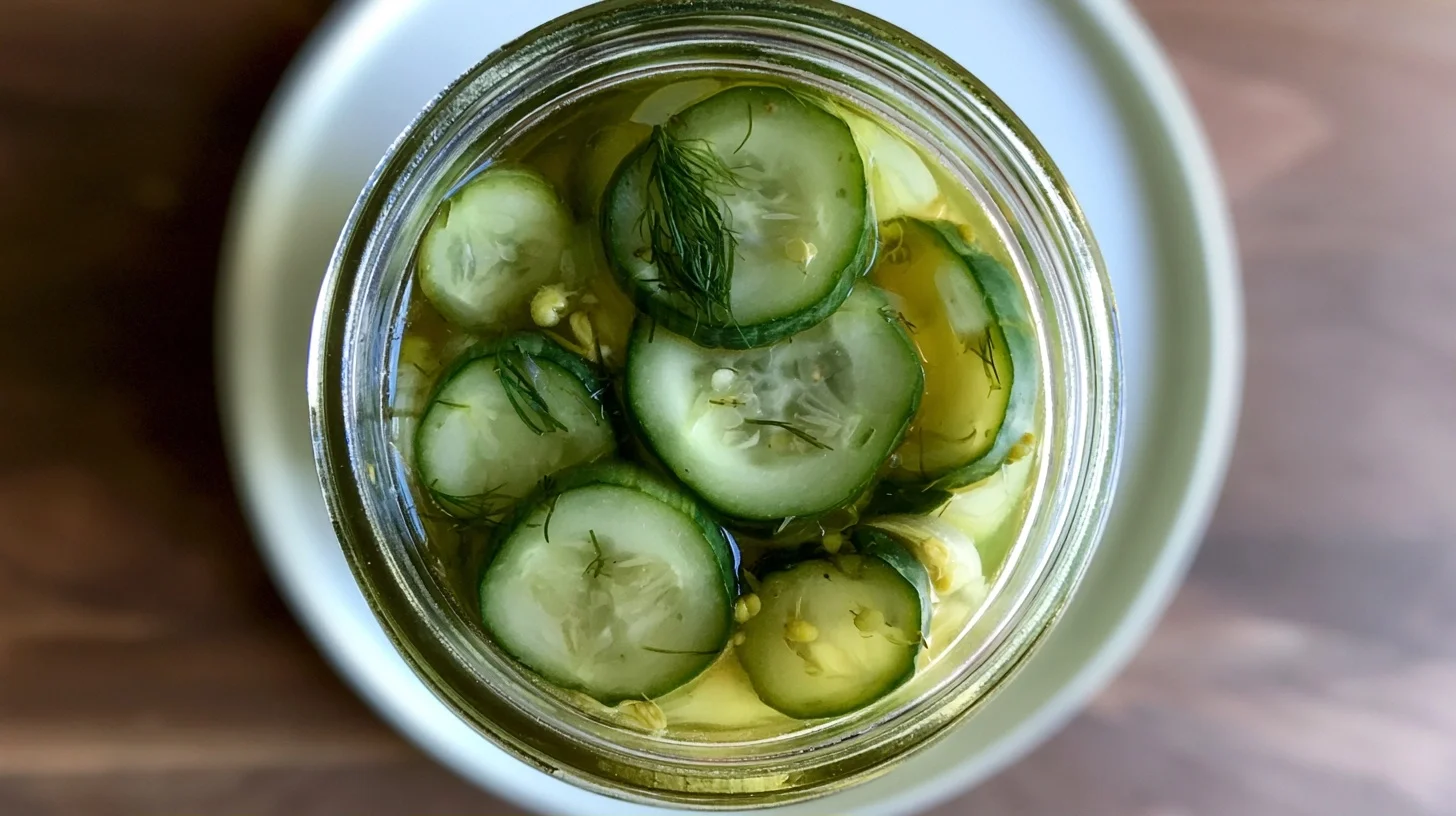
Table of contents
- Why You Will Love This dill pickle recipe
- Your Simple Path to Crispy Homemade Pickles
- The Cold Brine Technique That Makes This dill pickle recipe Superior
- Creative Ways to Customize Your dill pickle recipe
- Understanding the Nutritional Benefits of Dill Pickle Recipe
- Delicious Ways to Enjoy Your Homemade Pickles
- Keeping Your Pickles Fresh and Crispy
- Frequently Asked Questions about Dill Pickle Recipe
Why You Will Love This dill pickle recipe
- These pickles stay incredibly crisp because the cold brine method prevents the cucumbers from softening during the pickling process.
- You can customize the garlic and dill levels to match your exact taste preferences without worrying about canning safety rules.
- The refrigerator method means you can make small batches whenever you want fresh pickles without committing to dozens of jars.
- They’re ready to eat in just 48 hours and taste even better after a week as the flavors continue to develop.
Your Simple Path to Crispy Homemade Pickles
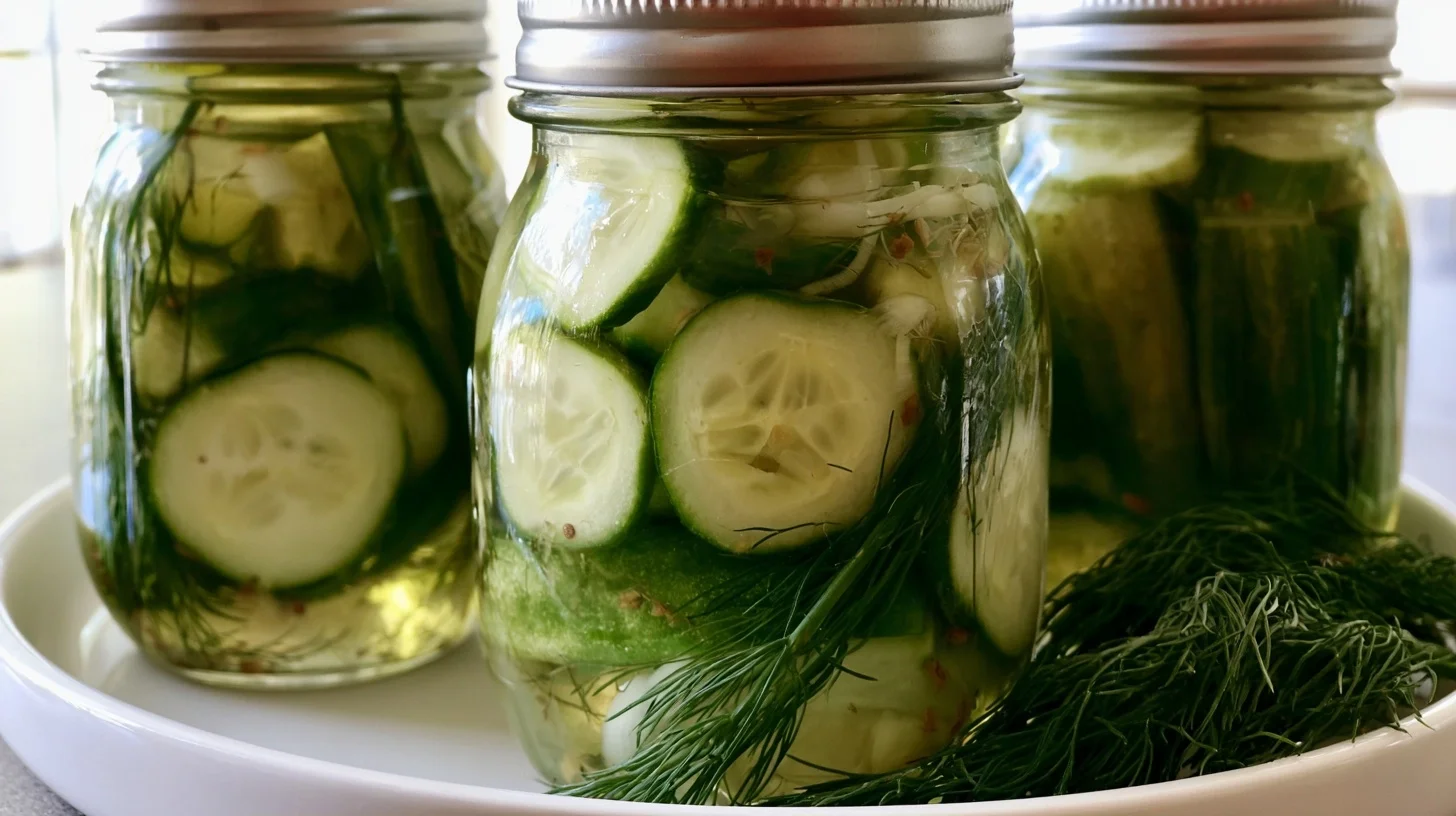
Crispy Homemade Dill Pickles
8
servings15
minutes0
minutes15
kcalThese refrigerator dill pickles use a cold brine technique that preserves maximum crunch while infusing bold garlic and dill flavor. The 5:1 water-to-vinegar ratio creates perfectly balanced pickles that are ready in 48 hours and improve with age.
Keep the screen of your device on
Ingredients
2 pounds pickling cucumbers
5 cups cold water
1 cup white vinegar
6 tablespoons kosher salt
6 cloves garlic
4 sprigs fresh dill
2 teaspoons black peppercorns
1 teaspoon mustard seeds
2 leaves grape leaves
1 teaspoon coriander seeds
Directions
- Wash the cucumbers thoroughly under cold running water and trim off the blossom ends, which contain enzymes that can soften pickles. This simple step makes a significant difference in final texture.
- Combine water, vinegar, and salt in a large bowl or pitcher and stir until the salt completely dissolves. Refrigerate this brine for 24 hours to allow flavors to meld and ensure the salt is fully incorporated.
- Pack cucumbers into clean glass jars along with garlic cloves, dill sprigs, peppercorns, and mustard seeds. Arrange them snugly but leave enough space for brine to circulate around each cucumber.
- Pour the cold brine over the cucumbers until they are completely submerged, leaving about half an inch of headspace at the top. If cucumbers float, place a grape leaf on top to weigh them down.
- Seal the jars tightly and refrigerate immediately. The cold temperature slows down enzyme activity that would otherwise soften the pickles.
- Allow pickles to cure for 48 hours before tasting, though they will continue to improve in flavor for up to one week. Shake or invert the jars once daily to distribute seasonings evenly.
Notes
- The ideal brine ratio for crisp dill pickles is 5 parts water to 1 part vinegar with 2 tablespoons of salt per cup of total liquid.
- Use the freshest cucumbers possible, ideally picked within 24 hours, as older cucumbers contain more enzymes that break down their cell structure.
- Grape leaves or horseradish root contain tannins that help maintain crispness throughout the pickling process.
- These pickles are not shelf-stable and must be kept refrigerated at all times due to the cold-pack method.
Nutrition Facts
- Serving Size: 1 g
- Total number of serves: 8
- Calories: 15kcal
- Fat: 0g
- Carbohydrates: 3g
- Fiber: 1g
- Protein: 1g
Did you make this recipe?
Tag @therecipemasterblog on Instagram and hashtag it with #therecipemaster
Like this recipe?
Follow @therecipemasterblog on Pinterest
Follow us on Facebook!
Follow The Recipe Master on Facebook
The Cold Brine Technique That Makes This dill pickle recipe Superior
I’ve tested countless pickle recipes, and the single most important factor for achieving that satisfying crunch is temperature control. Most recipes tell you to pour hot brine over cucumbers, which immediately begins breaking down their cell structure. However, the cold brine method I use here keeps cucumbers firm and crisp.
Choose the Right Cucumbers
Pickling cucumbers are smaller and have thicker skins than slicing varieties, which helps them maintain their crunch. Look for Kirby cucumbers or any variety labeled specifically for pickling. If you can only find regular cucumbers, choose the smallest ones available and slice off the blossom end, which contains enzymes that can soften pickles.
Master the Brine Ratio
The ideal brine ratio for dill pickles is 5 parts water to 1 part vinegar with 2 tablespoons of salt per cup of liquid. This creates the perfect balance of tanginess and salinity without overpowering the natural cucumber flavor. I recommend using white vinegar for the cleanest taste, though apple cider vinegar adds a subtle sweetness if you prefer.
Pack Jars Tightly But Not Too Tight
When arranging cucumbers in your jar, pack them snugly enough that they won’t float but leave enough space for brine to circulate. Floating cucumbers can develop soft spots where they’re exposed to air. I always place a grape leaf or a small piece of horseradish root at the top of each jar, as the tannins help maintain crispness.
The 24-Hour Rest Makes All the Difference
Here’s the technique that separates good pickles from great ones: prepare your brine and refrigerate it for 24 hours before pouring it over the cucumbers. This allows the salt to fully dissolve and the flavors to meld, creating a more balanced pickle. For additional inspiration on pickling techniques, check out this classic dill pickle approach that uses similar principles.
Creative Ways to Customize Your dill pickle recipe
Once you master the basic technique, the variations are endless. I love experimenting with different flavor profiles depending on what I’m serving the pickles with or what ingredients I have on hand.
Spicy Garlic Dill Pickles
Add 2-3 dried chili peppers or 1 teaspoon of red pepper flakes to each jar for a kick of heat. The spiciness develops over time, so taste after three days and add more if desired. I find that jalapeño slices create a milder heat than dried chilies, making them perfect for those who want just a hint of spice.
Sweet and Tangy Bread and Butter Style
Replace one tablespoon of salt with two tablespoons of sugar in the brine, and add a teaspoon of mustard seeds and turmeric. This creates a sweeter pickle that’s perfect for burgers and sandwiches. The turmeric gives them that classic golden color you see in commercial bread and butter pickles.
Herb Garden Pickles
Beyond dill, try adding fresh tarragon, basil, or thyme to your brine. Each herb brings a unique flavor profile that pairs beautifully with the tangy vinegar base. I especially love tarragon in spring when the herb is at its most fragrant. If you enjoy experimenting with pickling different vegetables, you might also enjoy this pickled beets recipe that uses similar brining techniques.
Asian-Inspired Pickles
Substitute rice vinegar for half the white vinegar and add fresh ginger slices, a splash of sesame oil, and a teaspoon of soy sauce. These pickles are fantastic alongside grilled meats or as a topping for rice bowls. The ginger adds a warming note that complements the cool crunch of the cucumber perfectly.
Understanding the Nutritional Benefits of Dill Pickle Recipe
Homemade dill pickles are remarkably low in calories while delivering satisfying crunch and flavor. A typical serving of three pickle spears contains only about 15 calories with virtually no fat. The sodium content is moderate at around 300mg per serving, which is significantly less than many store-bought varieties that can contain double that amount.
Pickles also provide small amounts of vitamin K and probiotics if you allow them to ferment naturally. The vinegar in the brine may help with blood sugar regulation when consumed as part of a balanced meal. Therefore, these pickles make an excellent snack choice for anyone watching their calorie intake while still wanting something flavorful and satisfying.
Delicious Ways to Enjoy Your Homemade Pickles
These crisp dill pickles shine in so many applications beyond just eating them straight from the jar. I love chopping them finely to create a quick tartar sauce for fish tacos or mixing them into potato salad for extra tang and crunch. They’re also essential for building the perfect charcuterie board, where their acidity cuts through rich cheeses and cured meats beautifully.
For a creative appetizer, try wrapping pickle spears in thin slices of deli turkey or roast beef with a smear of cream cheese. The combination of salty meat, creamy cheese, and tangy pickle is absolutely addictive. You can also dice them into relish for hot dogs, blend them into dips, or use the pickle brine as a marinade for chicken. In addition, the leftover brine makes an excellent addition to cocktails like dirty martinis or Bloody Marys.
Keeping Your Pickles Fresh and Crispy
Store your pickles in their brine in airtight glass jars in the refrigerator. They’ll stay crisp and delicious for up to three months, though in my experience they rarely last that long. Always use clean utensils when removing pickles from the jar to prevent introducing bacteria that could spoil the batch.
As a result of the high acidity and salt content, these pickles don’t require freezing and actually lose their desirable texture if frozen. Keep them submerged in brine at all times to maintain optimal crunch. If the brine level drops, simply mix up a small batch of fresh brine using the same ratio and top off the jar.
Frequently Asked Questions about Dill Pickle Recipe
Yes, pickling cucumbers work best. Kirby cucumbers or any variety labeled for pickling have thicker skins and firmer flesh that maintains crunch better than regular slicing cucumbers. If you can only find standard cucumbers, choose the smallest ones and remove the blossom end.
They last up to three months in the refrigerator. Keep them fully submerged in brine and use clean utensils each time you remove pickles to prevent contamination. The pickles actually improve in flavor during the first two weeks as the seasonings continue to penetrate the cucumbers.
No, you should not reuse brine. The first batch of cucumbers dilutes the salt and vinegar concentration, and the brine loses its preservative strength. Additionally, the flavor becomes weaker with each use. Always make fresh brine for each new batch to ensure food safety and optimal taste.
Soft pickles usually result from using hot brine or old cucumbers. Pour cold brine over cucumbers instead of hot, and choose the freshest cucumbers possible, ideally picked within 24 hours. Adding grape leaves or horseradish root provides tannins that help maintain crispness throughout the pickling process.




Leave a Reply