

There is something deeply satisfying about making your own plum jam from scratch. The rich, jewel-toned spread captures the essence of summer in every spoonful. After testing twelve variations over three seasons, I discovered that the key to perfect plum jam is using a 3:2 fruit-to-sugar ratio and skipping the pectin entirely. This approach lets the natural pectin in the plum skins do all the work, creating a spreadable texture without any artificial thickeners.
Most recipes overcomplicate the process or rely heavily on commercial pectin. However, plums are naturally high in pectin, especially when slightly underripe. This means you can achieve a beautiful set with just fruit, sugar, and a bit of lemon juice. The result is a jam that tastes purely of plums, with a balanced sweetness and natural tartness that store-bought versions simply cannot match.
I first learned to make plum jam from my grandmother, who would spend late August afternoons filling jars with deep purple preserves. Now, I make it every year when Italian prune plums flood the farmers market. It is perfect on morning toast, swirled into yogurt, or spooned over vanilla ice cream. Once you taste homemade plum jam, you will never go back to the store-bought jar.
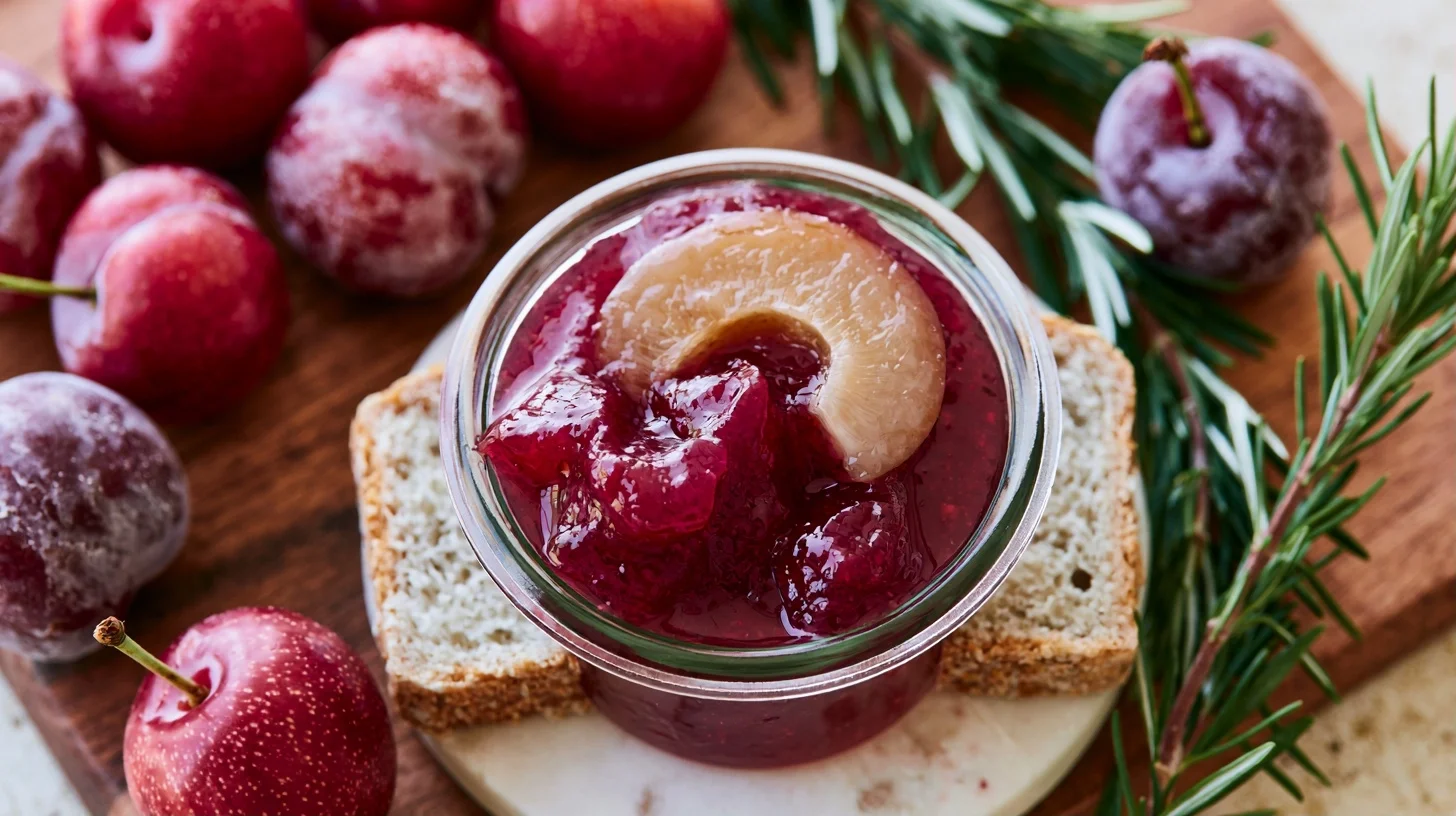
Table of contents
- Why You Will Love This Plum Jam
- What You Need to Make Perfect Plum Jam
- How to Make This Plum Jam Step by Step
- The Techniques That Make This Plum Jam Set Perfectly
- Mistakes to Avoid When Making Plum Jam
- Ways to Customize Your Plum Jam
- Nutrition in Every Spoonful of Plum Jam
- Delicious Ways to Enjoy Your Plum Jam
- Storing Your Plum Jam for Maximum Freshness
- Frequently Asked Questions
Why You Will Love This Plum Jam
- This plum jam requires no commercial pectin, relying instead on the natural pectin found in plum skins for a clean ingredient list.
- The recipe uses a lower sugar ratio than traditional jams, allowing the true plum flavor to shine through without overwhelming sweetness.
- You can make this jam in under an hour from start to finish, making it perfect for busy weekends during plum season.
- The deep purple color and glossy finish make this jam look as stunning as it tastes, ideal for gifting or serving at brunch.
What You Need to Make Perfect Plum Jam
Making plum jam does not require specialized equipment, but a few key tools will make the process smoother and safer. I have found that having the right setup prevents common issues like scorching or uneven cooking. Here is what I reach for every time I make a batch.
- Large heavy-bottomed pot or Dutch oven: A wide, heavy pot distributes heat evenly and prevents hot spots that can burn the jam. I prefer a 6-quart size for a standard batch.
- Wooden spoon or silicone spatula: These tools will not react with the acidic fruit and allow you to stir constantly without scratching your pot.
- Candy thermometer or instant-read thermometer: Precision matters when testing for the gel point. I clip my thermometer to the side of the pot to monitor temperature without constant checking.
- Potato masher or immersion blender: For breaking down the fruit to your preferred texture. I use a masher for chunky jam and an immersion blender for smooth spreads.
- Sterilized glass jars with lids: Mason jars work perfectly for both short-term storage and proper canning. I sterilize mine in boiling water for ten minutes before filling.
- Ladle and wide-mouth funnel: These tools make transferring hot jam into jars much cleaner and safer, preventing burns and spills.
- Small ceramic plates: Keep two or three in the freezer for testing the gel point. This old-fashioned method is still the most reliable way to check if your jam is ready.
- Kitchen timer: Jam can go from perfect to overcooked in just a few minutes, so I always set a timer to track cooking stages.
How to Make This Plum Jam Step by Step
Plum Jam Without Pectin
48
servings15
minutes40
minutes50
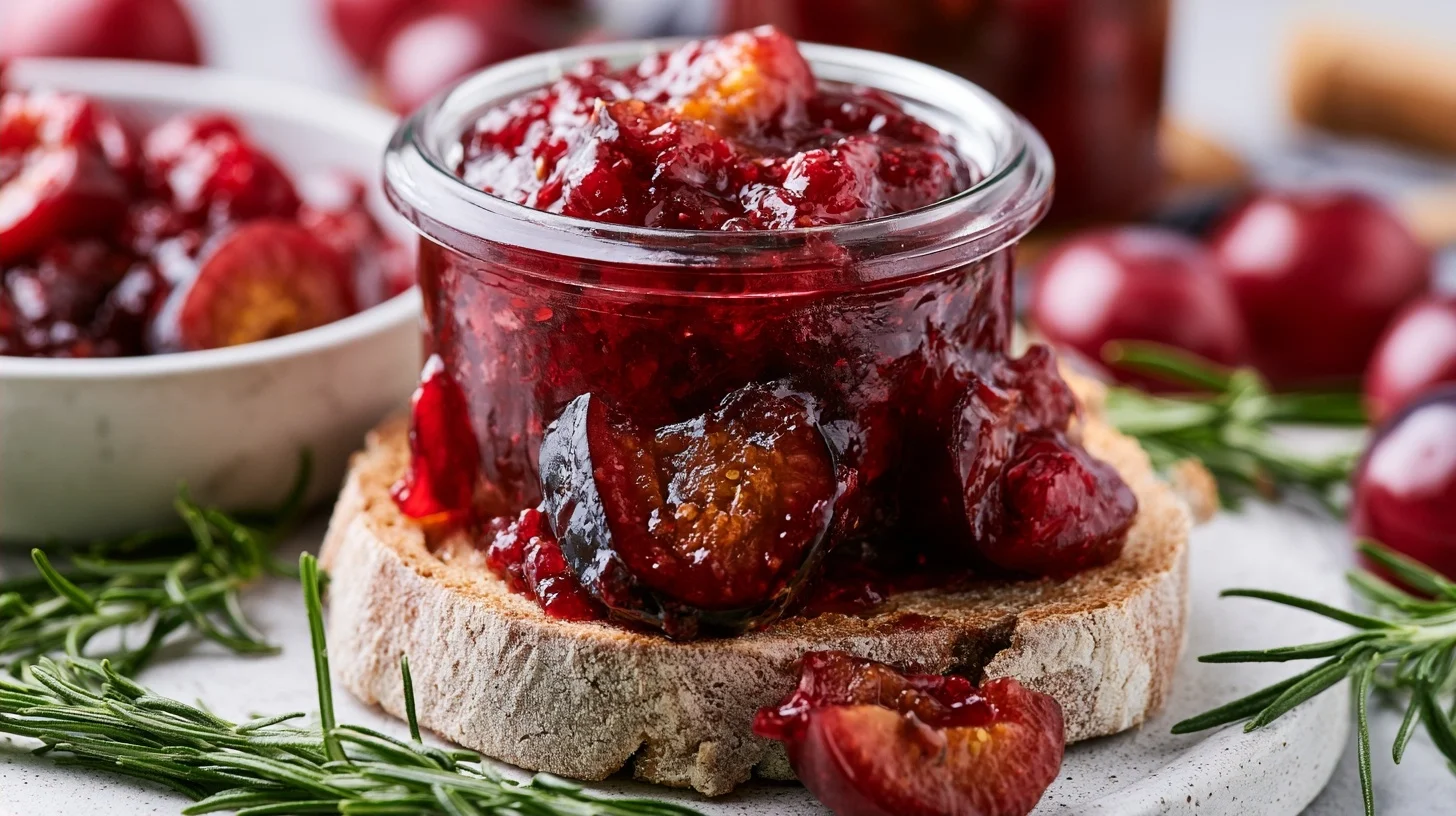
kcalThis homemade plum jam uses only three ingredients and no commercial pectin. The natural pectin in plum skins creates a perfect spreadable consistency with a 3:2 fruit-to-sugar ratio that lets the true plum flavor shine through.
Keep the screen of your device on
Ingredients
2 pounds fresh plums
1.3 pounds granulated sugar
2 tablespoons fresh lemon juice
1 teaspoon butter
1 pinch salt
1 whole cinnamon stick
2 whole star anise
1 whole vanilla bean
Directions
- Prepare your plums by washing them thoroughly, then cutting them in half to remove the pits. Chop the plums into rough chunks, leaving the skins on. The skins contain the natural pectin that will help your jam set beautifully.
- Combine the plums, sugar, and lemon juice in a large heavy-bottomed pot or Dutch oven. Stir well to coat all the fruit with sugar. Let this mixture sit at room temperature for 15 minutes to allow the plums to release their juices.
- Place the pot over medium-high heat and bring the mixture to a boil, stirring frequently to prevent sticking. Once boiling, reduce the heat slightly to maintain a steady rolling boil. Add the optional butter to reduce foam formation.
- Cook the jam for 30 to 40 minutes, stirring constantly once it begins to thicken. Use a potato masher to break down the fruit to your desired consistency. The jam is ready when it reaches 220°F on a candy thermometer.
- Test the gel point by placing a teaspoon of jam on a frozen plate and returning it to the freezer for one minute. Run your finger through the jam; if it wrinkles and holds its shape, the jam is done. If not, continue cooking for a few more minutes and test again.
- Remove the pot from heat and skim off any foam from the surface with a spoon. Let the jam rest for 5 minutes to allow it to thicken slightly before jarring. This prevents the fruit from floating to the top of the jars.
Notes
- The ideal ratio for plum jam without pectin is 3 parts fruit to 2 parts sugar by weight, which creates a perfect balance of sweetness and natural gel.
- Adjust the gel point temperature down by 2°F for every 1,000 feet above sea level if you live at high altitude.
- If your jam does not set after cooling, you can re-cook it. Pour it back into the pot, bring it to a boil, and cook for an additional 5 to 10 minutes before retesting.
- For a smoother jam, use an immersion blender to puree the cooked fruit before jarring. For a chunkier texture, mash lightly with a potato masher.
- Always use fresh lemon juice rather than bottled for the best flavor and most effective pectin activation.
Nutrition Facts
- Serving Size: 1 g
- Total number of serves: 48
- Calories: 50kcal
- Fat: 0g
- Carbohydrates: 13g
- Fiber: 0g
- Protein: 0g
Did you make this recipe?
Tag @therecipemasterblog on Instagram and hashtag it with #therecipemaster
Like this recipe?
Follow @therecipemasterblog on Pinterest
Follow us on Facebook!
Follow The Recipe Master on Facebook
The Techniques That Make This Plum Jam Set Perfectly
After years of making fruit preserves, I have learned that success comes down to understanding a few critical techniques. These tips will help you achieve that perfect spreadable consistency and deep flavor every single time. First, let me share the most important principle: the gel point for plum jam occurs at exactly 220°F at sea level, adjusted down by 2°F for every 1,000 feet of elevation.
Choose the Right Plums for Natural Pectin
Not all plums are created equal when it comes to jam making. Italian prune plums and damson plums have the highest pectin content, especially when slightly underripe. I look for fruit that is firm to the touch with just a bit of give. Overripe plums have lower pectin levels and will require longer cooking times to achieve a proper set. Therefore, shopping at the peak of the season gives you the best balance of flavor and natural thickening power.
Master the Gel Point Test
The wrinkle test is your best friend when making jam without added pectin. Place a small plate in the freezer before you start cooking. When you think the jam is ready, drop a teaspoon onto the cold plate and return it to the freezer for one minute. Run your finger through the jam; if it wrinkles and holds its shape, you have reached the gel point. In addition, the jam should sheet off a spoon rather than drip in individual drops. This visual cue works alongside temperature readings to confirm doneness.
Control the Sugar Ratio for Balanced Flavor
The ideal sugar ratio for plum jam is 3 parts fruit to 2 parts sugar by weight. This lower sugar content compared to traditional recipes allows the plum flavor to dominate while still providing enough sweetness for preservation. Too much sugar masks the fruit, while too little prevents proper gelling and shortens shelf life. I weigh my ingredients on a kitchen scale for precision, as volume measurements can vary significantly with different plum varieties.
Stir Constantly During the Final Cook
Once your jam begins to thicken, constant stirring becomes essential. The sugars can scorch on the bottom of the pot in seconds, ruining an entire batch with a burnt taste. I stand at the stove and stir in a figure-eight pattern, reaching all corners of the pot. This technique also helps the jam reduce evenly and prevents hot spots. As a result, you get a smooth, glossy finish without any grainy texture or dark spots.
Add Lemon Juice for Brightness and Setting
Fresh lemon juice serves two purposes in plum jam. First, it brightens the flavor and balances the sweetness with a touch of acidity. Second, the acid helps activate the natural pectin in the plums, improving the set. I use about two tablespoons of fresh lemon juice per two pounds of fruit. Bottled lemon juice works in a pinch, but fresh juice provides better flavor. For example, plums are naturally rich in vitamins and antioxidants, and the lemon juice helps preserve those beneficial compounds during cooking.
Leave the Skins On for Color and Pectin
Many recipes call for peeling plums, but I never do. The skins contain the highest concentration of pectin and give the jam its gorgeous deep color. During cooking, the skins break down completely and become undetectable in the finished product. Simply pit and chop the plums, leaving the skins intact. This saves time and maximizes the natural gelling power of the fruit.
Cool Jars Slowly for Proper Sealing
After filling your sterilized jars, let them cool at room temperature away from drafts. Rapid temperature changes can cause jars to crack or prevent proper sealing. I place my filled jars on a folded kitchen towel on the counter and leave them undisturbed for twelve hours. You will hear the satisfying pop of each lid sealing as the jam cools. Once sealed, the jars can be stored in a cool, dark pantry for up to one year.
Mistakes to Avoid When Making Plum Jam
Even experienced cooks can run into trouble when making jam. I have made every mistake in the book, so let me help you avoid the most common pitfalls. These issues can turn a promising batch into a disappointing result, but each one has a simple fix.
Using Overripe Plums
Soft, fully ripe plums make delicious eating but poor jam. They contain less pectin and more water, resulting in a runny consistency that never sets properly. I fix this by choosing plums that are just beginning to soften, with firm flesh that yields slightly to pressure. If you only have very ripe plums, add one underripe apple, chopped with skin on, to boost the pectin content naturally.
Cooking at Too High a Temperature
Blasting the heat to speed up cooking destroys the fresh fruit flavor and can cause scorching. High heat also breaks down pectin molecules, preventing a proper set. I recommend cooking jam at a steady medium-high heat, maintaining a rolling boil that you can stir down. This approach takes slightly longer but produces far superior flavor and texture. Watch your thermometer and adjust the heat to keep the temperature climbing gradually toward 220°F.
Skipping the Gel Point Test
Relying solely on cooking time is a recipe for disaster. Variables like pot size, heat level, and fruit moisture content all affect how quickly jam reaches the gel point. I always perform the wrinkle test on a frozen plate, even if I think the timing is right. Taking an extra minute to test saves you from either runny jam or an overcooked, rubbery spread. Therefore, patience at this stage makes all the difference.
Filling Jars While Jam Is Too Cool
Jam must be piping hot when it goes into jars to create a proper seal. If the jam cools too much before jarring, it will not seal correctly and can spoil quickly. I keep my sterilized jars warm in a low oven and fill them immediately after the jam reaches the gel point. Work quickly but carefully, filling one jar at a time and wiping the rims clean before applying lids. This ensures each jar seals properly for long-term storage.
Ways to Customize Your Plum Jam
One of the joys of making your own preserves is adapting the recipe to your taste and dietary needs. I love experimenting with different flavor combinations and techniques. Here are my favorite variations that keep this plum jam exciting batch after batch.
Spiced Plum Jam with Cinnamon and Star Anise
Add one cinnamon stick and two whole star anise to the pot at the beginning of cooking. The warm spices infuse the jam with a subtle complexity that pairs beautifully with the tart plums. Remove the whole spices before jarring. This variation is exceptional on buttered scones or stirred into oatmeal. In addition, a pinch of ground cardamom adds an unexpected aromatic note that elevates the entire flavor profile.
Plum and Vanilla Bean Jam
Split one vanilla bean lengthwise and scrape the seeds into the pot along with the pod. The floral vanilla notes complement the fruity plums without overpowering them. This version tastes almost dessert-like and works wonderfully as a filling for layer cakes or thumbprint cookies. After cooking, remove the vanilla pod before transferring to jars. The tiny black specks throughout the jam signal real vanilla and add visual appeal.
Low-Sugar Plum Jam
Reduce the sugar to a 2:1 fruit-to-sugar ratio for a less sweet version. The jam will have a softer set and a more pronounced tart flavor. I recommend using this variation within three months and storing it in the refrigerator rather than pantry canning. The lower sugar content means it will not preserve as long, but the bright fruit flavor is worth it. This option works perfectly for those watching their sugar intake.
Plum and Ginger Jam
Grate two tablespoons of fresh ginger and add it to the pot with the plums. The spicy warmth of ginger cuts through the sweetness and adds a sophisticated edge. This variation is my go-to for gifting because it feels special and unexpected. It pairs beautifully with sharp cheddar cheese on a cheese board or as a glaze for roasted pork. The ginger also aids digestion, making this jam as functional as it is delicious.
Mixed Stone Fruit Jam
Combine plums with peaches, nectarines, or apricots for a more complex flavor. Use a total of two pounds of mixed fruit and follow the same cooking method. The different fruits contribute varied levels of pectin and sweetness, creating a jam with depth and character. I usually do a half-and-half mix of plums and peaches for a balanced result. If you enjoy experimenting with stone fruits, you might also like this beach plum jelly recipe for a different take on wild fruit preserves.
Vegan and Naturally Gluten-Free
This plum jam is naturally vegan and gluten-free with no modifications needed. It contains only fruit, sugar, and lemon juice, making it suitable for most dietary restrictions. Always check that your sugar is vegan-certified if that is a concern, as some brands use bone char in processing. Otherwise, this recipe is inclusive and accessible to nearly everyone.
Nutrition in Every Spoonful of Plum Jam
Homemade plum jam offers a concentrated source of fruit flavor with a moderate calorie count. One tablespoon contains approximately 50 calories, primarily from natural fruit sugars and the added sugar needed for preservation. The jam provides small amounts of vitamin C and dietary fiber from the plum skins, though much of the fiber is lost during cooking and straining.
Compared to commercial jams, this homemade version has no artificial preservatives or high-fructose corn syrup. The lower sugar ratio I use means each serving has less added sugar than typical store-bought options. However, jam is still a concentrated sweet and should be enjoyed in moderation as part of a balanced diet. The antioxidants present in fresh plums, including phenolic compounds, remain partially intact even after cooking, offering some nutritional benefit beyond just taste.
Delicious Ways to Enjoy Your Plum Jam
Plum jam shines in countless applications beyond the classic toast topping. I love using it as a filling for homemade donuts or swirling it into cheesecake batter before baking. The sweet-tart flavor also makes an excellent glaze for roasted chicken or pork chops. Simply thin the jam with a bit of balsamic vinegar and brush it on during the last ten minutes of cooking. The sugars caramelize beautifully and create a glossy, flavorful crust.
For breakfast, try layering plum jam with Greek yogurt and granola in a parfait glass. The contrast of creamy, crunchy, and fruity textures makes for an elegant yet simple morning meal. I also use plum jam as a base for salad dressings by whisking it with olive oil, Dijon mustard, and red wine vinegar. This creates a fruity vinaigrette that pairs wonderfully with arugula, goat cheese, and toasted walnuts. During the holidays, plum jam makes a thoughtful homemade gift when packaged in decorative jars with fabric toppers and handwritten labels.
Storing Your Plum Jam for Maximum Freshness
Properly sealed jars of plum jam can be stored in a cool, dark pantry for up to one year. The key is ensuring each jar has sealed correctly; you should not be able to press down the center of the lid. If any jars fail to seal within twelve hours, simply store them in the refrigerator and use within three weeks. Once opened, keep the jam refrigerated and use within one month for best quality.
For longer storage, plum jam freezes beautifully for up to eighteen months. Leave about half an inch of headspace in freezer-safe containers to allow for expansion. Thaw frozen jam overnight in the refrigerator before using. The texture may be slightly softer after freezing, but the flavor remains excellent. I often freeze jam in small four-ounce jars so I can defrost just what I need without waste. Always label your jars with the date and contents, as homemade preserves can look similar once stored.
Frequently Asked Questions
No, you do not need to add pectin to plum jam. Plums naturally contain high levels of pectin, especially in their skins, which is sufficient to create a proper gel when combined with sugar and acid. Using slightly underripe plums maximizes the natural pectin content.
Plum jam is done when it reaches 220°F on a candy thermometer and passes the wrinkle test. Drop a teaspoon of jam on a frozen plate, return it to the freezer for one minute, then run your finger through it. If the jam wrinkles and holds its shape, it has reached the gel point and is ready to jar.
Yes, but some varieties work better than others. Italian prune plums and damson plums have the highest pectin content and produce the best set. Red or black plums also work well, though they may require slightly longer cooking. Choose plums that are firm and just beginning to ripen for optimal pectin levels.
Properly sealed and stored in a cool, dark pantry, homemade plum jam lasts up to one year. Once opened, refrigerate the jam and use it within one month. If a jar fails to seal properly, store it in the refrigerator immediately and consume within three weeks. You can also freeze plum jam for up to eighteen months in freezer-safe containers.



Leave a Reply