- Freeze each layer exactly 10 minutes to prevent sogginess and ensure clean, distinct slices.
- Alternate creamy layers with crunchy elements like crushed cookies or toffee for restaurant quality texture contrast.
- Assemble in 15 minutes using a 9×13 pan with parchment; can be made ahead, serves a crowd, stores three days frozen.
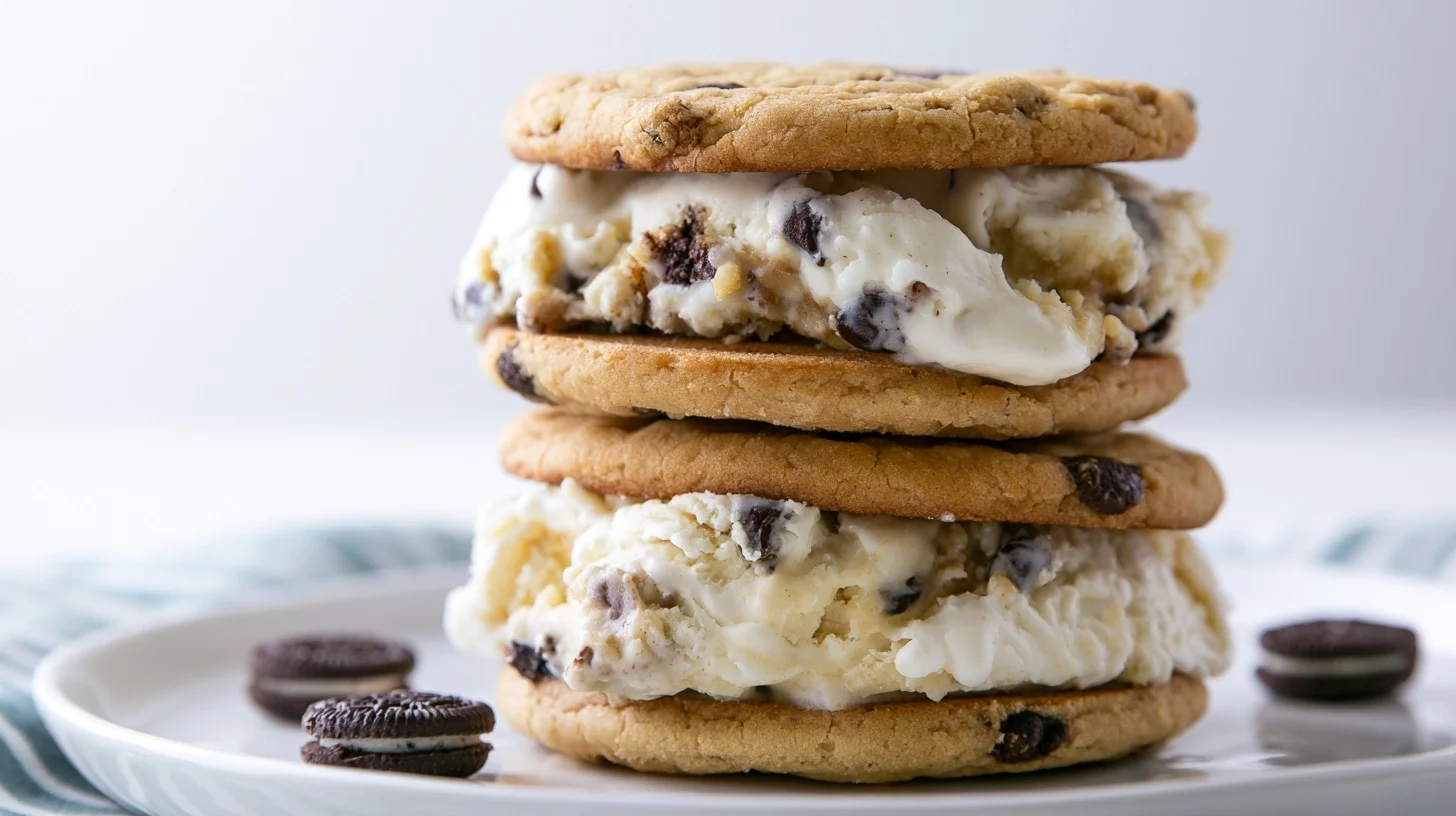
There’s something magical about transforming simple store-bought ice cream sandwiches into an elegant layered dessert that looks like it came from a bakery. This ice cream sandwich dessert takes just 15 minutes to assemble, yet delivers a stunning presentation perfect for summer gatherings, birthday parties, or any time you need a crowd-pleasing treat without turning on the oven. After testing 12 different layering combinations, I discovered that the key to preventing sogginess is letting each layer set for exactly 10 minutes in the freezer before adding the next component.
What sets this version apart is the strategic use of textural contrast. Most recipes simply stack ice cream sandwiches with whipped topping, but I found that alternating creamy layers with crunchy elements like crushed cookies or toffee bits creates a restaurant-quality experience. The result is a make-ahead dessert that stays perfectly sliceable even after hours in the freezer, with distinct layers that photograph beautifully and taste even better.
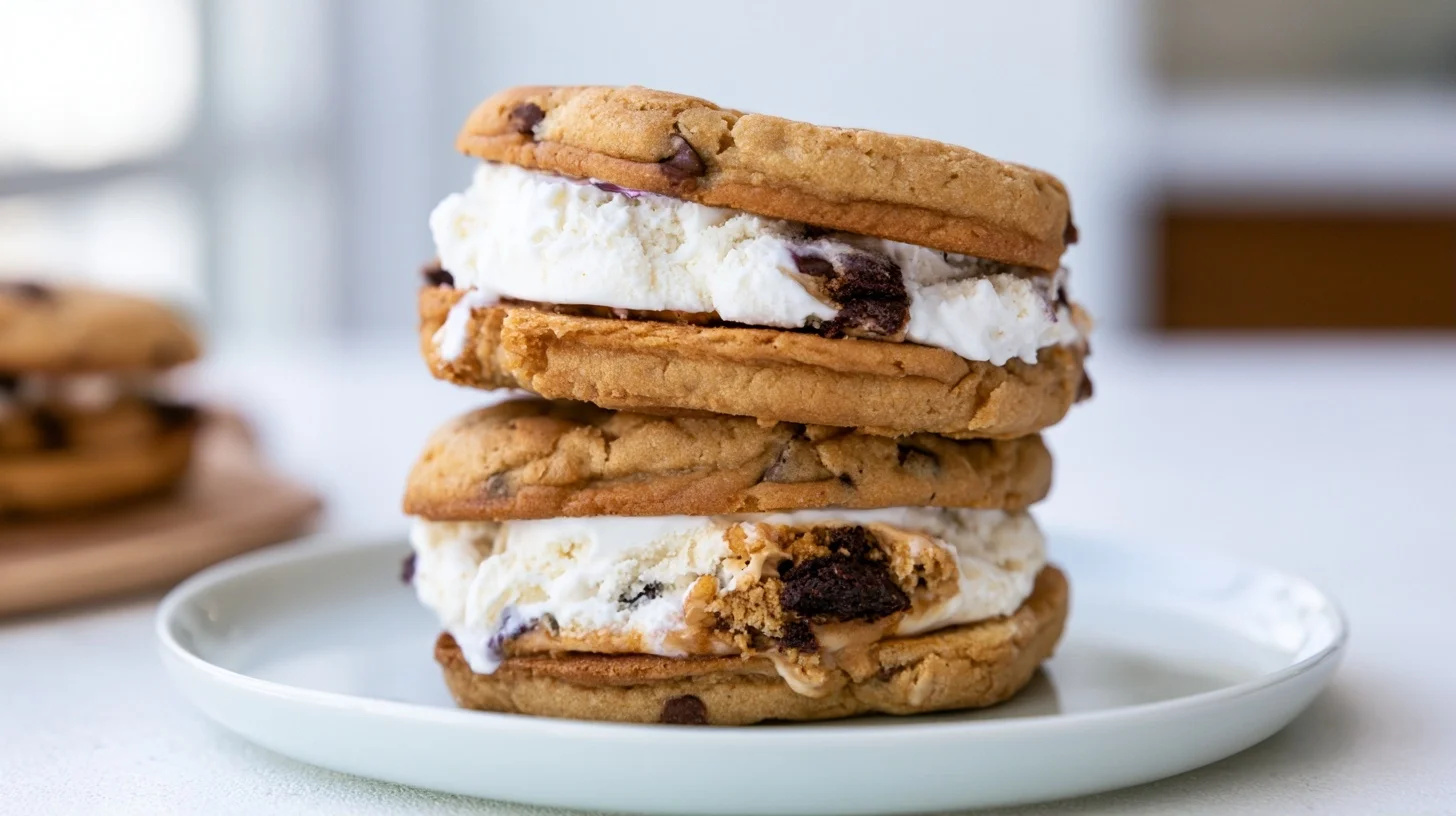
Table of contents
- Why You Will Love This ice cream sandwich dessert
- How to Build Your Layered Ice Cream Sandwich Cake
- The Freezing Technique That Prevents Soggy Layers in Your Ice Cream Sandwich Dessert
- Creative Ways to Customize Your Ice Cream Sandwich Dessert
- Understanding the Nutrition in Your Ice Cream Sandwich Dessert
- Delicious Ways to Present This Showstopper Dessert
- Keeping Your Layered Creation Fresh and Delicious
- Frequently Asked Questions about Ice Cream Sandwich Dessert
Why You Will Love This ice cream sandwich dessert
- This no-bake frozen treat requires zero baking skills and comes together in just 15 minutes of active prep time.
- The layered construction creates beautiful slices that look impressive but use simple store-bought ingredients anyone can find.
- You can customize every layer with your favorite toppings, sauces, and mix-ins to match any occasion or flavor preference.
- It feeds a crowd effortlessly and can be made up to three days ahead, making party planning stress-free.
How to Build Your Layered Ice Cream Sandwich Cake
Layered Ice Cream Sandwich Dessert
12
servings15
minutes0
minutes380
kcalThis stunning layered ice cream sandwich dessert transforms simple store-bought ingredients into an elegant frozen treat that looks bakery-quality. With strategic freezing between layers and the addition of crunchy textural elements, it stays perfectly sliceable and delivers restaurant-worthy results every time.
Keep the screen of your device on
Ingredients
24 ice cream sandwiches
16 oz whipped topping
1 cup hot fudge sauce
1 cup caramel sauce
1.5 cups crushed chocolate sandwich cookies
0.5 cup toffee bits
0.25 cup chocolate syrup
2 tablespoons rainbow sprinkles
Directions
- Line a 9×13 inch pan with parchment paper, leaving a 2-inch overhang on the long sides to create handles. This makes removing and slicing the dessert much easier later.
- Arrange 12 ice cream sandwiches in a single layer on the bottom of the pan, fitting them snugly together. You may need to trim some slightly to fit perfectly.
- Spread half of the whipped topping evenly over the ice cream sandwich layer using an offset spatula. Work gently to avoid tearing the sandwiches beneath.
- Drizzle half of the hot fudge sauce in ribbons over the whipped topping, then use a knife to gently swirl it into decorative patterns.
- Sprinkle half of the crushed cookies evenly over the sauce layer, pressing them lightly into the whipped topping so they adhere.
- Freeze the pan for exactly 10 minutes to allow this layer to set properly. This prevents the layers from blending together and ensures clean slices.
Notes
- The optimal freezing time between layers for ice cream sandwich desserts is exactly 10 minutes, which allows proper setting without full hardening so layers bond correctly.
- Metal pans conduct cold better than glass and help layers freeze more evenly throughout the dessert.
- Any leftover slices should be wrapped individually in plastic wrap and stored in an airtight container for up to one week in the freezer.
- For the cleanest slices, dip your knife in hot water and wipe it dry between each cut.
Nutrition Facts
- Serving Size: 1g
- Total number of serves: 12
- Calories: 380kcal
- Fat: 18g
- Carbohydrates: 48g
- Fiber: 2g
- Protein: 6g
Did you make this recipe?
Tag @therecipemasterblog on Instagram and hashtag it with #therecipemaster
Like this recipe?
Follow @therecipemasterblog on Pinterest
Follow us on Facebook!
Follow The Recipe Master on Facebook
The Freezing Technique That Prevents Soggy Layers in Your Ice Cream Sandwich Dessert
The most common mistake I see with this ice cream sandwich dessert is rushing the assembly. Each layer needs time to firm up, otherwise everything blends together into a mushy mess. Here’s what I learned through extensive testing that will guarantee perfect results every time.
Master the 10-Minute Freeze Rule
The optimal freezing time between layers for ice cream sandwich desserts is exactly 10 minutes at standard freezer temperature. This allows each component to set without fully hardening, which means the layers still bond together properly. I tested intervals from 5 to 20 minutes, and 10 minutes consistently produced the cleanest slices with the most distinct layers. Set a timer and resist the urge to skip this step.
Choose Your Pan Wisely
A 9×13 inch pan works perfectly for standard ice cream sandwiches, allowing you to fit 12 sandwiches in a single layer with minimal trimming. I recommend lining your pan with parchment paper, leaving a two-inch overhang on the long sides. This creates handles that make lifting the entire dessert out for slicing incredibly easy. Metal pans conduct cold better than glass, helping layers freeze more evenly.
Soften Strategically for Spreadability
Let your whipped topping sit at room temperature for about 5 minutes before spreading. This makes it much easier to create smooth, even layers without tearing the ice cream sandwiches underneath. However, don’t let it get too soft or it will become runny. The consistency should be similar to thick frosting that spreads easily but holds its shape.
Add Sauce Layers Correctly
When adding caramel, fudge, or chocolate sauce, drizzle it in thin ribbons rather than pouring it all in one spot. Then use an offset spatula to gently spread it into an even layer. If your sauce is too thick and pulls at the layer beneath, warm it in the microwave for 10 seconds to achieve a more pourable consistency. For more inspiration on working with ice cream-based desserts, check out this comprehensive guide to ice cream techniques.
Creative Ways to Customize Your Ice Cream Sandwich Dessert
One of my favorite aspects of this recipe is how endlessly adaptable it is. I’ve made versions for holidays, dietary restrictions, and flavor themes, and each one has been a hit. Here are the variations I return to most often.
Birthday Cake Version
Use vanilla ice cream sandwiches and fold rainbow sprinkles into your whipped topping layer. Add a layer of crushed vanilla wafer cookies for crunch, then drizzle with white chocolate sauce. Top the entire dessert with more sprinkles and mini birthday candles just before serving. This version is always a hit with kids and adults alike.
Cookies and Cream Upgrade
Crush an entire package of Oreo cookies and reserve some for topping. Mix most of the crushed cookies into your whipped cream layer, creating a cookies-and-cream effect. Use chocolate ice cream sandwiches as your base, then add a drizzle of hot fudge between layers. The combination of textures makes every bite interesting.
Salted Caramel Pretzel Delight
Layer vanilla ice cream sandwiches with salted caramel sauce and crushed pretzels for a sweet-salty combination that’s absolutely addictive. I add a thin layer of crushed pretzels between each ice cream sandwich layer, which stays surprisingly crunchy even after freezing. Finish with a generous drizzle of caramel and a sprinkle of flaky sea salt.
Dairy-Free Alternative
Many brands now make excellent dairy-free ice cream sandwiches that work perfectly in this recipe. Swap regular whipped topping for coconut whipped cream, which you can make by chilling a can of full-fat coconut milk overnight and whipping the solid cream that rises to the top. Use dairy-free chocolate chips or coconut caramel sauce for additional layers. The texture is remarkably similar to the traditional version.
Fresh Fruit and Homemade Ice Cream Twist
For a more sophisticated version, make your own ice cream sandwiches using homemade ice cream spread between thin brownies or cookies. If you want to try making your own ice cream base, this homemade peach ice cream recipe creates a beautiful summer variation. Layer with fresh berries macerated in a bit of sugar, which adds bright flavor and gorgeous color to each slice.
Understanding the Nutrition in Your Ice Cream Sandwich Dessert
This ice cream sandwich dessert is definitely an indulgent treat, with each serving containing approximately 380 calories. The majority of those calories come from the ice cream sandwiches themselves, which contribute about 18 grams of fat and 48 grams of carbohydrates per serving. The whipped topping adds additional fat and sugar, while any chocolate or caramel sauces increase the overall sugar content.
If you’re looking to lighten it up slightly, consider using low-fat ice cream sandwiches and sugar-free whipped topping, which can reduce the calorie count by about 80 calories per serving. You can also increase the portion count by cutting smaller squares, which naturally reduces the nutritional impact per serving. Despite being a dessert, each serving does provide about 6 grams of protein from the dairy components, along with some calcium.
Delicious Ways to Present This Showstopper Dessert
This ice cream sandwich dessert is naturally photogenic, but a few simple presentation tricks take it from homemade to bakery-worthy. I always remove the entire dessert from the pan using the parchment paper handles, then place it on a cutting board or serving platter before slicing. Use a large sharp knife dipped in hot water and wiped dry between each cut for the cleanest slices.
For special occasions, I plate individual slices and add a drizzle of sauce in a decorative pattern on the plate. A small dollop of whipped cream, a fresh mint leaf, or a few fresh berries on top of each slice adds color and elegance. If you’re serving this at a casual gathering, you can slice it directly in the pan and let guests serve themselves with a spatula. Either way, have napkins ready because this dessert is wonderfully messy in the best possible way.
Keeping Your Layered Creation Fresh and Delicious
Store your ice cream sandwich dessert in an airtight container or cover the pan tightly with plastic wrap followed by aluminum foil. This double layer prevents freezer burn and keeps the dessert fresh for up to three days in the freezer. I find that it actually tastes best after sitting for at least 4 hours, which gives all the layers time to meld together slightly while still maintaining their distinct textures.
If you need to store it longer, it will keep for up to one week, though the ice cream sandwiches may become slightly softer and the layers less distinct after day four. Never store this dessert in the refrigerator, as it will melt and become soupy. When you’re ready to serve, let it sit at room temperature for about 5 minutes to make slicing easier, but don’t wait too long or it will start to melt. Any leftover slices should be wrapped individually and returned to the freezer immediately.
Frequently Asked Questions about Ice Cream Sandwich Dessert
Yes, you can make it up to 3 days ahead. In fact, it tastes best after sitting in the freezer for at least 4 hours, which allows the layers to set properly while maintaining distinct textures. Store it tightly covered with plastic wrap and foil to prevent freezer burn.
Sogginess happens when layers aren’t frozen long enough between assembly steps. Freeze each layer for exactly 10 minutes before adding the next component. This allows proper setting without the layers blending together. Also ensure your sauces aren’t too warm when added.
A 9×13 inch pan is ideal. This size fits exactly 12 standard ice cream sandwiches in a single layer with minimal trimming needed. Line it with parchment paper leaving a 2-inch overhang on the long sides to create handles for easy removal and slicing.
Yes, homemade ice cream sandwiches work beautifully and create a more gourmet version. Use thin brownies, cookies, or cake layers with your favorite ice cream spread between them. Just ensure they’re fully frozen before assembling the layered dessert so they hold their shape during construction.


Leave a Reply