- Toast pine nuts until golden, cool completely before blending to add depth and prevent wilting.
- Use a 1 to 4 ratio of toasted pine nuts to basil by volume for balanced nuttiness.
- Pulse in short bursts, chop nuts and garlic first, add basil, then slowly drizzle oil for a silky emulsion.
- Add Parmesan and salt after basil and oil, taste and adjust, starting with less salt if cheese is salty.
- Store airtight with a thin olive oil layer for up to one week and freeze in ice cube trays for three months.
There’s something magical about making your own basil pesto recipe from scratch. The vibrant green color, the intoxicating aroma of fresh basil, and that perfect balance of nutty, garlicky, cheesy goodness simply can’t be matched by store-bought versions. After testing 12 different ratios and techniques, I discovered that the key to restaurant-quality pesto is toasting the pine nuts until they’re golden and fragrant, then letting them cool completely before blending. This single step transforms the entire flavor profile, adding depth and complexity that most home recipes miss.
Whether you’re tossing it with pasta, spreading it on sandwiches, or drizzling it over grilled vegetables, this homemade pesto brings a burst of summer to every dish. I make big batches during peak basil season and freeze portions for those cold winter months when I need a taste of sunshine. Once you experience how easy and rewarding it is to make your own, you’ll never go back to the jarred stuff.
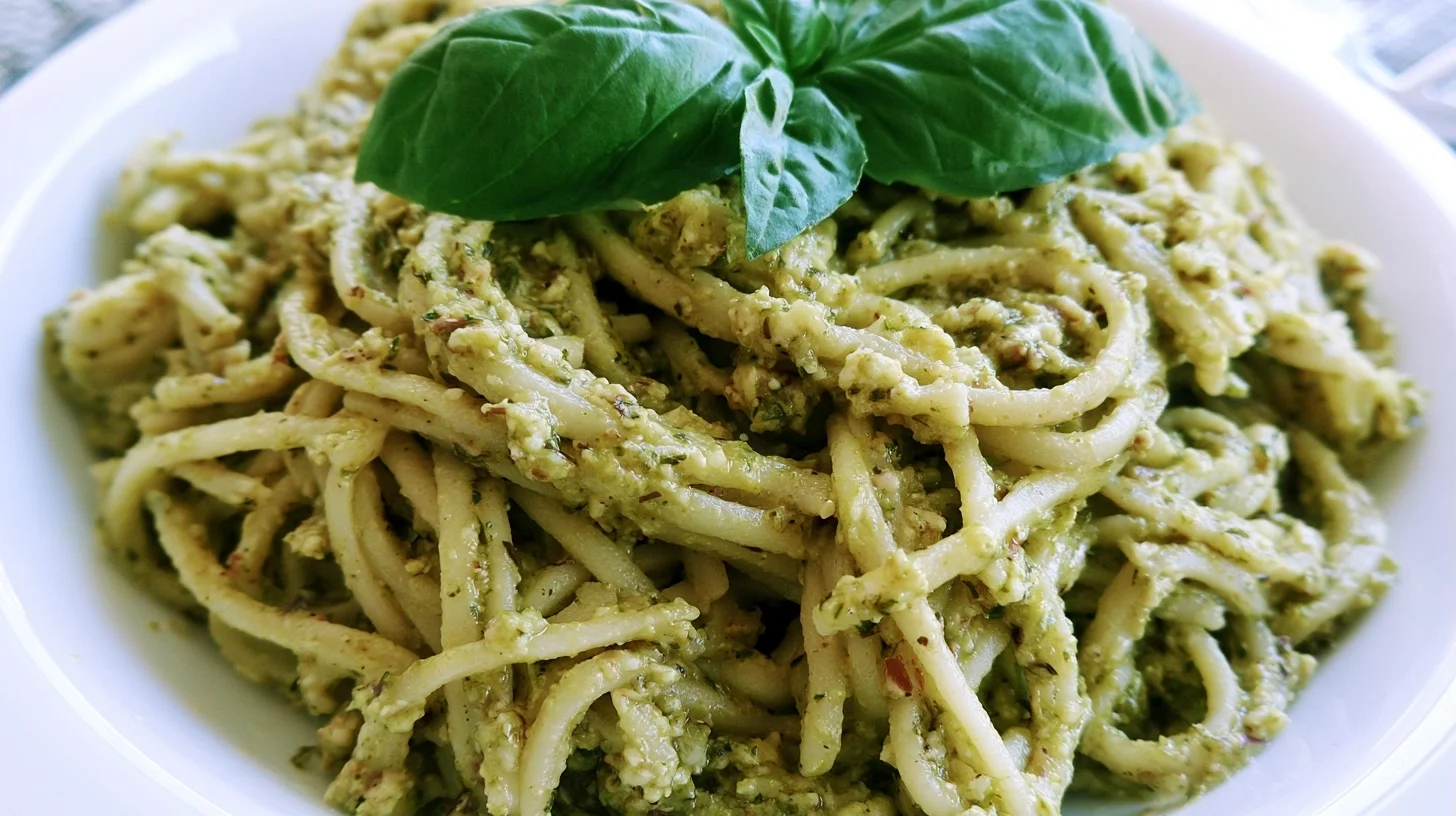
Table of contents
- Why You Will Love This basil pesto recipe
- How to Make the Best Homemade Basil Pesto Recipe
- The Technique That Makes This Basil Pesto Recipe Restaurant-Quality
- Creative Variations to Try with Your Basil Pesto Recipe
- Understanding the Nutrition in Homemade B asil P esto R ecipe
- Delicious Ways to Enjoy Your Fresh Pesto
- Storing Your Pesto to Keep It Fresh and Vibrant
- Frequently Asked Questions about Basil Pesto Recipe
Why You Will Love This basil pesto recipe
- This pesto takes only 10 minutes to make and delivers restaurant-quality flavor that surpasses any store-bought version.
- The toasted pine nuts create a rich, complex flavor with layers of nuttiness that elevate every bite.
- You can customize the ingredients to suit your taste preferences and dietary needs with endless variations.
- This versatile sauce works beautifully with pasta, sandwiches, grilled meats, roasted vegetables, and so much more.
How to Make the Best Homemade Basil Pesto Recipe
Basil Pesto Recipe
4
servings30
minutes40
minutes300
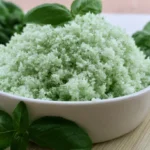
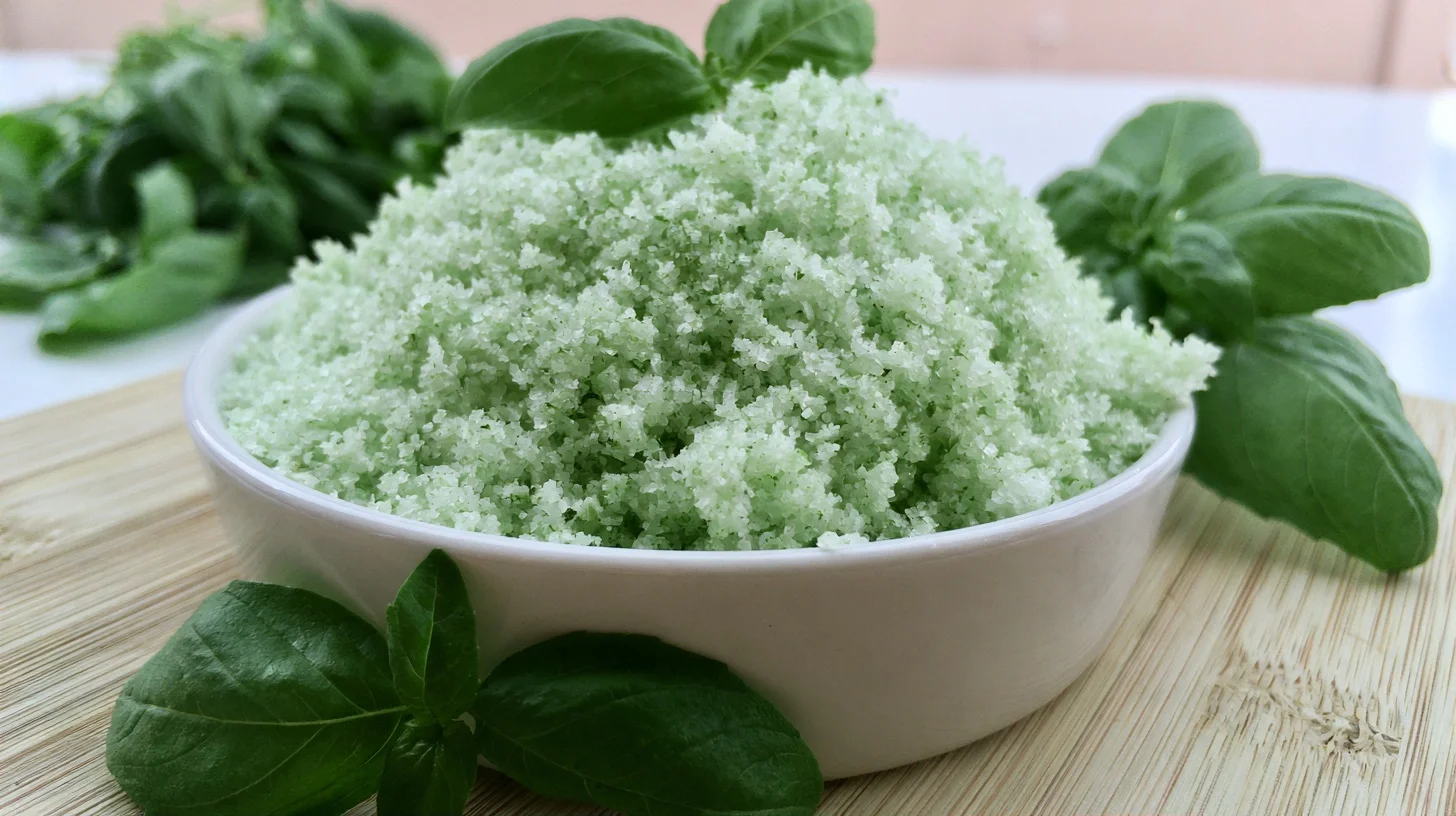
kcalThis restaurant-quality basil pesto features toasted pine nuts for deeper flavor, fresh basil leaves, premium Parmesan cheese, and fruity olive oil. The key to its vibrant color and silky texture is toasting the nuts until golden, then cooling them completely before blending to prevent the basil from wilting.
Keep the screen of your device on
Ingredients
0.5 cup pine nuts
3 cups fresh basil leaves
3 cloves garlic
0.75 cup extra virgin olive oil
0.75 cup Parmesan cheese
1 tablespoon lemon juice
0.5 teaspoon salt
0.25 teaspoon black pepper
Directions
- Toast the pine nuts in a dry skillet over medium heat for 3 minutes, shaking frequently until golden brown and fragrant. Transfer them to a plate and let them cool completely. This prevents the heat from wilting the basil and ensures a vibrant green color.
- Add the cooled pine nuts and garlic to a food processor and pulse 8 to 10 times until coarsely chopped. Scrape down the sides of the bowl to ensure even processing.
- Add the fresh basil leaves to the food processor and pulse 10 to 15 times until the basil is broken down but still has some texture. Avoid over-processing, which can make the pesto bitter.
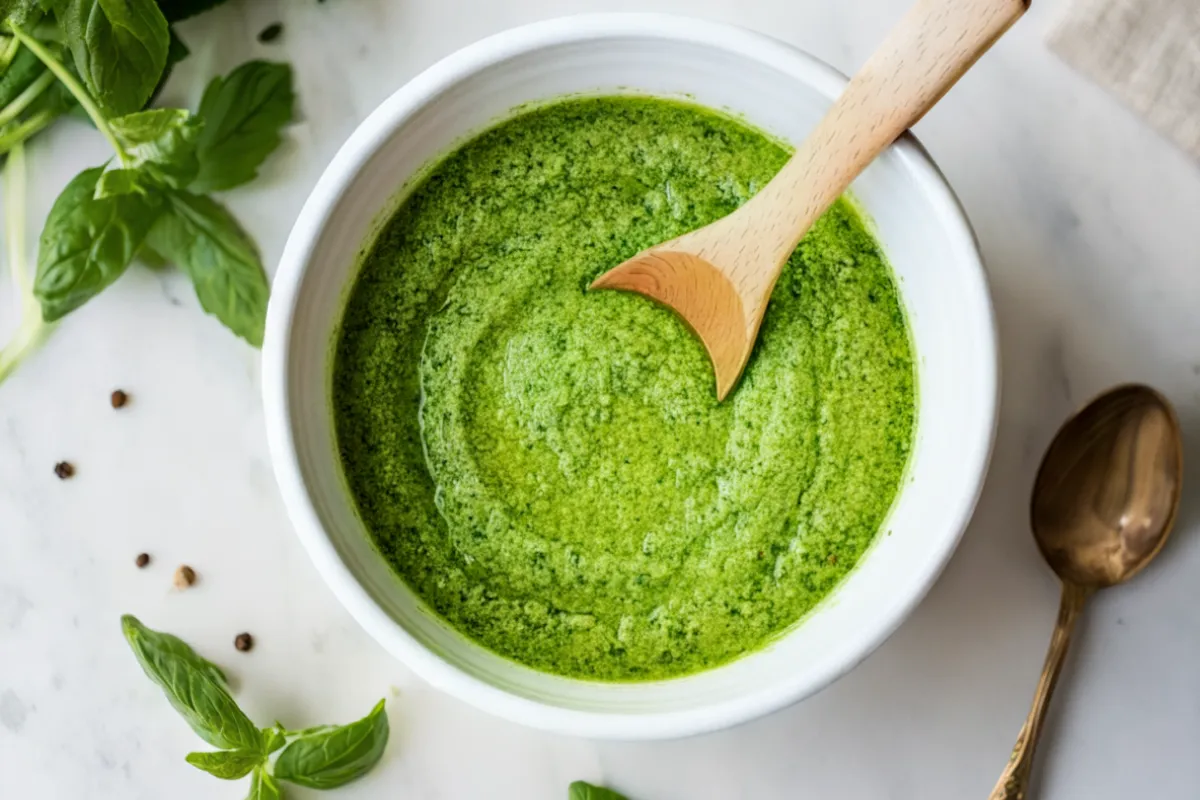
- With the processor running, slowly drizzle in the olive oil through the feed tube in a steady stream. This creates a smooth emulsion and silky texture that coats pasta beautifully.
- Add the grated Parmesan cheese, lemon juice, salt, and pepper to the processor. Pulse just 3 to 5 times until the cheese is incorporated and the pesto reaches your desired consistency.
- Taste and adjust the seasoning, adding more salt, pepper, or lemon juice as needed. The pesto should be bright, herbaceous, and well-balanced with a hint of garlic and nuttiness.
Notes
- The optimal ratio of toasted pine nuts to basil is 1:4 by volume for the deepest flavor without overwhelming the fresh herb taste.
- If you prefer a thinner consistency for tossing with pasta, reserve some pasta cooking water and stir it into the pesto one tablespoon at a time until you reach the desired texture.
- For the brightest green color, blanch the basil leaves in boiling water for 5 seconds, then shock them in ice water and pat completely dry before processing.
Nutrition Facts
- Serving Size: 1g
- Total number of serves: 8
- Calories: 180kcal
- Fat: 18g
- Carbohydrates: 2g
- Fiber: 1g
- Protein: 3g
Did you make this recipe?
Tag @therecipemasterblog on Instagram and hashtag it with #therecipemaster
Like this recipe?
Follow @therecipemasterblog on Pinterest
Follow us on Facebook!
Follow The Recipe Master on Facebook
The Technique That Makes This Basil Pesto Recipe Restaurant-Quality
After years of making pesto, I’ve learned that small details make a massive difference in the final result. These tips will help you achieve that bright green color, silky texture, and perfectly balanced flavor that makes homemade pesto so special. The most important thing to remember is that fresh, high-quality ingredients are non-negotiable when you’re working with such a simple recipe.
Toast Your Pine Nuts for Maximum Flavor
The optimal ratio of toasted pine nuts to basil is 1:4 by volume for the deepest flavor without overwhelming the herbs. I toast mine in a dry skillet over medium heat for about 3 minutes, shaking frequently until they’re golden brown. Then I let them cool completely before adding them to the food processor. This prevents the heat from wilting the basil and turning your pesto muddy green instead of vibrant.
Keep Your Basil Bright and Fresh
I always blanch my basil leaves in boiling water for just 5 seconds, then shock them in ice water before patting them completely dry. This technique preserves the brilliant green color and prevents oxidation. However, if you’re making pesto immediately and using it right away, you can skip this step. The health benefits of fresh basil are preserved either way, giving you antioxidants and anti-inflammatory compounds in every spoonful.
Use the Pulse Method for Perfect Texture
Never just turn on your food processor and let it run continuously. Instead, pulse in short bursts to control the texture precisely. I recommend pulsing the nuts and garlic first until coarsely chopped, then adding the basil and pulsing until it’s broken down but still has some texture. Finally, with the processor running, drizzle in the olive oil slowly to create that silky emulsion. This method prevents overheating and keeps your pesto from becoming bitter.
Season at the End for Best Results
I always add the Parmesan cheese and salt after the basil and oil are fully combined. This prevents the cheese from clumping and allows you to taste and adjust the seasoning accurately. Start with less salt than you think you need, especially if you’re using salty Parmesan. You can always add more, but you can’t take it away.
Creative Variations to Try with Your Basil Pesto Recipe
One of the things I love most about making pesto is how adaptable it is to different tastes and dietary needs. Once you master the basic technique, you can experiment with different nuts, herbs, and cheeses to create your own signature version. I encourage you to try these variations and discover which ones become your new favorites.
Nut-Free Pesto for Allergies
Replace the pine nuts with an equal amount of toasted sunflower seeds or pumpkin seeds. I’ve found that sunflower seeds create a milder flavor, while pumpkin seeds add a slightly earthier note. Both work beautifully and make the pesto accessible for those with nut allergies.
Budget-Friendly Walnut Pesto
Pine nuts can be expensive, so I often substitute toasted walnuts instead. They create a slightly more robust, earthy flavor that pairs wonderfully with whole wheat pasta or roasted root vegetables. Use the same amount as you would pine nuts and toast them the same way.
Dairy-Free and Vegan Version
Simply omit the Parmesan cheese and add an extra tablespoon of nutritional yeast for that savory, umami flavor. I also increase the salt slightly to compensate for the missing cheese. The result is a bright, herbaceous pesto that’s completely plant-based but still incredibly satisfying.
Mixed Herb Pesto
Try replacing half the basil with other fresh herbs like parsley, cilantro, or arugula. For instance, a lemon balm pesto variation adds a subtle citrus note that’s perfect for fish dishes. I love mixing basil with mint for a refreshing twist that works beautifully with lamb or in Mediterranean-inspired dishes.
Understanding the Nutrition in Homemade Basil Pesto Recipe
While pesto is calorie-dense due to the olive oil, nuts, and cheese, it’s also packed with beneficial nutrients. A typical serving contains healthy monounsaturated fats from the olive oil and pine nuts, which support heart health. The fresh basil provides vitamins K and A, along with powerful antioxidants. Because pesto is so flavorful, a little goes a long way, meaning you can enjoy rich taste without overdoing the calories.
Each serving delivers approximately 180 calories, with about 18 grams of fat, 3 grams of protein, and 2 grams of carbohydrates. The fat content is primarily from heart-healthy sources, making this a nutritious choice when enjoyed in moderation. If you’re watching calories, you can thin the pesto with a bit of pasta cooking water or vegetable broth to stretch it further without sacrificing flavor.
Delicious Ways to Enjoy Your Fresh Pesto
The classic way to serve basil pesto is tossed with hot pasta, but that’s just the beginning of its versatility. I love spreading it on crusty bread for bruschetta, swirling it into soups for an instant flavor boost, or using it as a marinade for chicken or fish. It also makes an incredible pizza sauce, especially when topped with fresh mozzarella, cherry tomatoes, and a drizzle of balsamic glaze.
For a stunning appetizer, serve pesto alongside a platter of fresh vegetables, crackers, and grilled bread. I often dollop it over baked potatoes, stir it into scrambled eggs, or use it as a sandwich spread instead of mayonnaise. During summer grilling season, I brush it over vegetables before roasting or use it to finish grilled steak or salmon. The possibilities are truly endless, and each application showcases the bright, fresh flavors in a different way.
Storing Your Pesto to Keep It Fresh and Vibrant
Proper storage is essential for maintaining that gorgeous green color and fresh flavor. I always transfer my pesto to an airtight container and smooth the top, then pour a thin layer of olive oil over the surface before sealing. This creates a barrier that prevents oxidation and keeps the pesto from turning brown. Stored this way in the refrigerator, it will stay fresh for up to one week.
For longer storage, I freeze pesto in ice cube trays, then pop the frozen cubes into freezer bags once they’re solid. This method lets me thaw exactly the amount I need without waste. Frozen pesto maintains its quality for up to three months. When you’re ready to use it, simply thaw the cubes in the refrigerator overnight or add them directly to hot pasta or soup. The texture may separate slightly after freezing, but a quick stir brings it right back together.
Frequently Asked Questions about Basil Pesto Recipe
Yes, you can make pesto using a mortar and pestle for a more traditional texture. This method takes longer but gives you complete control over the consistency. Alternatively, use a blender on low speed with frequent stirring to prevent overheating the basil.
Pesto turns brown due to oxidation when the basil is exposed to air. To prevent this, blanch the basil briefly before blending, add a squeeze of lemon juice, and cover the surface with a thin layer of olive oil during storage. Making pesto in small batches also helps maintain freshness.
Yes, you can substitute pine nuts with walnuts, almonds, cashews, sunflower seeds, or pumpkin seeds. Each creates a slightly different flavor profile, with walnuts being the most popular alternative. Toast your substitute nuts the same way you would pine nuts for the best flavor.
Homemade pesto lasts up to one week in the refrigerator when stored in an airtight container with a layer of olive oil on top. For longer storage, freeze pesto in ice cube trays for up to three months. Frozen pesto maintains its flavor beautifully and can be added directly to hot dishes.


Leave a Reply