There’s just something about a warm loaf of bread fresh from your oven that feels like home. This homemade sandwich bread recipe is one I’ve made countless times, and every single time, it hits that perfect balance of soft, fluffy, and just the right amount of chewy. It’s the kind of bread that makes even a simple PB&J taste extra special.
I started baking my own sandwich bread during a streak of trying to cut out overly processed stuff from the grocery store. And let me tell you, once you go homemade, there’s no going back. Whether you’re making school lunches, piling it high with turkey and avocado, or just toasting a slice with butter, this loaf has your back. Plus, it’s way easier than you’d think.
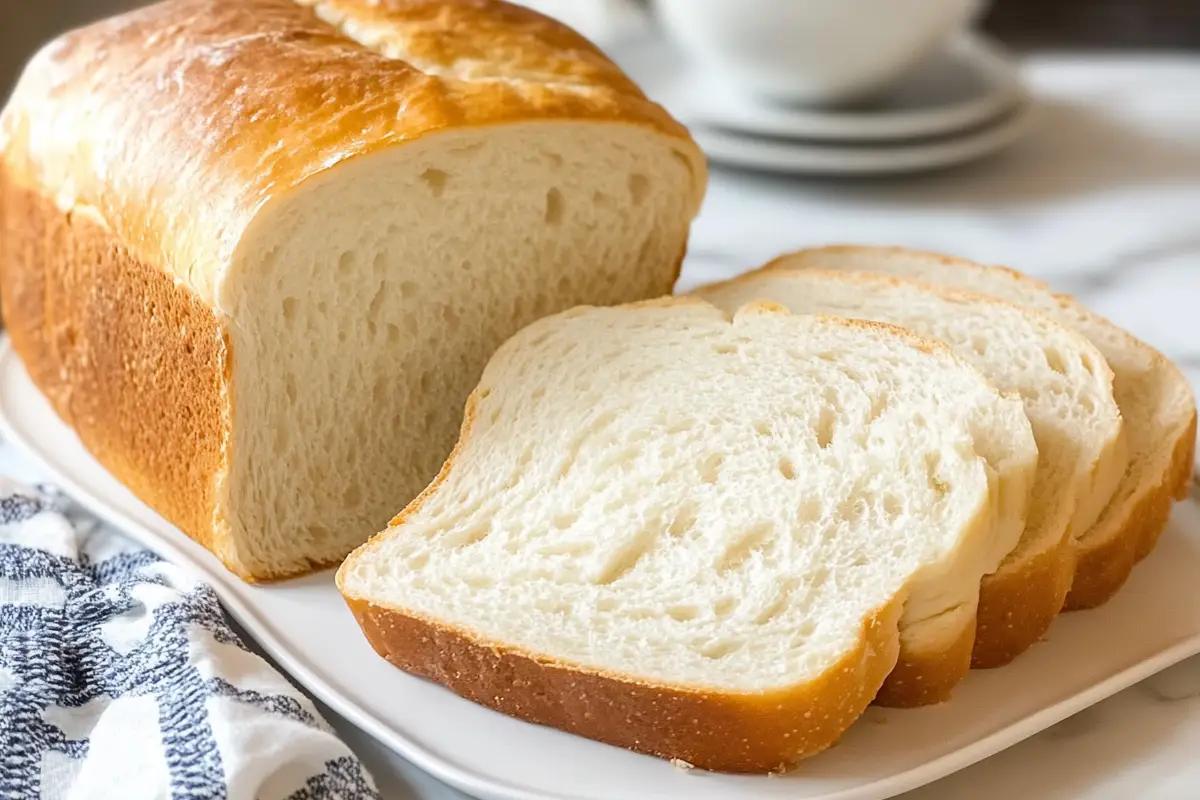
Table of contents
- How To Make It
- A Little Prep Now, Less Stress Later
- Bread Like a Pro: Tips You’ll Be Glad You Knew
- Why You’ll Love This Bread (Besides the Fact That It’s Homemade!)
- Mix It Up: Variations to Try
- Serving Ideas That Make Every Slice Shine
- Bake It Once, Use It Twice: Creative Uses for Leftovers
- Keep It Fresh: Storage & Reheating Tips
- FAQs
- Bake It, Slice It, Love It: Final Thoughts
How To Make It

Sandwich Bread Recipe
1
loaf20
minutes35
minutes160
kcalSoft, fluffy, and perfect for toast, sandwiches, or just warm with butter, this classic homemade sandwich bread recipe is easy and delicious.
Keep the screen of your device on
Ingredients
3 cups all-purpose flour
1 cup warm water (about 110°F/43°C)
0.5 cup milk (whole, 2%, or skim)
2 tablespoons granulated sugar
2 tablespoons unsalted butter, softened
1.25 teaspoons salt
1 packet active dry yeast (or 2 1/4 teaspoons instant yeast)
Directions
- Activate the yeast. This is where the bread magic begins! Grab a small bowl, stir the warm water and sugar together, then sprinkle the yeast over the top. Let it sit for about 5–10 minutes. You’ll know it’s ready when it gets nice and frothy on top, that means your yeast is alive and kicking.
- Next, grab a large mixing bowl. Combine the flour and salt, then pour in the frothy yeast mixture, the milk, and softened butter. Mix everything together until a shaggy dough forms. It’s going to be a little sticky, and that’s totally normal.
- Now, let’s get kneading. You can do this on a lightly floured surface by hand (which is a great little arm workout), or let your stand mixer with a dough hook do the heavy lifting. You’re aiming for a smooth, elastic dough, this usually takes about 8–10 minutes by hand or 5–7 minutes in a mixer.
- Place the dough into a greased bowl, cover it with a clean towel, and let it rise in a warm spot until it doubles in size. This could take anywhere from 1 to 2 hours depending on the temperature of your kitchen.
- Once it’s puffed up nicely, punch it down to release the air (my favorite part!). Shape it into a loaf by flattening it out into a rectangle, then roll it up like a cinnamon roll. Pinch the seam to seal it.
- Pop the dough into a greased 9×5-inch loaf pan. Cover it again and let it rise for another hour or so, it should rise just above the rim of the pan.
- When it’s ready to bake, preheat your oven to 350°F. Bake for 30–35 minutes until the crust is golden and the loaf sounds hollow when tapped. If you’re using a thermometer, the internal temp should be about 190°F.
- Let it cool in the pan for 10 minutes, then transfer it to a wire rack to cool completely. Don’t slice it too soon, it’s tempting, I know, but letting it rest ensures the perfect texture.
Notes
- Make sure your water isn’t too hot, it can kill the yeast. Aim for around 110°F.
- Don’t skip the second rise; it helps create a lighter, fluffier loaf.
- Letting the bread cool completely before slicing helps prevent it from getting gummy.
- For a golden, shiny top crust, brush with a little melted butter right after baking.
- You can double the recipe and freeze the second loaf once baked and cooled.
- If your kitchen is cold, let the dough rise in your (off) oven with the light on for gentle warmth.
Did you make this recipe?
Tag @therecipemasterblog on Instagram and hashtag it with #therecipemaster
Like this recipe?
Follow @therecipemasterblog on Pinterest
Follow us on Facebook!
Follow The Recipe Master on Facebook
A Little Prep Now, Less Stress Later
Bread baking might sound like a big project, but with a bit of prep, it becomes super manageable. Here’s what you can knock out ahead of time to make your baking day a breeze:
- Measure your ingredients in advance and set them out so everything is ready to go.
- Warm the milk and water to the right temp (about 110°F) so you don’t have to second-guess when it’s time to activate the yeast.
- Soften your butter ahead of time, cold butter can make mixing a lot harder.
- If using active dry yeast, you can even activate it ahead of time and store it (covered) in the fridge for a few hours before mixing the dough.
Bread Like a Pro: Tips You’ll Be Glad You Knew
Making homemade bread is one of those kitchen skills that gets better every time you do it. But a few small tips can make a huge difference, even on your first try. I’ve picked these up from years of baking (and yes, a few flops), so you don’t have to learn the hard way!
- Use a kitchen thermometer to check your water temperature (aim for 105°F–110°F). Too hot and you’ll kill the yeast; too cold and it won’t activate.
- Let your dough rise in a warm, draft-free place. The inside of your (turned-off) oven with the light on is a great cozy spot.
- Don’t rush the cooling time. Letting the loaf cool fully before slicing helps the interior finish setting and prevents a gummy texture.
- Brush the top with butter after baking for that soft, golden, bakery-style finish.
- Want an ultra-tender loaf? Add a splash more milk and knead just a little longer. It makes the texture melt-in-your-mouth soft.
- Store it properly. Once cool, keep your loaf wrapped in a bread bag or cloth—never plastic if you want to keep that lovely crust intact.
Why You’ll Love This Bread (Besides the Fact That It’s Homemade!)
Let’s be real, store-bought bread can get the job done, but homemade? That’s a whole different level of comfort and flavor. This homemade sandwich bread recipe isn’t just delicious, it’s also reliable, beginner-friendly, and totally customizable. Whether you’re a seasoned baker or just starting out, this one’s going to become your go-to.
Here’s why this bread stands out every single time:
- Soft, fluffy texture: Thanks to the milk and butter, the crumb is pillowy soft—perfect for any kind of sandwich or even just toast with jam.
- Slightly sweet flavor: The touch of sugar adds a warm, subtle sweetness without making it taste like dessert.
- Holds its shape: Whether you’re slicing thick or thin, this bread doesn’t crumble under pressure.
- No fancy tools needed: You can knead it by hand or use a stand mixer—whatever works for your kitchen setup.
- Versatile: Add-ins like herbs, cheese, or seeds work beautifully here if you want to change things up.
Want to make it your own? Try these easy tweaks:
- Add everything bagel seasoning or sesame seeds to the top before baking for extra flavor and crunch.
- Use whole wheat flour for a heartier, nuttier flavor.
- Swap out dairy for plant-based milk and vegan butter to keep it dairy-free.
Mix It Up: Variations to Try
Once you’ve nailed this classic homemade sandwich bread recipe, it’s super fun to experiment! Here are some easy variations that still deliver on soft texture and great flavor, just with a little twist.
- Gluten-Free Version: If you’re looking for a gluten-free alternative, you’ll love this gluten-free sourdough bread recipe. It has a totally different method, but the texture and flavor are just as satisfying.
- Whole Wheat Sandwich Bread: Replace half (or all) of the all-purpose flour with whole wheat flour. You’ll get a heartier flavor and more fiber. Add a tablespoon of honey to balance the nuttiness.
- Herbed Garlic Bread Loaf: Add 1 teaspoon of garlic powder and 2 teaspoons of dried Italian herbs to the dough. It makes an amazing side with soups or pasta.
- Cheddar Cheese Bread: Fold in 1 cup of shredded cheddar during the mixing stage. It bakes up with cheesy swirls and smells incredible.
- Sweet Honey Oat Bread: Swap the sugar for honey and sprinkle oats on top before baking. A cozy loaf that’s perfect for breakfast toast.
Serving Ideas That Make Every Slice Shine
Homemade sandwich bread is honestly one of the most versatile things you can pull out of your kitchen. Whether it’s the main event or just playing a supporting role, it makes everything taste better. Here are some of my absolute favorite ways to serve it:
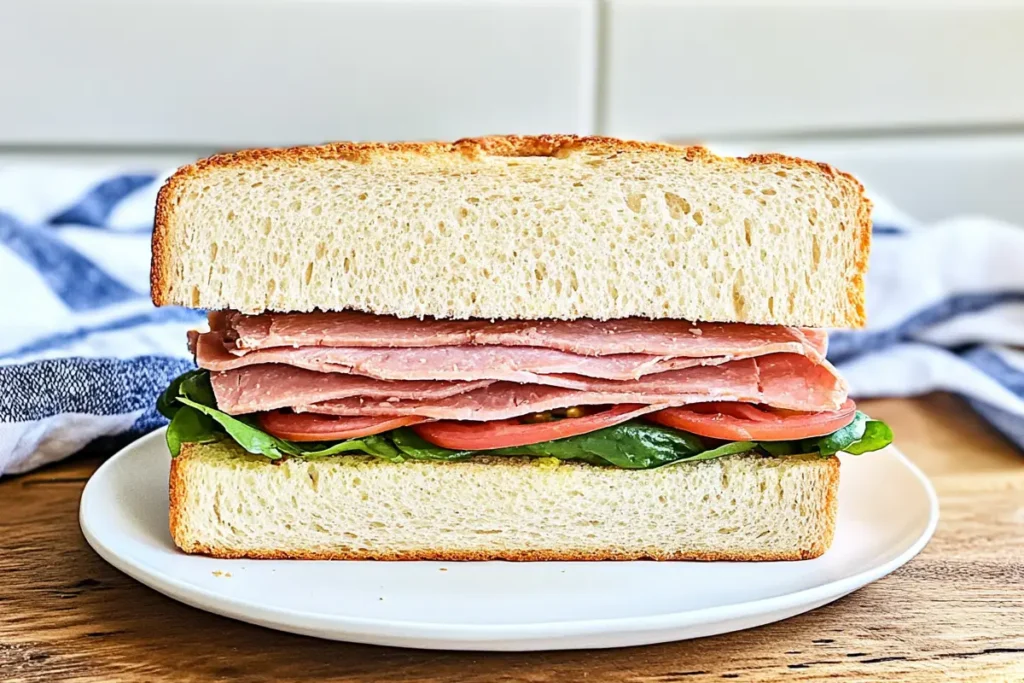
- Classic Sandwiches: Think turkey, ham, or tuna salad. The soft texture holds fillings perfectly without falling apart.
- Grilled Cheese: Crisp outside, gooey inside… need I say more? For a killer café-style version, try this Starbucks grilled cheese recipe.
- Avocado Toast: Lightly toasted, topped with smashed avocado, sea salt, and a sprinkle of chili flakes.
- French Toast: This bread soaks up the custard like a dream. Perfect for weekend brunch.
- Side to Soup or Stew: Thick, buttered slices are perfect for dipping into warm bowls of soup.
Bake It Once, Use It Twice: Creative Uses for Leftovers
I love a recipe that keeps on giving, and this homemade sandwich bread is one of them. If you’ve got a few slices hanging around, here’s how to turn them into something totally new:
- Croutons: Cube up the bread, toss with olive oil and seasoning, and bake until golden. Perfect for topping salads or soups.
- Bread Pudding: A cozy dessert made with cubes of leftover bread, milk, eggs, and a bit of sugar and spice.
- Sandwich Roll Upgrade: Use the dough to make individual rolls or buns by shaping into balls and baking in a muffin tin.
- Sourdough Swap: If you’re getting into the world of tangy loaves, you’ll love this ultimate cinnamon sourdough recipe or these fluffy sourdough rolls, great for savory or sweet meals.
- Sweet Breakfast Toast: Try it toasted with almond butter, banana slices, and a drizzle of honey for a quick and wholesome start to your day.
Keep It Fresh: Storage & Reheating Tips
You’ve put in the love to bake it, now let’s keep it fresh!
- At room temperature: Wrap your fully cooled loaf in a clean kitchen towel or store in a bread box for up to 3 days.
- In the fridge: Not ideal, it tends to dry the bread out faster. If you must, wrap tightly in foil or an airtight bag.
- In the freezer: Yes! Slice it first, then freeze in a freezer-safe bag. Just grab a slice and toast as needed, no thawing required.
Reheating tip: If your bread has gone a little stale, pop slices in the toaster or warm in the oven for 5–8 minutes at 300°F to refresh the texture.
For even more tips on the best way to store homemade bread, this article from The Kitchn has all the do’s and don’ts.
FAQs
There are a few possible culprits. First, make sure your yeast is fresh and active, if it doesn’t get frothy when activated, it won’t do its job. Also, your kitchen might be too cool. Try letting the dough rise in a slightly warm (but not hot) oven with the light on. Lastly, always double-check your water temperature, it should be warm, not hot.
Yes! Just use the same amount (2 1/4 teaspoons) and skip the activation step. You can mix it straight into the dry ingredients. Just keep an eye on the dough, it may rise a bit faster than expected.
The top should be golden brown, and the loaf should sound hollow when you tap the bottom. For extra accuracy, you can check with a food thermometer, the internal temperature should be around 190°F.
Absolutely. This recipe is very beginner-friendly and works perfectly with hand-kneading. It might take a few extra minutes, but you’ll get a great arm workout and the same fluffy results.
You sure can. Just use your favorite plant-based milk and dairy-free butter alternative. The texture will still be soft and lovely.
Typically, 2–3 days at room temperature if stored properly. After that, it’s best toasted, turned into croutons, or frozen for later. If you’re looking for a naturally long-lasting loaf, check out this banana bread recipe, it stays moist for days.
Bake It, Slice It, Love It: Final Thoughts
There’s just something incredibly satisfying about baking your own bread, especially when it turns out as soft, fluffy, and perfect as this homemade sandwich bread recipe. Whether you’re making weekday lunches, weekend brunch, or just a killer grilled cheese, this loaf is going to be your new kitchen staple.
Give it a try and let your kitchen fill up with that cozy, fresh-baked aroma. I promise, once you taste your own homemade bread, the store-bought stuff just won’t cut it anymore. Happy baking!


Leave a Reply