So, let’s talk about that magical fizz that brings homemade sodas to life, yes, I’m talking about the ginger bug. If you’ve ever wondered how to make naturally carbonated drinks without a fancy soda machine or store-bought cultures, this ginger bug recipe is about to become your new best friend.
I first stumbled upon ginger bugs years ago when I was diving into homemade kombucha and kefir, but I wanted something even simpler, something bubbly, slightly spicy, and naturally probiotic. This ginger bug delivers on all fronts. It’s a wild fermentation starter made from just ginger, sugar, and water, yet it packs the punch needed to turn fruit juices and herbal teas into fizzy, gut-friendly treats.
Whether you’re curious about fermentation, looking for a healthy soda alternative, or just love DIY kitchen projects, this recipe is a must-try. It fits beautifully into everyday life, no stress, no fancy equipment, just a jar, a spoon, and a little patience. Let’s get into the bubbly goodness!
Table of contents
- How to Make it
- Additional Recipe Tips
- Why This Ginger Bug Recipe Just Works (and Why You’ll Love It)
- What to Prep Ahead (So You’re Not Rushing Later)
- Little Secrets That Make a Big Difference
- How to Tell When Your Ginger Bug Is Ready (Engage All Your Senses)
- Flavor Twists You’ve Got to Try
- The Great Jar Cover Debate: Cloth or Lid?
- Frequently Asked Questions About Your Ginger Bug Recipe
- Wrapping It Up: Let the Fizz Begin!
How to Make it
Ginger Bug Recipe
1
servings25
minutes0
minutes20
kcalEffervescent, probiotic-rich starter for homemade sodas and fermented beverages
Keep the screen of your device on
Ingredients
2 tablespoons fresh organic ginger, grated (about a 2-inch piece)
2 tablespoons granulated sugar (or raw honey for the honey-powered ginger bug recipe)
2 cups filtered or spring water (chlorine-free)
Directions
- Day 1: In a clean glass jar, combine 1 tablespoon of grated ginger, 1 tablespoon of sugar, and ½ cup of filtered water at room temperature. Stir vigorously until the sugar dissolves completely. Cover the jar loosely with a breathable cloth or coffee filter, secured with a rubber band. Set it in a warm, dark place away from direct sunlight.
- Days 2–4: Each day, discard half of the contents (about ½ cup), then add 1 tablespoon grated ginger, 1 tablespoon sugar, and ½ cup fresh filtered water. Stir well after each feeding. You should start to notice small bubbles forming around day 3 and a subtle, yeasty ginger smell, that’s a good sign.
- Day 5: By now, your ginger bug should be bubbly and active with a pleasant, yeasty aroma and slight fizz. Remove about ¼ cup of the liquid, this is your active starter. Use it to carbonate your homemade sodas or ferments. Store the remaining bug in the fridge, loosely covered, and switch to weekly feedings of 1 teaspoon ginger + 1 teaspoon sugar (no water needed when refrigerating).
- Using Your Bug: To ferment, add 2–4 tablespoons of your ginger bug to 1 quart of juice or sweetened tea. Seal it in a swing-top bottle and leave it at room temperature for 2–3 days, checking pressure daily to avoid over-carbonation. Once fizzy, move it to the fridge to chill and slow fermentation.
Notes
- Alternative Sugars: Coconut sugar, demerara, or honey can be used, though each will slightly alter flavor and fermentation speed.
- Water Temperature: Aim for 68–75°F (20–24°C). Too-cold water slows fermentation; too-hot can kill the culture.
- Jar Size: A 24-oz (600 mL) wide-mouth jar works best, giving your culture room to breathe. Avoid metal lids, use plastic or glass.
- Feeding Frequency: If kept at room temperature, feed daily. If stored in the fridge, feed weekly.
Nutrition Facts
- Total number of serves: 1
- Calories: 20kcal
- Carbohydrates: 7g
- Sugar: 7g
Did you make this recipe?
Tag @therecipemasterblog on Instagram and hashtag it with #therecipemaster
Like this recipe?
Follow @therecipemasterblog on Pinterest
Follow us on Facebook!
Follow The Recipe Master on Facebook
Additional Recipe Tips
- Use unpeeled organic ginger: The skin contains natural yeasts essential for fermentation, just give it a good rinse and grate.
- Temperature matters: Keep the jar in a warm area (around 70–75°F); colder temps slow fermentation, while higher heat can kill the microbes.
- Avoid chlorinated water: Chlorine can inhibit or kill the beneficial microbes. If using tap water, boil and cool it first or let it sit out overnight to dissipate chlorine.
Why This Ginger Bug Recipe Just Works (and Why You’ll Love It)
There’s something a little magical about turning three humble ingredients, ginger, sugar, and water, into a bubbling, living starter that transforms ordinary juice into something sparkling and alive. This ginger bug recipe just works, and here’s why:
- Wild Fermentation at Its Finest: You don’t need a lab or special cultures, wild yeasts and bacteria do all the heavy lifting, creating bubbles and probiotics naturally.
- Low Effort, Big Results: Just a few minutes of stirring each day gives you a powerful starter that can carbonate multiple bottles of natural soda.
- Customizable Flavors: It’s a base that works with countless soda creations, think pineapple-mint fizz, berry-spice soda, or even a ginger bug cola.
- Naturally Probiotic: This is a fun way to add gut-friendly microbes into your diet without the sourness of kombucha or the effort of yogurt.
- Budget-Friendly: Store-bought fermented sodas or health drinks can be pricey. This ginger bug starter costs pennies and keeps on giving.
Want to tweak the recipe to fit your lifestyle?
- Vegan? Use organic sugar instead of honey.
- Avoiding refined sugar? Raw honey works too, just note that fermentation might take a day or two longer.
- Gluten-Free? No worries here, this starter is naturally gluten-free.
- Low FODMAP? Use maple syrup instead, and monitor your fermentation closely.
What to Prep Ahead (So You’re Not Rushing Later)
Getting started with your ginger bug is easy, but having these things ready will make the process smoother and more enjoyable.
Here’s what I recommend prepping ahead:
- Fresh organic ginger: Unpeeled and grated, about a 2-inch piece.
- Granulated sugar or raw honey: Measure out a few tablespoons so you’re ready for daily feedings.
- Filtered or spring water: Chlorine-free is a must; chlorine kills the beneficial microbes we’re trying to grow.
- A clean glass jar: A pint or quart size with a wide mouth for easy stirring.
- Cloth or coffee filter + rubber band: This breathable covering allows wild yeast and bacteria in while keeping dust and bugs out.
- A stirring utensil: Wood or plastic is ideal, metal can sometimes react with fermentation.
Trust me, a little prep goes a long way to keep your daily feeding ritual low-stress and fun.
Little Secrets That Make a Big Difference
I’ve made this recipe more times than I can count, and trust me, these little tricks make all the difference! From managing bubbles to keeping the wild yeast happy, these tips will help you build a reliable, fizzy starter that keeps going strong.
- Grate, don’t slice your ginger: Grated ginger releases more surface area, which helps speed up fermentation and boost those bubbles.
- Use a consistent feeding schedule: Feed your bug around the same time each day to keep the microbes stable and active.
- Don’t seal too early: During the first fermentation, always use a breathable cloth. Switching to an airtight lid too soon can cause pressure buildup and halt yeast growth.
- Watch the bubbles: Bubbles rising when you stir? That’s a great sign that your bug is alive and thriving.
- Sniff it daily: It should smell like sweet ginger beer. If it smells funky or moldy, something went wrong, better to start over.
- Label your jar: Include the start date and feeding times so you don’t forget where you’re at in the cycle.
How to Tell When Your Ginger Bug Is Ready (Engage All Your Senses)
This is the moment every fermenter looks forward to, when your bug comes alive! But how do you really know it’s ready? Here’s how to tell using all your senses:
- Sight: Look for a layer of bubbles forming on top and fizzing throughout the liquid. When you stir, bubbles should rise easily to the surface.
- Sound: You might hear a faint hiss or fizz when you open the jar or stir. That’s the sound of CO₂ being released.
- Smell: A ready ginger bug has a pleasantly yeasty, gingery aroma. It should smell fermented but not sour or rotten. A vinegary smell means it’s gone too far.
- Taste: Dip a clean spoon in and take a tiny sip, it should be slightly sweet, gingery, and mildly tangy with a hint of effervescence.
Flavor Twists You’ve Got to Try
If you’re like me, you love playing around with ingredients based on what’s in the fridge. Here are a few fun ideas to switch things up!
- Pineapple-Mint Soda: Add 3 tablespoons of ginger bug to 1 quart of fresh pineapple juice with a sprig of mint. Ferment in a sealed bottle for 2 days, then chill.
- Berry Ginger Fizz: Use a blend of berry juice (like blueberry + cranberry) with your bug for a sweet-tart soda.
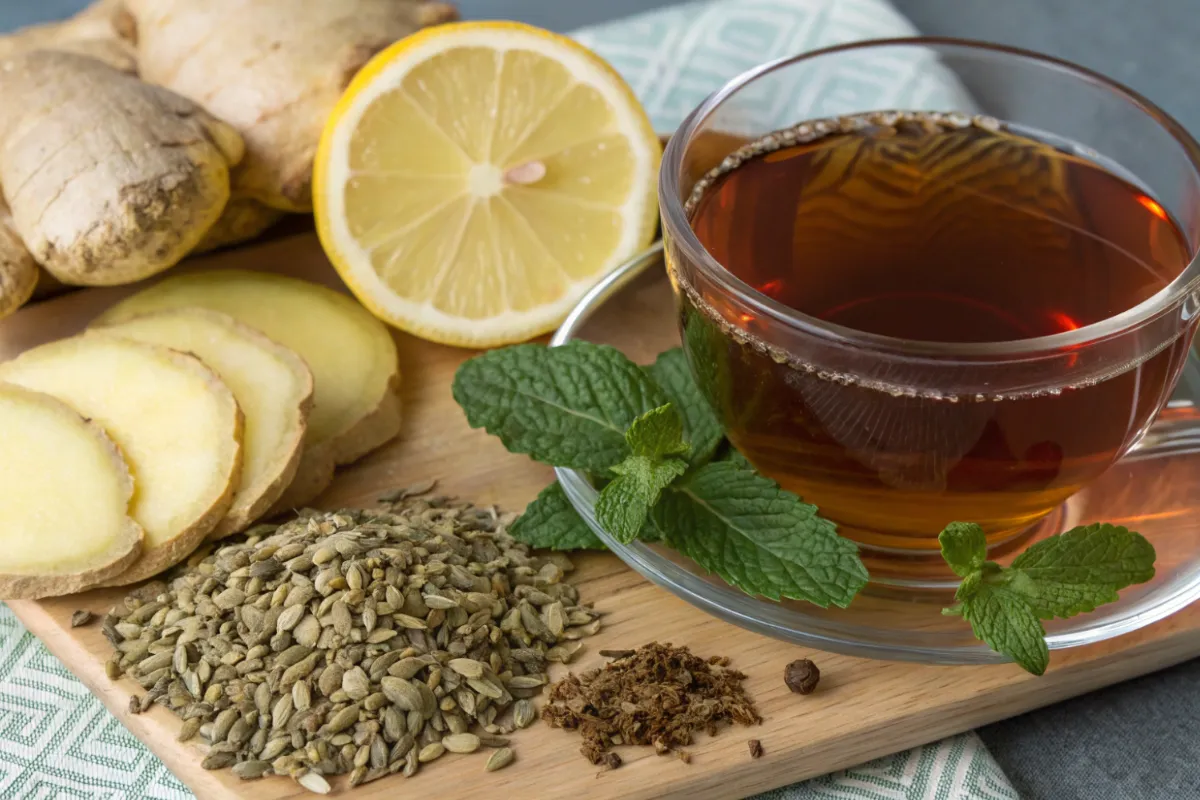
- Herbal Ginger Ale: Brew a strong tea with lemon balm or chamomile, sweeten it, cool it down, then add the bug and ferment like soda.
- Spiced Apple Cider Soda: Add cinnamon and clove to sweetened apple juice before fermenting with your bug for a cozy autumn drink.
- Tropical Tepache-Inspired Fizz: Try using your bug instead of wild pineapple peel to ferment sweetened water and pineapple scraps, similar to this tepache recipe.
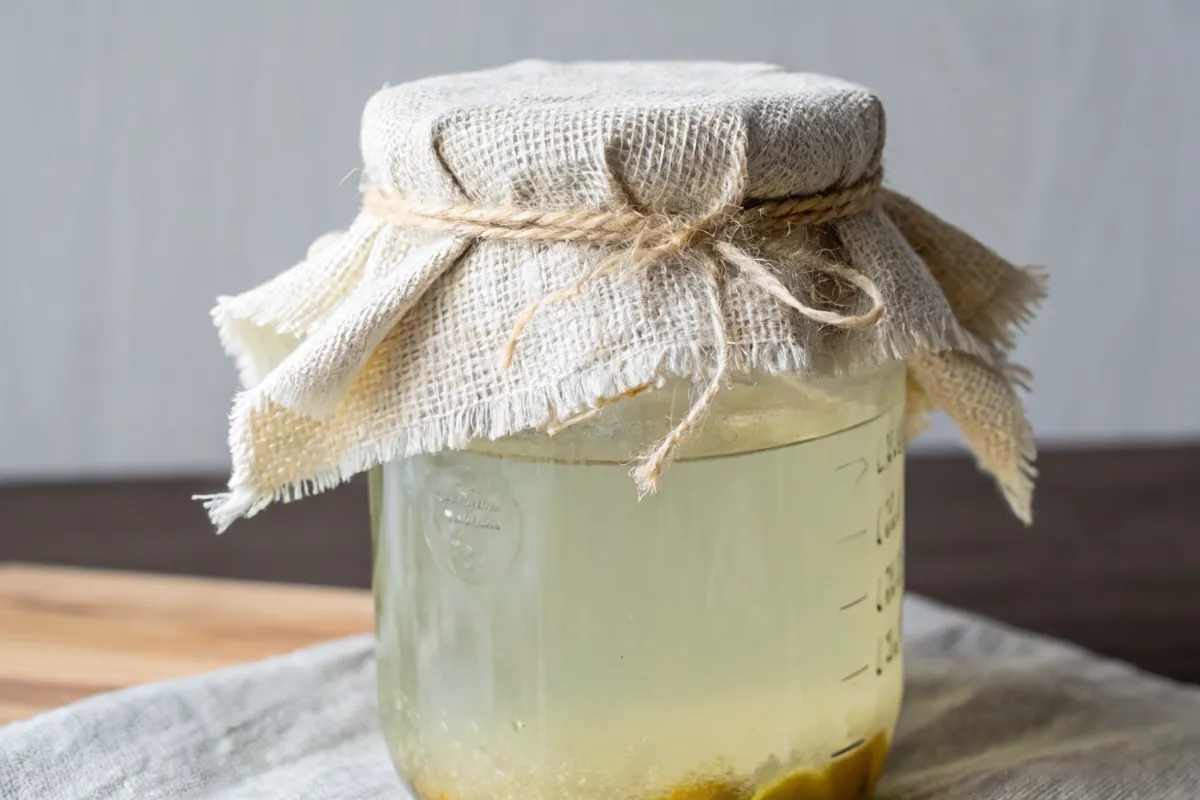
The Great Jar Cover Debate: Cloth or Lid?
There’s a bit of debate in the fermentation world about whether to cover your ginger bug jar with a breathable cloth or an airtight lid. So let’s clear it up.
While some methods suggest an airtight seal, a breathable cotton cloth is generally preferred for the initial fermentation of a ginger bug. It allows for optimal oxygen exchange, which helps wild yeasts and bacteria thrive and produce carbonation effectively.
Here’s a breakdown of when to use each:
- Breathable cloth or coffee filter: Best for the first 5 days when you’re actively building your bug. It encourages natural airborne microbes to settle and prevents mold while allowing airflow.
- Loose-fitting lid (optional): Once your bug is active and you’re storing it in the fridge, a lid can help retain moisture and prevent spills, but don’t seal it tightly or it could explode from pressure buildup.
Stick with breathable during the growing phase, and go semi-sealed only during refrigeration.
Frequently Asked Questions About Your Ginger Bug Recipe
Fresh ginger is best, it contains natural yeasts in the skin that powdered versions lack. Powdered ginger may not ferment well and can lead to weak or failed bugs.
This usually means one of three things: your environment is too cold, you’re using chlorinated water, or you’ve missed a feeding. Try moving it to a warmer spot, switching to filtered water, and staying consistent with daily feedings.
If you see fuzzy mold on the surface, it’s best to discard the bug and start fresh. Mold is a sign that the environment was contaminated or too exposed.
Indefinitely, if properly fed! Just feed it once a week with 1 teaspoon sugar and 1 teaspoon ginger to keep it alive and ready.
Absolutely! Try adding it to sourdough starters, veggie ferments, or even a creative twist in refreshing drinks like homemade frappuccinos.
Wrapping It Up: Let the Fizz Begin!
Making your own ginger bug is honestly one of those little kitchen projects that feels kind of magical. It takes just a few simple ingredients, a bit of patience, and before you know it, you’ve got a bubbly, living starter that brings homemade sodas to life.
I hope this ginger bug recipe gets you as excited about fermentation as it does for me. And if you’re in the mood to take your sodas to the next level, try adding a splash of brown sugar syrup for a deeper, caramel-like sweetness. It’s one of my go-to tricks for leveling up those flavors.
Give it a go, have fun with it, and don’t forget to let me know what fizzy combos you come up with!


Leave a Reply