

There’s something magical about the combination of warm spices and melting chocolate chips in a tender loaf of chocolate chip pumpkin bread. This recipe creates an incredibly moist, flavorful bread that balances the earthy sweetness of pumpkin with rich chocolate in every bite. After testing over 12 variations, I discovered the secret is using oil instead of butter and adding an extra tablespoon of pumpkin puree per cup of flour, which keeps the crumb tender for days without any gumminess.
Whether you’re looking for a cozy autumn breakfast or a crowd-pleasing dessert, this bread delivers every time. The aroma alone will have everyone gathering in your kitchen. I love serving it slightly warm with a smear of cream cheese, though it’s equally delicious at room temperature with your morning coffee.
This recipe comes together in one bowl with no mixer required, making cleanup a breeze. The result is a bakery-quality loaf that stays moist for up to five days. Trust me, once you try this version, it will become your go-to fall baking recipe.
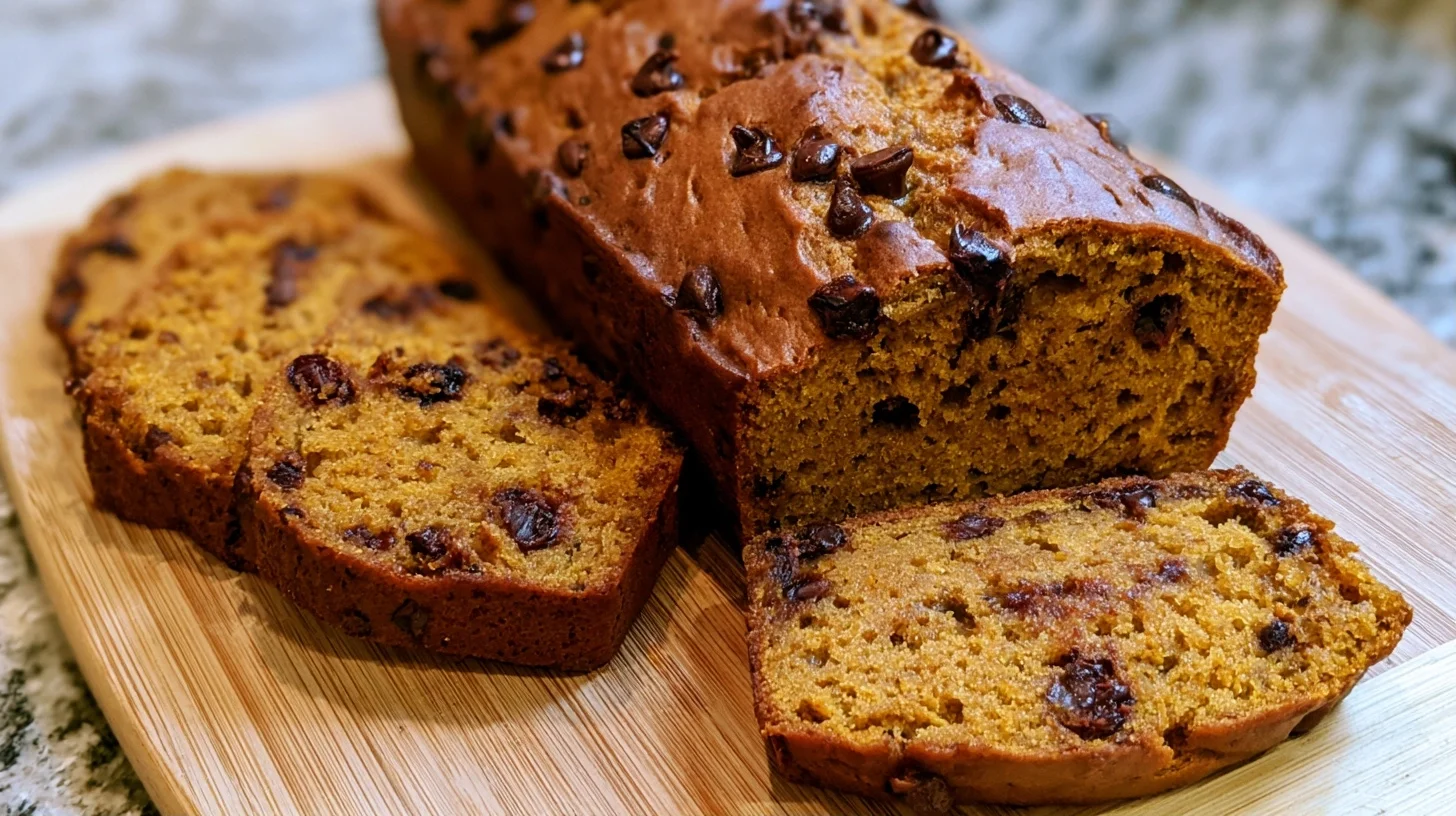
Table of contents
- Why You Will Love This Chocolate Chip Pumpkin Bread
- Essential Equipment for Perfect Chocolate Chip Pumpkin Bread
- How to Make the Moistest Chocolate Chip Pumpkin Bread
- Pro Tips That Make This Chocolate Chip Pumpkin Bread Superior
- Mistakes to Avoid When Making Chocolate Chip Pumpkin Bread
- Creative Variations for Chocolate Chip Pumpkin Bread
- Nutritional Benefits of Chocolate Chip Pumpkin Bread
- Delicious Ways to Serve Chocolate Chip Pumpkin Bread
- Best Practices for Storing Your Pumpkin Bread
- Frequently Asked Questions
Why You Will Love This Chocolate Chip Pumpkin Bread
- This bread stays incredibly moist for days thanks to the oil-based batter and extra pumpkin ratio.
- You can mix the entire batter by hand in one bowl without any electric mixer or complicated techniques.
- The balance of warm spices and chocolate creates a flavor that works equally well for breakfast or dessert.
- It freezes beautifully for up to three months, making it perfect for meal prep or gift giving.
Essential Equipment for Perfect Chocolate Chip Pumpkin Bread
I keep my equipment simple for this recipe, which is part of what makes it so approachable. However, having the right tools does make a difference in achieving that perfectly risen, evenly baked loaf. Here’s what I reach for every time I make this bread.
- 9×5-inch loaf pan: This standard size ensures even baking and the classic loaf shape that slices beautifully.
- Large mixing bowl: You need enough room to fold in ingredients without making a mess, so go for at least a 3-quart capacity.
- Whisk and rubber spatula: The whisk incorporates dry ingredients smoothly, while the spatula helps fold without overmixing.
- Measuring cups and spoons: Baking is chemistry, so accurate measurements matter for the proper moisture balance.
- Toothpick or cake tester: This helps you check doneness without cutting into the loaf prematurely.
- Cooling rack: Elevating the bread allows air circulation underneath, preventing a soggy bottom.
How to Make the Moistest Chocolate Chip Pumpkin Bread
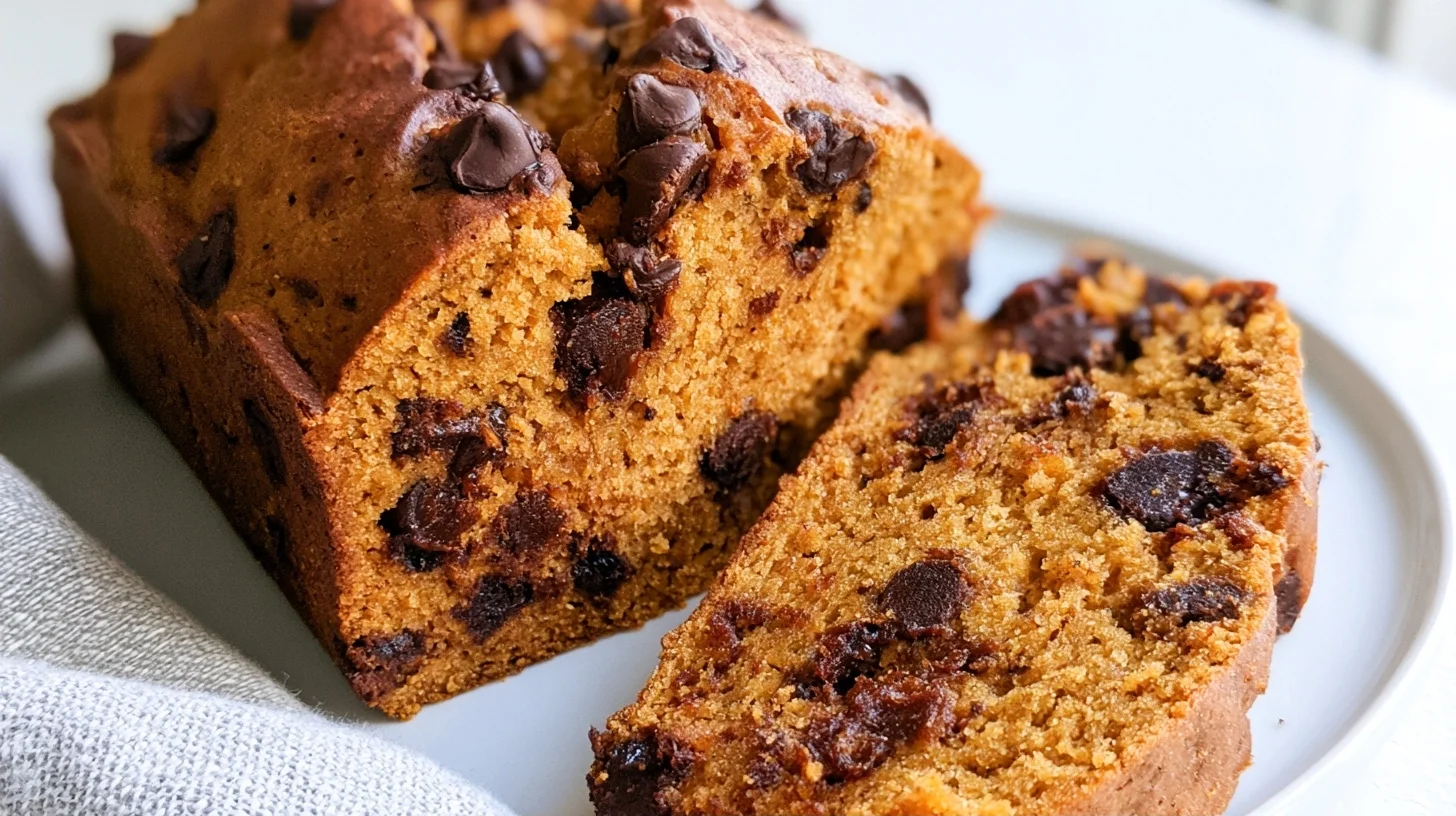
Chocolate Chip Pumpkin Bread
10
servings15
minutes1
hour285
kcalThis incredibly moist chocolate chip pumpkin bread uses an oil-based batter and extra pumpkin ratio to stay tender for days. The one-bowl recipe requires no mixer and balances warm fall spices with rich chocolate chips in every slice.
Keep the screen of your device on
Ingredients
1.75 cups all-purpose flour
1 teaspoon baking soda
1.5 teaspoons ground cinnamon
0.5 teaspoon ground ginger
0.5 teaspoon salt
1 cup pure pumpkin puree
0.5 cup vegetable oil
2 large eggs
1 cup granulated sugar
0.25 cup brown sugar
1 teaspoon vanilla extract
1 cup semi-sweet chocolate chips
Directions
- Preheat your oven to 350°F and grease a 9×5-inch loaf pan thoroughly with butter or cooking spray, then dust lightly with flour. This ensures the bread releases cleanly after baking.
- Whisk together the flour, baking soda, cinnamon, ginger, and salt in a large bowl until evenly combined. This distributes the leavening and spices so every bite tastes consistent.
- In a separate bowl, whisk the pumpkin puree, oil, eggs, both sugars, and vanilla extract until smooth and fully blended. The mixture should look uniform with no streaks of egg.
- Pour the wet ingredients into the dry ingredients and gently fold with a rubber spatula just until no flour streaks remain. Stop mixing as soon as the batter comes together to avoid developing too much gluten.
- Toss the chocolate chips with one tablespoon of flour from your measured amount, then fold them into the batter. The flour coating helps prevent them from sinking during baking.
- Pour the batter into the prepared loaf pan and smooth the top gently with your spatula. Tap the pan once on the counter to release any air bubbles.
Notes
- The ideal ratio of pumpkin to flour for maximum moisture without gumminess is 1 tablespoon of pumpkin puree per 1 cup of flour beyond the base recipe amount.
- Make sure to use pure pumpkin puree, not pumpkin pie filling, as the latter contains added sugar and spices that will throw off the recipe balance.
- This bread freezes beautifully for up to three months when wrapped tightly in plastic wrap and stored in a freezer bag.
- For even more moisture, you can add an extra two tablespoons of pumpkin puree without affecting the texture negatively.
Nutrition Facts
- Serving Size: 1 g
- Total number of serves: 10
- Calories: 285kcal
- Fat: 12g
- Carbohydrates: 42g
- Fiber: 2g
- Protein: 4g
Did you make this recipe?
Tag @therecipemasterblog on Instagram and hashtag it with #therecipemaster
Like this recipe?
Follow @therecipemasterblog on Pinterest
Follow us on Facebook!
Follow The Recipe Master on Facebook
Pro Tips That Make This Chocolate Chip Pumpkin Bread Superior
After years of baking quick breads, I’ve learned that small adjustments make huge differences in texture and flavor. These tips will help you achieve bakery-quality results every single time. The ideal ratio of pumpkin to flour for maximum moisture without gumminess is 1 tablespoon of pumpkin puree per 1 cup of flour beyond the base recipe amount.
Use Oil Instead of Butter for Lasting Moisture
Oil creates a more tender crumb that stays moist longer than butter-based batters. Butter contains water that can make the bread dry out faster, while oil coats the flour proteins more effectively. I prefer neutral oils like vegetable or canola, though melted coconut oil works beautifully if you want a subtle tropical note.
Don’t Overmix the Batter
Once you add the wet ingredients to the dry, mix just until no flour streaks remain. Overmixing develops gluten, which creates a tough, dense loaf instead of a tender one. I count about 15 to 20 gentle folds with my spatula, then stop even if the batter looks slightly lumpy.
Toss Chocolate Chips in Flour Before Adding
This simple trick prevents the chips from sinking to the bottom during baking. Just toss them with a tablespoon of flour from your measured amount, then fold them into the batter. The flour coating helps them stay suspended throughout the loaf, giving you chocolate in every slice.
Test for Doneness Properly
Insert a toothpick into the center of the loaf at the 55-minute mark. It should come out with just a few moist crumbs, not wet batter. However, if it touches a chocolate chip, you might get a false reading, so test in two spots. The top should spring back lightly when touched, and the edges should pull away slightly from the pan.
Let It Cool Completely Before Slicing
I know it’s tempting to cut into warm bread, but patience pays off here. The structure continues to set as it cools, and slicing too early can cause the loaf to crumble or compress. I let mine cool in the pan for 15 minutes, then transfer to a rack for at least 45 more minutes. For more information on the nutritional benefits of pumpkin in baking, check out this comprehensive guide to pumpkin nutrition.
Mistakes to Avoid When Making Chocolate Chip Pumpkin Bread
Even though this is a forgiving recipe, I’ve seen a few common pitfalls that can turn a perfect loaf into a disappointing one. Learning what to avoid will save you time and ingredients. Here are the mistakes I see most often and how I work around them.
Using Pumpkin Pie Filling Instead of Pure Puree
Pumpkin pie filling contains added sugar and spices, which throws off the recipe balance and makes the bread overly sweet and mushy. I always use 100% pure pumpkin puree with no additives. Check the label carefully, as the cans often look similar on the shelf.
Overbaking the Loaf
Leaving the bread in the oven too long dries it out, defeating the purpose of all that pumpkin moisture. I set my timer for 55 minutes and start checking then, knowing that my oven might finish the job anywhere between 55 and 65 minutes. Every oven runs differently, so trust the toothpick test over the clock.
Skipping the Room Temperature Eggs
Cold eggs don’t incorporate as smoothly into the batter and can cause the mixture to look curdled or separated. I take my eggs out of the fridge 30 minutes before I start baking. If I forget, I place them in a bowl of warm water for five minutes to take the chill off.
Not Greasing the Pan Thoroughly
Even with nonstick pans, I grease every corner and the bottom generously with butter or cooking spray, then dust lightly with flour. This ensures the loaf releases cleanly without tearing. I’ve had too many beautiful loaves stick and crumble to skip this step now.
Creative Variations for Chocolate Chip Pumpkin Bread
One of my favorite things about this recipe is how adaptable it is to different dietary needs and flavor preferences. I’ve tested these variations extensively, and each one delivers excellent results. Feel free to experiment and make this bread your own.
Gluten-Free Chocolate Chip Pumpkin Bread
Replace the all-purpose flour with a 1:1 gluten-free baking blend that contains xanthan gum. I’ve had great success with brands like Bob’s Red Mill and King Arthur. The texture comes out nearly identical to the original, though the bread may take an extra five minutes in the oven.
Dairy-Free Version
This recipe is naturally dairy-free if you use dairy-free chocolate chips, which are widely available now. Brands like Enjoy Life and Hu Kitchen make excellent options that melt beautifully and taste just as rich as traditional chips. The oil-based batter means you don’t need to substitute any butter.
Nutty Chocolate Pumpkin Bread
Fold in half a cup of chopped walnuts or pecans along with the chocolate chips for added crunch and earthy flavor. I toast the nuts first in a dry skillet for three minutes to bring out their oils and deepen their taste. This variation pairs especially well with cream cheese frosting.
Spiced Chocolate Chip Pumpkin Bread
Increase the cinnamon to two teaspoons and add a quarter teaspoon of ground cloves for a more intensely spiced loaf. I also like adding a half teaspoon of freshly grated nutmeg, which adds warmth without overwhelming the chocolate. This version is perfect for holiday gifting.
Pumpkin Zucchini Chocolate Bread
For an extra moist variation, replace half the pumpkin puree with shredded zucchini that’s been squeezed dry. This adds even more vegetable moisture and makes the bread incredibly tender. If you enjoy combining vegetables in baked goods, you might also love this pumpkin zucchini bread recipe for a chocolate-free option.
Nutritional Benefits of Chocolate Chip Pumpkin Bread
While this is definitely a treat, it does offer some nutritional value thanks to the pumpkin. Each serving provides a good amount of vitamin A from the pumpkin, which supports eye health and immune function. The bread also contains fiber from both the pumpkin and whole grain flour if you choose to substitute half the all-purpose flour with whole wheat.
At approximately 285 calories per slice, this bread is reasonable for an occasional breakfast or snack. The protein content is moderate, so I often pair it with Greek yogurt or a handful of nuts for a more balanced meal. The chocolate chips do add sugar, but you can reduce them to half a cup if you’re watching your intake.
Delicious Ways to Serve Chocolate Chip Pumpkin Bread
This versatile bread works beautifully in so many contexts. For breakfast, I love toasting a slice lightly and spreading it with cream cheese or almond butter, then drizzling with a touch of honey. The warmth brings out the spices and makes the chocolate chips extra melty. It’s also wonderful alongside your morning coffee or chai latte.
For dessert, serve it slightly warmed with a scoop of vanilla ice cream or a dollop of whipped cream. I’ve also made it into a trifle by cubing the bread and layering it with pumpkin mousse and whipped cream in individual glasses. It’s a stunning presentation for fall dinner parties. During the holidays, I wrap individual slices in parchment paper tied with twine for homemade gifts that everyone appreciates.
Best Practices for Storing Your Pumpkin Bread
Proper storage is key to maintaining that incredible moisture I worked so hard to build into this recipe. Once the bread is completely cool, I wrap it tightly in plastic wrap or aluminum foil, then place it in an airtight container or resealable bag. Stored this way at room temperature, it stays fresh for up to five days.
For longer storage, this bread freezes exceptionally well. I slice the entire loaf first, then wrap individual slices in plastic wrap before placing them all in a freezer bag. This way, I can pull out just one or two slices at a time without thawing the whole loaf. Frozen slices keep for up to three months and thaw in about 20 minutes at room temperature, or you can pop them directly in the toaster for a quick warm treat.
Frequently Asked Questions
Yes, canned pure pumpkin puree works perfectly for this recipe. Just make sure you’re using 100% pure pumpkin, not pumpkin pie filling which contains added sugar and spices that will throw off the balance of the recipe.
The most common cause is opening the oven door too early or too frequently during baking, which causes a temperature drop. Other causes include too much leavening agent, underbaking, or overmixing the batter which develops too much gluten.
Insert a toothpick into the center of the loaf at the 55-minute mark. It should come out with just a few moist crumbs attached, not wet batter. The top should also spring back lightly when touched, and the edges should pull slightly away from the pan.
Yes, this batter works beautifully as muffins. Fill muffin cups about two-thirds full and bake at 350°F for 18 to 22 minutes, or until a toothpick inserted in the center comes out clean. This recipe makes approximately 18 standard muffins.





Leave a Reply