

This apple butter recipe transforms fresh apples into a deeply caramelized, velvety spread with warm spices and concentrated apple flavor. Unlike apple sauce, which cooks quickly, apple butter simmers low and slow until the natural sugars darken and the texture becomes thick enough to mound on a spoon. The result is a rich, spreadable preserve that tastes like autumn in a jar and works beautifully on toast, biscuits, or stirred into oatmeal.
What makes this version especially reliable is the stovetop method, which gives you complete control over the final texture. You’ll know it’s ready when the mixture holds its shape on a chilled plate and turns a deep mahogany color. The slow reduction concentrates the apple flavor without adding excessive sugar, letting the natural sweetness shine through.
This recipe uses a blend of sweet and tart apples to create balanced flavor and requires no special equipment beyond a heavy-bottomed pot. The hands-on time is minimal, though the simmering does take patience. Once finished, the apple butter keeps for weeks in the refrigerator or can be processed in a water bath for longer shelf storage.
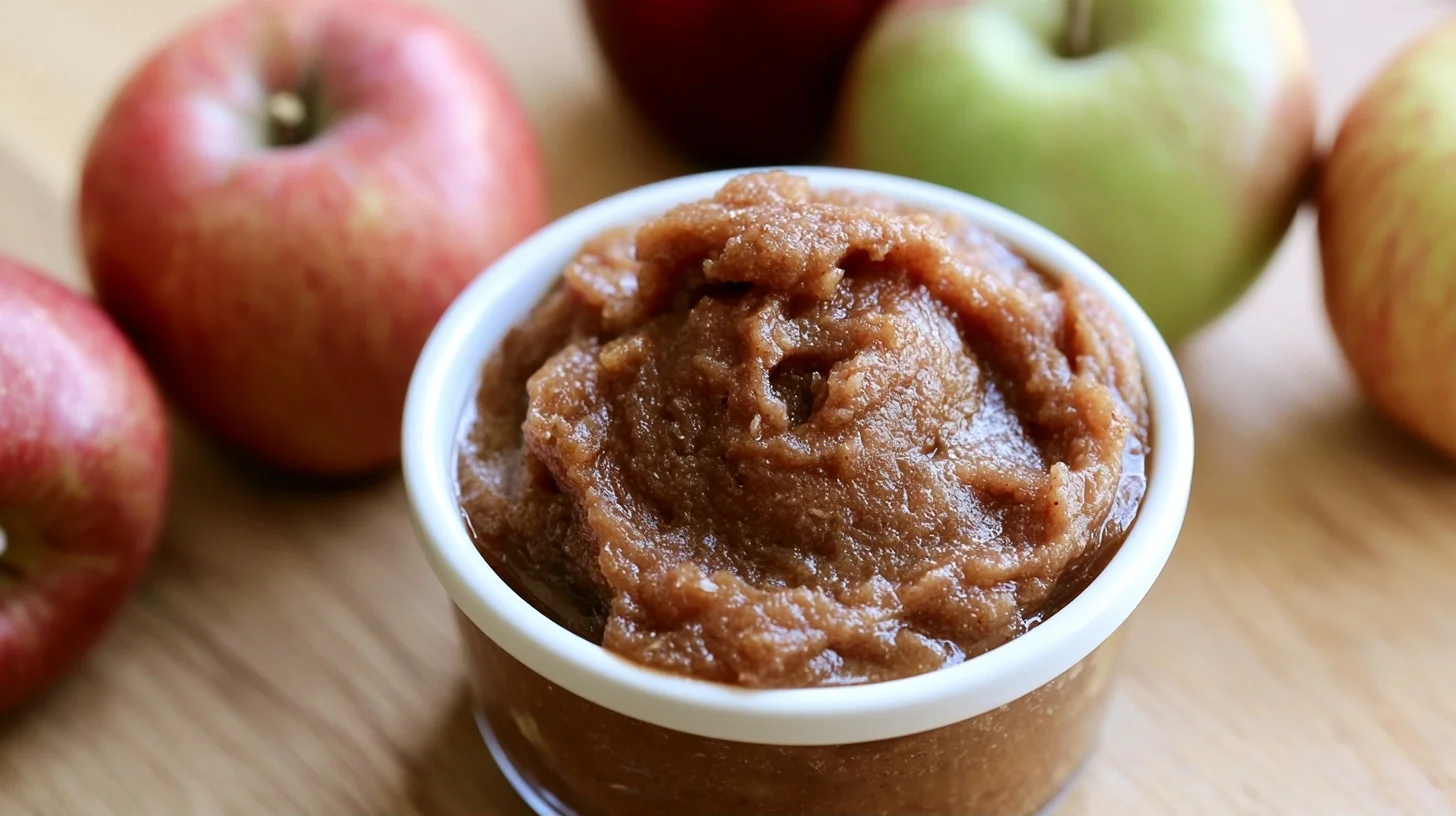
Table of contents
- Why You Will Love This Apple Butter Recipe
- Essential Equipment for Making Apple Butter
- How to Make Perfect Apple Butter Every Time
- Expert Tips for Rich, Spreadable Apple Butter
- Common Mistakes That Ruin Apple Butter Recipe
- Delicious Ways to Customize Your Apple Butter
- Nutritional Benefits of Homemade Apple Butter
- Best Ways to Serve Apple Butter Recipe
- How to Store Apple Butter for Maximum Freshness
- Frequently Asked Questions about Apple Butter Recipe
Why You Will Love This Apple Butter Recipe
- The slow stovetop method develops deep caramelized flavor without scorching.
- Uses a blend of apple varieties for natural sweetness and complexity.
- Requires no peeling, saving prep time while adding body to the final texture.
- The finished spread is thick enough to stay put on toast without running.
Essential Equipment for Making Apple Butter
The right equipment makes the long cooking process easier to manage and helps prevent scorching during the final reduction stage.
- Heavy-bottomed pot or Dutch oven: A 6 to 8 quart pot with a thick base distributes heat evenly and prevents hot spots that can burn the apple mixture during the extended simmering time.
- Immersion blender or food mill: An immersion blender purees the cooked apples directly in the pot, while a food mill removes skins and creates a smooth texture in one step.
- Wooden spoon or silicone spatula: A long-handled utensil lets you stir the thickening mixture safely as it bubbles and reduces, reaching the bottom to prevent sticking.
- Small plate for testing: Keeping a plate in the freezer allows you to test the consistency by spooning a small amount onto the cold surface to see if it holds its shape.
How to Make Perfect Apple Butter Every Time
Apple Butter Recipe
32
servings20
minutes2
hours30
minutes60
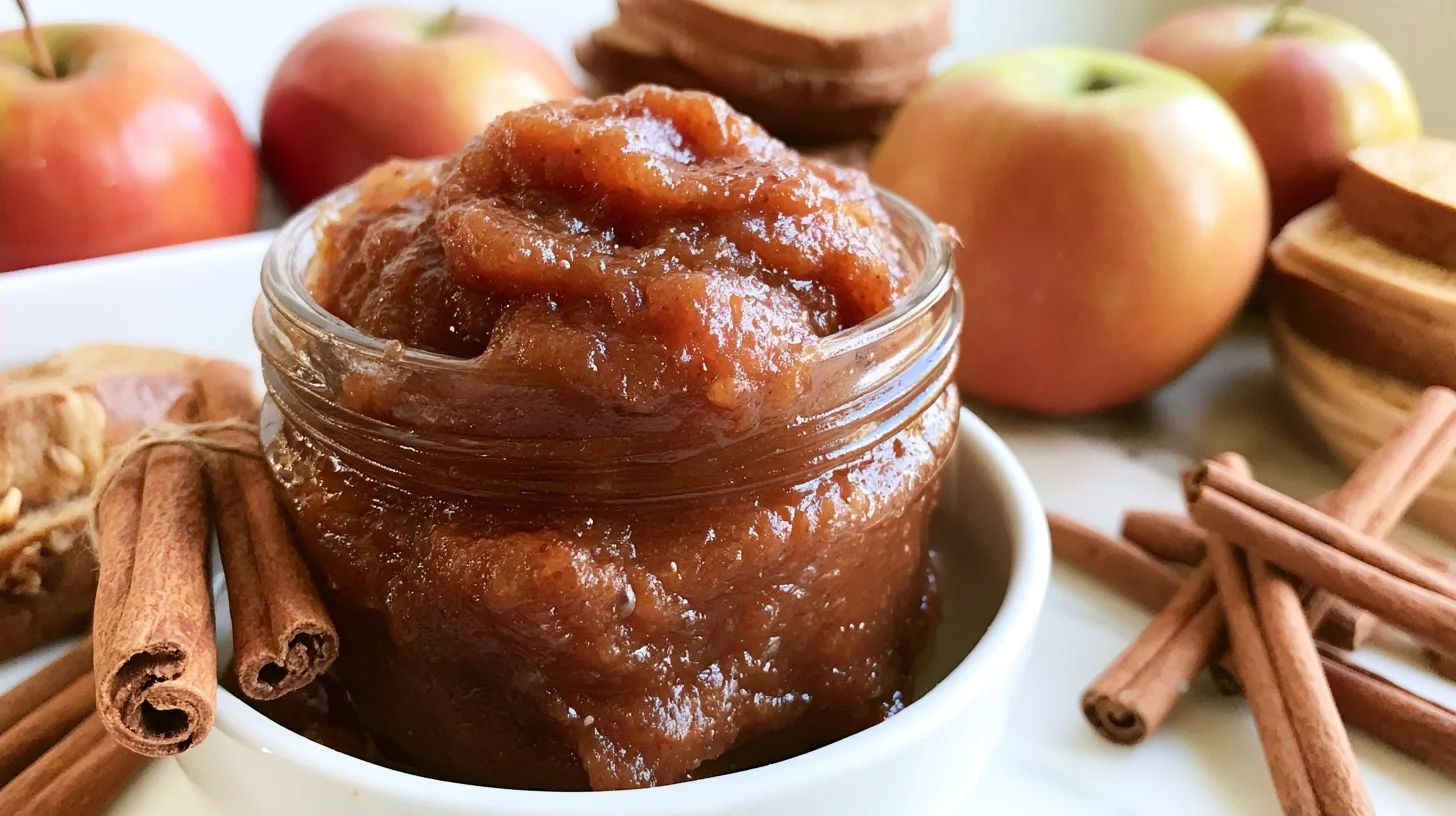
kcalThis apple butter recipe uses a blend of sweet and tart apples slow-simmered until deeply caramelized and spreadable. The stovetop method gives you complete control over texture and sweetness, creating a rich preserve perfect for toast, baking, or glazing meats.
Keep the screen of your device on
Ingredients
5 pounds mixed apples
0.5 cup apple cider
0.75 cup granulated sugar
0.25 cup brown sugar
1 tablespoon ground cinnamon
0.25 teaspoon ground cloves
0.25 teaspoon ground nutmeg
0.125 teaspoon salt
1 tablespoon lemon juice
0.5 teaspoon vanilla extract
Directions
- Combine the apples and cider in a heavy-bottomed pot or Dutch oven. No need to peel the apples—the skins add body and will blend in completely later. Bring to a boil over medium-high heat, then reduce to low, cover, and simmer for 45 to 60 minutes, stirring occasionally, until the apples are completely soft and falling apart.
- Blend the cooked apples using an immersion blender directly in the pot until completely smooth with no chunks remaining. If using a food mill or regular blender, work in batches and return the puree to the pot. The mixture should have a uniform, silky consistency.
- Stir in both sugars, spices, salt, and lemon juice and return the pot to medium-low heat. The lemon juice brightens the flavor and helps preserve the color. Cook uncovered, stirring every 15 minutes at first, then more frequently as it thickens, for 1.5 to 2 hours total.
- Reduce the heat if the mixture starts bubbling too vigorously or if you smell any hint of scorching. The apple butter should bubble gently and steadily, with steam rising but not rapid boiling. Scrape the bottom and sides of the pot regularly to prevent sticking.
- Test for doneness by spooning a small amount onto a chilled plate. Let it sit for 30 seconds—it’s ready when it mounds without liquid seeping around the edges. The color should be a deep mahogany brown, and the texture should be thick enough to coat a spoon heavily.
- Stir in vanilla extract if using, then remove from heat. Let the apple butter cool for 10 minutes before transferring to clean jars. The mixture will thicken slightly more as it cools.
Notes
- Leaving the apple skins on during cooking adds natural pectin and creates a smoother, more cohesive texture after blending than peeled apples alone.
- The apple butter is done when it holds its shape on a chilled plate without liquid pooling around the edges—this test is more reliable than visual cues alone.
- For freezer storage, leave half an inch of headspace in containers to allow for expansion. Frozen apple butter keeps for up to six months and should be thawed in the refrigerator overnight before use.
Nutrition Facts
- Serving Size: 1 g
- Total number of serves: 32
- Calories: 60kcal
- Fat: 0g
- Carbohydrates: 15g
- Fiber: 1g
- Protein: 0g
Did you make this recipe?
Tag @therecipemasterblog on Instagram and hashtag it with #therecipemaster
Like this recipe?
Follow @therecipemasterblog on Pinterest
Follow us on Facebook!
Follow The Recipe Master on Facebook
Expert Tips for Rich, Spreadable Apple Butter
The key to deeply flavored apple butter is managing the reduction carefully so the natural sugars caramelize without burning. These techniques ensure consistent results.
Choose the Right Apple Blend
Using a mix of sweet apples like Fuji or Gala with tart varieties such as Granny Smith creates balanced flavor and natural pectin for body. The tart apples add brightness that prevents the finished butter from tasting flat or one-dimensional. A ratio of two parts sweet to one part tart works well for most palates.
Skip Peeling to Save Time and Add Texture
Leaving the skins on during the initial cooking adds pectin and body to the mixture. After the apples break down, blending or milling incorporates the skins completely, creating a smoother texture than peeled apples alone. The skins also contribute a deeper color and slight tannic complexity that enhances the overall flavor.
Stir More Frequently as It Thickens
During the first hour, stirring every 15 minutes is sufficient. As the mixture reduces and thickens, increase stirring to every 5 to 10 minutes to prevent the bottom from scorching. The sugars become more concentrated as water evaporates, making the mixture more prone to sticking. A silicone spatula that reaches into the pot’s corners works best for this stage.
Test Doneness with the Plate Method
Spoon a small amount of apple butter onto a chilled plate and let it sit for 30 seconds. If it holds its shape without liquid seeping around the edges, it’s ready. This test is more reliable than visual cues alone because the mixture continues to thicken slightly as it cools. If liquid pools around the sample, continue cooking and test again in 10 minutes.
Add Spices After Blending
Waiting to add cinnamon, cloves, and nutmeg until after pureeing the apples prevents the spices from becoming bitter during the long cooking time. Stir them in during the final reduction stage so their flavors remain bright and aromatic rather than muted. This also lets you adjust the spice level to taste before finishing.
For a similar technique using stone fruit, try this peach butter recipe that uses the same slow reduction method for concentrated flavor.
Common Mistakes That Ruin Apple Butter Recipe
Cooking at Too High a Temperature
Rushing the process by raising the heat causes the sugars to scorch before the apples fully break down and the water evaporates. This creates a bitter, burnt flavor that cannot be fixed. The mixture should bubble gently rather than boil vigorously. If you see rapid bubbling or smell any hint of burning, immediately lower the heat and stir thoroughly, scraping the bottom of the pot.
Adding Sugar Too Early
Adding sugar at the beginning draws out water from the apples, which extends the cooking time significantly. It also dilutes the apple flavor because the mixture must reduce longer to reach the proper thickness. Wait until after blending the cooked apples to add sugar, then simmer just until the sweetness integrates and the texture thickens to your preference.
Not Blending Thoroughly Enough
Leaving chunks or uneven texture makes the apple butter less spreadable and causes it to separate during storage. Blend until completely smooth with no visible pieces remaining. If using an immersion blender, move it around the pot systematically to catch all the apples. If using a food mill, pass the mixture through twice if needed to achieve a silky consistency.
Stopping Before It’s Thick Enough
Apple butter that seems thick while hot often becomes too loose after cooling. The mixture should mound on a spoon and hold its shape on a chilled plate before you remove it from the heat. If you’re unsure, it’s better to cook it a few minutes longer than to end up with runny apple sauce. The finished product should be thick enough to spread without sliding off toast.
Delicious Ways to Customize Your Apple Butter
Maple Cinnamon Apple Butter Recipe
Replace half the sugar with pure maple syrup and double the cinnamon for a deeper, more complex sweetness. The maple adds a subtle woodsy note that complements the caramelized apples beautifully. Add the maple syrup during the final reduction stage along with the spices.
Bourbon Apple Butter
Stir in two tablespoons of bourbon during the last 10 minutes of cooking for a warming, slightly smoky flavor. The alcohol cooks off but leaves behind vanilla and caramel notes that enhance the apple’s natural sweetness. This variation pairs especially well with sharp cheddar cheese or pork chops.
Chai-Spiced Apple Butter
Add a quarter teaspoon each of ground cardamom, ginger, and black pepper along with the cinnamon and cloves. This creates a more aromatic, warming profile reminiscent of chai tea. The ginger adds brightness while the cardamom contributes floral complexity.
Sugar-Free Apple Butter Recipe
Omit the added sugar entirely and rely on naturally sweet apples like Fuji, Honeycrisp, or Pink Lady. The finished butter will be less thick and more tart, but it works well for those reducing sugar intake. You can also add a small amount of stevia or monk fruit sweetener during the final reduction if needed.
Nutritional Benefits of Homemade Apple Butter
Apple butter provides concentrated apple flavor with less added sugar than many commercial spreads. A typical two-tablespoon serving contains around 60 calories, primarily from natural fruit sugars and any added sweetener. Because the apples cook down significantly, you get a concentrated source of the fruit’s fiber and antioxidants, particularly quercetin and polyphenols that support heart health.
The long cooking process breaks down the fruit’s cell walls, making the nutrients more bioavailable. Leaving the skins on adds extra fiber and increases the antioxidant content. Using less sugar than traditional recipes reduces the overall calorie count while still delivering satisfying sweetness from the caramelized apples themselves.
Apple butter contains no fat unless you spread it on buttered toast, making it a lighter alternative to nut butters for those watching fat intake. The natural pectin from the apples may also support digestive health. Keep in mind that the reduction concentrates both nutrients and sugars, so portion control matters for blood sugar management.
Best Ways to Serve Apple Butter Recipe
Apple butter shines as a breakfast spread on warm biscuits, English muffins, or sourdough toast. Its thick texture stays put better than jam and adds moisture without making the bread soggy. Try it swirled into plain yogurt or oatmeal for natural sweetness and apple flavor without refined sugar.
It also works beautifully in savory applications. Use it as a glaze for roasted pork tenderloin or chicken thighs during the last 10 minutes of cooking. The caramelized sugars create a glossy coating that balances savory seasonings. Spread a thin layer on grilled cheese sandwiches before cooking for a sweet-savory contrast that pairs especially well with sharp cheddar or Gruyère.
For baking, substitute apple butter for half the oil or butter in muffin and quick bread recipes to add moisture and reduce fat. It also makes an excellent filling for thumbprint cookies or a layer in spice cakes. Stir a spoonful into barbecue sauce or vinaigrettes for subtle sweetness and body.
To learn more about the history and traditional uses of this preserve, visit this guide to what apple butter is and how it differs from applesauce.
How to Store Apple Butter for Maximum Freshness
Store cooled apple butter in clean glass jars with tight-fitting lids in the refrigerator for up to three weeks. The high sugar and acid content act as natural preservatives, but refrigeration is still necessary once opened. Always use a clean spoon when scooping to prevent introducing bacteria that can shorten shelf life.
For longer storage, process the hot apple butter in a water bath canner for 10 minutes using half-pint or pint jars. Properly sealed jars can be stored in a cool, dark pantry for up to one year. The flavor actually improves after a few weeks as the spices meld. Once opened, refrigerate and use within three weeks.
Freezing is another excellent option. Leave half an inch of headspace in freezer-safe containers or jars to allow for expansion. Frozen apple butter keeps for up to six months. Thaw overnight in the refrigerator and stir well before using, as some separation may occur during freezing.
Frequently Asked Questions about Apple Butter Recipe
Apple butter is cooked much longer than applesauce until the sugars caramelize and the texture becomes thick and spreadable. Applesauce remains lighter in color and has a thinner, sauce-like consistency, while apple butter is dark, concentrated, and rich.
No, leaving the skins on saves time and adds pectin and body to the final texture. After cooking, blending or milling incorporates the skins completely, creating a smoother consistency than peeled apples alone.
Yes, you can cook the apples on low for 8 to 10 hours in a slow cooker with the lid slightly ajar to allow moisture to evaporate. Stir occasionally and blend when the apples are completely soft, then continue cooking uncovered until thick.
The apple butter is ready when it mounds on a spoon and holds its shape on a chilled plate without liquid seeping around the edges. It should be thick enough to spread without running and have a deep mahogany color.




Leave a Reply