

Making caramel apples recipe at home is easier than you might think, and the result is a classic fall treat with a glossy, buttery caramel coating that clings perfectly to crisp, tart apples. Unlike store-bought versions that often taste overly sweet or waxy, homemade caramel apples let you control the caramel’s texture and flavor, creating a fresher, more satisfying bite. The key is using the right apples and ensuring the caramel reaches the correct temperature so it sets firm without being too hard to bite through.
This recipe uses a simple stovetop caramel made from scratch with just a handful of ingredients. The caramel should reach 245°F, which creates a coating that’s firm enough to hold but still pleasantly chewy. Choosing tart, firm apples like Granny Smith or Honeycrisp ensures the fruit doesn’t get lost under the sweetness, and removing the waxy coating from the apple skins helps the caramel stick properly.
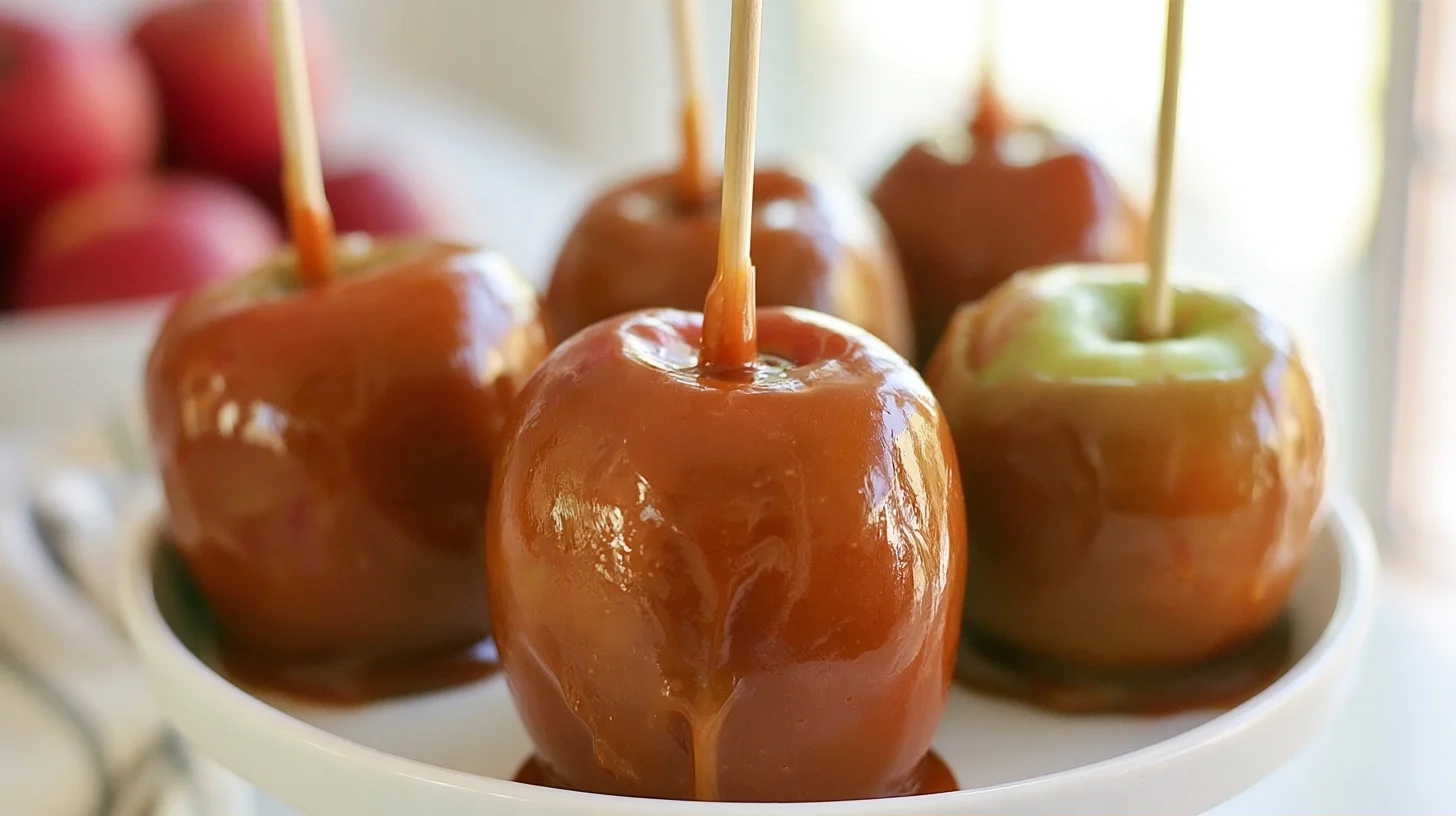
Table of contents
- Why You Will Love This Caramel Apples Recipe
- What You’ll Need to Make Caramel Apples
- How to Make Perfect Caramel Apples Recipe Every Time
- Common Mistakes When Making Caramel Apples
- Ways to Customize Your Caramel Apples
- Nutrition and Health Considerations
- How to Serve Caramel Apples
- How to Store Caramel Apples
Why You Will Love This Caramel Apples Recipe
- The caramel is made from scratch with real butter and cream, giving it a rich, buttery flavor that’s far better than anything from a package.
- The recipe includes a simple trick to remove the waxy coating from apples, which is the most common reason caramel slides off.
- You can customize the coating with chopped nuts, crushed cookies, or drizzled chocolate for a gourmet finish.
- The caramel sets in about 30 minutes, so you can make these the same day you plan to serve them.
What You’ll Need to Make Caramel Apples
This recipe requires a few specific tools to ensure the caramel reaches the correct temperature and the apples are easy to handle. Each piece of equipment plays a role in the process, from melting the sugar evenly to creating a smooth, glossy coating.
- Heavy-bottomed saucepan: A thick base prevents the caramel from scorching as the sugar melts and the mixture heats.
- Candy thermometer: Essential for monitoring the caramel temperature, which must reach 245°F for the right texture.
- Wooden spoon or silicone spatula: Used to stir the caramel constantly, ensuring it doesn’t burn or develop hot spots.
- Wooden sticks or dowels: These are inserted into the apple cores to create handles for dipping and holding.
- Parchment paper or silicone mat: Provides a non-stick surface for the caramel apples to set without sticking.
- Large bowl of ice water: Used to quickly cool the apples after a hot water bath, which removes the waxy coating.
How to Make Perfect Caramel Apples Recipe Every Time
The most important step in making caramel apples is removing the waxy coating that’s applied to most store-bought apples. This wax prevents the caramel from adhering properly, causing it to slide off in sheets once it cools. Dipping the apples briefly in boiling water, then immediately transferring them to ice water, melts the wax and allows you to dry the apples thoroughly before dipping.
Once the apples are prepped, the caramel itself is straightforward. The sugar, butter, corn syrup, and cream are heated together until the mixture reaches exactly 245°F. This temperature is critical because it creates a caramel that’s firm enough to hold its shape but still soft enough to bite through. If the caramel doesn’t reach this temperature, it will remain too soft and sticky. If it goes much higher, it becomes brittle and difficult to eat.
After dipping, the caramel apples need to rest on parchment paper until fully set, which takes about 30 minutes at room temperature. If you’re adding toppings like chopped peanuts or mini chocolate chips, roll the apples in the toppings immediately after dipping, while the caramel is still tacky. For a smooth caramel dip that pairs well with apple slices, you can use a similar base but skip the high-heat stage.
Choosing the Right Apples
Granny Smith apples are the most popular choice because their tartness balances the sweetness of the caramel, and their firm texture holds up well during dipping and eating. Honeycrisp and Fuji apples also work well, offering a slightly sweeter flavor while maintaining the necessary crispness. Avoid softer varieties like Red Delicious or McIntosh, which can become mushy and don’t provide enough contrast to the caramel.
Why Temperature Matters
Caramel texture is directly controlled by the temperature it reaches during cooking. At 245°F, the caramel is in the firm ball stage, meaning it will set into a coating that’s chewy but not sticky. If the caramel only reaches 235°F, it will remain too soft and may slide off the apples or stick to your teeth. If it exceeds 250°F, it hardens into a shell that’s difficult to bite through and can crack instead of yielding.
How to Prevent Air Bubbles
Stirring the caramel constantly while it heats prevents air bubbles from forming, which can create weak spots in the coating. Once the caramel is ready, let it cool slightly before dipping the apples. If you dip the apples while the caramel is still boiling hot, it will be too thin and run off in rivulets. Waiting 2 to 3 minutes after removing the pan from the heat allows the caramel to thicken just enough to cling evenly.
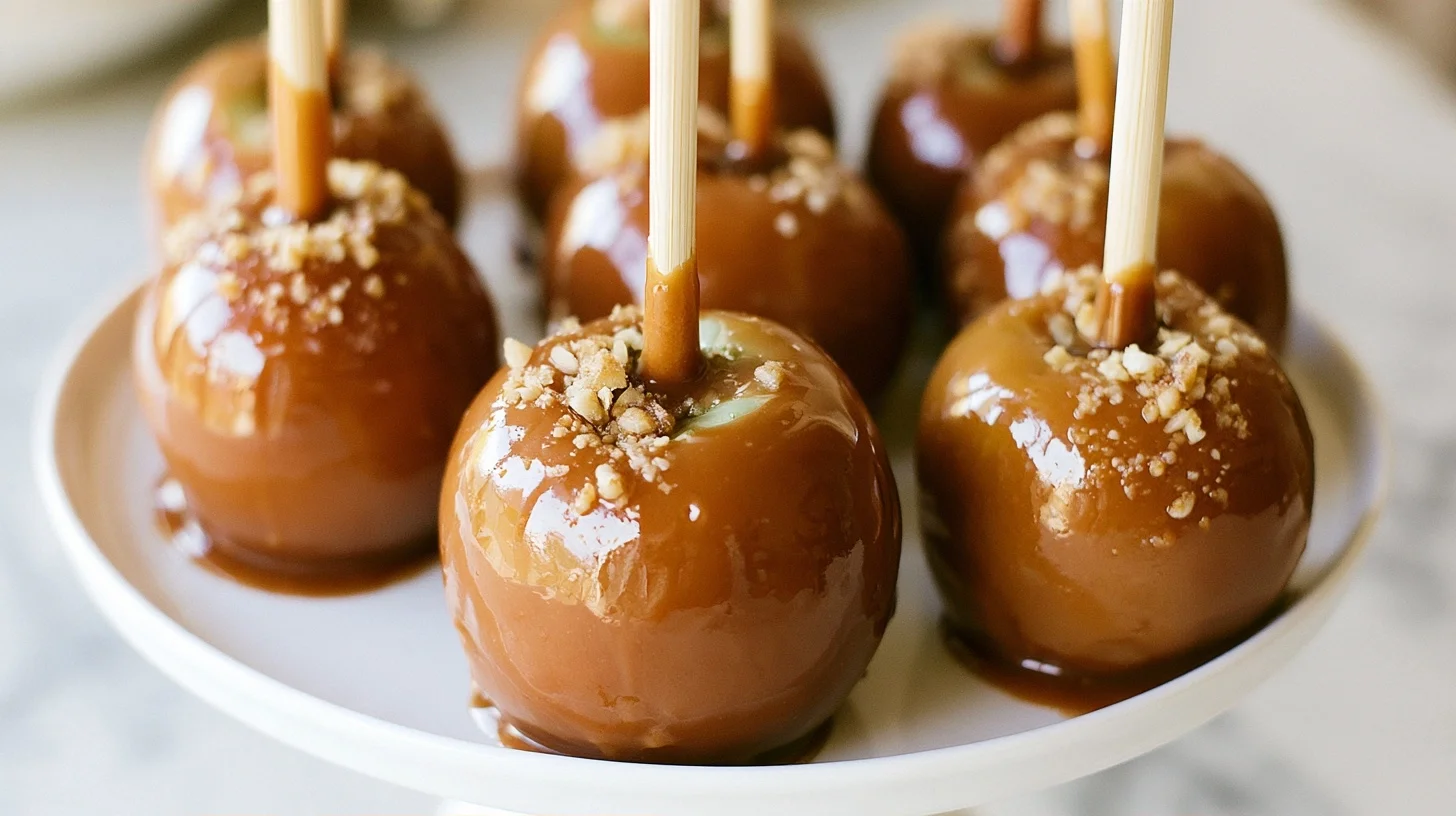
Caramel Apples
6
servings15
minutes20
minutes380
kcalThis caramel apples recipe creates a glossy, buttery coating that clings perfectly to tart, crisp apples. The caramel is cooked to exactly 245°F for a firm but chewy texture, and a quick hot water bath removes the waxy coating that prevents adhesion.
Keep the screen of your device on
Ingredients
6 medium Granny Smith apples
6 wooden sticks or dowels
1 cup granulated sugar
0.5 cup unsalted butter
0.5 cup light corn syrup
0.5 cup heavy cream
1 teaspoon vanilla extract
0.25 teaspoon salt
1 cup chopped peanuts
2 ounces dark chocolate
Directions
- Prepare the apples by removing the stems and inserting a wooden stick firmly into the core of each apple. Bring a large pot of water to a boil, then dip each apple into the boiling water for 5 seconds. Immediately transfer the apples to a bowl of ice water, then pat them completely dry with a clean kitchen towel. This step removes the waxy coating that prevents caramel from sticking.
- Line a baking sheet with parchment paper or a silicone mat and set it aside. Make sure the apples are at room temperature and completely dry before dipping.
- Combine the sugar, butter, corn syrup, and cream in a heavy-bottomed saucepan over medium heat. Stir constantly with a wooden spoon or silicone spatula until the butter melts and the sugar dissolves completely.
- Attach a candy thermometer to the side of the pan, making sure the tip doesn’t touch the bottom. Continue cooking the caramel, stirring frequently, until the temperature reaches exactly 245°F. This should take about 15 to 20 minutes. The caramel will be a deep amber color and smell nutty and buttery.
- Remove the pan from the heat and stir in the vanilla extract and salt. Let the caramel cool for 2 to 3 minutes, which allows it to thicken slightly so it clings to the apples instead of running off.
- Dip each apple into the caramel, tilting the pan if necessary to coat the apple evenly. Let any excess caramel drip back into the pan, then immediately roll the apple in chopped peanuts or other toppings if using. The caramel should coat the apple in a smooth, even layer without pooling at the bottom.
Notes
- The caramel must reach exactly 245°F to achieve the firm ball stage, which creates a coating that’s chewy but not sticky. If the temperature is too low, the caramel will remain soft and slide off the apples.
- Removing the waxy coating from the apples is the most important step for ensuring the caramel sticks. Even organic apples often have a thin layer of wax, so don’t skip the hot water bath.
- If the caramel becomes too thick to dip easily, return the pan to low heat for a minute or two, stirring constantly, until it reaches a dipping consistency again.
Nutrition Facts
- Serving Size: 1 g
- Total number of serves: 6
- Calories: 380kcal
- Fat: 19g
- Carbohydrates: 52g
- Fiber: 4g
- Protein: 3g
Did you make this recipe?
Tag @therecipemasterblog on Instagram and hashtag it with #therecipemaster
Like this recipe?
Follow @therecipemasterblog on Pinterest
Follow us on Facebook!
Follow The Recipe Master on Facebook
Common Mistakes When Making Caramel Apples
Not Removing the Wax Coating
Most apples sold in grocery stores are coated with a thin layer of food-grade wax to extend shelf life and improve appearance. This wax creates a slippery surface that prevents caramel from sticking. Even if the apples look clean, the wax is still present. Dipping the apples in boiling water for 5 seconds, then immediately transferring them to ice water, melts the wax and allows you to wipe it away with a towel. Skipping this step is the most common reason caramel slides off.
Dipping Wet Apples
After washing or removing the wax, the apples must be completely dry before dipping. Any moisture on the surface will cause the caramel to bead up and refuse to adhere. Pat the apples thoroughly with a clean kitchen towel, then let them sit at room temperature for 10 to 15 minutes to ensure no residual moisture remains.
Overheating or Underheating the Caramel
Using a candy thermometer is essential because visual cues alone are unreliable. If the caramel doesn’t reach 245°F, it will remain too soft and sticky, making the apples difficult to handle and eat. If it goes above 250°F, the caramel hardens into a brittle shell that cracks instead of biting cleanly. Remove the pan from the heat as soon as the thermometer reads 245°F, and don’t rely on guessing.
Refrigerating the Apples Too Soon
Placing caramel apples in the refrigerator before the caramel has fully set can cause condensation to form on the surface, making the coating sticky and dull. Let the apples rest at room temperature on parchment paper for at least 30 minutes before moving them to the fridge. Once fully set, they can be refrigerated to keep them fresh, but the initial setting should happen at room temperature.
Ways to Customize Your Caramel Apples
Nut-Coated Caramel Apples Recipe
After dipping the apples in caramel, immediately roll them in finely chopped peanuts, pecans, or walnuts. The nuts should be chopped small enough to stick to the caramel without falling off, but large enough to provide texture and flavor. Toasting the nuts beforehand deepens their flavor and makes them more aromatic.
Chocolate-Drizzled Caramel Apples Recipe
Once the caramel has set, melt dark or milk chocolate and drizzle it over the apples using a spoon or a piping bag. The chocolate adds a layer of richness and creates visual contrast. White chocolate also works well and can be tinted with food coloring for seasonal designs.
Candy or Cookie Crumb Coating
Crushed Oreos, graham crackers, or candy pieces like M&Ms or toffee bits can be pressed into the caramel while it’s still soft. This creates a textured, colorful coating that’s especially popular with kids. Make sure the pieces are small enough to adhere without sliding off.
Salted Caramel Apples Recipe
Sprinkling flaky sea salt over the caramel immediately after dipping creates a sweet-salty contrast that enhances the buttery flavor of the caramel. Use a light hand, too much salt can overpower the sweetness. Maldon or fleur de sel are ideal because their large flakes provide bursts of salt without making the entire apple taste salty.
Nutrition and Health Considerations
Caramel apples are a treat, not a health food, but they do contain some nutritional value from the apple itself. Apples are a good source of fiber and vitamin C, which remain present even under the caramel coating. A medium apple provides about 4 grams of fiber, which supports digestion and helps regulate blood sugar.
The caramel itself is high in sugar and fat, primarily from the butter and cream. Each caramel apple contains approximately 300 to 400 calories, depending on the size of the apple and the thickness of the coating. Adding toppings like nuts increases the calorie count but also adds protein and healthy fats, which can make the treat more satisfying and help slow the absorption of sugar.
For a lighter version, you can reduce the amount of butter and cream slightly, though this will affect the caramel’s texture and richness. Another option is to make smaller caramel apple slices by cutting the apples into wedges and dipping just the tips, which reduces the overall sugar and calorie content while still delivering the flavor.
How to Serve Caramel Apples
Caramel apples are traditionally served on a stick, which makes them easy to hold and eat. They’re a popular treat at fall festivals, Halloween parties, and Thanksgiving gatherings. For a more elegant presentation, you can slice the apples into wedges after the caramel has set, arranging them on a platter with the cut sides facing up to show the layers of apple and caramel.
Pairing caramel apples with hot cider, spiced tea, or coffee enhances the fall flavors and provides a warm contrast to the cold, crisp apple. For a dessert table, caramel apples can be displayed on individual squares of parchment paper, each wrapped in cellophane and tied with a ribbon for a festive, gift-ready look.
If you’re serving caramel apples to young children, consider cutting the apples into smaller pieces before dipping, or slicing them after the caramel sets. Whole caramel apples can be difficult for small children to bite through, and the hard caramel coating can pose a choking risk. Sliced caramel apples are easier to eat and still deliver the same flavor and texture.
How to Store Caramel Apples
Caramel apples should be stored in the refrigerator to keep the apples fresh and prevent the caramel from becoming too soft. Place them on a parchment-lined plate or tray, making sure they don’t touch each other, and cover them loosely with plastic wrap. They will keep for up to 3 days, though the apples may begin to release moisture after the first day, which can make the caramel slightly sticky.
If the caramel apples have been coated with nuts or other toppings, store them in a single layer to prevent the toppings from being crushed or falling off. Avoid stacking them, as the weight can cause the caramel to flatten or the sticks to shift.
Caramel apples do not freeze well because the texture of the apple changes when thawed, becoming soft and watery. The caramel itself can be made ahead and stored in an airtight container in the refrigerator for up to a week, then gently reheated on the stove before dipping fresh apples.







Leave a Reply