

If you’re a fan of classic American confections, Milton Hershey’s Caramels represent a sweet piece of candy-making history. Before Milton Hershey became synonymous with chocolate bars, he built his fortune on buttery, melt-in-your-mouth caramels that captured hearts across the country. These soft, chewy caramels deliver rich vanilla and butter flavor with a smooth texture that’s leagues above anything you’ll find wrapped in plastic at the checkout counter. Making them at home gives you control over sweetness, texture, and freshness while connecting you to a recipe tradition that helped launch one of America’s most iconic brands.
This recipe uses heavy cream, butter, and corn syrup to create caramels with a tender chew and deep caramelized flavor. The key is reaching the right temperature and stirring consistently to prevent scorching. Once you master the technique, you’ll have a confection that makes an impressive homemade gift or a luxurious treat to keep on hand.
Milton Hershey caramels from 1894 are a nostalgic treat, try them at home and Let me know how they turn out.
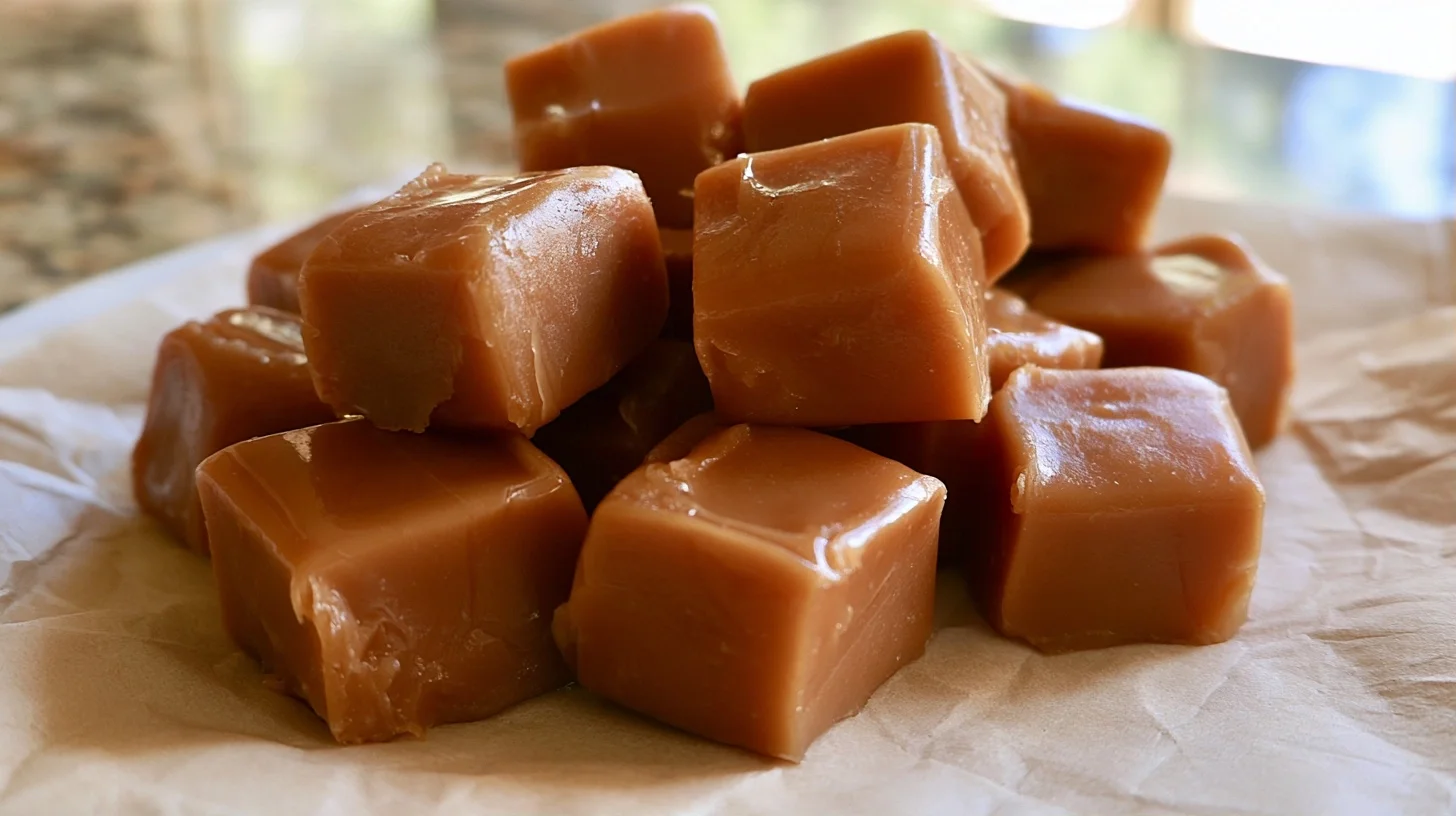
Table of contents
- Why You Will Love This Milton Hershey’s Caramels Recipe
- Essential Equipment for Perfect Caramels
- How to Make Milton Hershey’s Caramels at Home
- How to Get Soft, Chewy Milton Hershey’s Caramels Every Time
- Common Mistakes When Making Caramels
- Ways to Customize Your Milton Hershey’s Caramels
- Nutritional Profile of Homemade Caramels
- How to Serve Milton Hershey’s Caramels
- How to Store Caramels for Maximum Freshness
- Frequently Asked Questions
Why You Will Love This Milton Hershey’s Caramels Recipe
- These caramels have a soft, buttery texture that melts on your tongue without sticking to your teeth.
- The recipe uses simple ingredients you likely already have in your pantry, with no special additives or preservatives.
- Making caramels from scratch lets you control the sweetness and texture to match your preference.
- They make beautiful homemade gifts when wrapped in wax paper and tied with ribbon.
Essential Equipment for Perfect Caramels
Success with caramel depends on precise temperature control and proper pan preparation. Using the right tools makes the process smoother and helps you avoid common pitfalls like scorching or uneven cooking.
- Heavy-bottomed saucepan: A 3 to 4 quart heavy-bottomed pan distributes heat evenly and prevents hot spots that can burn the sugar.
- Candy thermometer: Accuracy matters when making caramel. A clip-on candy thermometer lets you monitor temperature without holding it the entire time.
- Wooden spoon or heat-resistant silicone spatula: You’ll need to stir constantly once the mixture begins to boil, and wood or silicone won’t conduct heat like metal.
- 8×8 inch baking pan: This size produces caramels about half an inch thick, which gives the ideal chew.
- Parchment paper: Lining your pan with parchment makes removing and cutting the caramels much easier and prevents sticking.
- Sharp knife: A large, sharp chef’s knife cuts through set caramel cleanly without dragging or tearing.
How to Make Milton Hershey’s Caramels at Home
Milton Hershey’s Caramels
64
servings10
minutes25
minutes55
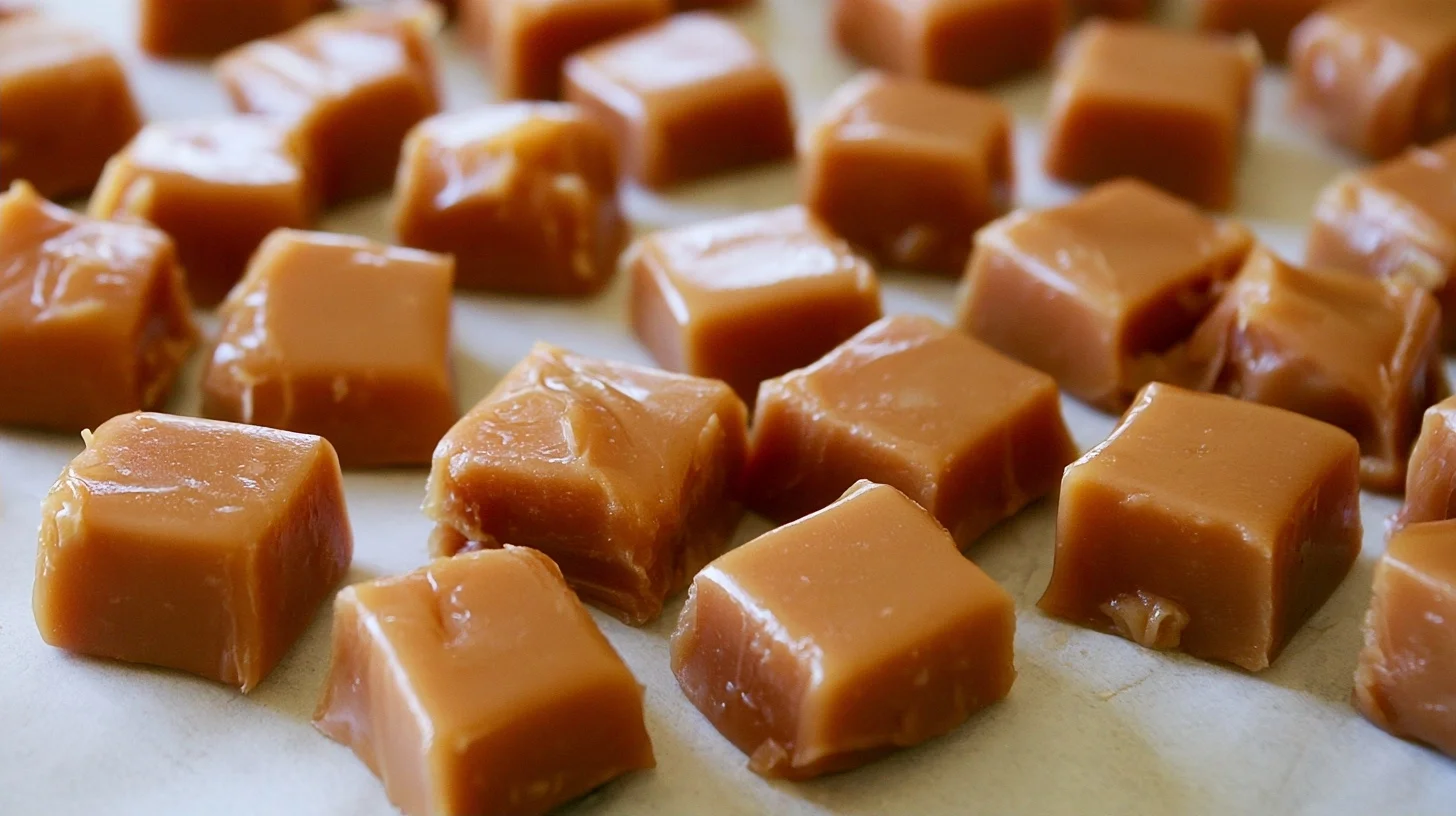
kcalThese buttery, soft caramels are inspired by the candy that built Milton Hershey’s fortune before he became famous for chocolate. Made with heavy cream, butter, and corn syrup, they have a tender chew and rich vanilla flavor. The key is reaching exactly 245°F to 248°F on a candy thermometer and stirring constantly to prevent scorching.
Keep the screen of your device on
Ingredients
1 cup unsalted butter
2 cups granulated sugar
1 cup light corn syrup
1 cup heavy cream
0.5 cup sweetened condensed milk
1 teaspoon vanilla extract
0.5 teaspoon salt
1 tablespoon flaky sea salt
Directions
- Line an 8×8 inch baking pan with parchment paper, leaving an overhang on two sides. Lightly grease the parchment with butter or cooking spray.
- Combine the butter, sugar, corn syrup, heavy cream, and sweetened condensed milk in a heavy-bottomed 3 to 4 quart saucepan. Place over medium heat and stir occasionally until the butter melts and the sugar dissolves.
- Clip a candy thermometer to the side of the pan, making sure the bulb doesn’t touch the bottom. Increase the heat to medium-high and bring the mixture to a boil.
- Stir constantly once the mixture begins to boil, using a wooden spoon or heat-resistant silicone spatula. Continue cooking and stirring until the thermometer reaches 245°F to 248°F, which takes about 15 to 20 minutes. The mixture will thicken and turn a deep golden color.
- Remove the pan from heat immediately when the temperature reaches 245°F to 248°F. Stir in the vanilla extract and salt quickly.
- Pour the hot caramel into the prepared pan in one smooth motion. Use a spatula to spread it evenly if needed, but work quickly as it begins to set. If using flaky sea salt, sprinkle it over the surface now.
Notes
- Reaching 245°F produces very soft caramels, while 248°F gives a slightly firmer chew with better shape retention.
- Stirring constantly once the mixture boils prevents the sugars from settling and scorching on the pan bottom, which would create a bitter flavor.
- Store wrapped caramels in an airtight container at room temperature for up to 2 weeks, in the refrigerator for up to 1 month, or in the freezer for up to 3 months.
Nutrition Facts
- Serving Size: 1g
- Total number of serves: 64
- Calories: 55kcal
- Fat: 2g
- Carbohydrates: 9g
- Fiber: 0g
- Protein: 0g
Did you make this recipe?
Tag @therecipemasterblog on Instagram and hashtag it with #therecipemaster
Like this recipe?
Follow @therecipemasterblog on Pinterest
Follow us on Facebook!
Follow The Recipe Master on Facebook
How to Get Soft, Chewy Milton Hershey’s Caramels Every Time
The difference between grainy, hard caramels and smooth, tender ones comes down to temperature control and stirring technique. Reaching exactly 245°F to 248°F on a candy thermometer produces the soft-ball stage, which gives caramels their characteristic chew without being sticky or brittle.
Stir Constantly Once the Mixture Boils
Once your sugar, butter, cream, and corn syrup reach a boil, stirring constantly prevents the sugars from settling and scorching on the bottom of the pan. Even a few seconds without stirring can create burnt spots that ruin the flavor. Use a steady, sweeping motion that covers the entire pan bottom. This also helps the mixture cook evenly and reach the target temperature at a consistent rate.
Use a Candy Thermometer for Precision
Guessing temperature by appearance alone is unreliable. A candy thermometer clipped to the side of your pan gives you real-time feedback. Make sure the thermometer bulb doesn’t touch the pan bottom, which can give a false high reading. When the mixture reaches 245°F, it’s at the lower end of soft-ball stage and will produce very soft caramels. At 248°F, the caramels will be slightly firmer with more chew. Most recipes for classic Hershey desserts rely on precise temperature control to achieve consistent results.
Let the Caramels Cool Completely Before Cutting
Patience is essential once you pour the hot caramel into your prepared pan. Cutting too early results in caramels that lose their shape and stick to everything. Let the pan sit at room temperature for at least four hours, or until the caramel feels firm and cool to the touch. If you’re in a hurry, you can refrigerate the pan for about two hours, but letting it cool slowly at room temperature produces a slightly smoother texture.
Wrap Individual Pieces to Prevent Sticking
Caramels are hygroscopic, meaning they absorb moisture from the air. This can make them sticky and cause them to stick together if left unwrapped. Once you cut your caramels into squares, wrap each piece in a small square of wax paper or parchment. Twist the ends to seal. This keeps them fresh, prevents sticking, and makes them easy to share or gift.
Common Mistakes When Making Caramels
Not Stirring Enough During Cooking
If you stop stirring or stir too slowly, the sugars can settle and burn on the bottom of the pan. This creates bitter, dark spots and an acrid flavor that spreads through the entire batch. The fix is simple: once the mixture begins to boil, commit to stirring constantly until it reaches temperature. Keep the heat at medium to medium-high so the caramel cooks steadily without boiling over, and maintain a steady stirring rhythm.
Cooking to the Wrong Temperature
Stopping too early, below 240°F, results in caramels that are too soft and may not set properly. Cooking past 250°F makes them hard and brittle instead of chewy. The solution is to use an accurate candy thermometer and watch it closely as the temperature climbs. The last 10 degrees happen quickly, so don’t walk away. Remove the pan from heat as soon as it reaches 245°F to 248°F.
Using Cold Cream or Butter
Adding cold cream or butter to the hot sugar mixture causes the temperature to drop suddenly, which can make the caramel seize or cook unevenly. Warm your cream slightly before adding it, or at least bring it to room temperature. This keeps the cooking process smooth and helps the mixture reach the target temperature without prolonged boiling that can cause graininess.
Skipping the Parchment Paper
Pouring caramel directly into an unlined pan makes removal nearly impossible. Even with butter or oil, the caramel bonds to the pan and tears when you try to lift it out. Always line your pan with parchment paper, leaving an overhang on two sides. Once the caramel is set, you can lift the entire slab out using the parchment as handles, then peel it away and cut cleanly.
Ways to Customize Your Milton Hershey’s Caramels
Salted Caramels
Sprinkle flaky sea salt over the surface of the caramel immediately after pouring it into the pan. The salt crystals add a savory contrast that balances the sweetness and enhances the buttery flavor. Use a coarse salt like Maldon or fleur de sel for the best texture and visual appeal.
Vanilla Bean Caramels
Replace the vanilla extract with the seeds from one vanilla bean. Split the bean lengthwise, scrape out the seeds, and add both the seeds and the pod to the cream as it warms. Remove the pod before pouring the caramel into the pan. This gives a more complex, aromatic vanilla flavor with visible specks throughout the caramel.
Chocolate-Dipped Caramels
Once your caramels are cut and wrapped, you can dip them partially or fully in melted chocolate. Use tempered dark or milk chocolate for a glossy finish that snaps cleanly. Dip each caramel halfway, let the excess drip off, and place it on parchment to set. The combination of chewy caramel and crisp chocolate is classic for a reason.
Bourbon or Rum Caramels
Stir in one to two tablespoons of bourbon or dark rum after removing the pan from the heat. The alcohol adds depth and a subtle warmth without making the caramels boozy. Make sure to stir it in quickly before pouring, as the caramel sets fast once it stops cooking.
Nutritional Profile of Homemade Caramels
Homemade caramels are a treat, not a health food, but understanding their nutritional content helps you enjoy them mindfully. Each piece contains primarily sugar and fat from the butter and cream, which contribute to the rich flavor and smooth texture. A single caramel typically contains around 50 to 60 calories, with about 2 grams of fat, 9 grams of carbohydrates, and 8 grams of sugar. There’s minimal protein and no fiber.
Because caramels are calorie-dense and high in sugar, they’re best enjoyed in moderation. The advantage of making them at home is that you can control the size of each piece and avoid the artificial flavors and preservatives found in many commercial caramels. If you’re looking to reduce sugar, you can experiment with reducing the total sugar slightly, though this will affect texture and may require adjusting the cooking temperature.
How to Serve Milton Hershey’s Caramels
These caramels shine on their own, but they also work beautifully in other desserts. Chop them into chunks and fold them into vanilla ice cream, or press a few pieces into the center of brownie batter before baking for a gooey surprise. You can also melt caramels gently in a double boiler and drizzle the warm sauce over apple slices, popcorn, or pound cake.
For gifting, arrange wrapped caramels in a small box lined with tissue paper, or layer them in a glass jar tied with twine. They pair well with dark chocolate truffles, shortbread cookies, or spiced nuts for a homemade candy assortment. Serve them alongside coffee or hot chocolate for a simple but elegant finish to a meal.
How to Store Caramels for Maximum Freshness
Store wrapped caramels in an airtight container at room temperature for up to two weeks. Keep the container in a cool, dry place away from direct sunlight and heat, which can cause the caramels to soften or sweat. If your kitchen is warm or humid, store them in the refrigerator instead, where they’ll keep for up to a month. Let refrigerated caramels come to room temperature before eating for the best texture.
You can also freeze caramels for up to three months. Wrap each piece individually, then place them in a freezer-safe bag or container. Thaw them in the refrigerator overnight, then bring them to room temperature before unwrapping. Freezing doesn’t noticeably affect the texture or flavor, making it a great option if you want to make a large batch ahead of time.
Frequently Asked Questions
It’s not recommended. A candy thermometer ensures you reach the precise temperature needed for the right texture. Without one, you risk making caramels that are too soft or too hard.
Graininess usually happens when sugar crystals form during cooking. This can occur if you stir too much before the mixture boils, if sugar crystals on the pan sides fall back in, or if the mixture cooks too long. Brush down the pan sides with a wet pastry brush and avoid stirring until the mixture boils.
Yes, but reduce or omit any additional salt in the recipe. Salted butter will make the caramels slightly saltier, which some people prefer, but it gives you less control over the final flavor.
Lightly oil the knife blade or spray it with cooking spray between cuts. You can also dip the knife in hot water, dry it quickly, and then cut. A sharp knife also helps produce clean cuts without dragging.




Leave a Reply