

If you’ve ever grabbed a box of Trader Joes Pumpkin Ginger Scones during fall and wished you could recreate them at home, this recipe delivers that same warm, spiced flavor with a tender, buttery crumb. These scones combine the earthy sweetness of pumpkin with the bright kick of fresh ginger and warm spices, creating a breakfast treat that feels both cozy and sophisticated. The key to getting that signature crumbly-yet-moist texture is keeping your butter cold and handling the dough gently, which prevents gluten development and ensures every bite practically melts in your mouth.
What makes this version stand out is the balance between pumpkin moisture and structural integrity, too much pumpkin puree and your scones turn dense and gummy, but this recipe uses just enough to flavor the dough without weighing it down. A simple glaze adds a subtle sweetness that complements rather than overpowers the spiced base, making these scones perfect for pairing with coffee or tea any morning of the week.
Who didn’t want the return of Trader Joe’s Pumpkin Ginger Scones!!
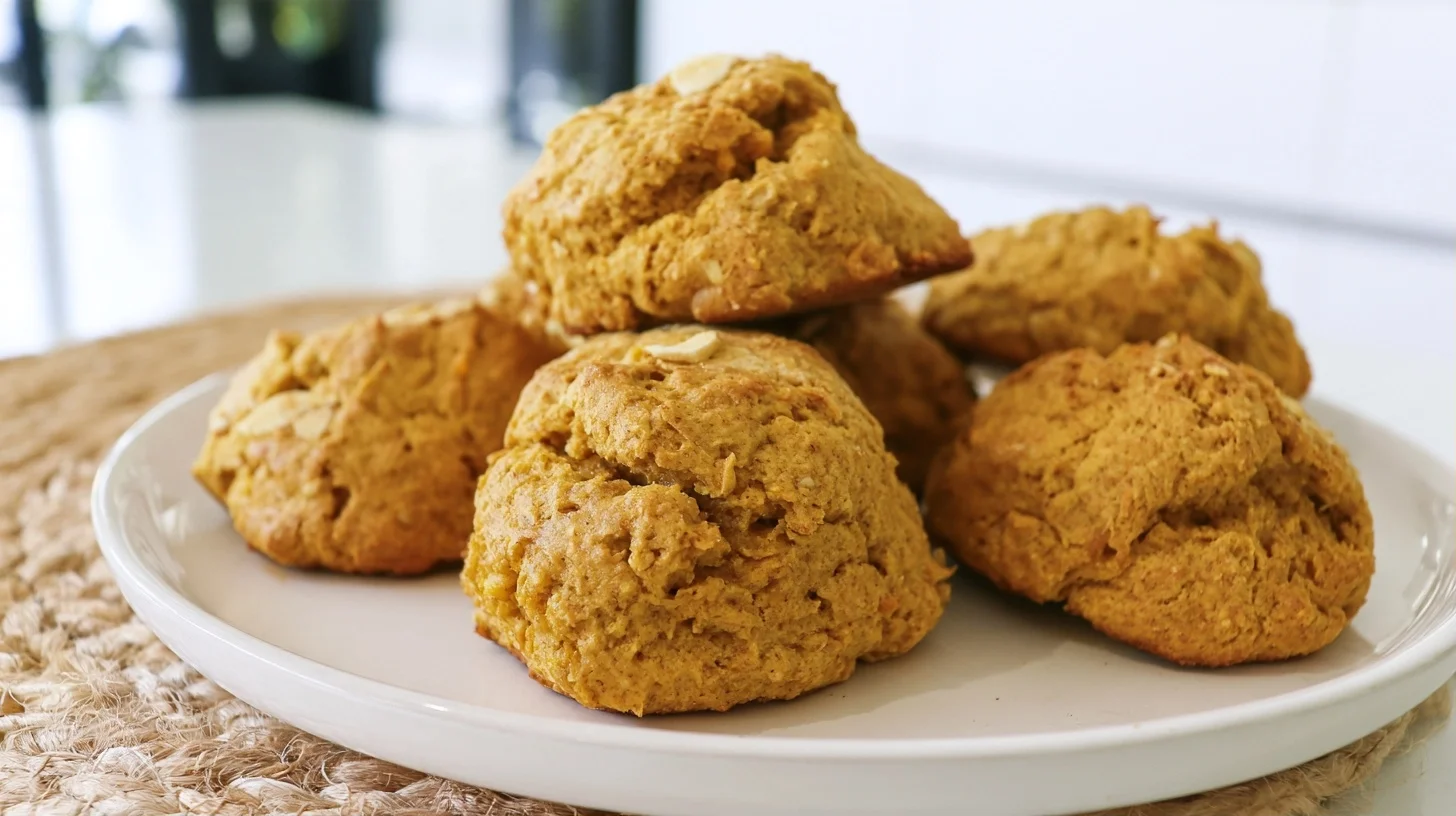
Table of contents
- Why You Will Love These Pumpkin Ginger Scones
- Essential Equipment for Perfect Scones
- How to Make Bakery-Style Pumpkin Ginger Scones
- Key Tips for Tender, Flaky Scones Every Time
- Common Mistakes That Ruin Scone Texture
- Delicious Variations of Trader Joes Pumpkin Ginger Scones to Try
- What Makes These Scones Nutritious
- How to Serve Trader Joes Pumpkin Ginger Scones
- How to Store and Reheat Your Scones
- Frequently Asked Questions about Trader Joes Pumpkin Ginger Scones Recipe
Why You Will Love These Pumpkin Ginger Scones
- They capture the seasonal flavor of Trader Joe’s beloved scones without requiring a trip to the store.
- The dough comes together in under 15 minutes with simple pantry ingredients and real pumpkin puree.
- Fresh ginger adds a bright, warming note that dried ginger alone can’t replicate.
- The texture stays tender for days when stored properly, making them ideal for meal prep or weekend baking.
Essential Equipment for Perfect Scones
You don’t need specialized tools to make excellent scones, but a few key items make the process smoother and help you achieve that signature flaky texture.
- Large mixing bowl: Gives you enough room to cut in the butter without making a mess and allows for gentle folding of the wet ingredients.
- Pastry cutter or fork: Essential for breaking cold butter into pea-sized pieces, which creates steam pockets during baking that result in a flaky crumb.
- Baking sheet lined with parchment paper: Prevents sticking and ensures even browning on the bottom without over-crisping the edges.
- Sharp knife or bench scraper: A clean cut through the dough prevents compression at the edges, which can inhibit rise and create uneven texture.
- Small whisk or fork: Useful for blending the pumpkin puree with the egg and cream to ensure even distribution throughout the dough.
How to Make Bakery-Style Pumpkin Ginger Scones
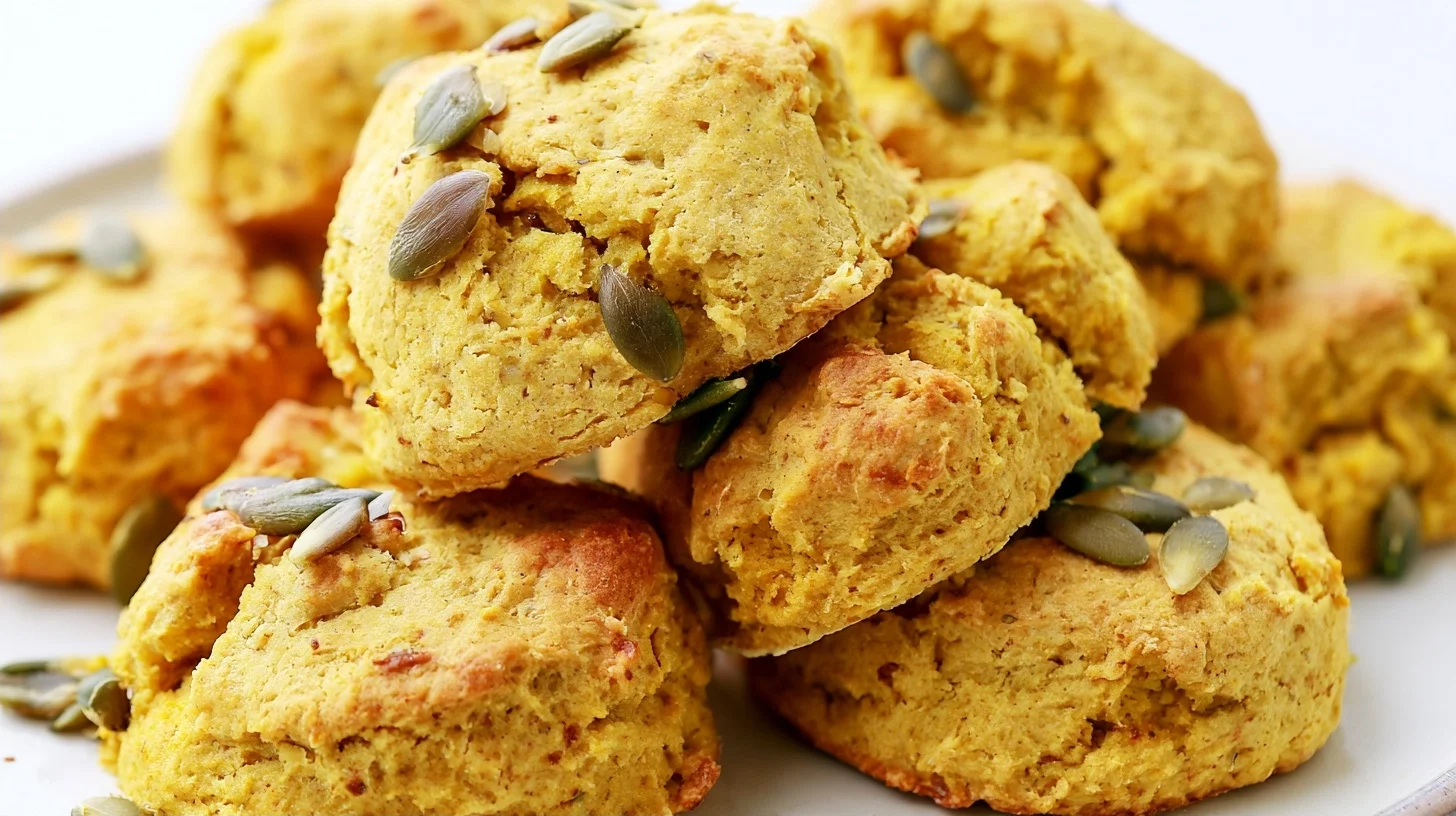
Trader Joe’s Pumpkin Ginger Scones
8
servings15
minutes18
minutes285
kcalThese pumpkin ginger scones capture the warm, spiced flavor of the beloved Trader Joe’s seasonal treat with a tender, buttery crumb and bright fresh ginger kick. The secret is keeping the butter cold and handling the dough gently to create flaky layers without overworking the gluten.
Keep the screen of your device on
Ingredients
2 cups all-purpose flour
0.33 cup granulated sugar
1 tablespoon baking powder
0.5 teaspoon salt
1 teaspoon ground cinnamon
0.5 teaspoon ground nutmeg
0.5 cup unsalted butter
0.5 cup pumpkin puree
1 tablespoon fresh ginger
1 large egg
0.25 cup heavy cream
1 cup powdered sugar
Directions
- Preheat your oven to 400°F and line a baking sheet with parchment paper. This high temperature is essential for creating steam quickly, which lifts the dough and forms those desirable flaky layers.
- Whisk together the flour, sugar, baking powder, salt, cinnamon, and nutmeg in a large mixing bowl until evenly combined. This distributes the leavening and spices so every bite tastes balanced.
- Cut the cold butter into the flour mixture using a pastry cutter or fork until the mixture resembles coarse crumbs with pea-sized butter pieces throughout. These butter chunks will melt during baking and create steam pockets that make the scones flaky.
- Whisk together the pumpkin puree, grated fresh ginger, egg, and heavy cream in a separate bowl until smooth. This ensures the wet ingredients distribute evenly and the ginger flavor reaches every corner of the dough.
- Pour the wet ingredients into the dry ingredients and stir gently with a wooden spoon or spatula just until the dough comes together in shaggy clumps. A few dry streaks are fine—they’ll hydrate as the dough rests, and overmixing will make the scones tough.
- Turn the dough out onto a lightly floured surface and gently pat it into a circle about 1 inch thick. Use a sharp knife or bench scraper to cut the circle into 8 wedges, pressing straight down without twisting to avoid sealing the edges.
Notes
- Keeping the butter cold throughout the mixing process is the single most important factor for achieving flaky, tender scones with a light crumb.
- If your pumpkin puree looks watery, blot it gently with a paper towel before mixing to prevent the dough from becoming too wet and dense.
- These scones freeze beautifully for up to three months—wrap individually and reheat from frozen in a 325°F oven for 10 to 12 minutes.
Nutrition Facts
- Serving Size: 1g
- Total number of serves: 8
- Calories: 285kcal
- Fat: 13g
- Carbohydrates: 38g
- Fiber: 2g
- Protein: 4g
Did you make this recipe?
Tag @therecipemasterblog on Instagram and hashtag it with #therecipemaster
Like this recipe?
Follow @therecipemasterblog on Pinterest
Follow us on Facebook!
Follow The Recipe Master on Facebook
Key Tips for Tender, Flaky Scones Every Time
Keep Your Butter Cold
Cold butter is the foundation of flaky scones. When small pieces of cold butter hit the oven’s heat, they release steam, creating layers and air pockets that give scones their characteristic crumbly texture. If your butter softens before baking, those pockets collapse and the scones turn dense. Cutting butter into cubes and chilling them for 10 minutes before mixing ensures they stay firm throughout the process. If your kitchen is warm, you can even freeze the butter briefly and grate it directly into the flour using a box grater, which creates perfectly sized flakes that distribute evenly.
Don’t Overmix the Dough
Overworking scone dough activates gluten, which makes the final product tough and chewy instead of tender. Once you add the wet ingredients to the dry, stir just until the flour disappears and the dough holds together in shaggy clumps. A few dry streaks are fine—they’ll hydrate as the dough rests. Use a light hand when patting the dough into shape, and avoid kneading or pressing too firmly. If the dough feels sticky, dust your hands and work surface lightly with flour rather than adding more flour directly to the dough, which can throw off the moisture balance.
Use Fresh Ginger for Brighter Flavor
Fresh ginger brings a sharp, aromatic quality that ground ginger can’t match. Grating fresh ginger releases its oils and juice, which distribute throughout the dough and create bursts of flavor in every bite. One tablespoon of finely grated fresh ginger is roughly equivalent to one teaspoon of ground ginger in terms of intensity, but the fresh version adds a lively, almost citrusy note that complements the earthiness of pumpkin. If you only have ground ginger, use it, but consider adding a pinch of lemon zest to mimic some of that brightness. For more inspiration on baking with warm spices, try these cranberry orange scones that pair tart fruit with citrus in a similar tender base.
Chill the Shaped Dough Before Baking
Chilling the dough for at least 15 minutes after shaping helps the scones hold their shape during baking and prevents excessive spreading. This rest period also allows the flour to fully hydrate, which improves the final texture and makes the scones easier to cut cleanly. If you’re short on time, even 10 minutes in the freezer will firm up the butter enough to make a noticeable difference. This step is especially important if your kitchen is warm or if you’ve handled the dough more than usual.
Common Mistakes That Ruin Scone Texture
Adding Too Much Pumpkin Puree
Pumpkin puree adds moisture and flavor, but too much makes the dough wet and heavy, resulting in scones that bake up dense and gummy instead of light and crumbly. The problem happens because pumpkin contains a lot of water, and excess liquid interferes with gluten development and prevents the butter from creating those essential flaky layers. Stick to the measured amount in the recipe, and if your puree looks particularly watery, blot it gently with a paper towel before mixing. If you accidentally add too much, you can sometimes rescue the dough by adding a tablespoon or two of extra flour, but it’s better to measure carefully from the start.
Baking at Too Low a Temperature
Scones need high heat to set their structure quickly and create a golden, slightly crisp exterior while keeping the inside tender. Baking at 375°F or lower gives the butter too much time to melt and spread before the dough sets, which results in flat, greasy scones with poor texture. A 400°F oven is ideal—it’s hot enough to create steam rapidly, which lifts the dough and forms layers, but not so hot that the outside burns before the center cooks through. If your scones are browning too quickly on top, tent them loosely with foil during the last few minutes rather than lowering the temperature.
Cutting the Dough with a Dull Knife
A dull knife or a sawing motion compresses the edges of the dough, which seals the layers and prevents the scones from rising evenly. This creates scones that are lopsided or have a dense ring around the perimeter. Use a sharp knife or a bench scraper and press straight down through the dough in one clean motion, then lift the blade without dragging it. Wipe the blade between cuts to prevent buildup, which can also cause dragging. If you’re using a round cutter, dip it in flour and press straight down without twisting, which has the same compressing effect.
Delicious Variations of Trader Joes Pumpkin Ginger Scones to Try
Maple Pecan Pumpkin Scones
Replace the granulated sugar in the dough with two tablespoons of pure maple syrup and fold in a half cup of chopped toasted pecans before shaping. The maple syrup adds a deeper, more complex sweetness that pairs beautifully with pumpkin, and the pecans contribute crunch and a buttery, earthy flavor. For the glaze, whisk together powdered sugar with maple syrup instead of milk for a cohesive flavor profile. Note that adding liquid sweetener like maple syrup will make the dough slightly softer, so you may need to add an extra tablespoon of flour to compensate.
Dairy-Free Pumpkin Ginger Scones
Substitute cold coconut oil or vegan butter for the regular butter, and use full-fat coconut milk or oat milk in place of the heavy cream. Coconut oil works well because it solidifies when cold, creating similar steam pockets to butter, though the scones will have a slightly different flavor and may spread a bit more. Make sure the coconut oil is cold and solid before cutting it into the flour. The final texture will be a touch less flaky than traditional scones but still tender and satisfying. For the glaze, use the same non-dairy milk you used in the dough.
Chocolate Chip Trader Joes Pumpkin Ginger Scones
Fold in three-quarters of a cup of dark chocolate chips or chopped chocolate after mixing the wet and dry ingredients. Dark chocolate balances the sweetness of the pumpkin and adds richness without overwhelming the spices. Mini chocolate chips distribute more evenly throughout the dough, while larger chunks create pockets of melted chocolate. If you use chocolate, consider reducing the sugar in the dough by one tablespoon to keep the sweetness balanced. Skip the glaze or use a simple dusting of powdered sugar instead, since the chocolate already adds plenty of richness.
What Makes These Scones Nutritious
Each scone provides a moderate amount of calories with a good balance of carbohydrates for energy, a small amount of protein, and fat from the butter that helps you feel satisfied. The pumpkin puree contributes vitamin A, which supports vision and immune function, as well as fiber that aids digestion. Fresh ginger adds anti-inflammatory compounds, and the spices like cinnamon contain antioxidants. While these scones are a treat rather than a health food, they offer more nutritional value than many bakery pastries because they use real pumpkin and whole ingredients rather than artificial flavorings or excessive sugar.
If you’re looking to reduce sugar, you can cut the granulated sugar in the dough by up to half without drastically affecting texture, though the scones will be less sweet and more savory. The glaze is optional and adds about 30 calories per scone, so you can skip it entirely for a lighter option or use a simple sprinkle of coarse sugar before baking for a subtle sweetness and appealing crunch.
How to Serve Trader Joes Pumpkin Ginger Scones
These scones are best enjoyed slightly warm, either fresh from the oven or gently reheated in a 300°F oven for five minutes. Serve them alongside a hot cup of coffee, black tea, or chai for a cozy breakfast or afternoon snack. They pair beautifully with salted butter, cream cheese, or a smear of pumpkin butter for extra richness. For a more indulgent treat, split a scone in half and toast it lightly, then spread with mascarpone or whipped honey butter.
If you’re serving these for brunch, they work well on a platter with fresh fruit, yogurt, and soft-boiled eggs. The warm spices and subtle sweetness make them versatile enough to complement both sweet and savory dishes. You can also crumble a scone over vanilla ice cream or Greek yogurt for a quick dessert that highlights the pumpkin and ginger flavors without requiring additional preparation.
How to Store and Reheat Your Scones
Store cooled scones in an airtight container at room temperature for up to two days. For longer storage, refrigerate them for up to five days, though the texture may firm up slightly in the cold. To bring back that fresh-baked softness, warm refrigerated scones in a 300°F oven for about five minutes or microwave them for 10 to 15 seconds. Avoid microwaving for too long, as this can make the scones rubbery.
These scones freeze beautifully for up to three months. Wrap each scone individually in plastic wrap, then place them all in a freezer-safe bag or container. You can freeze them before or after glazing, though glazing after thawing gives you more control over the final appearance. To thaw, leave the scones at room temperature for about an hour, or warm them directly from frozen in a 325°F oven for 10 to 12 minutes. Freezing unbaked scones is also an option—shape and cut the dough, freeze the pieces on a baking sheet until solid, then transfer to a bag and bake directly from frozen, adding a few extra minutes to the baking time.
Frequently Asked Questions about Trader Joes Pumpkin Ginger Scones Recipe
Yes, canned pumpkin puree works perfectly and is actually preferred over fresh pumpkin because it has a consistent moisture content and smooth texture. Make sure to use plain pumpkin puree, not pumpkin pie filling, which contains added sugar and spices that will throw off the recipe balance.
Yes, you can use one teaspoon of ground ginger in place of one tablespoon of fresh grated ginger. The flavor will be slightly less bright and aromatic, but the scones will still taste delicious. If you want to add back some of that fresh brightness, consider adding a quarter teaspoon of lemon zest.
Dry scones usually result from too much flour or overbaking. Make sure you’re measuring flour correctly by spooning it into the measuring cup and leveling it off rather than scooping directly from the bag, which packs in extra flour. Also check your oven temperature with an oven thermometer, as many ovens run hot and can overbake scones before they look done.
The scones are done when the edges and bottoms are golden brown and the tops are set with a light golden color. A toothpick inserted into the center should come out clean or with just a few moist crumbs. The scones will feel firm to the touch but should not look dark brown, which indicates overbaking.



Leave a Reply