

A gluten free pizza crust recipe that actually holds together, crisps up beautifully, and doesn’t taste like cardboard can feel impossible to find. This version uses a blend of rice flour and tapioca starch to create a crust that’s sturdy enough to support your favorite toppings while staying tender on the inside. The addition of xanthan gum provides the elasticity that gluten normally would, and a quick pre-bake ensures the bottom gets crispy instead of soggy.
Unlike many gluten-free crusts that crumble or turn gummy, this one bakes up with a golden edge and a satisfying chew. The dough comes together quickly in one bowl, requires no kneading, and can be pressed directly into your pan without any rolling. Whether you’re avoiding gluten by necessity or choice, this crust delivers the texture and flavor you’ve been missing.
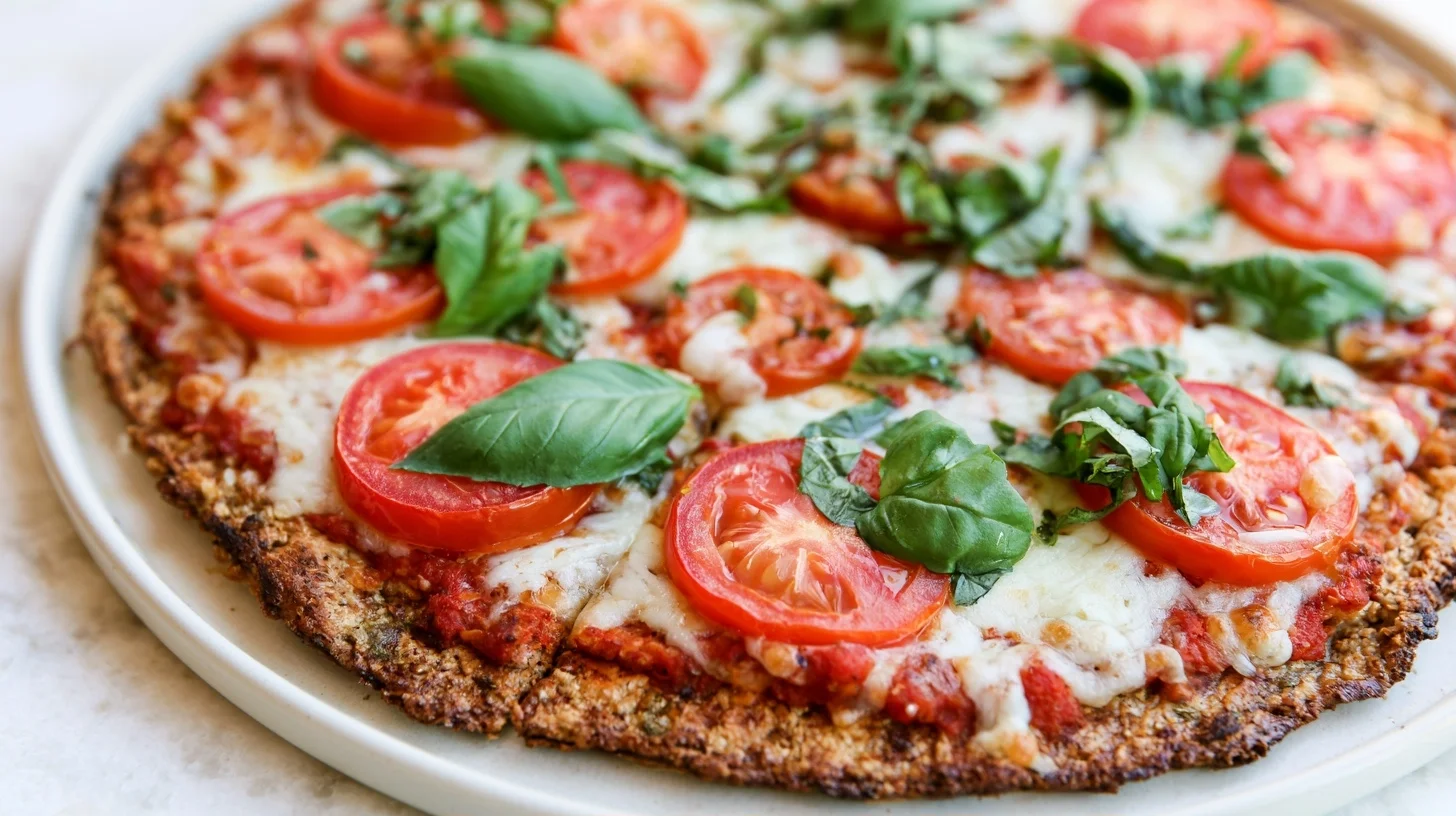
Table of contents
- Why You Will Love This Gluten Free Pizza Crust Recipe
- What You’ll Need to Make This Gluten Free Pizza Crust
- How to Make a Crispy Gluten Free Pizza Crust Recipe
- Tips for the Best Gluten Free Pizza Crust Every Time
- Common Mistakes When Making Gluten Free Pizza Crust Recipe
- Ways to Customize Your Gluten Free Pizza Crust
- Nutrition in Gluten Free Pizza Crust
- How to Serve Gluten Free Pizza
- How to Store Gluten Free Pizza Crust
- Frequently Asked Questions about Gluten Free Pizza Crust Recipe
Why You Will Love This Gluten Free Pizza Crust Recipe
- The crust crisps on the bottom and edges while staying soft enough to fold without cracking.
- No rolling pin or special equipment is needed—the dough presses directly into the pan with your hands.
- A short pre-bake step prevents the crust from becoming soggy under wet toppings.
- The flavor is mild and slightly nutty, letting your toppings shine without any off-putting aftertaste.
What You’ll Need to Make This Gluten Free Pizza Crust
This recipe uses basic gluten-free pantry staples and requires minimal equipment. A pizza stone or baking sheet works equally well, though a stone will give you a slightly crispier bottom.
- Mixing bowl: A medium bowl is all you need to combine the dry and wet ingredients without any kneading.
- Pizza pan or baking sheet: A 12-inch round pan or a standard baking sheet lined with parchment paper prevents sticking and makes cleanup easy.
- Parchment paper: Keeps the dough from sticking and allows you to transfer the shaped crust easily.
- Measuring cups and spoons: Gluten-free baking is more sensitive to ratios, so accurate measurements matter.
- Whisk or fork: For blending the dry ingredients evenly before adding the wet ingredients.
How to Make a Crispy Gluten Free Pizza Crust Recipe
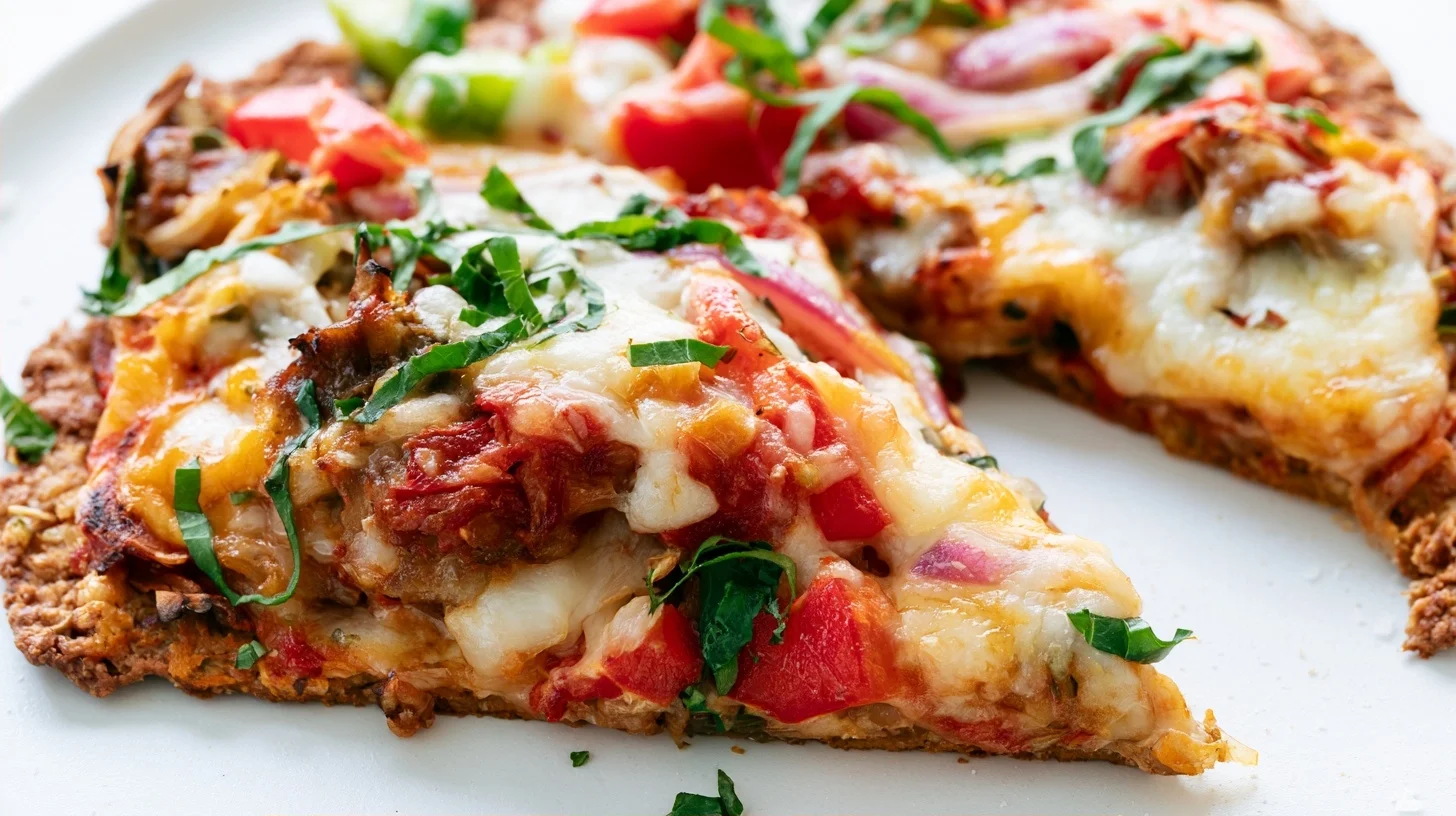
Gluten Free Pizza Crust
4
servings10
minutes20
minutes240
kcalThis gluten-free pizza crust uses a blend of rice flour and tapioca starch to create a sturdy, crispy base that doesn’t crumble or turn gummy. A quick pre-bake step ensures the bottom stays crisp even under wet toppings, and the dough comes together in one bowl without any kneading.
Keep the screen of your device on
Ingredients
1.5 cups white rice flour
0.5 cup tapioca starch
1 teaspoon xanthan gum
1 teaspoon active dry yeast
1 teaspoon sugar
1 teaspoon salt
1 cup warm water
2 tablespoons olive oil
0.5 teaspoon dried Italian herbs
Directions
- Preheat your oven to 425°F and line a 12-inch pizza pan or baking sheet with parchment paper. If using a pizza stone, place it in the oven now to preheat.
- Whisk together the rice flour, tapioca starch, xanthan gum, yeast, sugar, and salt in a medium bowl until evenly combined. This ensures the xanthan gum and yeast are distributed throughout the flour blend, which helps the dough rise evenly.
- Add the warm water and olive oil to the dry ingredients and stir with a spoon or spatula until a thick, sticky dough forms. The dough will be softer and wetter than traditional pizza dough, which is normal for gluten-free recipes.
- Press the dough into the prepared pan using your hands or the back of a spoon, spreading it evenly to the edges. Aim for a consistent thickness across the entire surface to ensure even baking. If the dough sticks to your hands, lightly oil your fingers.
- Pre-bake the crust for 8 to 10 minutes until the surface looks dry and slightly firm. This step prevents the crust from becoming soggy when you add toppings. The edges may just start to turn golden.
- Remove the crust from the oven and add your sauce, cheese, and toppings. Use a light hand with wet ingredients to avoid weighing down the crust.
Notes
- Pre-baking the crust for 8 to 10 minutes before adding toppings prevents the center from becoming soggy, which is a common issue with gluten-free dough.
- If the dough feels too stiff or dry, add warm water one tablespoon at a time until it reaches a soft, spreadable consistency.
- Store baked crust in an airtight container in the refrigerator for up to three days, or freeze unbaked dough for up to two months.
Nutrition Facts
- Serving Size: 1g
- Total number of serves: 4
- Calories: 240kcal
- Fat: 7g
- Carbohydrates: 42g
- Fiber: 2g
- Protein: 3g
Did you make this recipe?
Tag @therecipemasterblog on Instagram and hashtag it with #therecipemaster
Like this recipe?
Follow @therecipemasterblog on Pinterest
Follow us on Facebook!
Follow The Recipe Master on Facebook
Tips for the Best Gluten Free Pizza Crust Every Time
Getting the texture right in a gluten-free crust depends on a few key steps that prevent common problems like sogginess, crumbling, or excessive dryness. These tips address the most frequent issues that come up when baking without gluten.
Pre-Bake the Crust Before Adding Toppings
Baking the crust for 8 to 10 minutes before adding sauce and toppings allows the surface to set and form a barrier against moisture. This step is especially important for gluten-free dough, which absorbs liquid more readily than traditional wheat dough. Without this pre-bake, the crust will often turn soft and gummy in the center, even if the edges crisp up. The surface should look dry and slightly firm to the touch before you add any toppings.
Use a Blend of Gluten-Free Flours
A single gluten-free flour rarely provides the structure and texture you need. Combining white rice flour with tapioca starch creates a balance between strength and tenderness. Rice flour contributes body and a mild flavor, while tapioca starch adds chewiness and helps the crust brown. Avoid using only almond flour or coconut flour, as these absorb moisture differently and produce a dense, cake-like texture that doesn’t crisp well.
Add Xanthan Gum for Elasticity
Xanthan gum mimics the binding properties of gluten by helping the dough hold together and stretch slightly without tearing. One teaspoon per cup of flour blend is usually sufficient. If you skip it, the crust will be fragile and may crack when you try to slice it. Some gluten-free flour blends already contain xanthan gum, so check the label before adding more. If your blend includes it, you can reduce or omit the additional xanthan gum called for in the recipe.
Press the Dough Evenly
Gluten-free pizza dough is softer and stickier than traditional dough, so rolling it out with a pin can be frustrating. Instead, press it directly into your pan using your hands or the back of a spoon. Aim for an even thickness across the entire surface—thinner spots will crisp too quickly and may burn, while thicker areas will stay doughy. If the dough sticks to your hands, lightly oil your fingers or use a piece of parchment paper on top while pressing.
Bake at a High Temperature
A hot oven, ideally between 425°F and 450°F, encourages the crust to crisp quickly before the interior becomes overly dry. Lower temperatures can cause the crust to bake too slowly, resulting in a tough, leathery texture. If you’re using a pizza stone, preheat it in the oven for at least 20 minutes before baking. The stored heat from the stone helps the bottom of the crust crisp up faster than a cold baking sheet would.
Don’t Overload with Toppings
Gluten-free crusts are more delicate and can’t support as much weight as a traditional wheat crust. Heavy or wet toppings like fresh tomatoes, watery vegetables, or excessive cheese can weigh down the center and prevent it from crisping. Drain canned vegetables, pat fresh ingredients dry, and use a moderate amount of sauce. A light hand with toppings allows the crust to bake evenly and stay structurally sound.
For more information on gluten-free eating and ingredient selection, see this guide from the Mayo Clinic.
Common Mistakes When Making Gluten Free Pizza Crust Recipe
Even with a straightforward recipe, a few missteps can lead to disappointing results. These are the most frequent problems and how to avoid them.
Skipping the Pre-Bake
Adding sauce and toppings directly to raw gluten-free dough almost always results in a soggy center. The dough absorbs moisture quickly and doesn’t have the gluten structure to stay firm. Pre-baking the crust for 8 to 10 minutes allows the surface to set and form a protective layer. If you’re short on time, at least bake the crust until it looks dry on top before adding any wet ingredients.
Using Cold Water
Cold water slows down the activation of the yeast and can leave the dough dense and heavy. Warm water, around 110°F, helps the yeast bloom quickly and creates a lighter texture. If the water is too hot, above 120°F, it can kill the yeast entirely. Test the temperature with your finger—it should feel warm but not uncomfortable to touch.
Not Measuring Flour Accurately
Gluten-free flours are lighter and more variable in density than wheat flour, so scooping directly from the bag can pack too much into your measuring cup. This leads to a dry, crumbly dough that won’t hold together. Spoon the flour into your measuring cup and level it off with a knife, or use a kitchen scale for the most consistent results. If the dough feels too stiff, add a tablespoon of water at a time until it reaches a soft, spreadable consistency.
Baking on a Cold Pan
Placing the dough on a cold baking sheet and then putting it in the oven means the bottom takes longer to heat up, which can leave the crust pale and soft underneath. Preheat your pan or pizza stone in the oven before transferring the dough. If you’re using parchment paper, you can assemble the crust on the paper and then slide it onto the hot surface, which gives you a crispier bottom without the risk of sticking.
Ways to Customize Your Gluten Free Pizza Crust
This base recipe is flexible enough to adapt to different flavor profiles and dietary needs. Small changes to the ingredients or technique can give you a crust that fits your preferences or accommodates additional restrictions.
Dairy-Free Version
If the recipe calls for butter or milk, replace the butter with olive oil or a neutral vegetable oil, and use water or a non-dairy milk like almond or oat milk. The texture will be slightly less rich, but the crust will still crisp up well. Olive oil adds a subtle flavor that works especially well with Mediterranean toppings.
Herb and Garlic Crust
Mix a teaspoon of dried Italian herbs, garlic powder, or onion powder into the dry ingredients before adding the wet ingredients. This gives the crust a savory depth that complements simple toppings like marinara and mozzarella. Fresh herbs can burn during the high-heat baking, so stick with dried seasonings or brush the crust with garlic oil after baking.
Cauliflower Addition
For a lower-carb option, replace up to half of the rice flour with finely riced and thoroughly dried cauliflower. The cauliflower must be squeezed dry in a clean towel to remove as much moisture as possible, or the dough will be too wet to hold together. This version will be softer and more delicate, so handle it gently and avoid overloading with toppings.
Thicker Crust for Deep Dish
Press the dough into a smaller pan or a cast iron skillet to create a thicker, more substantial crust. Increase the baking time by 5 to 7 minutes to ensure the center cooks through. This style works well with heartier toppings like sausage, peppers, and extra cheese.
Thin and Crispy Style
Spread the dough as thin as possible across a large baking sheet for a cracker-like crust. Reduce the baking time by a few minutes and watch closely to prevent burning. This version crisps up quickly and works best with lighter toppings.
If you enjoy experimenting with alternative crusts, try this cottage cheese pizza crust for a high-protein option.
Nutrition in Gluten Free Pizza Crust
A typical serving of this gluten-free pizza crust contains fewer calories than a traditional wheat crust, though the exact numbers depend on the specific flours and fats used. Rice flour and tapioca starch are naturally lower in protein than wheat flour, so the crust provides less protein per serving. However, it’s also lower in fiber unless you add a small amount of psyllium husk or ground flaxseed to the dough.
The fat content comes primarily from the oil or butter in the recipe, and you can reduce this by using less fat or substituting with applesauce in some cases, though this will change the texture. Carbohydrates remain relatively high due to the starch content, but the crust is free from gluten, making it suitable for those with celiac disease or gluten sensitivity. Adding vegetables or protein-rich toppings can balance the overall nutritional profile of the finished pizza.
How to Serve Gluten Free Pizza
Serve the Gluten Free Pizza Crust Recipe hot from the oven, cut into slices with a sharp pizza cutter or chef’s knife. Gluten-free crusts can be slightly more fragile than wheat-based ones, so use a gentle sawing motion rather than pressing down hard. Pair the pizza with a simple green salad dressed with olive oil and lemon, or serve it alongside roasted vegetables for a complete meal.
For a casual gathering, set out a variety of toppings and let everyone build their own personal pizzas on individual portions of the dough. This works especially well when you have guests with different dietary preferences. Leftover pizza can be reheated in a skillet over medium heat to restore some of the crispness, which works better than microwaving.
How to Store Gluten Free Pizza Crust
Store baked pizza crust in an airtight container or wrapped tightly in plastic wrap in the refrigerator for up to three days. The crust will soften slightly as it cools, but you can re-crisp it by reheating in a 375°F oven for 5 to 7 minutes. Avoid microwaving, as this makes the crust chewy and tough.
Unbaked dough can be pressed into a pan, covered with plastic wrap, and refrigerated for up to 24 hours before baking. This makes it easy to prep ahead for a quick weeknight meal. For longer storage, freeze the unbaked dough on a parchment-lined baking sheet until solid, then wrap it tightly in plastic wrap and aluminum foil. Frozen dough keeps for up to two months and can be baked directly from frozen—just add a few extra minutes to the baking time.
Fully baked and topped pizza slices can also be frozen. Wrap each slice individually in plastic wrap and store them in a freezer-safe bag. Reheat frozen slices in a 375°F oven for 10 to 12 minutes, or until heated through and crispy on the edges.
Frequently Asked Questions about Gluten Free Pizza Crust Recipe
No, xanthan gum is essential for binding the dough and preventing it from crumbling. Without it, the crust will be fragile and difficult to slice. Some gluten-free flour blends already contain xanthan gum, so check the label before adding more.
The most common cause is skipping the pre-bake step or adding too many wet toppings. Pre-bake the crust for 8 to 10 minutes before adding sauce and toppings to allow the surface to set. Drain vegetables and use a light hand with sauce.
Yes, freeze the unbaked dough after pressing it into a pan. Wrap it tightly in plastic wrap and aluminum foil, and freeze for up to two months. Bake directly from frozen, adding a few extra minutes to the baking time.
Reheat in a 375°F oven for 5 to 7 minutes, or in a skillet over medium heat for 3 to 4 minutes. Both methods restore crispness better than microwaving, which makes the crust chewy and tough.



Leave a Reply