

If you’ve been craving a comforting, creamy pasta dish with a bold kick, hatch chili mac and cheese delivers exactly that. This recipe combines the smoky, earthy heat of fire-roasted Hatch green chiles with a rich, velvety cheese sauce that clings to every bite of tender macaroni. Unlike standard mac and cheese, the addition of Hatch chiles brings a complex flavor that’s both savory and slightly sweet, with just enough heat to keep things interesting without overwhelming the dish. The result is a satisfying comfort food that feels special enough for a gathering but simple enough to make on a weeknight.
What sets this version apart is the balance between the creamy cheese base and the bright, roasted flavor of the chiles. The chiles are stirred directly into the sauce, so every spoonful carries that distinctive Southwestern character. Whether you’re already a fan of Hatch chiles or just looking to upgrade your usual mac and cheese routine, this recipe offers a straightforward way to bring more depth and flavor to a classic dish.
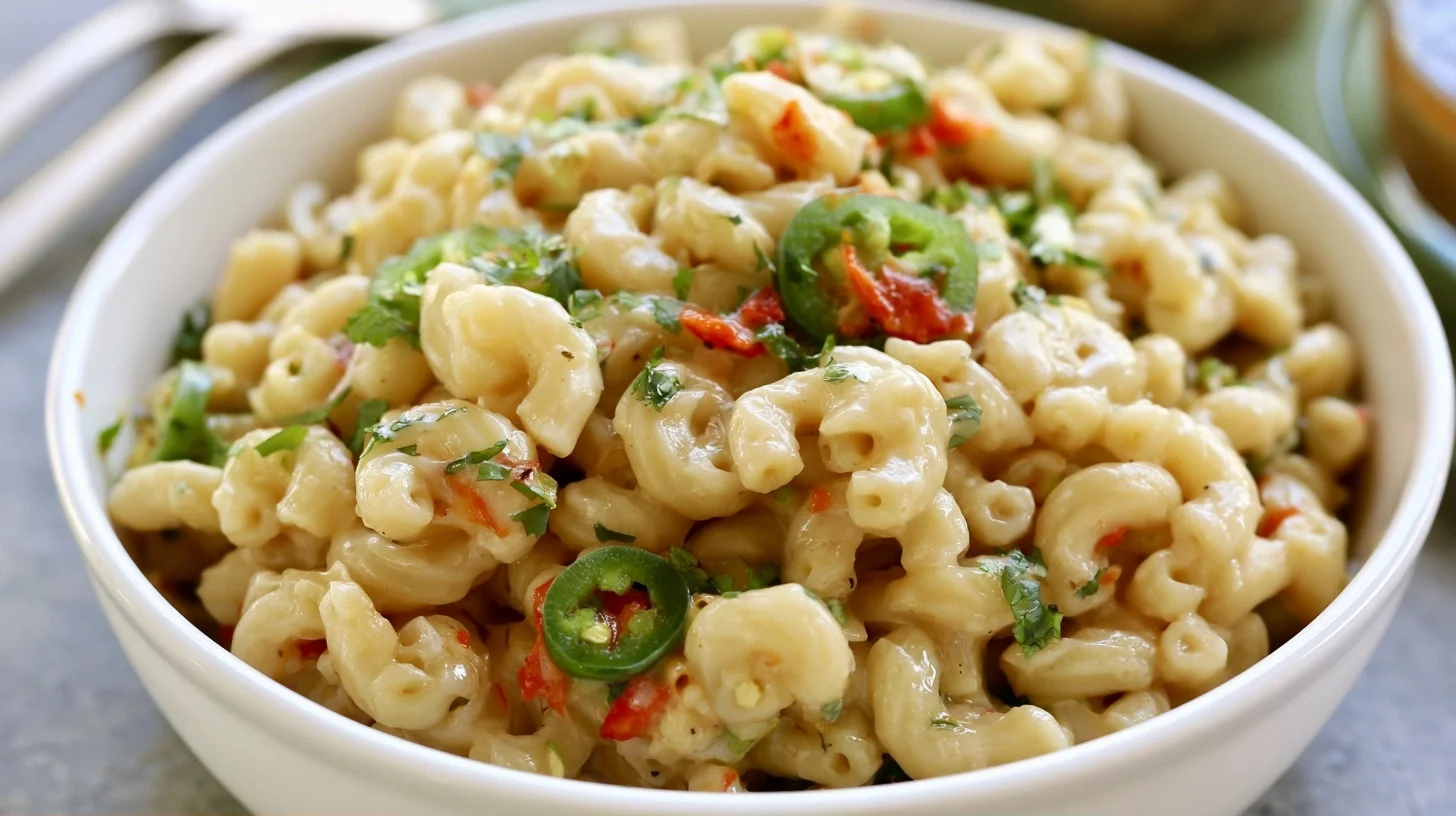
Table of contents
- Why You Will Love This Hatch Chili Mac and Cheese
- Essential Equipment for Hatch Chili Mac and Cheese
- How to Make Hatch Chili Mac and Cheese Perfectly Creamy
- Common Mistakes When Making Hatch Chili Mac and Cheese
- Hatch Chili Mac and Cheese Variations
- Nutrition in Hatch Chili Mac and Cheese
- Serving Suggestions for Hatch Chili Mac and Cheese
- How to Store Hatch Chili Mac and Cheese
- Frequently Asked Questions
Why You Will Love This Hatch Chili Mac and Cheese
- The smoky, roasted flavor of Hatch chiles adds complexity without overpowering the creamy cheese sauce.
- This recipe uses a simple stovetop method that requires no baking, so it comes together in under 30 minutes.
- The combination of sharp cheddar and Monterey Jack creates a smooth, flavorful sauce that coats the pasta evenly.
- It’s easily adaptable for different spice levels by adjusting the amount of chiles or choosing mild versus hot varieties.
Essential Equipment for Hatch Chili Mac and Cheese
You don’t need any specialized tools to make this dish, but a few key pieces of equipment will help you achieve the smoothest sauce and most evenly cooked pasta.
- Large pot: A 4 to 6 quart pot gives you enough room to cook the pasta without crowding, which helps it cook evenly and prevents sticking.
- Medium saucepan: This is where you’ll build the cheese sauce. A heavy-bottomed pan distributes heat more evenly, reducing the risk of scorching the milk or cheese.
- Whisk: A whisk helps you create a smooth roux and prevents lumps from forming when you add the milk.
- Wooden spoon or silicone spatula: Use this to stir the pasta into the sauce and fold in the chiles gently without breaking up the pasta.
- Colander: For draining the pasta quickly once it reaches the right texture.
- Box grater: Freshly grated cheese melts more smoothly than pre-shredded varieties, which often contain anti-caking agents that can make the sauce grainy.
How to Make Hatch Chili Mac and Cheese Perfectly Creamy
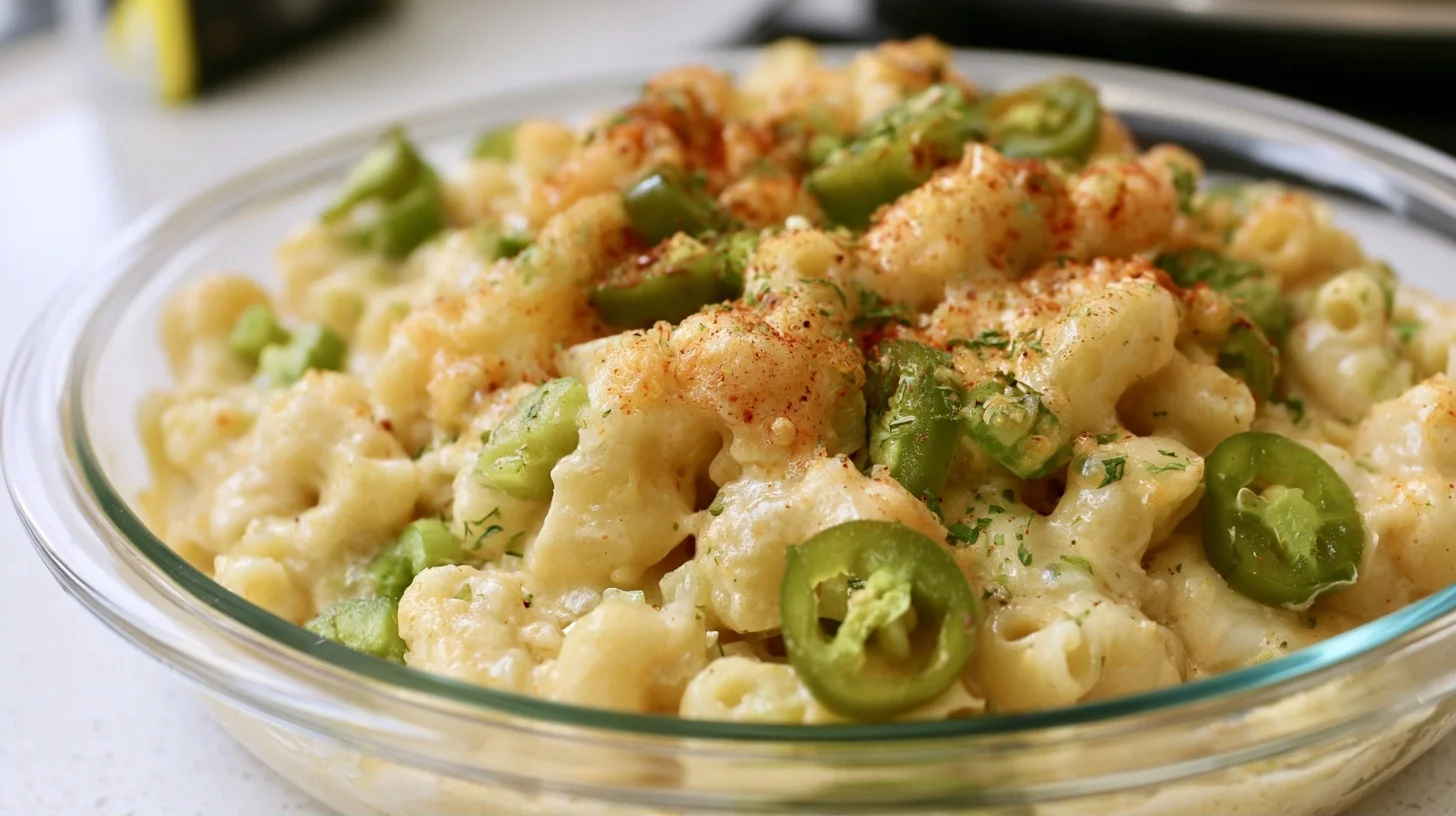
Hatch Chili Mac and Cheese
6
servings10
minutes20
minutes420
kcalThis hatch chili mac and cheese combines tender elbow macaroni with a rich, creamy cheese sauce made from sharp cheddar and Monterey Jack, then stirred together with smoky roasted Hatch green chiles. The result is a comforting, flavorful dish that balances creamy richness with a subtle kick of heat. It comes together in under 30 minutes using a simple stovetop method.
Keep the screen of your device on
Ingredients
1 pound elbow macaroni
3 tablespoons butter
3 tablespoons all-purpose flour
2.5 cups whole milk
2 cups sharp cheddar cheese
1 cup Monterey Jack cheese
1 cup roasted Hatch green chiles
0.5 teaspoon garlic powder
0.5 teaspoon salt
0.25 teaspoon black pepper
2 tablespoons fresh cilantro
1 tablespoon lime juice
Directions
- Bring a large pot of salted water to a boil and cook the elbow macaroni according to package directions until just al dente, usually about 7 to 8 minutes. Drain the pasta in a colander and set aside.
- Melt the butter in a medium saucepan over medium heat. Once the butter is fully melted and begins to foam, add the flour and whisk constantly for about 2 minutes until the mixture is smooth and lightly golden. This step cooks off the raw flour taste and creates the base for a smooth sauce.
- Gradually pour in the milk while whisking continuously to prevent lumps from forming. Continue whisking over medium heat until the mixture thickens and coats the back of a spoon, about 5 to 7 minutes.
- Remove the pan from the heat and stir in the grated cheddar and Monterey Jack cheese until fully melted and smooth. Removing the pan from direct heat prevents the cheese from seizing or becoming grainy.
- Stir in the garlic powder, salt, and black pepper, then taste and adjust the seasoning as needed. The sauce should be creamy and well-seasoned at this point.
- Fold in the chopped Hatch chiles and stir gently until they are evenly distributed throughout the sauce. Make sure the chiles are well-drained if using canned or jarred varieties.
Notes
- Freshly grated cheese melts more smoothly than pre-shredded varieties, which often contain anti-caking agents that can make the sauce grainy.
- If the sauce becomes too thick after sitting, reheat gently over low heat and stir in a small amount of milk until the desired consistency is restored.
- For a spicier version, use hot Hatch chiles or add a pinch of cayenne pepper to the cheese sauce before folding in the pasta.
Nutrition Facts
- Serving Size: 1 g
- Total number of serves: 6
- Calories: 420kcal
- Fat: 19g
- Carbohydrates: 42g
- Fiber: 3g
- Protein: 18g
Did you make this recipe?
Tag @therecipemasterblog on Instagram and hashtag it with #therecipemaster
Like this recipe?
Follow @therecipemasterblog on Pinterest
Follow us on Facebook!
Follow The Recipe Master on Facebook
The secret to a silky, smooth cheese sauce is controlling the heat and adding the cheese gradually. If the heat is too high when you add the cheese, the proteins can seize and turn the sauce grainy or separated. Instead, once your roux and milk have thickened into a smooth base, remove the pan from the heat before stirring in the shredded cheese. This allows the residual heat to melt the cheese gently without breaking the emulsion.
Another key step is choosing the right Hatch chiles. Fresh roasted chiles offer the most vibrant flavor, but canned or jarred varieties work well and are available year-round. If using fresh chiles, roast them until the skins blister, then peel and chop them before stirring them into the sauce. The roasting process deepens their flavor and adds a subtle smokiness that complements the richness of the cheese.
Why the Roux Matters
The roux is the foundation of the sauce. Cooking the butter and flour together for about two minutes allows the flour to lose its raw taste and develop a slightly nutty aroma. This step also creates the structure that will thicken the milk into a smooth, spoonable sauce. If you rush this step, the sauce may taste starchy or thin out as it sits.
Adding the Milk Gradually
Pour the milk into the roux slowly while whisking constantly. This prevents lumps from forming and ensures the flour is evenly distributed throughout the liquid. Once all the milk is incorporated, continue whisking over medium heat until the mixture thickens enough to coat the back of a spoon. This usually takes about five to seven minutes.
Stirring in the Hatch Chiles
Once the cheese has melted into the sauce, fold in the chopped Hatch chiles. Stir gently to distribute them evenly without breaking up the pasta. The chiles should be drained well if using canned or jarred varieties, as excess liquid can thin the sauce and make it watery.
Common Mistakes When Making Hatch Chili Mac and Cheese
Adding Cheese Over High Heat
When cheese is added to a sauce that’s too hot, the proteins can clump together and cause the fat to separate, resulting in a grainy or oily texture. To avoid this, remove the pan from the heat before stirring in the cheese. The residual warmth from the milk mixture is enough to melt the cheese smoothly. If the sauce cools too much and the cheese isn’t melting, return the pan to low heat and stir gently until everything is combined.
Using Pre-Shredded Cheese
Pre-shredded cheese often contains cellulose or starch coatings to prevent clumping in the bag. These additives can interfere with the cheese’s ability to melt smoothly, leading to a gritty or separated sauce. Grating cheese from a block takes only a few extra minutes and makes a noticeable difference in the final texture.
Overcooking the Pasta
Pasta that’s cooked beyond al dente will become mushy when combined with the hot cheese sauce. Cook the pasta just until it has a slight firmness in the center, then drain it immediately. The pasta will continue to soften slightly as it absorbs the sauce, so undercooking it by a minute or two ensures the final dish has the right texture.
Skipping the Roux
Some cooks try to skip the roux step and thicken the sauce with cheese alone, but this often results in a thin, unstable sauce that separates as it cools. The roux provides the structure needed to hold the sauce together, even after reheating.
Hatch Chili Mac and Cheese Variations
Vegetarian Version
This recipe is already vegetarian as written. To add more substance, stir in sautéed bell peppers, corn, or black beans along with the chiles. These ingredients complement the Southwestern flavor profile and add texture without overwhelming the dish.
Dairy-Free Adaptation
Replace the butter with a plant-based alternative and use unsweetened almond or oat milk instead of dairy milk. For the cheese, use a combination of dairy-free cheddar and Monterey Jack shreds. The sauce won’t be quite as rich, but it will still have a creamy texture and the smoky flavor of the chiles will remain the star.
Gluten-Free Option
Substitute gluten-free elbow macaroni and use a gluten-free all-purpose flour blend for the roux. Make sure the flour blend contains xanthan gum or another binder, as this helps the roux thicken properly. The rest of the recipe remains the same.
Spicier Version
If you prefer more heat, use hot Hatch chiles instead of mild, or add a pinch of cayenne pepper or red pepper flakes to the cheese sauce. You can also stir in a spoonful of diced jalapeños or a dash of hot sauce just before serving.
Baked Version
For a baked casserole style dish, transfer the finished mac and cheese to a greased baking dish, top with panko breadcrumbs mixed with a little melted butter, and bake at 375°F for 15 to 20 minutes until the top is golden and crispy. This adds a textural contrast to the creamy interior.
Nutrition in Hatch Chili Mac and Cheese
This dish is rich and satisfying, with a good balance of carbohydrates from the pasta, protein and fat from the cheese, and a moderate amount of fiber and vitamins from the Hatch chiles. One serving provides approximately 420 calories, 18 grams of protein, 42 grams of carbohydrates, 19 grams of fat, 3 grams of fiber, and 5 grams of sugar. The chiles contribute vitamin C, vitamin A, and antioxidants, while the cheese provides calcium and protein.
To lighten the dish slightly, you can use reduced-fat cheese and low-fat milk, though the sauce will be less rich. You can also increase the vegetable content by adding sautéed onions, tomatoes, or spinach, which boosts the fiber and micronutrient content without significantly increasing calories.
Serving Suggestions for Hatch Chili Mac and Cheese
This mac and cheese works well as a main dish or a hearty side. Serve it alongside grilled chicken, steak, or other creative mac and cheese variations for a complete meal. It also pairs nicely with a simple green salad dressed with lime vinaigrette, which provides a bright contrast to the richness of the cheese.
For a casual gathering, serve it in individual ramekins topped with fresh cilantro, diced tomatoes, or a dollop of sour cream. You can also offer hot sauce or pickled jalapeños on the side so guests can adjust the heat level to their preference.
How to Store Hatch Chili Mac and Cheese
Store leftovers in an airtight container in the refrigerator for up to four days. The sauce may thicken as it cools, so when reheating, add a splash of milk and stir over low heat until the sauce loosens and becomes creamy again. You can also reheat individual portions in the microwave, stirring every 30 seconds and adding a little milk if needed.
This dish can be frozen for up to two months. Let it cool completely before transferring to a freezer-safe container. Thaw overnight in the refrigerator before reheating. The texture may change slightly after freezing, as the cheese sauce can become grainy, but stirring in a bit of cream or milk while reheating usually restores a smoother consistency.
Frequently Asked Questions
Yes, canned or jarred Hatch chiles work well in this recipe and are available year-round. Drain them thoroughly before adding to the sauce to prevent excess liquid from thinning the cheese sauce. Fresh roasted chiles offer slightly more vibrant flavor, but canned varieties still provide the smoky, earthy taste that makes this dish distinctive.
If the sauce is too thin, simmer it over low heat for a few extra minutes to allow some of the liquid to evaporate. You can also whisk together a small amount of cornstarch and cold milk, then stir it into the sauce and cook until thickened. Avoid adding more cheese alone, as this can make the sauce greasy without improving the texture.
Yes, you can prepare the mac and cheese up to one day in advance. Store it in the refrigerator in an airtight container, then reheat gently on the stovetop or in the oven. Add a splash of milk while reheating to restore the creamy texture, as the sauce will thicken as it cools.
Roast fresh Hatch chiles directly over a gas flame, under a broiler, or on a grill until the skins blister and char. Place them in a covered bowl for 10 minutes to steam, which makes the skins easier to peel. Once cooled, remove the skins, stems, and seeds, then chop the flesh before adding it to the recipe.





Leave a Reply