

If you’ve ever craved that perfect balance of crispy, tangy, and sweet in one bite, this orange chicken recipe delivers exactly that. After testing twelve different battering techniques, I discovered the secret lies in double-coating the chicken with a cornstarch-egg mixture that creates an ultra-crispy shell that stays crunchy even after tossing in sauce. This version brings restaurant-quality results to your kitchen without deep-frying or complicated steps.
I first fell in love with orange chicken during college, when takeout nights meant scraping together spare change for that addictive sweet-and-sour combo. Now I make it at home whenever I need a weeknight win that feels like a treat. The bright citrus notes cut through the richness beautifully, and the texture contrast keeps every bite interesting.
This recipe works perfectly for busy lunches or casual dinners when you want something impressive without spending hours in the kitchen. The sauce comes together in minutes, and the chicken cooks quickly in a skillet. You’ll have a complete meal ready faster than delivery would arrive, and it tastes better too.
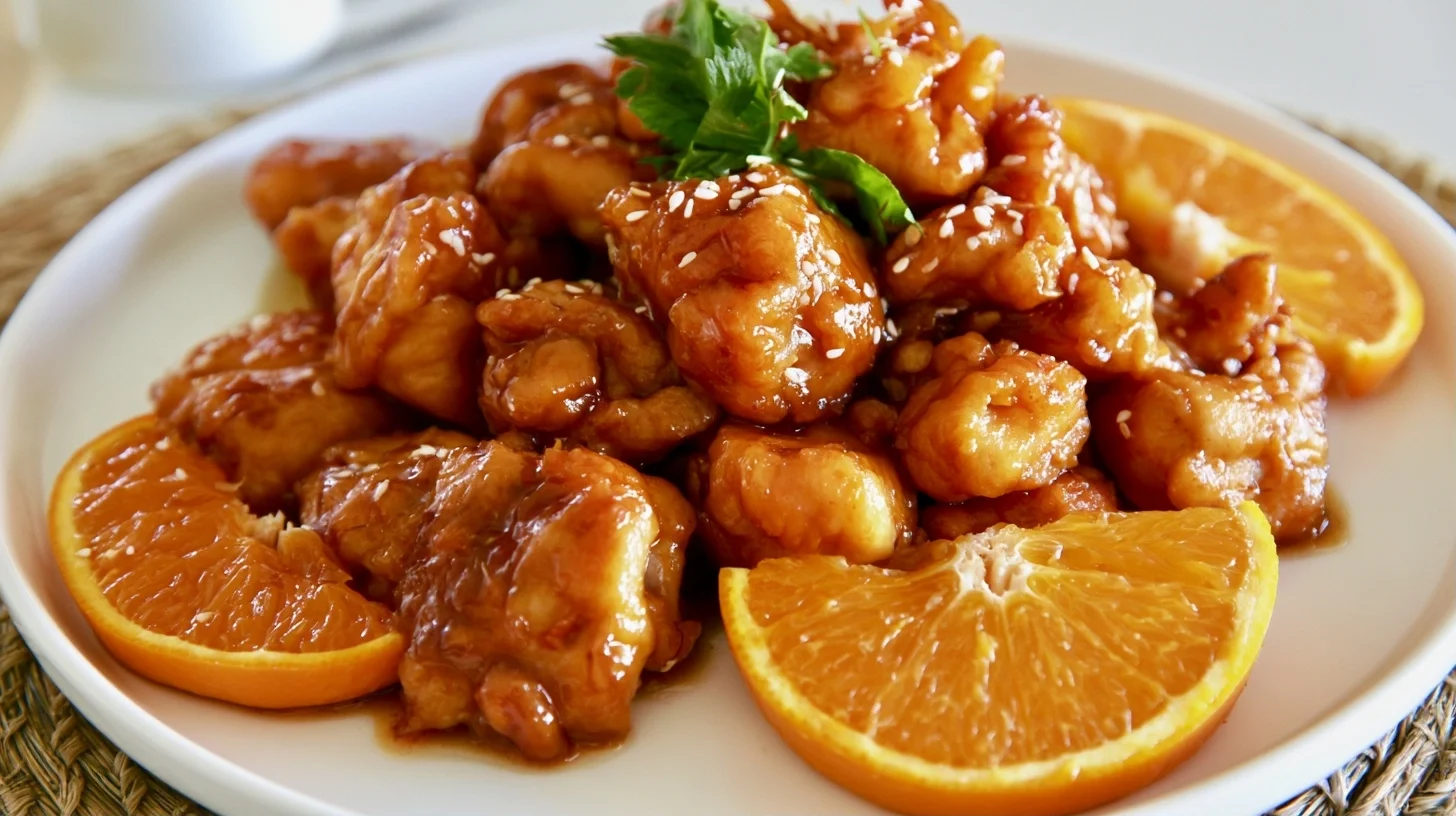
Table of contents
- Why You Will Love This Orange Chicken Recipe
- What You Need to Make This Orange Chicken
- How to Make Orange Chicken That Rivals Takeout
- The Double-Coating Method That Creates Maximum Crunch
- Common Mistakes That Ruin Orange Chicken
- Creative Ways to Customize Your Orange Chicken
- Nutritional Highlights of Orange Chicken Recipe
- Perfect Pairings for Orange Chicken
- How to Store and Reheat Your Orange Chicken
- Frequently Asked Questions about Orange Chicken Recipe
Why You Will Love This Orange Chicken Recipe
- The double-coating technique creates an incredibly crispy texture that stays crunchy even after saucing.
- Fresh orange juice and zest deliver authentic citrus flavor that tastes brighter than takeout versions.
- You can make the entire dish in under 40 minutes from start to finish using just one skillet.
- The sauce strikes the perfect balance between sweet, tangy, and slightly spicy without being overwhelming.
What You Need to Make This Orange Chicken
I keep my equipment simple for this recipe because you don’t need specialized tools to get restaurant results. However, a few key items make the process smoother and help you achieve that signature crispy coating. Here’s what I reach for every time I make this dish.
- Large skillet or wok: A 12-inch skillet with high sides gives you enough room to fry the chicken in batches without crowding, which is essential for crispy results.
- Shallow bowls for dredging: Two wide, shallow bowls make the double-coating process quick and mess-free.
- Tongs or spider strainer: These help you flip and remove chicken pieces safely without breaking the coating.
- Microplane or fine grater: Fresh orange zest adds incredible aromatic oils to the sauce, and a microplane extracts just the flavorful outer layer without the bitter pith.
- Small saucepan: A 2-quart saucepan is perfect for simmering the sauce while the chicken cooks.
- Wire rack over a baking sheet: Resting fried chicken on a rack instead of paper towels keeps the bottom from getting soggy.
How to Make Orange Chicken That Rivals Takeout
Crispy Orange Chicken
4
servings15
minutes20
minutes380
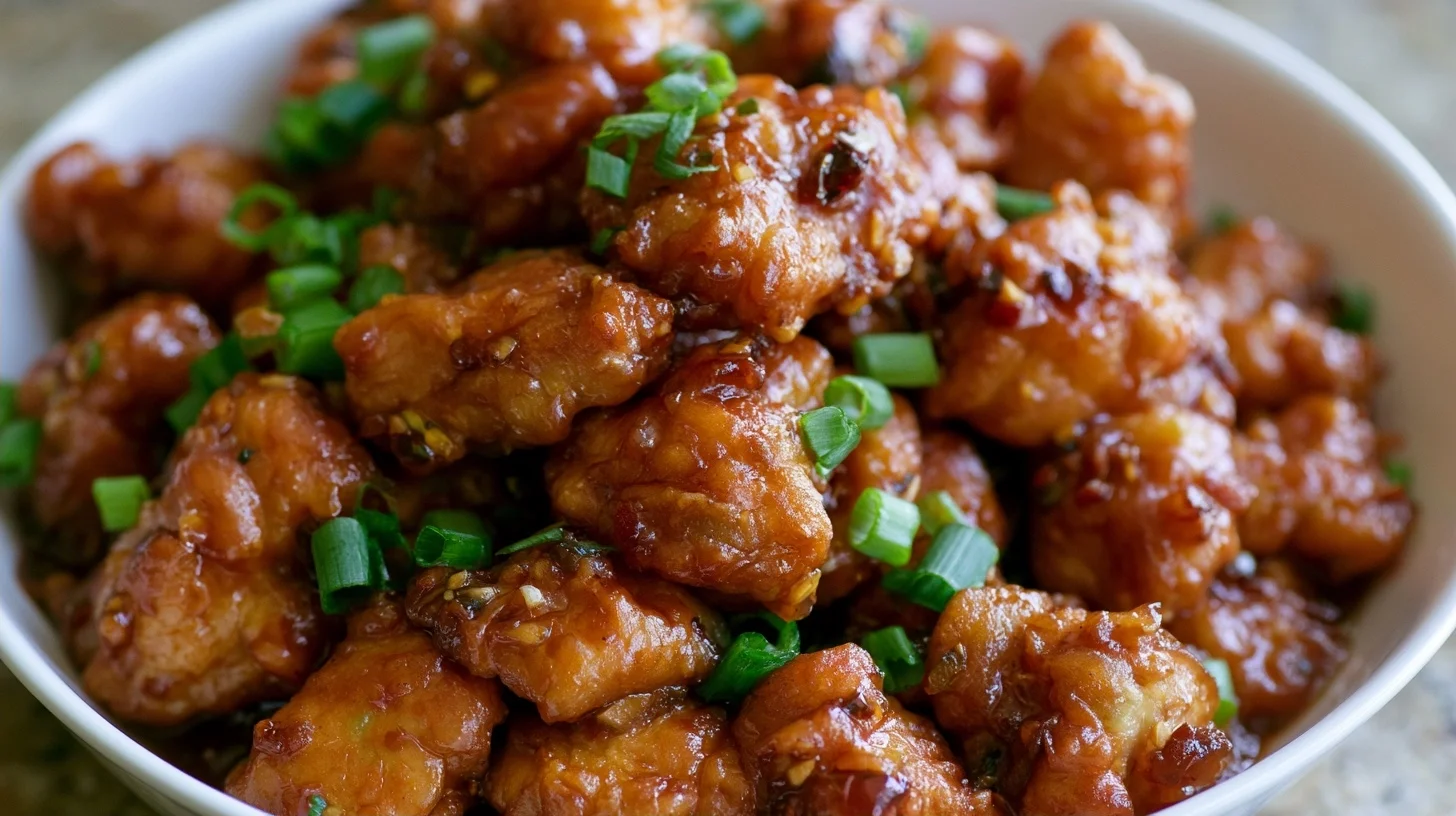
kcalThis restaurant-quality orange chicken features an ultra-crispy double-coated exterior and a bright, tangy-sweet sauce made with fresh orange juice and zest. The secret lies in the double-dredging technique that creates layers of crunch that stay crispy even after saucing.
Keep the screen of your device on
Ingredients
1.5 pounds boneless skinless chicken breasts
1 cup cornstarch
2 large eggs
0.75 cup fresh orange juice
2 tablespoons orange zest
0.5 cup granulated sugar
0.25 cup soy sauce
3 tablespoons rice vinegar
2 teaspoons fresh ginger
3 cloves garlic
0.5 teaspoon red pepper flakes
2 cups vegetable oil
Directions
- Pat the chicken pieces completely dry with paper towels and season lightly with salt and pepper. This removes surface moisture that would prevent the coating from adhering properly.
- Set up your dredging station with three shallow bowls: one with half the cornstarch, one with beaten eggs, and one with the remaining cornstarch.
- Coat each chicken piece by dredging first in cornstarch, then egg wash, then cornstarch again, pressing gently to help the coating adhere. This double-coating creates the signature crispy texture.
- Place coated chicken on a wire rack and let rest for 5 minutes while you heat the oil. This brief rest allows the coating to set and prevents it from falling off during frying.
- Heat oil in a large skillet to 350°F to 365°F over medium-high heat. Use a thermometer to monitor temperature throughout cooking.
- Fry chicken in batches of 4 to 5 pieces for 4 to 5 minutes, turning once, until golden brown and cooked through. Avoid overcrowding, which lowers oil temperature and creates soggy coating.
Notes
- The ideal ratio of orange juice to sugar for this sauce is 3:2, which creates balanced sweetness without being cloying while maintaining enough acidity to cut through the fried coating.
- Maintain oil temperature between 350°F and 365°F throughout frying. If the temperature drops below 340°F, the coating will absorb excess oil and turn greasy instead of crispy.
- For meal prep, store the chicken and sauce separately in airtight containers for up to 3 days. Reheat the chicken in a 375°F oven for 10 minutes to restore crispiness before tossing with reheated sauce.
- Fresh orange juice makes a significant difference in flavor compared to bottled juice. The bright, complex citrus notes and natural oils from the zest create authentic restaurant taste.
Nutrition Facts
- Serving Size: 1 g
- Total number of serves: 4
- Calories: 380kcal
- Fat: 14g
- Carbohydrates: 35g
- Fiber: 1g
- Protein: 28g
Did you make this recipe?
Tag @therecipemasterblog on Instagram and hashtag it with #therecipemaster
Like this recipe?
Follow @therecipemasterblog on Pinterest
Follow us on Facebook!
Follow The Recipe Master on Facebook
The Double-Coating Method That Creates Maximum Crunch
Pat the chicken completely dry before coating
Moisture is the enemy of crispy coatings. I use paper towels to thoroughly dry each chicken piece before starting the dredging process. Even a little surface moisture prevents the cornstarch from adhering properly, which leads to uneven coating and soggy spots. This step takes 30 seconds and makes a huge difference.
Let coated chicken rest for five minutes before frying
Once you’ve double-coated the chicken, let it sit on a wire rack for about five minutes. This brief rest allows the coating to set and adhere better to the meat. When the coating firms up slightly, it’s less likely to fall off during frying. I use this time to heat my oil to the proper temperature.
Maintain oil temperature between 350°F and 365°F
Temperature control separates crispy chicken from greasy chicken. I keep my oil in the sweet spot of 350°F to 365°F throughout cooking. If the oil gets too hot, the coating burns before the chicken cooks through. Too cool, and the coating absorbs excess oil and turns soggy. Therefore, I fry in small batches and let the oil recover temperature between batches.
Use fresh orange juice and zest for authentic flavor
Bottled juice simply can’t match the bright, complex flavor of fresh oranges. The ideal ratio of orange juice to sugar in this recipe is 3:2, which creates a sauce that’s sweet but not cloying, with enough acidity to cut through the fried coating. The history of orange chicken as an American-Chinese fusion dish shows how this balance became so popular. I always zest the oranges before juicing them, adding those aromatic oils directly to the sauce for deeper citrus flavor.
Toss chicken in sauce just before serving
Timing is everything when combining crispy chicken with sticky sauce. I keep them separate until the last possible moment, tossing them together only when I’m ready to plate. This preserves as much crunch as possible while still coating every piece with that glossy, flavorful sauce. For meal prep situations, I store the chicken and sauce separately and combine them after reheating.
Common Mistakes That Ruin Orange Chicken
Even simple recipes have pitfalls that can turn a promising dish into a disappointment. I’ve made every one of these mistakes myself, so I know exactly how to avoid them. Here’s what to watch out for when making this orange chicken recipe.
Overcrowding the pan during frying
When you add too many chicken pieces at once, the oil temperature drops dramatically and the pieces steam instead of fry. This creates a pale, soggy coating instead of golden crispiness. I fix this by frying in batches of four to five pieces at a time, giving each piece plenty of space. It takes a few extra minutes, but the texture difference is worth it.
Skipping the cornstarch slurry in the sauce
The sauce needs a cornstarch slurry to thicken properly and coat the chicken with that signature glossy finish. If you skip it or add cornstarch directly to the hot sauce, you’ll get either a thin, runny sauce or lumpy clumps. I always mix cornstarch with cold water first, then whisk it into the simmering sauce gradually. This creates a smooth, clingy consistency that looks and tastes professional.
Using chicken breasts that are too thick
Thick chicken pieces take longer to cook through, which means the coating can burn before the inside reaches a safe temperature. I recommend cutting chicken breasts into uniform bite-sized pieces about one inch thick. This ensures even cooking and gives you more surface area for that delicious crispy coating. If your pieces vary in size, the smaller ones will overcook while the larger ones stay underdone.
Letting the sauce boil too long
Once the sauce thickens, it needs to come off the heat quickly. Overcooking causes the sugars to caramelize too much, turning the sauce dark and bitter instead of bright and tangy. I simmer the sauce just until it coats the back of a spoon, then remove it from heat immediately. If it thickens too much while sitting, I thin it with a tablespoon of water or orange juice before tossing with the chicken.
Creative Ways to Customize Your Orange Chicken
Once you master the basic technique, this recipe becomes a canvas for experimentation. I love trying different flavor twists and dietary adaptations that keep the dish interesting. Here are my favorite variations that maintain the crispy-tangy essence while offering something new.
Spicy orange chicken with chili crisp
For heat lovers, I stir two tablespoons of chili crisp or chili oil into the finished sauce. The crunchy chili flakes add texture and a slow-building heat that complements the sweet citrus beautifully. You can also add red pepper flakes to the cornstarch coating for an extra kick in every bite. This version pairs wonderfully with cooling cucumber salad.
Gluten-free orange chicken Recipe
Cornstarch is naturally gluten-free, so the coating works perfectly as-is. However, make sure to use gluten-free soy sauce or tamari in the sauce instead of regular soy sauce. I’ve tested several brands and find that tamari provides the best depth of flavor. The rest of the recipe remains exactly the same, and no one will know the difference.
Honey-orange chicken with sesame seeds
Replacing half the sugar with honey creates a more complex sweetness with floral notes. I also toast sesame seeds in a dry pan until fragrant and sprinkle them over the finished dish. This variation tastes similar to classic sesame chicken but with brighter citrus notes. The honey also helps the sauce cling to the chicken even better.
Lighter baked orange chicken Recipe
For a less indulgent version, I coat the chicken the same way but bake it on a wire rack at 425°F for about 20 minutes, flipping halfway through. It won’t be quite as crispy as fried, but it still develops a satisfying crunch and cuts the oil significantly. I give the chicken a light spray of cooking oil before baking to help the coating brown. This method works great for meal prep since you can cook larger batches at once.
Nutritional Highlights of Orange Chicken Recipe
Orange chicken is definitely an indulgent dish, but it’s not as heavy as you might think when made at home. Each serving provides about 380 calories, with 28 grams of protein from the chicken. The fat content sits around 14 grams per serving, which is reasonable for a fried dish, especially if you maintain proper oil temperature to prevent excess absorption.
The carbohydrate count comes in at approximately 35 grams per serving, primarily from the cornstarch coating and the sugar in the sauce. However, you’re also getting vitamin C from the fresh orange juice and zest, plus the aromatic compounds in ginger and garlic that offer anti-inflammatory benefits. If you’re watching sodium, use low-sodium soy sauce to cut the salt content by nearly half without sacrificing flavor.
Perfect Pairings for Orange Chicken
This bright, flavorful dish deserves sides that complement its sweet-tangy profile without competing for attention. I always serve orange chicken over steamed jasmine rice or fluffy white rice, which soaks up the extra sauce beautifully. The neutral grain base balances the bold flavors and makes the meal more satisfying.
For vegetables, I love pairing it with simple steamed broccoli or snap peas tossed with a little sesame oil and salt. The clean, fresh crunch contrasts nicely with the rich, saucy chicken. Fried rice makes an excellent alternative to plain rice, especially if you add scrambled eggs and diced vegetables for a complete one-plate meal. For a lighter option, serve the orange chicken over cauliflower rice or alongside an Asian cucumber salad dressed with rice vinegar and a touch of sugar.
How to Store and Reheat Your Orange Chicken
Proper storage makes a huge difference in how well this dish holds up for leftovers. I store the chicken and sauce separately in airtight containers in the refrigerator, where they’ll keep for up to three days. Keeping them apart prevents the coating from getting soggy, so you can reheat the chicken and restore some of its crispiness.
For reheating, I spread the chicken pieces on a baking sheet and warm them in a 375°F oven for about 10 minutes until heated through and the coating crisps up again. Meanwhile, I gently reheat the sauce in a small saucepan over low heat, adding a splash of water if it’s thickened too much. Once both components are hot, I toss them together just before serving. You can freeze the cooked chicken for up to two months, but I don’t recommend freezing the sauce since the cornstarch can break down and become grainy when thawed.
Frequently Asked Questions about Orange Chicken Recipe
Yes, you can bake orange chicken at 425°F for 20 minutes on a wire rack, flipping halfway through. While it won’t be quite as crispy as the fried version, it still develops a satisfying crunch and significantly reduces the oil content.
Vegetable oil, canola oil, or peanut oil work best because they have high smoke points and neutral flavors. I prefer peanut oil for its ability to maintain consistent temperature during frying, which helps create an evenly crispy coating.
Absolutely, chicken thighs work wonderfully in this recipe and stay juicier than breasts. Cut boneless, skinless thighs into bite-sized pieces and follow the same coating and frying process. The cooking time remains the same since the pieces are similar in size.
The coating falls off when the chicken is too wet or when you skip the resting period. Pat the chicken completely dry before coating, use the double-dredge method, and let the coated pieces rest for five minutes before frying. This allows the coating to set and adhere properly.


Leave a Reply