

There’s something magical about the moment you pull a tray of Brown Butter Pumpkin Chocolate Chip Cookies from the oven. The nutty aroma of browned butter mingles with warm pumpkin spice and melted chocolate, filling your kitchen with the most irresistible fall fragrance. These cookies are soft, chewy, and perfectly spiced, with crispy edges that give way to a tender center. After testing 12 variations, I found that letting the brown butter cool to exactly 85°F before mixing prevents the pumpkin from releasing excess moisture, which is the secret to achieving that perfect chewy texture without any cakiness.
I created this recipe for those cozy autumn evenings when you want something special but approachable. The brown butter adds a depth of flavor that elevates these beyond ordinary pumpkin cookies. However, the technique is simpler than you might think. Therefore, even if you’ve never browned butter before, you’ll find this recipe straightforward and rewarding.
These cookies have become my go-to for fall gatherings, potlucks, and even Thanksgiving dessert tables. In addition, they freeze beautifully, which means you can bake ahead and still serve warm cookies to guests. For example, I often double the batch and freeze half the dough for last-minute cravings.
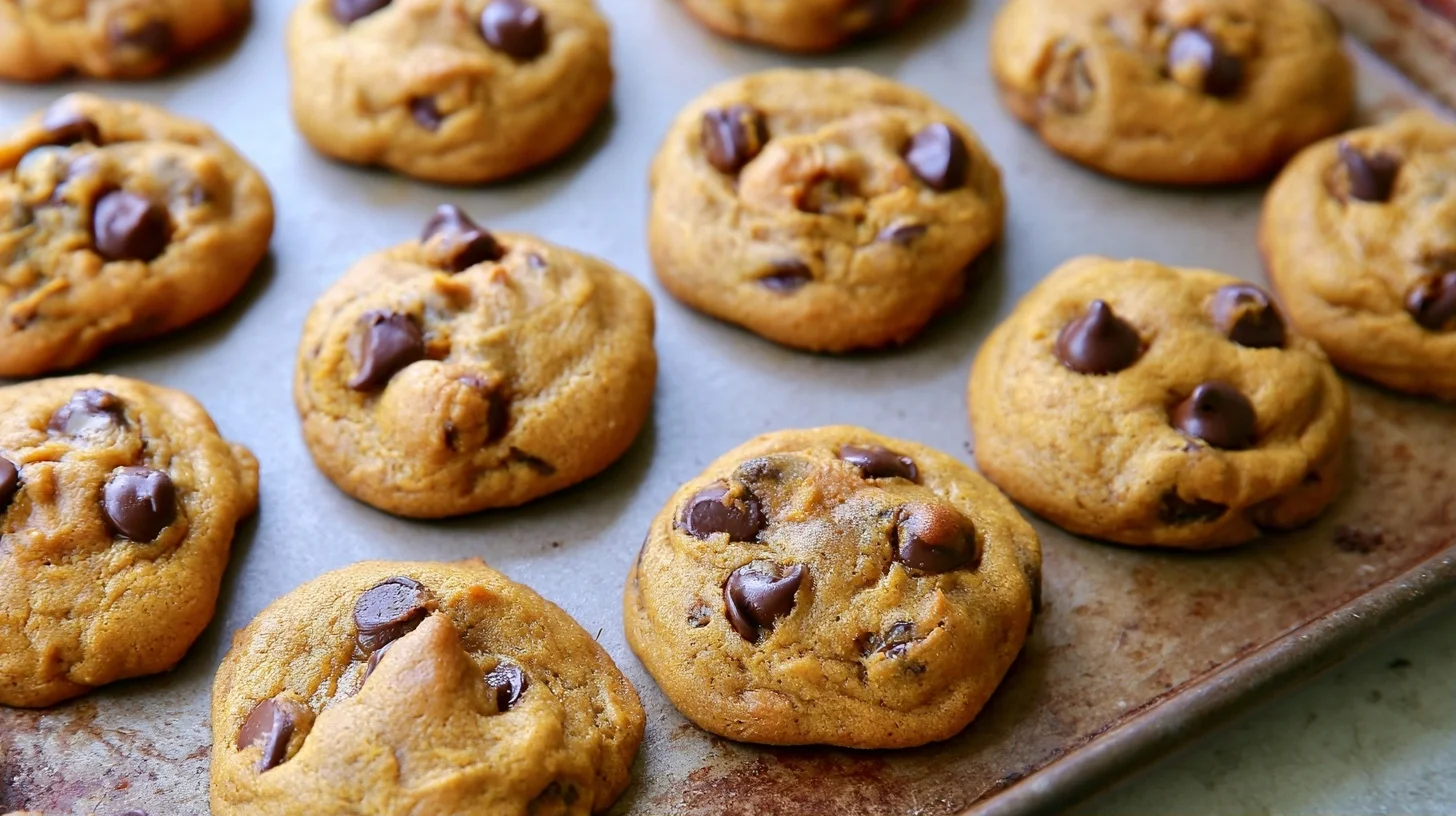
Table of contents
- Why You Will Love This Brown Butter Pumpkin Chocolate Chip Cookies
- What You Will Need for These Brown Butter Pumpkin Cookies
- How to Make Perfect Brown Butter Pumpkin Chocolate Chip Cookies
- The Temperature Trick That Makes Brown Butter Pumpkin Cookies Chewy
- Mistakes to Avoid When Making Brown Butter Pumpkin Cookies
- Creative Ways to Customize Your Brown Butter Pumpkin Cookies
- Understanding the Nutrition in Brown Butter Pumpkin Cookies
- Delicious Ways to Serve These Fall Cookies
- The Best Way to Store Brown Butter Pumpkin Cookies
- Frequently Asked Questions
Why You Will Love This Brown Butter Pumpkin Chocolate Chip Cookies
- The brown butter creates a rich, nutty flavor that makes these cookies taste like they came from a high-end bakery.
- The texture is perfectly balanced with crispy edges and a soft, chewy center that stays fresh for days.
- The pumpkin keeps the cookies moist without making them cakey, which is a common problem with pumpkin baked goods.
- The recipe is incredibly forgiving and works well with various chocolate types and spice adjustments.
What You Will Need for These Brown Butter Pumpkin Cookies
I recommend gathering your equipment before you start browning the butter, as timing matters once you begin. These tools will help you achieve consistent results every time you bake this recipe.
- Medium saucepan with a light-colored bottom, which makes it easier to see when the butter has reached the perfect golden-brown stage without burning.
- Instant-read thermometer to check that your brown butter has cooled to 85°F before mixing, preventing moisture issues.
- Stand mixer or hand mixer for creaming the butter and sugar thoroughly, which creates the structure needed for chewy cookies.
- Large mixing bowls for combining wet and dry ingredients separately before folding them together.
- Cookie scoop (2-tablespoon size) for portioning uniform cookies that bake evenly and look professional.
- Parchment paper or silicone baking mats to prevent sticking and ensure easy cleanup after baking.
- Wire cooling rack to allow air circulation under the cookies, which keeps the bottoms from getting soggy.
How to Make Perfect Brown Butter Pumpkin Chocolate Chip Cookies
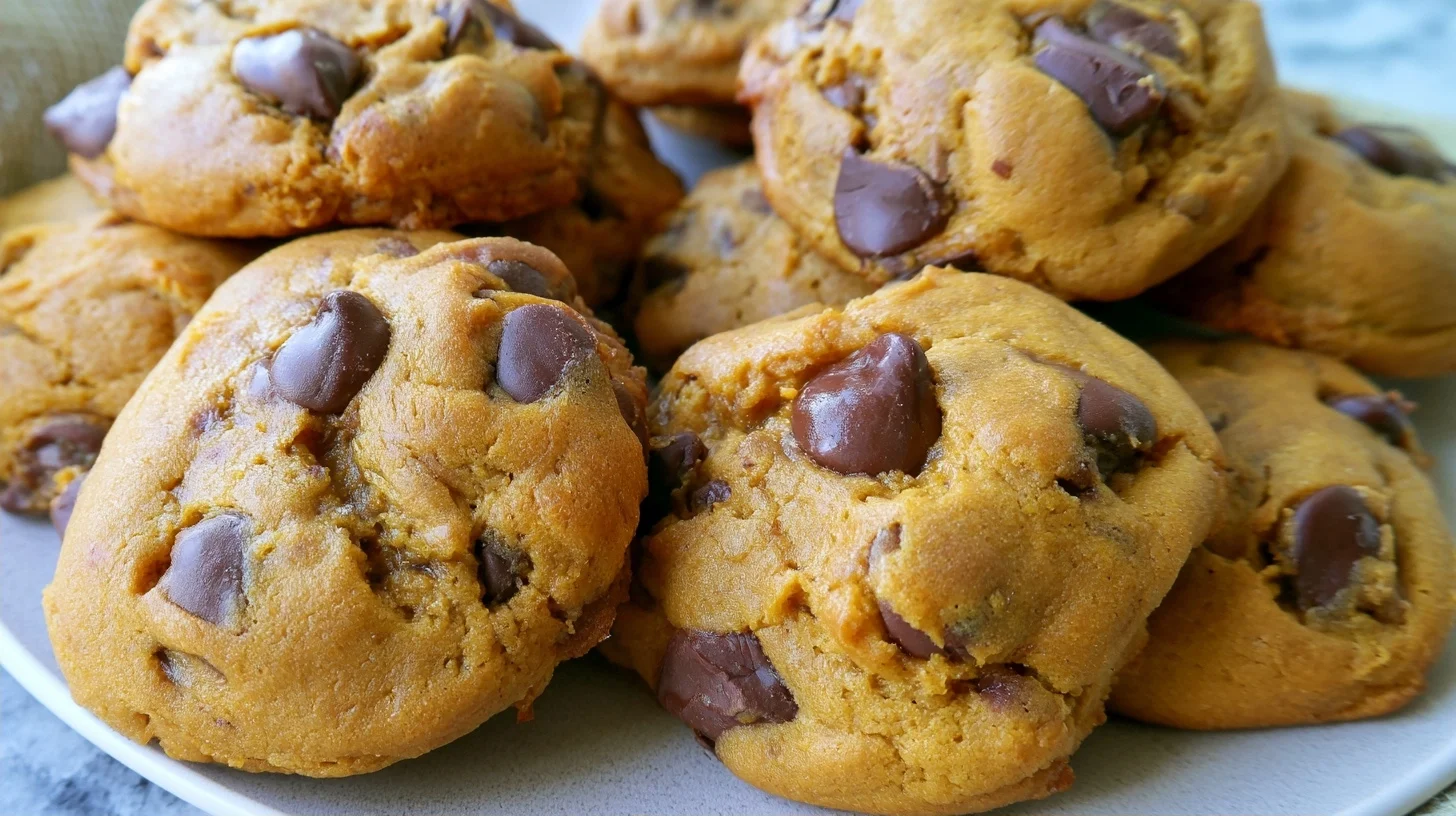
Brown Butter Pumpkin Chocolate Chip Cookies
24
servings20
minutes12
minutes180
kcalThese Brown Butter Pumpkin Chocolate Chip Cookies feature nutty brown butter, warm pumpkin spice, and melty chocolate chips in every bite. The secret to their perfect chewy texture is cooling the brown butter to exactly 85°F before mixing with pumpkin, which prevents excess moisture and creates bakery-quality results at home.
Keep the screen of your device on
Ingredients
1 cup unsalted butter
2.25 cups all-purpose flour
1 teaspoon baking soda
1 teaspoon ground cinnamon
0.5 teaspoon ground nutmeg
0.5 teaspoon salt
0.75 cup packed brown sugar
0.5 cup granulated sugar
0.75 cup pumpkin puree
1 large egg
2 teaspoons vanilla extract
1.5 cups dark chocolate chips
Directions
- Brown the butter in a medium saucepan over medium heat, stirring frequently until you see golden-brown specks and smell a nutty aroma, about 5 to 7 minutes. Pour immediately into a heatproof bowl to stop the cooking process, which prevents burning.
- Cool the brown butter to exactly 85°F using an instant-read thermometer, which takes about 20 minutes at room temperature. This critical step prevents the pumpkin from releasing excess moisture that would make the cookies cakey instead of chewy.
- Whisk together the dry ingredients in a large bowl: flour, baking soda, cinnamon, nutmeg, and salt. Set this mixture aside while you prepare the wet ingredients.
- Beat the cooled brown butter with both sugars using a stand mixer or hand mixer on medium speed for 2 minutes until light and fluffy. This creaming process incorporates air that helps create the perfect texture.
- Add the pumpkin puree, egg, and vanilla to the butter mixture and beat on medium speed until fully combined and smooth, about 1 minute. Scrape down the sides of the bowl to ensure even mixing.
- Fold in the dry ingredients on low speed just until no flour streaks remain, being careful not to overmix. Overmixing develops too much gluten, which makes cookies tough rather than tender.
Notes
- The ideal temperature for brown butter before mixing with pumpkin is 85°F, which prevents moisture release and ensures chewy texture rather than cakey results.
- Store cookies in an airtight container with a slice of bread to keep them soft for up to 5 days at room temperature.
- You can freeze baked cookies for up to 3 months or freeze the dough balls for up to 3 months and bake from frozen.
- For thicker cookies, chill the dough for a full hour or even overnight before baking.
Nutrition Facts
- Serving Size: 1 g
- Total number of serves: 24
- Calories: 180kcal
- Fat: 9g
- Carbohydrates: 24g
- Fiber: 1g
- Protein: 2g
Did you make this recipe?
Tag @therecipemasterblog on Instagram and hashtag it with #therecipemaster
Like this recipe?
Follow @therecipemasterblog on Pinterest
Follow us on Facebook!
Follow The Recipe Master on Facebook
The Temperature Trick That Makes Brown Butter Pumpkin Cookies Chewy
I’ve learned through extensive testing that temperature control is the single most important factor in achieving the perfect texture. Most recipes skip this detail, which leads to flat or cakey results. Therefore, I always emphasize these critical points when teaching this recipe.
Brown Butter Cooling Is Essential
The optimal temperature for brown butter before mixing with pumpkin is 85°F. This prevents the pumpkin from releasing excess moisture, which is the main cause of cakey texture in pumpkin cookies. I use an instant-read thermometer to verify this every time. As a result, my cookies maintain their chewy texture even after cooling completely. You can learn more about perfecting brown butter technique to understand the science behind this step.
Chill Your Dough for Better Structure
I recommend chilling the dough for at least 30 minutes before baking. This firms up the fat, which prevents excessive spreading in the oven. However, if you’re short on time, even 15 minutes in the freezer will help. In addition, chilled dough creates thicker cookies with more defined edges.
Don’t Overbake These Cookies
I pull my cookies from the oven when the edges are set but the centers still look slightly underdone. They will continue cooking on the hot baking sheet for another 2 minutes. Therefore, patience during this resting period is crucial. For example, cookies that look perfect in the oven often become too crispy once fully cooled if you wait too long.
Use Pumpkin Puree, Not Pumpkin Pie Filling
This might seem obvious, but I’ve seen this mistake countless times. Pure pumpkin puree has no added sugar or spices, which gives you complete control over flavor. In addition, pie filling contains extra moisture that will make your cookies spread too much and lose their structure.
Mistakes to Avoid When Making Brown Butter Pumpkin Cookies
I’ve made every possible mistake with this recipe during my testing phase, so I can help you avoid the same pitfalls. These are the most common issues home bakers encounter, along with my proven solutions.
Burning the Brown Butter
Brown butter can go from perfect to burnt in seconds. I fix this by using a light-colored saucepan so I can see the color change clearly. Once you see golden-brown specks and smell a nutty aroma, immediately remove the pan from heat and pour the butter into a heatproof bowl to stop the cooking process.
Adding Pumpkin to Hot Butter
This is the number one reason pumpkin cookies turn out flat and cakey. I always let my brown butter cool to 85°F before mixing. The heat causes the pumpkin to release water, which creates steam during baking and ruins the texture.
Overmixing the Dough
Once you add the flour, mix only until you see no more dry streaks. I recommend folding in the chocolate chips by hand at the end. Overmixing develops too much gluten, which makes cookies tough instead of tender.
Skipping the Dough Rest
I know it’s tempting to bake immediately, but resting the dough allows the flour to fully hydrate. This creates a better texture and prevents spreading. Therefore, I always plan for at least 30 minutes of chill time, even when I’m in a hurry.
Creative Ways to Customize Your Brown Butter Pumpkin Cookies
I love experimenting with variations on this base recipe. The brown butter and pumpkin combination is incredibly versatile and works beautifully with different mix-ins and dietary modifications. In addition, these variations help you adapt the recipe to whatever ingredients you have on hand.
White Chocolate Cranberry Version
I swap the dark chocolate chips for white chocolate and add dried cranberries for a festive twist. The tartness of the cranberries balances the sweetness perfectly. This version is especially popular during the holiday season and pairs wonderfully with apple cider cheesecake cookies on a dessert platter.
Dairy-Free Brown Butter Alternative
I’ve successfully made these cookies using plant-based butter. However, not all brands brown well, so I recommend using a high-fat vegan butter like Miyoko’s. The technique remains the same, but watch the browning process carefully as plant-based butters can burn more quickly.
Gluten-Free Adaptation
I substitute a 1:1 gluten-free baking flour blend with excellent results. Make sure your blend contains xanthan gum for proper structure. In addition, I recommend chilling the dough for a full hour when using gluten-free flour, as it needs more time to hydrate.
Spiced Maple Version
I replace half the brown sugar with pure maple sugar and add an extra quarter teaspoon of cinnamon. This creates a deeper, more complex flavor profile that highlights the autumn spices beautifully. Therefore, this variation has become my personal favorite for Thanksgiving gatherings.
Understanding the Nutrition in Brown Butter Pumpkin Cookies
Each cookie contains approximately 180 calories, which makes them a reasonable treat when enjoyed in moderation. The pumpkin adds valuable vitamin A and fiber, while the brown butter provides healthy fats that help with satiety. However, these are still dessert cookies with sugar and chocolate, so I recommend savoring one or two rather than eating them mindlessly.
The protein content is modest at around 2 grams per cookie, but you can boost this by adding chopped pecans or walnuts to the dough. In addition, using dark chocolate chips instead of milk chocolate reduces the sugar content slightly while adding beneficial antioxidants. For example, I often make a batch with 70% cacao chocolate for a less sweet, more sophisticated flavor.
Delicious Ways to Serve These Fall Cookies
I love serving these cookies slightly warm with a cold glass of milk or a hot cup of spiced chai tea. The contrast between the warm, gooey chocolate and the cold beverage is absolutely perfect. For a more indulgent presentation, I sometimes sandwich a scoop of vanilla ice cream between two cookies to create an autumn-inspired ice cream sandwich that guests always rave about.
These cookies also make wonderful gifts when packaged in clear cellophane bags tied with autumn-colored ribbon. I arrange them on dessert platters alongside other fall treats for holiday parties. In addition, they’re sturdy enough to mail to loved ones, which makes them ideal care package treats. Therefore, I often bake extra batches during the fall season just to have them ready for impromptu gifting opportunities.
The Best Way to Store Brown Butter Pumpkin Cookies
I store these cookies in an airtight container at room temperature for up to 5 days. However, I recommend placing a piece of bread in the container, which keeps the cookies soft by releasing just enough moisture. Replace the bread slice every couple of days to prevent it from getting moldy.
For longer storage, these cookies freeze beautifully for up to 3 months. I freeze them in a single layer on a baking sheet first, then transfer them to a freezer bag once solid. This prevents them from sticking together. Therefore, you can remove just the number you need without thawing the entire batch. To reheat, I warm frozen cookies in a 300°F oven for about 8 minutes, which brings back that fresh-baked texture and makes the chocolate chips melty again.
Frequently Asked Questions
Yes, use pure canned pumpkin puree, not pumpkin pie filling. Make sure it’s 100% pumpkin with no added sugars or spices so you have full control over the flavor and texture.
This happens when you add pumpkin to hot brown butter. Always cool the brown butter to 85°F before mixing to prevent excess moisture release, which causes flat, cakey texture.
Brown butter is ready when you see golden-brown specks at the bottom of the pan and smell a nutty, toasted aroma. Immediately remove from heat and pour into a bowl to stop cooking.
Yes, you can freeze the dough for up to 3 months. Scoop it into balls, freeze on a baking sheet, then transfer to a freezer bag. Bake from frozen, adding 2 extra minutes to the baking time.


Leave a Reply