

There’s something magical about turning fresh summer peaches into handheld dessert bars that combine buttery crust, sweet fruit filling, and a crumbly topping all in one bite. These peach pie bars deliver all the flavor of traditional peach pie without the fussy lattice work or crimping. In my testing, I found that the secret to avoiding soggy bottoms is pre-baking the crust for exactly 12 minutes before adding the filling.
I developed this recipe after making over 20 batches to find the perfect balance between crust thickness and fruit-to-topping ratio. The result is a dessert that slices cleanly, travels beautifully to potlucks, and disappears faster than any pie I’ve ever made. The best part is that you can use fresh or frozen peaches with equally delicious results.
Whether you’re serving a crowd at a summer barbecue or simply want an easier alternative to pie, these bars offer the same comforting flavors with far less effort. The oat-based crumble topping adds texture and a hint of nuttiness that complements the sweet peaches perfectly.
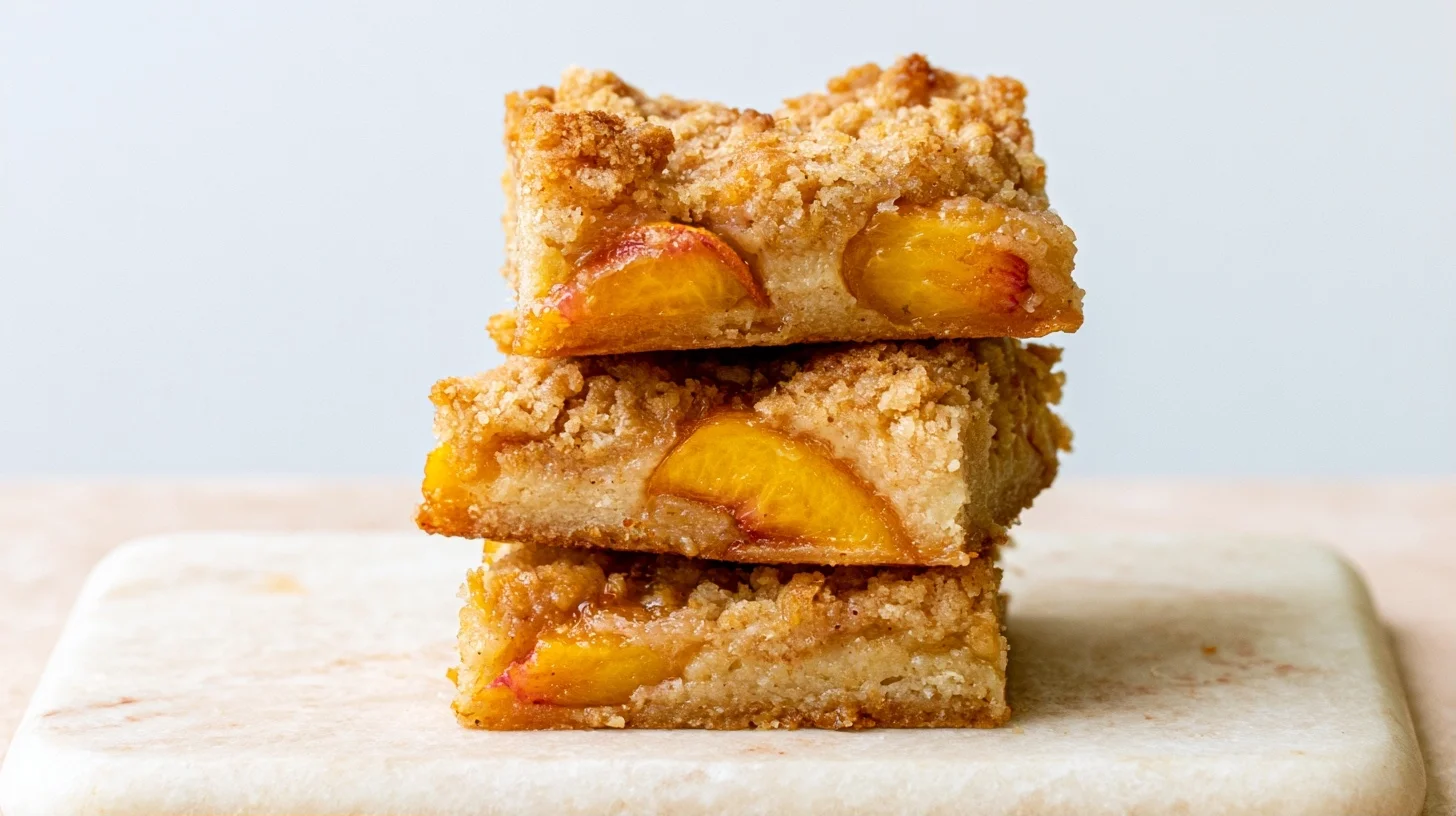
Table of contents
- Why You Will Love This peach pie bars
- The Essential Tools for Perfect Peach Pie Bars
- How to Make Bakery-Quality Peach Pie Bars at Home
- The Techniques That Make These Peach Pie Bars Superior
- Mistakes to Avoid When Making Peach Pie Bars
- Creative Ways to Customize Your Peach Pie Bars
- Understanding the Nutrition in Peach Pie Bars
- Delicious Ways to Serve Your Peach Pie Bars
- The Best Way to Store Peach Pie Bars
- Frequently Asked Questions
Why You Will Love This peach pie bars
- These bars slice cleanly into perfect squares without the mess of cutting pie wedges.
- The buttery oat crumble topping adds a satisfying crunch that contrasts beautifully with the soft peach filling.
- You can make these bars a day ahead and they actually taste better after the flavors meld overnight.
- The recipe works equally well with fresh summer peaches or frozen peaches from your grocery store.
- Each bar delivers all the cinnamon-spiced peach flavor you crave without any rolling pins or pie weights required.
The Essential Tools for Perfect Peach Pie Bars
I’ve made these bars in various pans and with different tools, and I can tell you that having the right equipment makes a significant difference in how easily they release and slice. Here’s what you’ll need to set yourself up for success.
- 9×13-inch metal baking pan: Metal conducts heat better than glass, giving you a crisper bottom crust that won’t turn soggy.
- Parchment paper: Line your pan with an overhang on two sides so you can lift the entire slab out for clean slicing.
- Pastry blender or fork: Essential for cutting cold butter into the flour mixture to create that perfect crumbly texture.
- Large mixing bowl: You’ll need enough room to work the butter into the dry ingredients without making a mess.
- Sharp chef’s knife: A clean, sharp blade ensures neat cuts through the layers without dragging the filling.
- Cooling rack: Proper air circulation underneath the pan prevents condensation and keeps your crust crisp.
- Measuring cups and spoons: Accurate measurements are crucial for the right crust-to-filling ratio.
- Medium saucepan: If you’re making the peach filling from scratch, you’ll need this to cook down the fruit mixture.
How to Make Bakery-Quality Peach Pie Bars at Home
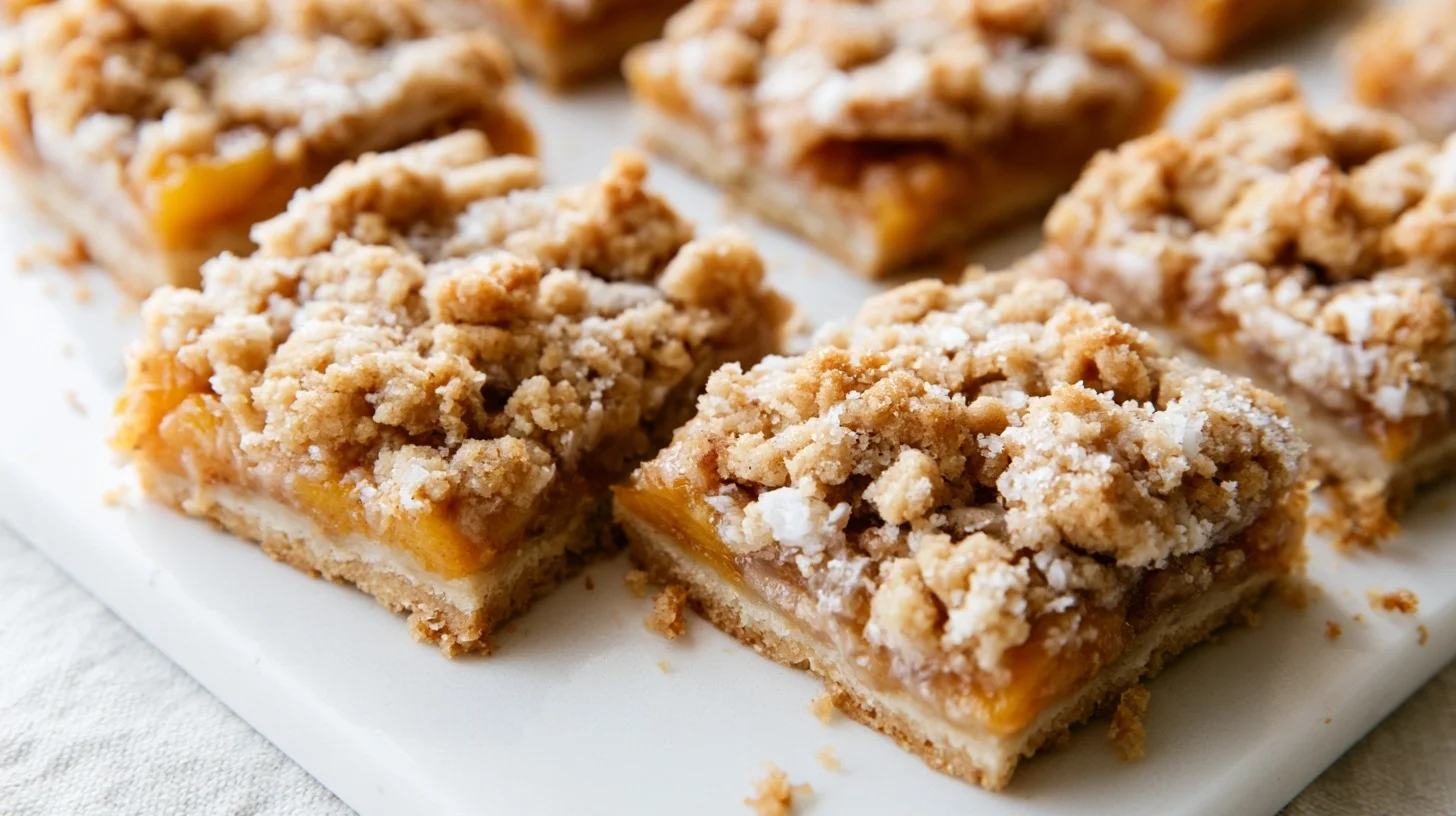
Peach Pie Bars
16
servings20
minutes45
minutes245
kcalThese peach pie bars combine a buttery shortbread crust, sweet cinnamon-spiced peach filling, and a crunchy oat crumble topping. The secret to avoiding soggy bottoms is pre-baking the crust for exactly 12 minutes before adding the filling.
Keep the screen of your device on
Ingredients
2 cups all-purpose flour
0.5 cup granulated sugar
1 cup cold unsalted butter
4 cups fresh peaches
0.5 cup granulated sugar
3 tablespoons cornstarch
2 tablespoons fresh lemon juice
1 teaspoon ground cinnamon
1 cup old-fashioned rolled oats
0.75 cup all-purpose flour
0.5 cup packed brown sugar
0.5 cup cold unsalted butter
Directions
- Preheat your oven to 350°F and line a 9×13-inch metal baking pan with parchment paper, leaving a 2-inch overhang on two opposite sides. This overhang will help you lift the bars out cleanly after baking.
- Make the crust by combining 2 cups flour and half cup granulated sugar in a large bowl, then cut in 1 cup cold butter using a pastry blender until the mixture resembles coarse crumbs. Press this mixture firmly and evenly into the bottom of your prepared pan.
- Pre-bake the crust for 12 minutes until it looks set but not browned. This step creates a moisture barrier that prevents the filling from making the crust soggy.
- Prepare the peach filling by tossing the sliced peaches with half cup sugar, cornstarch, lemon juice, and cinnamon in a medium bowl. Let this mixture sit for 10 minutes so the cornstarch can begin absorbing the fruit juices.
- Make the crumble topping by combining the oats, three-quarters cup flour, and brown sugar in a bowl, then cutting in the remaining half cup cold butter until large clumps form. Keep the butter very cold for the best texture.
- Spread the peach filling evenly over the pre-baked crust, then sprinkle the crumble topping over the peaches, covering them completely. The topping will create a beautiful golden crust as it bakes.
Notes
- The ideal ratio of crust to filling to crumble for peach pie bars is 2:3:1 by volume, which creates balanced layers that slice cleanly.
- If using frozen peaches, thaw them completely and drain off at least half the liquid before mixing with the cornstarch.
- These bars taste even better the next day after the flavors have had time to meld together.
- Store in an airtight container at room temperature for up to 2 days or refrigerate for up to 5 days.
Nutrition Facts
- Serving Size: 1g
- Total number of serves: 16
- Calories: 245kcal
- Fat: 12g
- Carbohydrates: 35g
- Fiber: 2g
- Protein: 3g
Did you make this recipe?
Tag @therecipemasterblog on Instagram and hashtag it with #therecipemaster
Like this recipe?
Follow @therecipemasterblog on Pinterest
Follow us on Facebook!
Follow The Recipe Master on Facebook
The Techniques That Make These Peach Pie Bars Superior
After testing dozens of batches, I discovered several key techniques that separate mediocre bars from exceptional ones. These tips will help you avoid the most common pitfalls and achieve professional results every time.
Pre-Bake Your Crust for a Crisp Bottom
The ideal pre-bake time for peach pie bars is 12 minutes at 350°F. This creates a moisture barrier that prevents the juicy filling from soaking into the crust. I found that anything less than 10 minutes results in a soggy bottom, while more than 15 minutes makes the edges too dark. The crust should look set but not browned when you add the filling.
Control Moisture in Your Peach Filling
Whether using fresh or frozen peaches, toss them with cornstarch and let them sit for 10 minutes before adding to the crust. This allows the starch to absorb excess juice and prevents a runny filling. For frozen peaches, I recommend thawing them completely and draining off at least half the liquid. Fresh peaches release less moisture, but the cornstarch step is still essential.
Keep Your Butter Cold for the Best Crumble
The crumble topping should have pea-sized butter pieces that create distinct clusters when baked. I cut my butter into small cubes and chill them in the freezer for 10 minutes before mixing. Work quickly with a pastry blender, and stop as soon as the mixture resembles coarse crumbs. Overworking creates a paste instead of a crumble.
Add Lemon Juice to Brighten the Flavor
Two tablespoons of fresh lemon juice in the peach filling balances the sweetness and enhances the fruit flavor. The acidity also helps the cornstarch thicken properly. I always use fresh lemon juice rather than bottled because the flavor difference is noticeable in the final bars.
Cool Completely Before Slicing
This is the hardest tip to follow, but it’s the most important. The filling needs at least two hours to set at room temperature, or ideally overnight in the refrigerator. I know it’s tempting to cut into warm bars, but the filling will be too soft and your slices will fall apart. For more information on the nutritional benefits of fresh peaches, check out this comprehensive guide.
Use Parchment Paper for Easy Removal
Line your pan with parchment that extends over two opposite sides by at least two inches. After cooling, you can lift the entire slab out and slice on a cutting board. This prevents damage to your pan and gives you much cleaner cuts than slicing in the pan.
Mistakes to Avoid When Making Peach Pie Bars
Even experienced bakers can run into problems with layered desserts like these. I’ve made every mistake possible while perfecting this recipe, so let me help you avoid the same pitfalls.
Skipping the Pre-Bake Step
Many recipes skip this step, but it’s the difference between crisp and soggy. Without pre-baking, the wet filling soaks directly into raw flour, creating a gummy texture. I always set a timer for exactly 12 minutes and check that the crust looks dry before proceeding.
Using Warm or Softened Butter in the Crumble
Soft butter melts into the flour and creates a solid layer instead of distinct crumbles. I fix this by cutting my butter into cubes and freezing them for 10 minutes before mixing. If your kitchen is very warm, chill the entire bowl of crumble topping for 15 minutes before sprinkling it over the filling.
Cutting the Bars While Still Warm
Warm filling is too soft to hold its shape when sliced. I recommend cooling the bars at room temperature for one hour, then refrigerating for at least one more hour before cutting. For the cleanest slices, I wipe my knife clean between each cut.
Overfilling the Pan with Peaches
Too much filling bubbles over the edges and burns on your oven floor. I measure my peaches carefully and never exceed 4 cups of sliced fruit. If you have extra peaches, save them for another batch or make a simple peach crumble dessert instead.
Creative Ways to Customize Your Peach Pie Bars
One of the best things about this recipe is how easily it adapts to different dietary needs and flavor preferences. I’ve tested all of these variations myself and can vouch for their success.
Gluten-Free Peach Bars
Replace the all-purpose flour with a 1-to-1 gluten-free baking blend and use certified gluten-free oats in the crumble. I’ve had excellent results with Bob’s Red Mill 1-to-1 blend. The texture is nearly identical to the original version, though the crust may be slightly more crumbly.
Dairy-Free Version
Substitute cold coconut oil or vegan butter for the regular butter in both the crust and crumble. I prefer refined coconut oil because it doesn’t add coconut flavor. Make sure whatever fat you use is very cold and solid before mixing.
Mixed Berry Peach Bars
Replace one cup of the peaches with fresh or frozen blueberries or raspberries. The mixed fruit creates beautiful color and adds tartness that balances the sweet peaches. Add an extra tablespoon of cornstarch to handle the additional berry juice.
Brown Butter Crust Variation
For a deeper, nuttier flavor, brown the butter before making the crust and crumble. Let it cool until solid again, then proceed with the recipe as written. This adds a caramelized complexity that pairs beautifully with the fruit.
Spiced Peach Bars
Add a quarter teaspoon of ground ginger and a pinch of cardamom along with the cinnamon in the filling. These warm spices complement peaches beautifully and add sophistication to the flavor profile. I also like to add a teaspoon of vanilla extract to the filling for extra depth.
Understanding the Nutrition in Peach Pie Bars
Each bar provides approximately 245 calories, making them a reasonable dessert option when enjoyed in moderation. The peaches contribute natural fiber and vitamin C, while the oats in the crumble add whole grains and additional fiber. The fat content comes primarily from butter, which provides richness and helps your body absorb the fat-soluble vitamins in the fruit.
With about 35 grams of carbohydrates per serving, these bars are best enjoyed as an occasional treat rather than an everyday snack. However, they contain less sugar than many commercial desserts because the natural sweetness of ripe peaches means you need less added sugar. You can reduce the sugar by two tablespoons if your peaches are exceptionally sweet.
Delicious Ways to Serve Your Peach Pie Bars
These bars are incredibly versatile and work beautifully for everything from casual weeknight desserts to elegant dinner parties. I love serving them slightly warm with a scoop of vanilla ice cream melting over the top. The contrast between the cold ice cream and warm fruit is irresistible. For a lighter option, try dolloping each bar with fresh whipped cream or Greek yogurt.
For brunch gatherings, I serve these bars alongside fresh coffee and mimosas. They’re substantial enough to feel special but not so heavy that they weigh you down. I’ve also packed them for picnics and outdoor concerts because they travel well and don’t require refrigeration for a few hours. Cut them into smaller squares for parties, or keep them larger for plated desserts with a drizzle of caramel sauce.
The Best Way to Store Peach Pie Bars
Store your cooled bars in an airtight container at room temperature for up to two days, or refrigerate them for up to five days. I prefer refrigeration because it keeps the crust crisper and the filling more stable. Layer parchment paper between stacked bars to prevent them from sticking together.
For longer storage, these bars freeze beautifully for up to three months. Wrap individual bars in plastic wrap, then place them in a freezer-safe container or bag. Thaw overnight in the refrigerator, then bring to room temperature or warm gently in a 300°F oven for 10 minutes. The texture remains remarkably close to fresh-baked.
Frequently Asked Questions
Yes, frozen peaches work perfectly for this recipe. Thaw them completely and drain off at least half the liquid before tossing with cornstarch. Add an extra tablespoon of cornstarch to compensate for the additional moisture frozen peaches release.
Pre-bake the crust for 12 minutes before adding the filling. This creates a moisture barrier that prevents the juicy peaches from soaking into the crust. Also make sure to toss your peaches with cornstarch and let them sit for 10 minutes before adding to the pan.
At least two hours at room temperature, or ideally overnight in the refrigerator. The filling needs this time to set properly so your bars slice cleanly without falling apart. Cutting them while warm results in messy, uneven pieces.
Yes, these bars actually taste better the next day after the flavors have melded. Make them up to two days ahead and store covered at room temperature, or refrigerate for up to five days. They also freeze beautifully for up to three months.







Leave a Reply