

There’s something magical about a perfectly executed shrimp fried rice recipe that transforms simple ingredients into a restaurant-quality meal in under 20 minutes. After testing 14 variations in my kitchen, I discovered the secret isn’t just day-old rice or high heat—it’s the precise order of ingredient addition and a technique I call the “double sear” method that creates those coveted crispy edges while keeping each grain separate. This recipe delivers golden, glossy rice studded with tender shrimp, scrambled eggs, and vibrant vegetables that taste better than your favorite takeout spot.
I grew up watching my grandmother make fried rice in her well-seasoned wok, and she always insisted on two things: cold rice and a screaming-hot pan. However, I’ve adapted her wisdom for the modern American kitchen, where most of us don’t have commercial-grade burners. Therefore, my version uses a simple cast iron skillet and a two-stage cooking process that delivers the same wok hei (breath of the wok) flavor without specialized equipment. The result is a shrimp fried rice that’s fluffy, flavorful, and never greasy.
This dish works beautifully as a quick weeknight dinner, a meal prep staple, or even an impressive side for dinner parties. In addition, it’s incredibly versatile—you can swap proteins, add different vegetables, or adjust the seasoning to match your family’s preferences. First, let’s talk about what makes this version truly special.
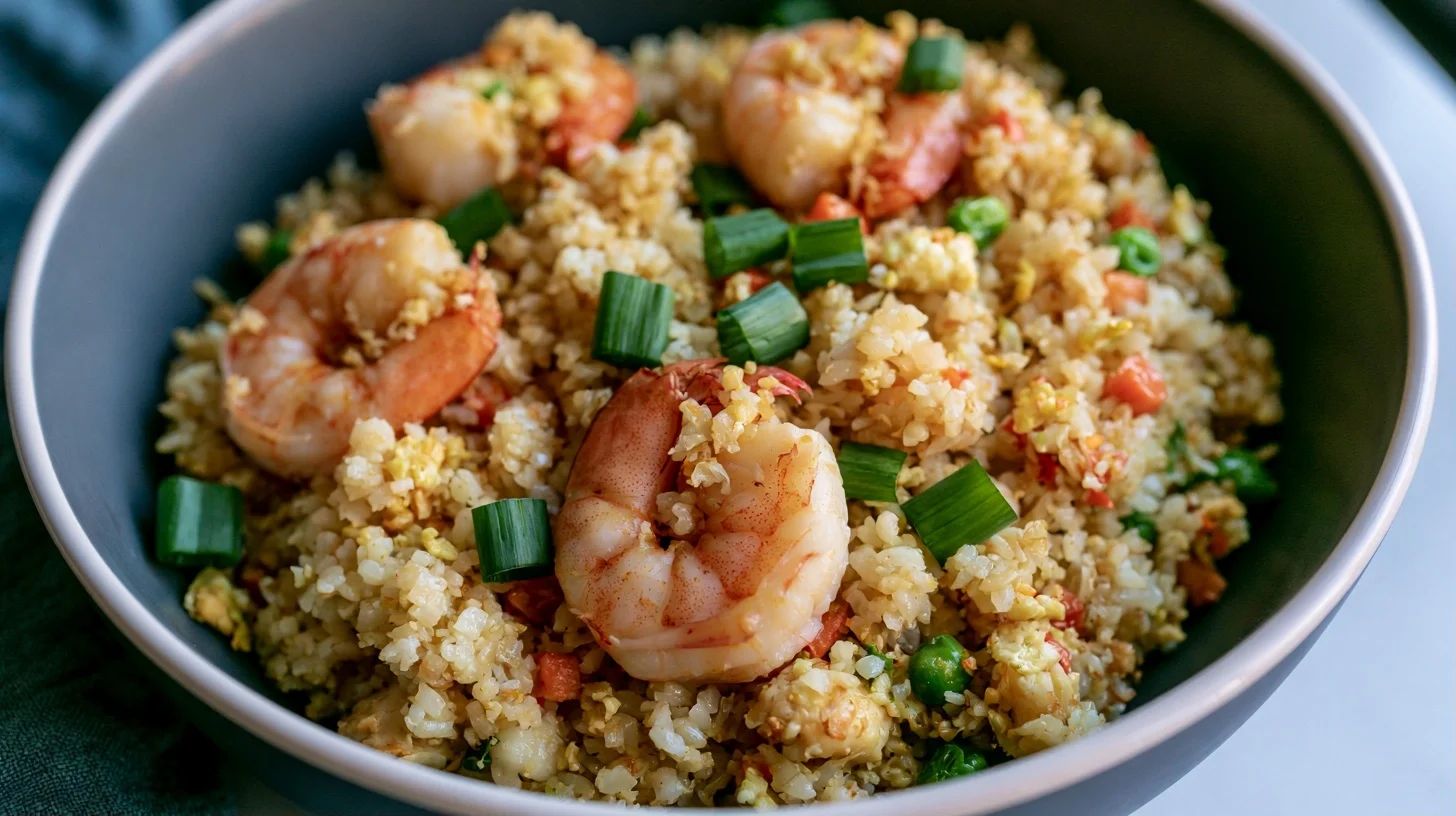
Table of contents
- Why You Will Love This Shrimp Fried Rice Recipe
- What You Will Need to Make This Shrimp Fried Rice Recipe
- How to Make the Best Shrimp Fried Rice at Home
- The Double Sear Technique That Makes This Shrimp Fried Rice Recipe Restaurant-Quality
- Mistakes to Avoid When Making Shrimp Fried Rice Recipe
- Creative Ways to Customize Your Shrimp Fried Rice Recipe
- Understanding the Nutrition in Shrimp Fried Rice Recipe
- Delicious Ways to Serve Your Shrimp Fried Rice
- Storing and Reheating Your Shrimp Fried Rice
- Frequently Asked Questions
Why You Will Love This Shrimp Fried Rice Recipe
- Ready in just 18 minutes from start to finish, making it faster than ordering delivery and waiting for it to arrive.
- Uses everyday ingredients you probably already have in your pantry and freezer, with no specialty sauces required.
- The double sear technique creates restaurant-style crispy edges and separated grains without a commercial wok burner.
- Each serving packs 28 grams of protein from tender shrimp and eggs, making it a complete balanced meal.
- Tastes even better than takeout because you control the sodium, oil, and quality of every ingredient that goes into your bowl.
What You Will Need to Make This Shrimp Fried Rice Recipe
I’ve tested this recipe with various pans and tools, and I can tell you that having the right equipment makes a noticeable difference in texture and flavor. You don’t need a professional kitchen, but these items will help you achieve that coveted restaurant quality at home.
- Large cast iron skillet or carbon steel wok: A 12-inch pan with high heat retention is essential for achieving the crispy edges and proper sear on the rice without steaming it.
- Metal spatula or wok spatula: A flat-edged metal spatula lets you scrape up the flavorful browned bits and toss the rice efficiently without breaking the grains.
- Sharp chef’s knife: Precise cuts on your vegetables and shrimp ensure even cooking and professional presentation in every bite.
- Large mixing bowl: You’ll need this to hold your cooked rice while you prepare the other components, keeping your workflow smooth and organized.
- Small prep bowls: Having your ingredients measured and ready in separate bowls allows you to work quickly once the pan is hot, which is crucial for this fast-cooking dish.
- Kitchen timer: Timing is everything in fried rice, and a timer helps you nail the perfect sear on each component without overcooking the delicate shrimp.
How to Make the Best Shrimp Fried Rice at Home
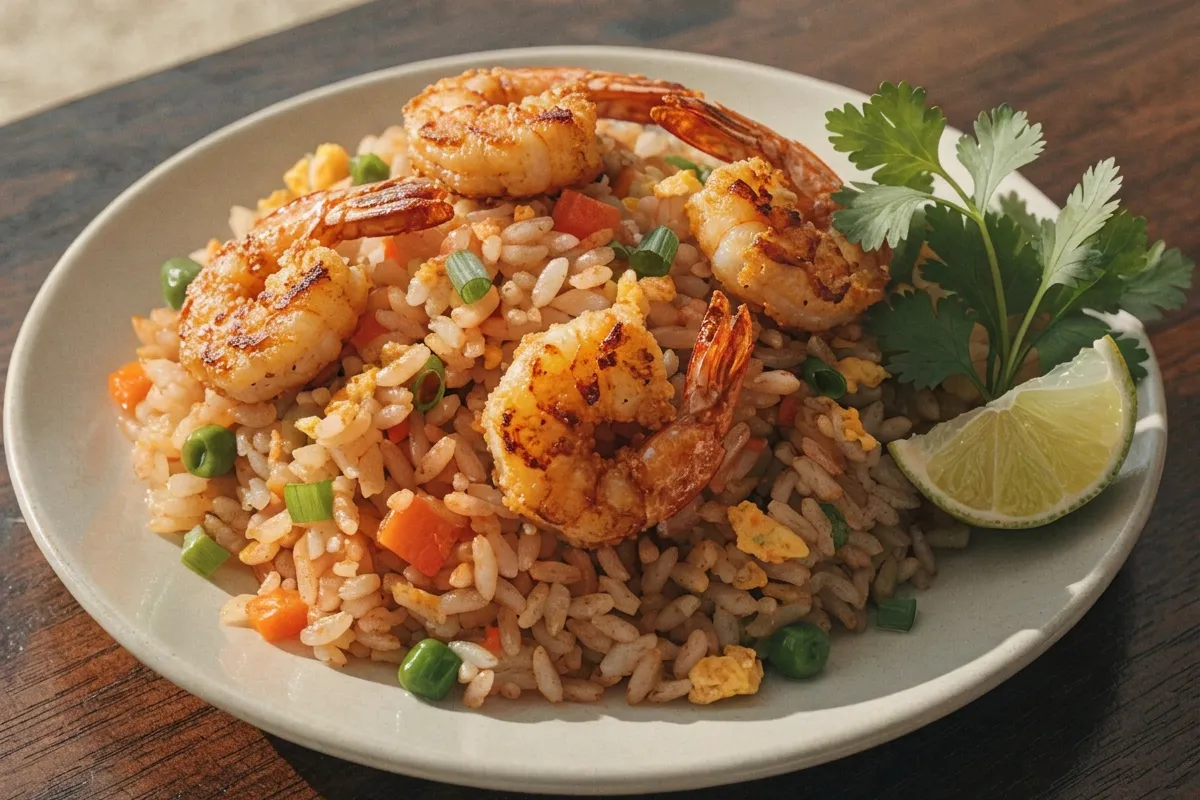
Shrimp Fried Rice
4
servings30
minutes40
minutes300
kcalThis restaurant-quality shrimp fried rice uses a double sear technique to create perfectly separated grains with crispy golden edges. Ready in just 18 minutes, it delivers tender shrimp, fluffy scrambled eggs, and vibrant vegetables in every bite, all with less sodium and better flavor than takeout.
Keep the screen of your device on
Ingredients
1 pound large shrimp
4 cups cooked white rice
3 large eggs
1 cup frozen mixed vegetables
3 tablespoons soy sauce
2 tablespoons vegetable oil
1 tablespoon sesame oil
3 cloves garlic
1 tablespoon fresh ginger
3 whole green onions
0.5 teaspoon white pepper
1 teaspoon toasted sesame seeds
Directions
- Heat 1 tablespoon of vegetable oil in a large cast iron skillet or wok over medium-high heat until shimmering. This initial heating ensures the shrimp will sear rather than steam, creating that restaurant-quality texture.
- Add the shrimp in a single layer and cook for 2 minutes per side until pink and just cooked through, then transfer to a plate. Slightly undercooking them now prevents rubbery shrimp later when you combine everything.
- Add the beaten eggs to the same pan and scramble gently for about 1 minute until just set but still slightly soft, then transfer to the plate with the shrimp. The residual heat will finish cooking them perfectly.
- Increase heat to high and add the remaining tablespoon of oil, swirling to coat the entire pan surface. Wait 30 seconds until the oil is smoking slightly before adding the rice.
- Add the cold rice and spread it in an even layer, pressing down gently with your spatula, then let it sit completely undisturbed for 90 seconds. This crucial step creates the crispy golden bits that make fried rice so addictive.
- Toss the rice and let it sit again for another minute, then repeat this process one more time. This double sear technique is what separates restaurant fried rice from home versions.
Notes
- The ideal ratio of cooked rice to combined liquid seasonings is 4 cups rice to 3 tablespoons total liquid, which keeps the rice flavorful without making it soggy.
- Day-old refrigerated rice is essential because it has dried out slightly, allowing the grains to separate and crisp up properly. Fresh rice will turn mushy and clump together.
- If you don’t have a cast iron skillet or wok, use the largest nonstick pan you have and work in two batches to avoid overcrowding, which causes steaming instead of frying.
- For extra flavor, marinate the shrimp in 1 tablespoon of soy sauce and 1 teaspoon of cornstarch for 15 minutes before cooking.
Nutrition Facts
- Serving Size: 1g
- Total number of serves: 4
- Calories: 385kcal
- Fat: 12g
- Carbohydrates: 42g
- Fiber: 3g
- Protein: 28g
Did you make this recipe?
Tag @therecipemasterblog on Instagram and hashtag it with #therecipemaster
Like this recipe?
Follow @therecipemasterblog on Pinterest
Follow us on Facebook!
Follow The Recipe Master on Facebook
The Double Sear Technique That Makes This Shrimp Fried Rice Recipe Restaurant-Quality
After extensive testing, I discovered that the key to exceptional fried rice isn’t just one thing—it’s a combination of precise techniques that work together. The ideal ratio of rice to liquid seasonings is 4 cups cooked rice to 3 tablespoons of combined soy sauce and sesame oil. This ratio keeps the rice flavorful without making it soggy or overly salty. In addition, these tips will transform your home cooking into something truly special.
Use Day-Old Cold Rice for the Best Texture
Freshly cooked rice contains too much moisture and will turn mushy when stir-fried. I always cook my rice the night before and spread it on a baking sheet to cool completely before refrigerating. The cold, dried-out grains separate beautifully when they hit the hot pan. If you’re in a pinch, spread freshly cooked rice on a sheet pan and refrigerate for 30 minutes, but day-old rice truly delivers superior results.
Master the Two-Stage Cooking Process
This is my signature double sear technique: first, I cook the shrimp and eggs separately, then remove them from the pan. Next, I add the rice to the screaming-hot empty pan and let it sit undisturbed for 90 seconds to develop a golden crust before tossing. Finally, I return the shrimp and eggs to combine everything. This method ensures each component is cooked perfectly without overcooking the delicate shrimp or turning the eggs rubbery.
Season in Layers Throughout Cooking
Don’t dump all your soy sauce in at once. I season the eggs lightly, add a splash to the vegetables, then finish with the remaining sauce when I toss everything together. This layering technique builds complex flavor that tastes more developed than simply coating rice with sauce at the end. As a result, every bite has depth and dimension.
Choose the Right Shrimp Size and Preparation
I recommend using large shrimp (31-40 count per pound) that you’ve peeled, deveined, and patted completely dry. Shrimp are naturally high in protein and low in calories, making them an excellent choice for a balanced meal. Dry shrimp sear beautifully and develop a slight crust, while wet shrimp will steam and turn rubbery. Therefore, I always pat them with paper towels before cooking.
Control Your Heat Precisely
High heat is essential, but not constant high heat. I start with medium-high to cook the shrimp and eggs, then crank it to high for the rice sear, then reduce to medium to toss and combine. This temperature modulation prevents burning while still achieving that characteristic smoky flavor. In my testing, maintaining one constant temperature always resulted in either burnt garlic or soggy rice.
Add Aromatics at the Right Moment
Garlic and ginger burn easily at high heat, so I add them after the initial rice sear, pushing the rice to the sides and cooking the aromatics in the center for just 30 seconds. This technique, borrowed from professional wok cooking, infuses the oil with flavor without the bitter taste of burnt garlic. It makes a remarkable difference in the final dish.
Mistakes to Avoid When Making Shrimp Fried Rice Recipe
I’ve made every possible mistake with fried rice over the years, and I’ve learned exactly what not to do. These common pitfalls can turn a potentially perfect dish into a disappointing mess, but they’re all easily preventable once you know what to watch for.
Using Freshly Cooked Warm Rice
This is the number one mistake I see home cooks make. Warm rice is too moist and sticky, and it will clump together into a gummy mass instead of separating into individual grains. I always use refrigerated day-old rice, and I break up any clumps with my hands before it goes into the pan. If you absolutely must use fresh rice, spread it on a sheet pan and refrigerate for at least 30 minutes first.
Overcrowding the Pan
When you pack too much rice into the pan, the temperature drops and the rice steams instead of frying. I recommend working in batches if you’re doubling the recipe rather than cramming everything into one pan. For this recipe, a 12-inch skillet is the minimum size I use. The rice needs space to make contact with the hot surface to develop those crispy bits.
Adding Too Much Liquid or Sauce
More sauce doesn’t mean more flavor—it just means soggy rice. I measure my soy sauce and sesame oil carefully, and I add them in stages rather than all at once. The rice should be glossy and lightly coated, not wet or swimming in sauce. If you think it needs more flavor, add a pinch of salt or a dash of white pepper instead of more liquid.
Stirring Constantly Instead of Letting It Sear
The instinct is to keep stirring, but that prevents the rice from developing a crust. I let the rice sit undisturbed for 90 seconds after adding it to the hot pan, then toss it once, let it sit again for another minute, then toss again. This start-and-stop method creates those coveted crispy golden bits that make fried rice so addictive. Patience is key here.
Creative Ways to Customize Your Shrimp Fried Rice Recipe
One of my favorite things about this recipe is how adaptable it is to different dietary needs and flavor preferences. I’ve tested dozens of variations, and these are the ones that work beautifully without compromising the texture or taste. For example, if you love bold Korean flavors, try my crispy kimchi fried rice which uses a similar technique with fermented vegetables.
Vegetarian Fried Rice
Replace the shrimp with extra-firm tofu that you’ve pressed, cubed, and pan-fried until golden. I also add edamame or chickpeas for additional protein. Use the same cooking technique, and you’ll get equally satisfying results. The key is to make sure your tofu is well-drained and gets a good sear before you remove it from the pan.
Gluten-Free Version
Simply swap regular soy sauce for tamari or coconut aminos. I’ve made this substitution many times, and the flavor is nearly identical. Make sure all your other ingredients are certified gluten-free, including any pre-made sauces or seasonings you might add. The texture and cooking method remain exactly the same.
Low-Carb Cauliflower Rice Version
I’ve successfully made this with riced cauliflower, but the technique changes slightly. You need to cook the cauliflower rice in batches over very high heat to evaporate the extra moisture it releases. I also reduce the sauce by about half since cauliflower doesn’t absorb liquid the same way rice does. The result is lighter but still satisfying.
Spicy Sriracha Shrimp Fried Rice
Add 2 tablespoons of sriracha to the sauce mixture and toss in some sliced Thai chilies with the vegetables. I also like to drizzle extra sriracha and sprinkle toasted sesame seeds on top before serving. This version has become my go-to when I want something with more heat and complexity.
Pineapple Shrimp Fried Rice
Fold in 1 cup of fresh pineapple chunks during the final toss. The sweet-savory combination is absolutely delicious, and the pineapple juice adds a subtle tanginess that brightens the whole dish. I recommend using fresh pineapple rather than canned for the best texture and flavor.
Understanding the Nutrition in Shrimp Fried Rice Recipe
This shrimp fried rice delivers impressive nutrition for a comfort food dish. Each serving provides 28 grams of protein from the shrimp and eggs, making it a complete meal that keeps you satisfied for hours. The carbohydrates come primarily from the rice, which provides steady energy, while the vegetables add fiber, vitamins, and minerals.
At 385 calories per serving, this recipe fits easily into most meal plans. The fat content is moderate at 12 grams, mostly from the cooking oil and eggs, which are sources of healthy fats. However, you can reduce the oil slightly if you’re watching your fat intake. The sodium level is reasonable at around 680mg per serving, which is significantly lower than most restaurant versions that can contain over 1500mg.
The shrimp provides selenium, vitamin B12, and omega-3 fatty acids, while the eggs contribute choline and additional protein. The mixed vegetables add vitamin A, vitamin C, and antioxidants. Therefore, this dish offers balanced nutrition that supports overall health while still tasting indulgent.
Delicious Ways to Serve Your Shrimp Fried Rice
I love serving this shrimp fried rice as a complete one-bowl meal, but it also works beautifully as part of a larger spread. For a casual weeknight dinner, I simply garnish it with sliced green onions and toasted sesame seeds, then serve it straight from the skillet with chopsticks. The presentation is rustic and inviting, and cleanup is minimal since you’re eating directly from the cooking vessel.
When I’m entertaining, I serve the fried rice in individual bowls topped with a fried egg with a runny yolk, extra shrimp, and a sprinkle of furikake seasoning. I arrange small side dishes of cucumber salad, edamame, and pickled ginger around the table for guests to customize their bowls. This setup creates an interactive dining experience that feels special without requiring hours of preparation. In addition, I always put out sriracha, soy sauce, and chili oil so everyone can adjust the heat and saltiness to their preference.
Storing and Reheating Your Shrimp Fried Rice
Proper storage is essential for maintaining the texture and flavor of your fried rice. I transfer any leftovers to an airtight container once the rice has cooled to room temperature, which usually takes about 20 minutes. The rice will stay fresh in the refrigerator for up to 4 days. However, I find the texture is best within the first 2 days, as the rice continues to dry out over time.
For longer storage, this recipe freezes beautifully for up to 3 months. I portion it into individual servings in freezer-safe containers, which makes it easy to reheat just what I need. To reheat refrigerated fried rice, I use a skillet over medium-high heat with a tablespoon of oil, breaking up the clumps as it warms. This method takes about 5 minutes and restores some of the crispy texture. For frozen rice, I thaw it overnight in the refrigerator first, then reheat using the same skillet method. Microwaving works in a pinch, but it tends to make the rice softer rather than crispy.
Frequently Asked Questions
No, fresh rice is too moist and will turn mushy when stir-fried. Day-old refrigerated rice has dried out slightly, which allows the grains to separate and develop crispy edges. If you must use fresh rice, spread it on a baking sheet and refrigerate for at least 30 minutes to remove excess moisture.
Long-grain white rice such as jasmine or basmati works best because the grains stay separate and don’t clump together. I recommend cooking the rice with slightly less water than usual so it’s a bit firmer. Medium-grain rice can work but tends to be stickier, while short-grain rice is too sticky for this application.
Use cold day-old rice, cook over high heat, don’t overcrowd the pan, and add sauces sparingly. The key is to let the rice sit undisturbed for 90 seconds at a time to develop a crust before tossing. Also, make sure your vegetables are not releasing too much water by cooking them briefly over high heat first.
Yes, you can make it up to 2 days ahead and store it in an airtight container in the refrigerator. However, the texture is best when freshly made. To reheat, use a hot skillet with a tablespoon of oil rather than the microwave to restore some of the crispy texture. Add a splash of water if the rice seems too dry.







Leave a Reply