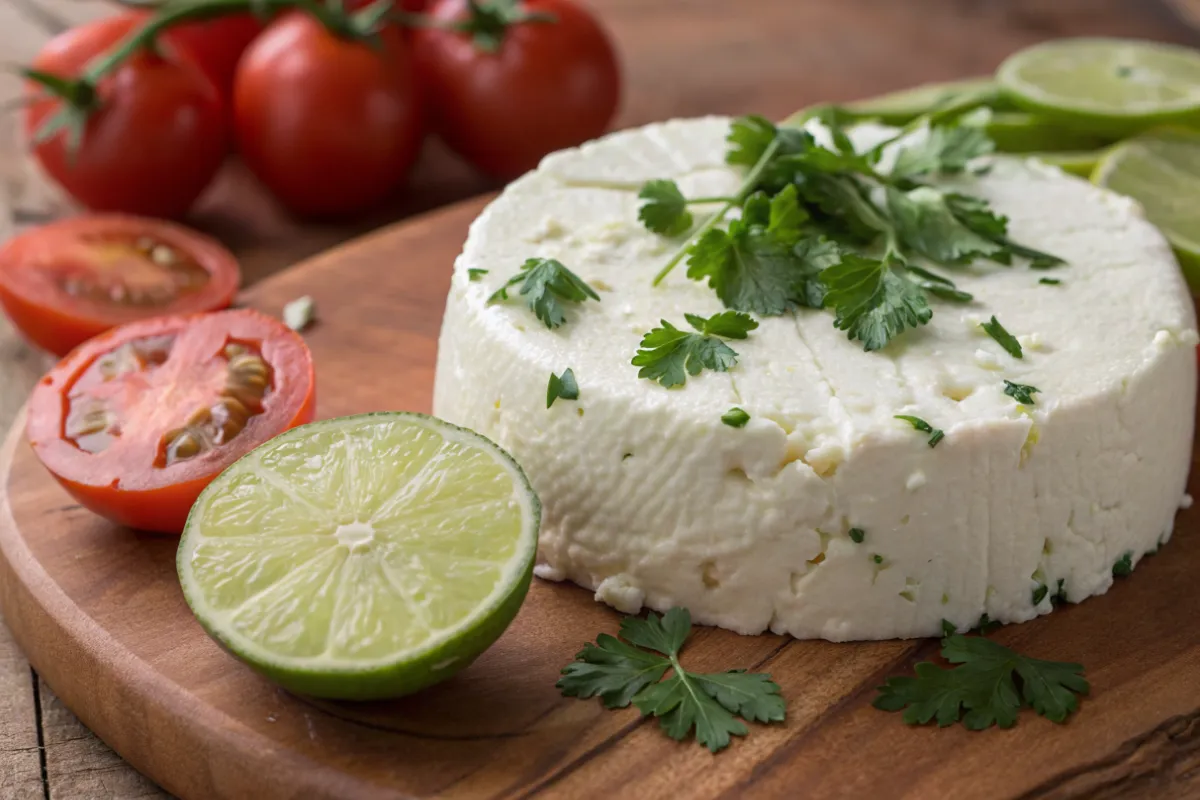
There’s something magical about making cheese from scratch. The first time I tried this queso fresco recipe, I was surprised by how easy it was and how fresh and delicate the result tasted compared to anything store-bought. Queso fresco is a staple in Mexican kitchens, loved for its mild flavor and soft, crumbly texture. Whether it’s sprinkled on enchiladas, melted into warm tortillas, or paired with a juicy slice of watermelon, it brings brightness and balance to every bite.
So if you’re looking for a way to elevate your taco night or add a homemade touch to your favorite dishes, this queso fresco recipe will definitely become your go-to.
Table of contents
Why This Queso Fresco Recipe Works So Well
What makes this queso fresco recipe so reliable and delicious is its simplicity. It’s rooted in a traditional method that’s been used in Latin American kitchens for generations. The goal is to lightly curdle the milk to create a soft cheese that holds its shape but melts just slightly when warmed, the ultimate textural balance.
Here’s why this version stands out:
- Only 3 Ingredients: Whole milk, lemon juice (or vinegar), and salt. No rennet, no cultures, just pure basics.
- Fast Prep: You’ll go from fresh milk to formed cheese in under 45 minutes.
- Beginner Friendly: No special tools are needed beyond a pot, a strainer, cheesecloth, and a bowl.
- Customizable Texture: Whether you like it soft and spreadable or firmer and crumbly, you control the pressing time and draining.
Another reason this recipe shines is how adaptable it is. You can use raw milk if available, but it also works perfectly with high-quality pasteurized milk. You can swap lemon juice for white vinegar or even try a splash of apple cider vinegar for a slight flavor variation. And salt can be adjusted to taste.
Best of all, the final product is versatile. Crumble it on chilaquiles, stuff it into gorditas, or use it as a base for Mexican-style cheesecake. It’s a humble cheese that adapts beautifully to different cuisines and dietary needs.
Recipe Card
Tips for Perfect Queso Fresco
- Use Whole Milk: For the best texture and flavor, always use whole milk. The higher fat content helps create a creamier cheese.
- Don’t Rush the Acid: If the milk doesn’t curdle immediately, give it a little more time after adding the vinegar or lime juice.
- Press the Cheese for a Firmer Texture: The longer you press the curds, the firmer and drier the cheese will be.
- Save the Whey: Don’t throw away the whey! It’s packed with nutrients and can be used in cooking.
- Control Saltiness: Start with a small amount of salt, taste, and adjust as necessary.
Delicious Variants of the Queso Fresco Recipe
1. Herbed Queso Fresco
After salting the curds, mix in fresh chopped herbs like cilantro, chives, or oregano before pressing. It adds visual appeal and bright flavor, perfect for summer salads or avocado toast.
2. Spicy Queso Fresco
Add a small amount of finely minced jalapeño or chili flakes to the curds before pressing. This gives your cheese a gentle heat that pairs well with grilled meats or spicy salsas.
3. Smoked Queso Fresco
Once the cheese is pressed and chilled, place it in a stovetop smoker or on a grill over indirect heat for 10 to 15 minutes using applewood or hickory chips. This subtle smokiness takes your cheese to the next level, especially in tacos or on roasted vegetables.
4. Garlic and Black Pepper Queso Fresco
Stir in roasted minced garlic and cracked black pepper after draining the curds. This savory twist is ideal as a spread or crumbled over pasta dishes.
FAQs
It’s best to use whole milk for queso fresco. Skim milk won’t provide the rich texture needed for the cheese.
It can last up to a week in the fridge. Always store it in an airtight container to maintain its freshness.
Queso fresco doesn’t freeze well, as it changes in texture when thawed. It’s best enjoyed fresh!
This usually happens if the milk is ultra-pasteurized. Ultra-pasteurization changes the protein structure in the milk, making it harder for curds to form. Always use whole milk that’s labeled simply “pasteurized,” not “ultra-pasteurized.” Also, make sure the milk is hot enough (around 185°F or 85°C) before adding the acid.
Let’s Wrap This Up
Homemade cheese sounds intimidating but this queso fresco recipe proves that you don’t need a culinary degree or specialized tools to enjoy the pleasure of fresh cheese at home. It’s fast, fun, and deeply satisfying, offering an entry into the beautiful world of traditional Mexican flavors.
You’ll find yourself reaching for it again and again, whether it’s to crumble over eggs, layer into tacos, or pair with ripe tomatoes and herbs. It brings a delicate, creamy tang that elevates both simple dishes and showstopping meals. And because the process is so approachable, it’s a wonderful recipe to share with kids, friends, or anyone curious about homemade cooking.
If you loved this queso fresco recipe, you’ll also enjoy our Easy Mexican Quesadilla Recipe that’s perfect for pairing with your homemade queso fresco!


Leave a Reply