- Soften cream cheese to room temperature for 2 hours to ensure a smooth, lump-free mixture.
- Use a food processor or crush cookies thoroughly, including filling, to bind without extra sugar or butter.
- Freeze rolled balls at least 20 minutes before dipping to prevent them from falling apart.
- Melt chocolate gently in 30-second intervals and thin with a teaspoon of coconut oil if needed for glossy coating.
I still remember the first Christmas I brought a platter of oreo balls to a family gathering. I placed them on the dessert table, sandwiched between elaborate pies and intricate cookies. Within ten minutes, the entire plate was empty, and my aunt was begging for the recipe. These bite-sized truffles are the definition of a high-reward, low-effort dessert.
This recipe fits perfectly into your busy life as a festive dish for holiday exchanges, but it is also a fantastic quick dessert for movie nights. Because they require no baking, they are a stress-free option when your oven is already occupied. These oreo balls offer a sophisticated look with a taste that brings out the inner child in everyone. It is honest comfort food at its finest.
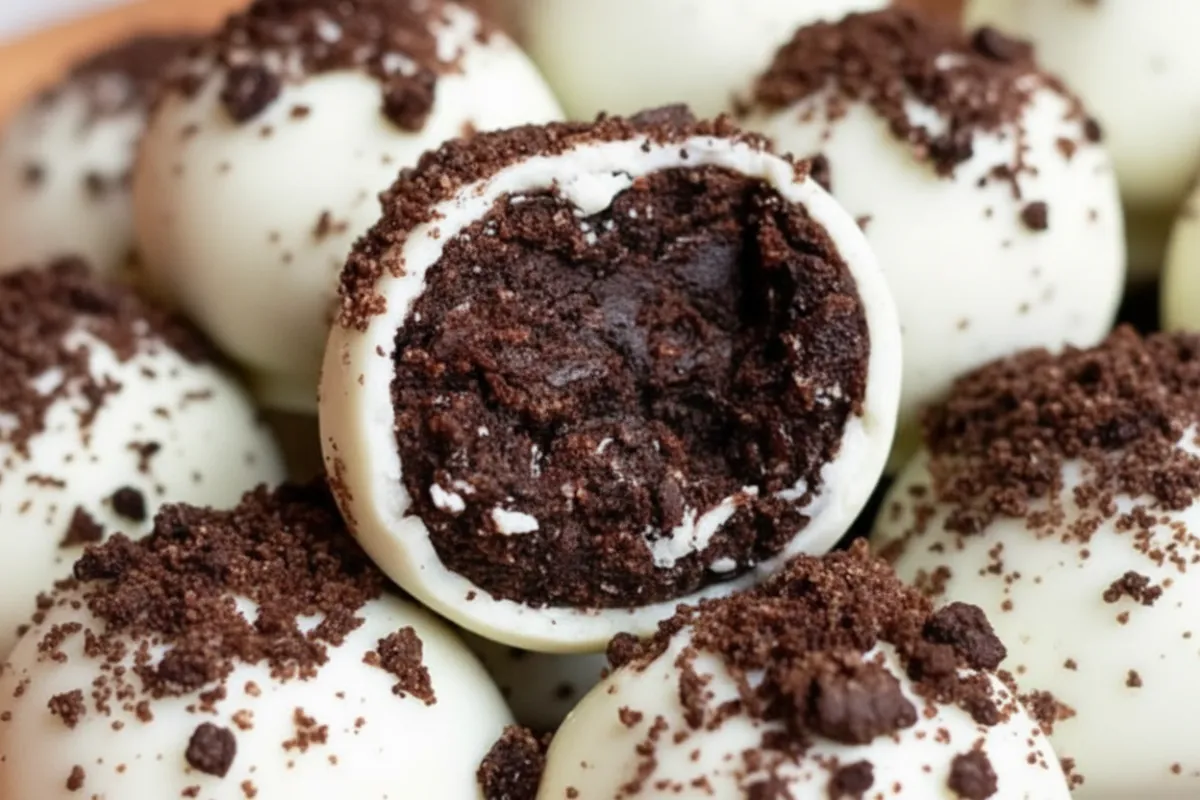
Table of contents
Smart Prep for Stress-Free Dipping
To ensure your oreo balls look professional and not messy, preparation is everything. Here is how I set up my station to keep things moving smoothly:
- Soften the Cheese: Take your cream cheese out of the fridge at least 2.0 hours before you start. It must be completely room temperature to blend without lumps.
- Line the Sheets: Prepare two baking sheets with parchment paper or wax paper before you even crush a cookie.
- Chill Space: Clear a shelf in your freezer or refrigerator. You will need quick access to cold air to set the centers.
- The Crumb Prep: If you don’t have a food processor, place the cookies in a zip-top bag and use a rolling pin. Do this step ahead of time so you are ready to mix.
Oreo Balls Recipe Card
Oreo Balls Recipe
36
servings20
minutes0
minutes110
kcalThese decadent oreo balls feature a rich, fudgy center made from crushed cookies and cream cheese, all coated in a crisp chocolate shell. They are a 3-ingredient wonder that looks elegant but is incredibly easy to make.
Keep the screen of your device on
Ingredients
1.0 package (14.3 oz) Chocolate Sandwich Cookies (e.g., Oreos)
1.0 block (8.0 oz) Cream Cheese, softened to room temperature
12.0 oz Semi-Sweet or White Baking Chocolate
1.0 teaspoon Coconut Oil (optional, for thinning chocolate)
Directions
- Start by crushing the cookies. Place the entire package of cookies, including the filling, into a food processor. Pulse them until they are fine crumbs. You do not want any large chunks remaining.
- Transfer the crumbs to a large mixing bowl. Add the softened cream cheese. Use a hand mixer or a strong spatula to blend them together until the mixture is uniform and dark brown. It should feel like a thick dough.
- Roll the dough into small spheres, about 1.0 inch in diameter. You should get roughly 36 balls. Place them on a baking sheet lined with parchment paper. Freeze them for 20.0 minutes so they firm up.
- While the balls are chilling, melt your chocolate. Place the chocolate and coconut oil in a microwave-safe bowl. Heat in 30-second increments, stirring in between, until completely smooth.
- Remove the balls from the freezer. Dip each one into the melted chocolate, ensuring it is fully coated. Tap off the excess and place it back on the parchment paper. Let them set at room temperature or in the fridge until the shell is hard.
Notes
- Storage: These must be kept refrigerated due to the cream cheese. They last up to 2 weeks in the fridge.
- Prevents Cracking: If the balls are too frozen, the expanding center might crack the chocolate shell. 20 minutes in the freezer is the sweet spot.
- Garnish: Sprinkle crushed cookie dust on top while the chocolate is still wet for a professional look.
Nutrition Facts
- Fat: 6g
- Sodium: 65mg
- Carbohydrates: 13g
Did you make this recipe?
Tag @therecipemasterblog on Instagram and hashtag it with #therecipemaster
Like this recipe?
Follow @therecipemasterblog on Pinterest
Follow us on Facebook!
Follow The Recipe Master on Facebook
Why These Oreo Balls Are a Crowd Favorite
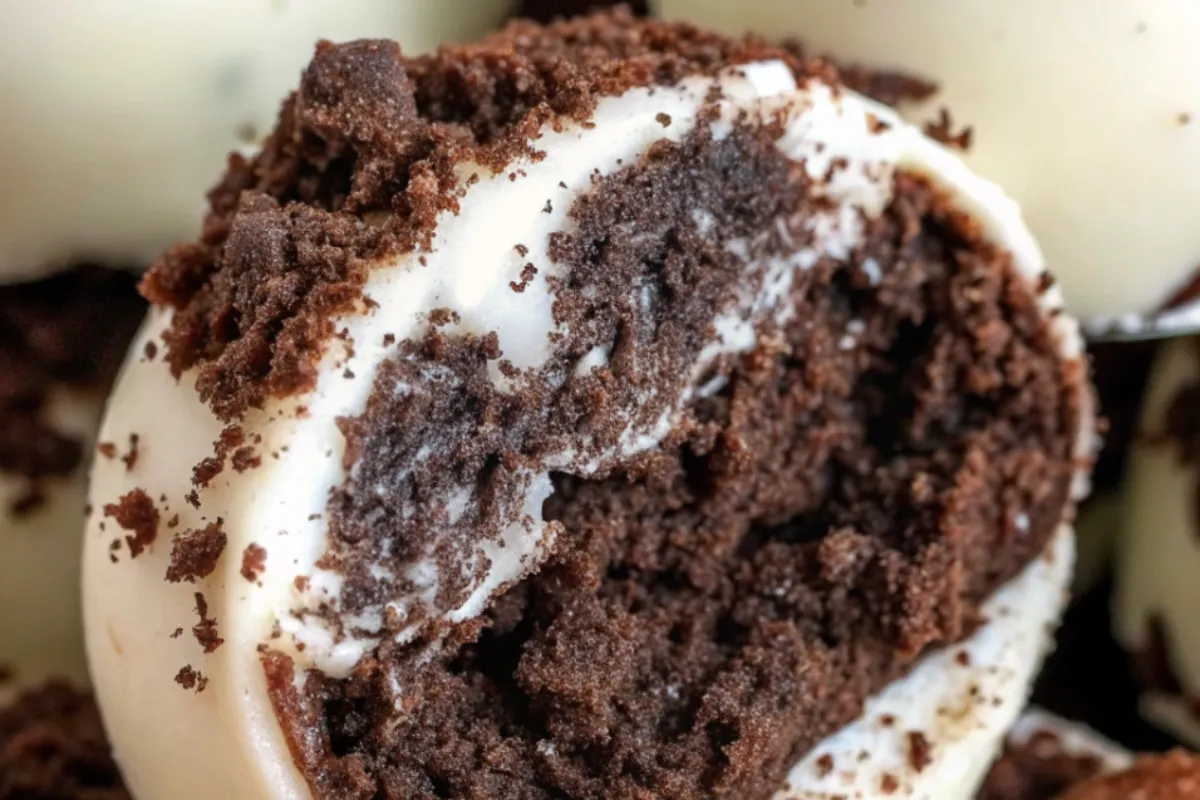
The genius of these oreo balls lies in the ratio of crumb to cream cheese. Many recipes result in a mixture that is too soft to hold its shape or too dry to be enjoyable. My version hits the sweet spot where the center is dense and fudgy, similar to a high-end ganache, but with the distinct flavor of the classic cookie.
Furthermore, this recipe is highly customizable. You can easily swap the standard cookies for gluten-free sandwich cookies to suit different dietary needs. You can also vary the chocolate coating, using white, milk, or dark chocolate changes the profile entirely. Using the entire cookie, including the cream filling, acts as a binder, meaning you do not need to add extra sugar or butter. To understand the chemistry of how chocolate creates that satisfying “snap” when you bite into it, you can read about chocolate tempering science. This contrast between the crisp shell and the soft interior is why this recipe works so well.
Chef Secrets for a Flawless Finish
I have rolled thousands of these truffles, and I have learned a few tricks to avoid common pitfalls:
- The Freezer is Your Friend: You must freeze the rolled balls for at least 20.0 minutes before dipping. If they are too warm, they will fall apart in the hot chocolate.
- Don’t Overheat the Chocolate: Melt your chocolate in 30-second intervals. If it gets too hot, it will seize and become grainy.
- Use a Fork: When dipping, drop the ball into the chocolate, lift it out with a fork, and tap the fork handle against the side of the bowl. This removes excess chocolate and prevents a “foot” from forming at the bottom.
- Decoration Timing: If you plan to add sprinkles or extra crumbs on top, do it immediately after dipping. The coating sets faster than you think.
Flavor Spins
The Mint Chocolate Chip Variant
For a refreshing twist, use mint-flavored sandwich cookies instead of the original. Add a drop of green food coloring to the white chocolate drizzle for a festive look. This version tastes exactly like a thin mint cookie but with a creamy, cheesecake-like texture. It is exceptionally popular during the winter holidays.
The Golden Vanilla Bean Variant
Swap the classic chocolate cookies for the golden vanilla version. Mix in a teaspoon of vanilla bean paste with the cream cheese. Dip these in white chocolate and top with rainbow sprinkles. This “birthday cake” style of oreo balls is much sweeter and looks beautiful on a spring or summer dessert platter.
If you love no-bake treats, you must try my No-Bake Peanut Butter fudge, which offer a similar ease of preparation with a nutty profile.
Troubleshooting Your Oreo Balls
Yes, absolutely. Because the center is made with cream cheese, they should not be left out at room temperature for more than two hours. Store them in an airtight container in the refrigerator.
This usually happens due to extreme temperature changes. If the oreo balls are frozen solid and you dip them in hot chocolate, the center expands as it thaws, cracking the shell. Only chill them for 20 minutes.
If your melting chocolate is too thick, stir in a teaspoon of coconut oil or vegetable shortening. This thins the chocolate and gives it a nice glossy sheen once it dries.
This means they are too warm. The mixture needs to be cold to hold its shape against the weight of the warm chocolate. Pop them back in the freezer for 10 minutes.
The Sweetest Ending
I hope these oreo balls bring a little bit of magic to your kitchen. They are an honest, delightful treat that proves you do not need complicated techniques to create something spectacular. The combination of the dense, creamy center and the snap of the chocolate shell is truly irresistible.


Leave a Reply