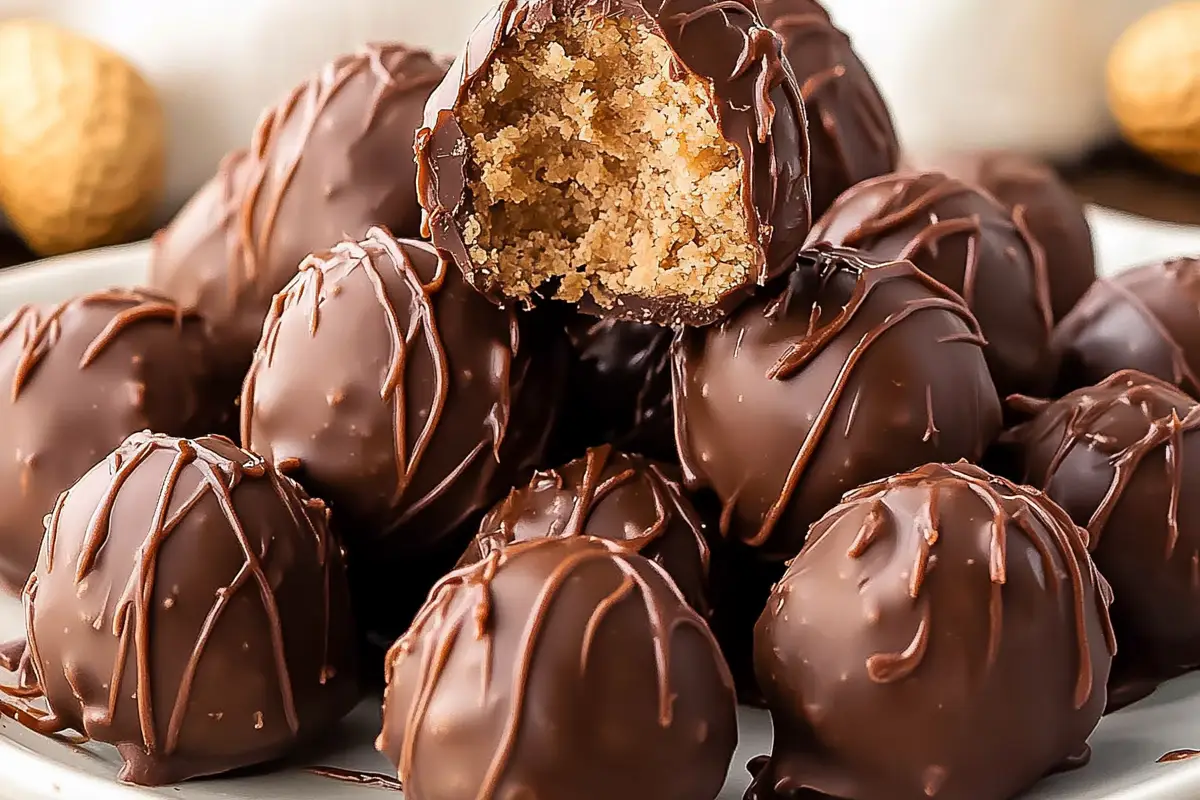
If you’re a fan of the irresistible combination of chocolate and peanut butter, then this Chocolate Peanut Butter Balls recipe is about to become your new favorite treat. Imagine a creamy, sweet, and nutty peanut butter center wrapped in a smooth, decadent chocolate coating. These bite-sized delights are a perfect indulgence for any occasion, from holiday gatherings to casual snacking.
Not only are these Chocolate Peanut Butter Balls incredibly easy to make, but they also require minimal ingredients, making them an excellent last-minute dessert option. Whether you’re preparing a batch for a family movie night, a party, or a homemade gift, these little treats will satisfy every chocolate lover’s cravings.
One of the best things about this recipe is its versatility. You can adjust the sweetness, experiment with different coatings, or even add crunchy textures for a personalized twist. Plus, since they don’t require baking, they’re a fantastic no-fuss option that even kids can help make!
Get ready to experience a perfect balance of flavors in every bite, rich chocolate, creamy peanut butter, and a touch of sweetness that will leave you wanting more.
Table of contents
Recipe Card
Pro Tips for Success
To make sure your Chocolate Peanut Butter Balls turn out perfectly every time, here are some expert tips to help you avoid common mistakes and elevate the flavor and texture.
1. Use the Right Peanut Butter
For the best consistency, use a creamy peanut butter like Jif or Skippy. Natural peanut butter tends to be too oily or too runny, which can make the filling difficult to roll and coat properly. If you prefer natural peanut butter, stir it thoroughly before using and consider adding extra powdered sugar to firm up the mixture.
2. Achieve the Perfect Filling Consistency
The peanut butter mixture should be thick and moldable but not overly dry. If it’s too soft, the balls won’t hold their shape. Add more powdered sugar, one tablespoon at a time, until the texture is just right. If it’s too dry, a small spoonful of melted butter or honey can help soften it.
3. Chill Before Dipping
After rolling the peanut butter mixture into balls, refrigerate them for at least 30 minutes before dipping them in melted chocolate. This helps them firm up and prevents them from falling apart in the warm chocolate.
4. Use High-Quality Chocolate
Since chocolate is a major component of this recipe, choose high-quality melting chocolate or chocolate chips. Ghirardelli, Lindt, or couverture chocolate works best for a silky, smooth coating. Adding a teaspoon of coconut oil or vegetable shortening to the melted chocolate makes the coating even smoother and prevents it from becoming too thick.
5. The Best Dipping Technique
For an easy and mess-free way to coat your peanut butter balls in chocolate, use a fork or a toothpick. Dip the peanut butter ball into the melted chocolate, then lift it out and let the excess chocolate drip off before placing it on parchment paper to set.
6. Let Them Set at Room Temperature
To prevent condensation and cracking, let the chocolate peanut butter balls set at room temperature rather than refrigerating them immediately after dipping. If you’re in a hurry, you can chill them for about 10 minutes to speed up the process.
7. Add Toppings or Drizzles for Extra Flair
Before the chocolate hardens completely, consider sprinkling the tops with crushed peanuts, sea salt, or festive sprinkles. You can also drizzle melted white or dark chocolate over them for a gourmet touch.
Other Variants of the Chocolate Peanut Butter Balls
- Peanut Butter Balls with Rice Krispies Recipe: Add 1 cup of Rice Krispies to the peanut butter mixture before shaping the balls for a delightful crunch. This recipe for peanut butter balls using Rice Krispies is perfect for those who love added texture in their treats!
- Oatmeal Peanut Butter Balls: Substitute half of the powdered sugar with rolled oats for a healthier, more fiber-rich version.
- Protein Peanut Butter Balls: Mix in a scoop of vanilla or chocolate protein powder for an energy-boosting snack.
FAQ
Yes, you can use natural peanut butter, but the texture might be slightly softer and more oily. If the mixture feels too soft to roll, try adding a little more powdered sugar or chilling it before shaping into balls.
To get a smooth chocolate coating, melt the chocolate slowly over low heat, ideally using a double boiler or microwave in short intervals, stirring frequently. Adding a small amount of coconut oil or vegetable oil can also help the chocolate coat more evenly and give it a shiny finish.
If your peanut butter balls are crumbling or falling apart, the mixture may be too dry. Try adding a little more melted butter or a teaspoon of honey to help bind the ingredients together. Also, make sure they are well-chilled before dipping them in chocolate to prevent them from becoming too soft.
If your melted chocolate is too thick, add a teaspoon of coconut oil or vegetable shortening to thin it out. This will give you a smoother, glossier finish and make dipping much easier. Avoid adding water, as it can cause the chocolate to seize up and become grainy.
Final Thoughts
Making Chocolate Peanut Butter Balls at home is a rewarding and delicious experience. With their creamy peanut butter filling and rich chocolate coating, these treats are perfect for satisfying your sweet tooth while being easy to prepare. Whether you’re making them for a special occasion, as an edible gift, or just to enjoy with a cup of coffee, they never fail to impress.
If you love homemade desserts, you might also enjoy trying this Easy Fudge Recipe for another no-bake chocolate delight. For a festive twist, you can also check out this Christmas Crack Recipe, a quick and addictive treat that’s perfect for the holiday season.
Looking for more peanut butter-infused creations? This Peanut Butter and Jelly Cake Recipe offers a nostalgic take on a classic flavor combination. Or, if you’re in the mood for another easy, sweet treat, try your hand at these Almond Joy Cookies, packed with coconut, chocolate, and almonds.
No matter how you choose to enjoy them, these Chocolate Peanut Butter Balls are guaranteed to be a hit. So, gather your ingredients, roll up your sleeves, and treat yourself to this simple yet indulgent dessert today!



Leave a Reply