- Homemade candy corn is easy to make and tastes creamier with a softer bite than store-bought versions.
- Prep matters: measure ingredients, line surfaces, have colors and thermometer ready, and clear a cooling area.
- Hit the syrup’s soft-ball stage (240°F/115°C) and work quickly to color, roll, and cut before it stiffens.
- Recipe is flexible: customize flavors, colors, make vegan swaps, and try healthier sweeteners or natural colorings.
- Store in an airtight container at room temperature up to three weeks; avoid humidity and refrigeration.
Candy corn is one of those Halloween candies that everyone instantly recognizes, bright colors, soft texture, and that unmistakable sweetness. I used to think you could only buy it, but making homemade candy corn is easier than it looks. The first time I tried creating it from scratch, I was surprised by how fun and rewarding it felt, especially shaping those colorful layers by hand.
This candy corn recipe is ideal for festive occasions like Halloween parties, candy bags, or edible gifts. You can also make it ahead and store it for weeks. Once you try making it yourself, you’ll understand why homemade candy corn has a richer flavor and softer bite than the store-bought version.
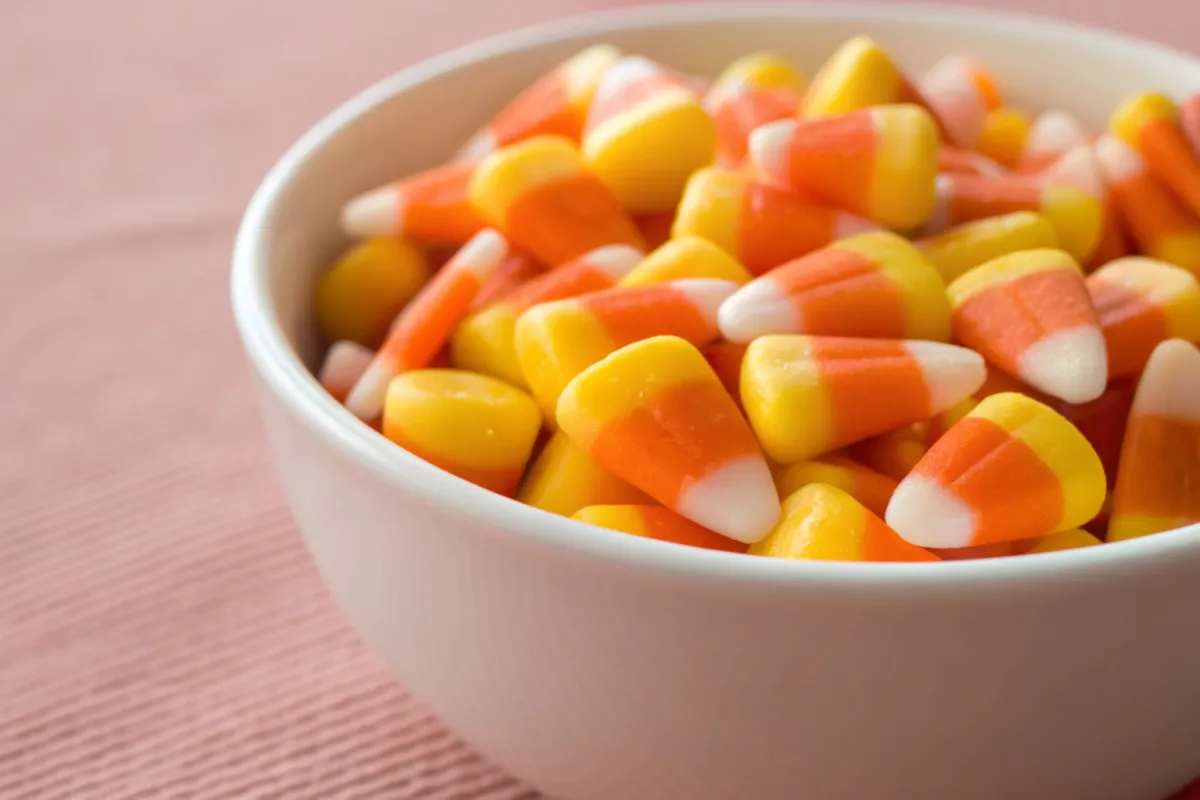
Table of contents
Homemade Candy Corn Recipe Card
Candy Corn Recipe
80
servings15
minutes20
minutes38
kcalA fun and colorful homemade candy corn recipe that brings back the sweet nostalgia of Halloween with simple ingredients and an irresistible chewy texture.
Keep the screen of your device on
Ingredients
300 g powdered sugar
60 g powdered milk
0.25 tsp salt
250 g granulated sugar
180 g light corn syrup
60 g unsalted butter
1 tsp vanilla extract
Orange and yellow food coloring
Directions
- Start by mixing your dry ingredients, powdered sugar, powdered milk, and salt, in a medium bowl. In a small saucepan, combine sugar, corn syrup, and butter. Heat over medium flame until the mixture melts completely and reaches a smooth, glossy texture.
- Once the mixture starts boiling, let it bubble for about five minutes without stirring, until it reaches 245°F (118°C) on a candy thermometer. Take it off the heat and stir in the vanilla extract.
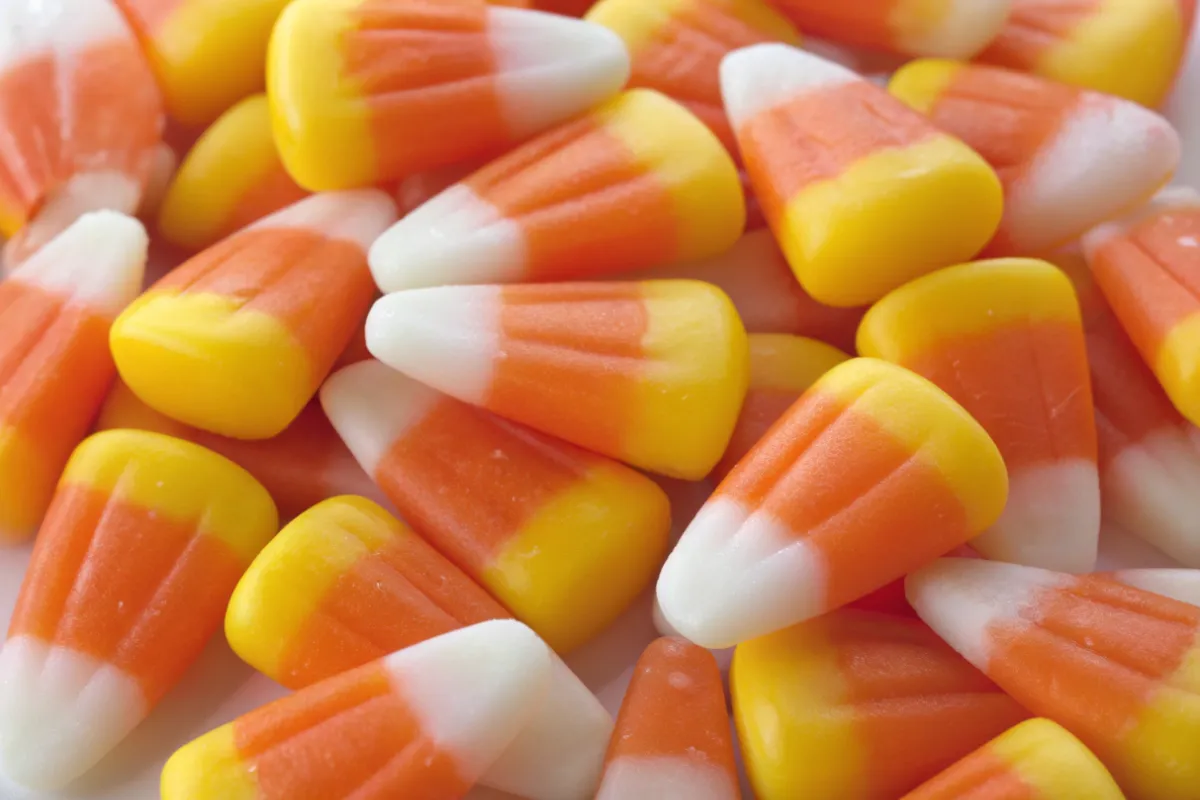
- Gradually mix the dry ingredients into the warm syrup, stirring until everything comes together into a soft dough. Split the dough into three equal parts. Leave one plain (white), color the second yellow, and the third orange.
- Roll each piece into long ropes, about half an inch thick, and line them side by side (yellow, orange, then white). Press them together gently and flatten slightly. Cut small triangles using a sharp knife. Let the pieces cool completely at room temperature for at least two hours before serving.
Notes
- If the dough becomes too stiff, warm it slightly in your hands to soften it before shaping.
- For a glossy finish, lightly brush each candy piece with a touch of corn syrup.
- Keep candy corn stored in an airtight container to maintain its texture for up to three weeks.
Nutrition Facts
- Fat: 0.4g
- Carbohydrates: 9.6g
- Sugar: 9.3g
- Protein: 0.2g
Did you make this recipe?
Tag @therecipemasterblog on Instagram and hashtag it with #therecipemaster
Like this recipe?
Follow @therecipemasterblog on Pinterest
Follow us on Facebook!
Follow The Recipe Master on Facebook
What to Do Ahead of Time
Since candy-making can move quickly once the syrup reaches the right temperature, a little prep makes all the difference. Here’s what I always set up before melting anything:
- Measure ingredients in advance. Once the sugar mixture starts boiling, there’s no time to scramble.
- Line your work surface. Use parchment paper or silicone mats to prevent sticking when shaping the candy.
- Color ready. Have three small bowls and your food coloring nearby for quick layering (usually yellow, orange, and white).
- Cooling area. Make sure there’s space to roll and cut strips without crowding.
- Candy thermometer. Essential for precision, the syrup must reach the “soft ball stage” (around 240°F or 115°C).
What Makes This Recipe Stand Out
This candy recipe works because it combines simplicity with flexibility. You get to control the sweetness level, color vibrancy, and texture, something you can’t do with pre-packaged candy. Plus, it’s made with ingredients most home bakers already have: sugar, powdered milk, corn syrup, butter, and a little vanilla.
Another reason it’s worth trying is the taste. Homemade candy corn doesn’t have that waxy aftertaste found in commercial versions. Instead, it’s creamy and melts in your mouth. You can even customize it for different seasons, try red and green layers for Christmas, or pastels for spring parties.
For dietary tweaks, you can easily make it vegan by using dairy-free butter and plant-based milk powder. It’s also fun for kids because they can roll, cut, and decorate the candy in any shape they want.
If you’re curious about the history of this iconic sweet, check out Smithsonian Magazine’s piece on candy corn’s origins. It’s been around since the late 1800s and continues to be a nostalgic favorite every fall.
Candy-Making Success Tips
Candy-making can be tricky, but this recipe is quite forgiving once you know a few tricks. Here are some practical tips that make all the difference:
- Watch the temperature. The syrup temperature determines the final texture. Too low, and it won’t set. Too high, and it becomes brittle.
- Work fast but calm. Once the candy dough cools enough to handle, you’ll need to color, roll, and cut before it stiffens.
- Use gloves for coloring. Food coloring can stain your hands, so wear gloves when kneading the dough.
- Store correctly. Keep candy corn in an airtight container at room temperature. Refrigeration can make it sticky.
- Avoid humidity. Moisture softens candy and affects its texture. A cool, dry spot is best for storage.
Making Candy Corn Healthier
Homemade candy corn doesn’t have to be all sugar and no substance. While it’s a treat, you can make small tweaks to improve it:
- Replace some corn syrup with honey or maple syrup for natural sweetness.
- Use natural coloring made from turmeric, beet juice, and carrot powder.
- Add a touch of sea salt to balance the sweetness.
These small changes can make your homemade candy corn taste more natural and less artificial, perfect for families who want better control over what they eat.
Fun Twists You Can Try with Candy Corn
1. Chocolate Candy Corn
If you’re a chocolate lover, this twist is pure bliss. Replace one-third of the powdered sugar with cocoa powder for a deeper, richer taste. You can also dip the finished pieces in melted dark or white chocolate for a layered sweetness. The slightly bitter cocoa contrasts perfectly with the sugary candy flavor.
2. Fruity Candy Corn
Add a fruity vibe by incorporating natural flavor extracts such as strawberry, raspberry, or orange into each colored section. This gives your candy a fun, tangy note and brightens the color palette. Perfect for summer parties or kids’ events.
3. Matcha Candy Corn
For a more sophisticated twist, add a pinch of matcha powder to the green layer instead of yellow. It gives an earthy flavor and a stunning pastel tone that pairs beautifully with the sweetness. It’s a Japanese-inspired variation that will impress guests.
4. Salted Caramel Candy Corn
For those who love a sweet-salty combo, sprinkle a touch of flaky sea salt on top of each candy piece once set. The salt intensifies the caramel-like flavor of the candy and gives a modern twist to the traditional version.
5. Vegan Candy Corn
Swap the butter with coconut oil and use corn syrup alternatives like agave nectar. This plant-based candy corn still holds its shape and offers a light coconut aroma that feels both tropical and festive.
For more Halloween treats here is a delightful Spider cookies Recipe!
Candy Corn Cooking Methods
If you want to experiment further, the cooking method can also influence the texture and taste of your candy corn.
- 1. Classic Stovetop Method: This traditional approach allows you to control every step of the sugar melting process. Use a candy thermometer to maintain consistency and avoid crystallization.
- 2. Microwave Shortcut: Perfect for quick batches. Mix the sugar, syrup, and butter in a large heatproof bowl, then heat in short bursts, stirring between intervals. This method is faster but requires careful monitoring to prevent overheating.
- 3. Air-Dried Candy Corn: Skip the final shaping step and let the candy cool into sheets, then break it into pieces once firm. This creates a slightly crispier texture, similar to toffee brittle.
Your Candy Guide
Yes, you can replace it with agave syrup or honey, though the texture will be slightly softer.
It means the sugar crystallized too early. Make sure all sugar dissolves before boiling and avoid stirring once the syrup starts to bubble.
Stored in a sealed container at room temperature, it stays fresh for up to three weeks.
Add a teaspoon of butter or a few drops of water when reheating the mixture for a slightly chewier bite.
Sweet Farewell
Making candy corn at home is more than a recipe, it’s a creative adventure. You can shape it, color it, and tweak the flavor to match any season or celebration. Once you try this version, you might never go back to store-bought again.
Next time you host a Halloween party or crave a fun afternoon project, grab your saucepan and turn simple sugar into nostalgic joy.


Leave a Reply