

- Use fresh or reserved clam juice and add it slowly so breadcrumbs feel like wet sand, keeping the filling moist but not soggy.
- Sauté onions, garlic, and celery in butter until soft; pack filling firmly and drizzle butter on top for a golden, crispy crust.
- Bake at 375°F for 20 to 25 minutes for even browning; broil briefly if needed. Works with fresh or canned clams.
If you’ve ever enjoyed the savory, buttery bite of stuffed clams at a seaside restaurant or family gathering, you know how satisfying they can be. These baked beauties combine tender clam meat with a seasoned breadcrumb mixture that crisps on top while staying moist inside. What makes this version stand out is the balance between the briny clam flavor and the richness of butter and herbs, without the filling becoming soggy or bland. The key is using fresh clam juice to bind the stuffing and baking at the right temperature to achieve that golden, crispy top layer.
This recipe works whether you’re using fresh littleneck or cherrystone clams, or taking a shortcut with canned minced clams. Either way, you’ll end up with a crowd-pleasing appetizer that’s easier to make than most people think. The shells make perfect individual serving vessels, and the aroma of garlic, parsley, and toasted breadcrumbs will have everyone gathering in the kitchen before they’re even out of the oven.
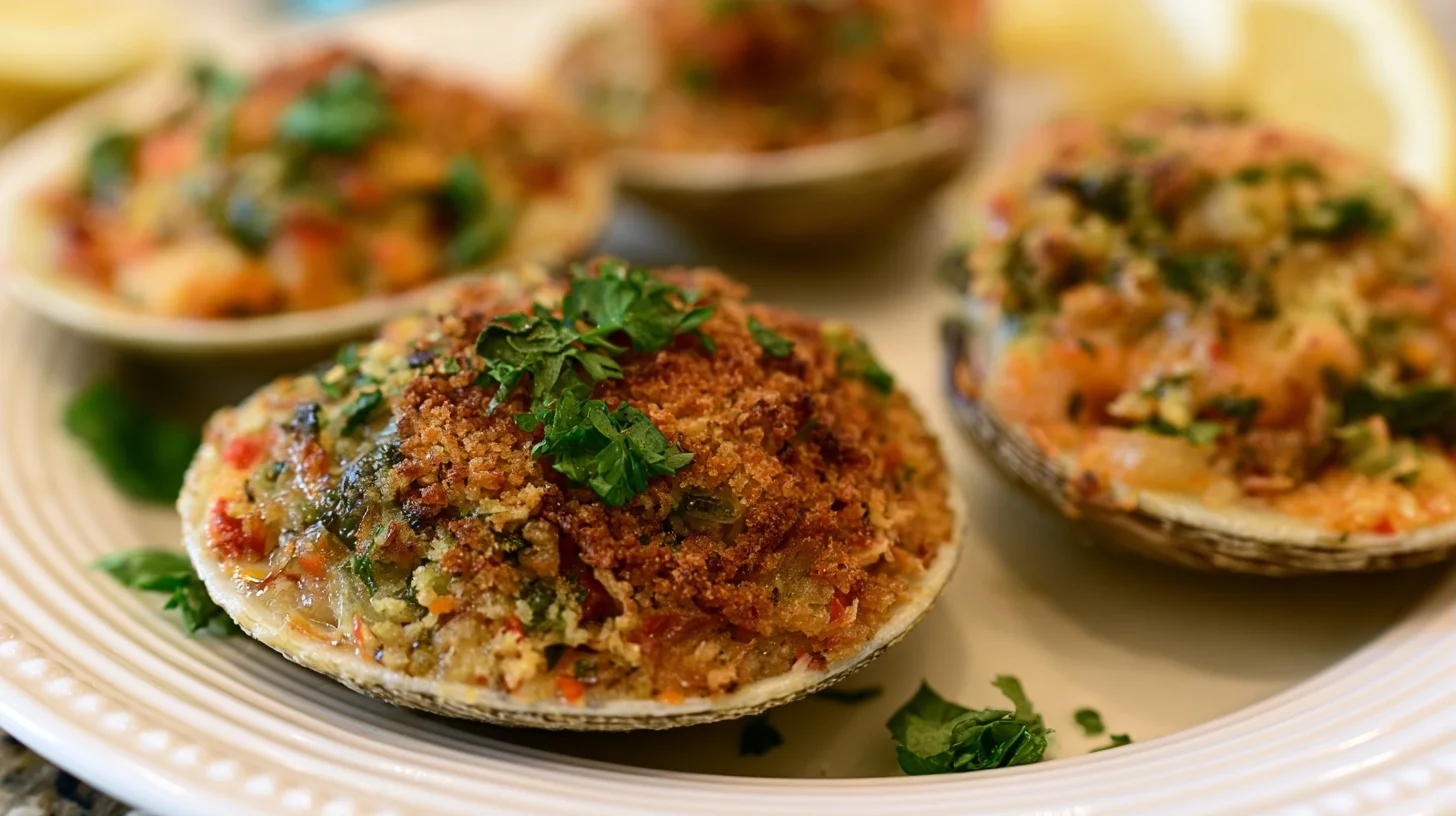
Table of contents
- Why You Will Love This Stuffed Clams Recipe
- What You Need to Make Stuffed Clams
- How to Make Stuffed Clams That Stay Moist and Crispy
- Common Mistakes When Making Stuffed Clams
- Ways to Customize Your Stuffed Clams
- Nutrition in Stuffed Clams
- How to Serve Stuffed Clams
- How to Store Leftover Stuffed Clams
- Frequently Asked Questions
Why You Will Love This Stuffed Clams Recipe
- The filling stays moist inside while the top gets golden and crispy, giving you two textures in every bite.
- You can prep the stuffed clams hours ahead and bake them right before serving, making them ideal for entertaining.
- The recipe works with fresh clams or canned, so you can make them any time without a trip to the seafood counter.
- Each clam shell serves as its own portion, making plating and serving effortless.
What You Need to Make Stuffed Clams
This recipe doesn’t require any specialized equipment, but a few key tools will make the process smoother and help you get the best results.
- Baking sheet: A rimmed baking sheet keeps the clams stable and catches any butter that bubbles over during baking.
- Mixing bowl: A medium bowl is all you need to combine the breadcrumb mixture evenly.
- Skillet: For sautéing the onions, garlic, and celery until softened, which builds the flavor base for the stuffing.
- Clam knife or paring knife: If you’re using fresh clams, a sturdy knife helps you open the shells cleanly and remove the meat.
- Aluminum foil or crumpled parchment: Creating a stable base on the baking sheet prevents the clam shells from tipping over while they bake.
How to Make Stuffed Clams That Stay Moist and Crispy
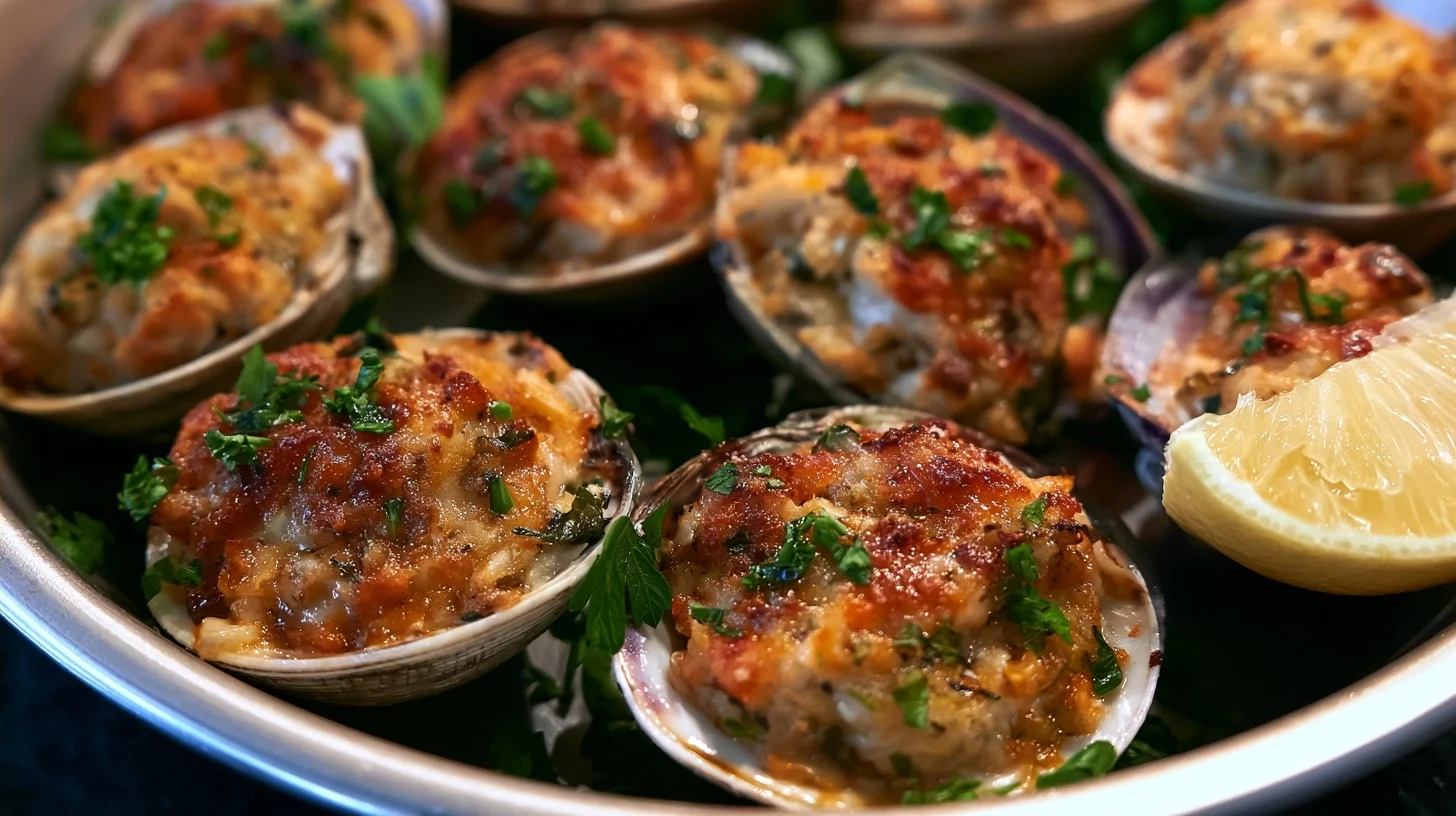
Stuffed Clams
12
servings20
minutes25
minutes135
kcalThese baked stuffed clams combine tender clam meat with a savory breadcrumb filling that crisps on top while staying moist inside. The key is using fresh clam juice to bind the stuffing and baking at the right temperature to achieve a golden, crispy top layer without drying out the clams.
Keep the screen of your device on
Ingredients
12 littleneck or cherrystone clams
1 cup coarse breadcrumbs
4 tablespoons unsalted butter
0.5 cup yellow onion
2 cloves garlic
0.25 cup celery
0.25 cup fresh parsley
0.25 cup clam juice
0.25 teaspoon black pepper
0.25 teaspoon salt
1 tablespoon lemon juice
1 pinch red pepper flakes
Directions
- Preheat the oven to 375°F and line a baking sheet with crumpled aluminum foil to create stable nests for the clam shells.
- If using fresh clams, steam them in a large pot with about half an inch of water until the shells open, about 5 to 7 minutes. Remove the clam meat, chop it coarsely, and reserve the shells and cooking liquid. If using canned clams, drain them and reserve the liquid.
- In a medium skillet over medium heat, melt 4 tablespoons of butter. Add the diced onion, celery, and garlic, and sauté until softened and fragrant, about 5 minutes. This step removes the raw bite and infuses the butter with flavor.
- In a mixing bowl, combine the breadcrumbs, sautéed vegetables with butter, chopped clams, parsley, lemon juice, black pepper, salt, and red pepper flakes if using. Add the reserved clam juice one tablespoon at a time, mixing after each addition, until the mixture holds together when pressed but is not soggy.
- Spoon the filling into each clam shell, pressing it down gently with the back of the spoon to pack it firmly. This helps the filling hold its shape and prevents it from drying out during baking.
- Drizzle the remaining 2 tablespoons of melted butter over the tops of the stuffed clams. This encourages the top layer to brown and crisp while keeping the interior moist.
Notes
- Adding clam juice one tablespoon at a time prevents the breadcrumb mixture from becoming too wet, which would cause it to steam instead of crisp.
- If the tops aren’t browning evenly, rotate the baking sheet halfway through the baking time.
- Leftover stuffed clams can be stored in the refrigerator for up to two days and reheated in a 350°F oven for about 10 minutes.
Nutrition Facts
- Serving Size: 1 g
- Total number of serves: 12
- Calories: 135kcal
- Fat: 7g
- Carbohydrates: 10g
- Fiber: 1g
- Protein: 8g
Did you make this recipe?
Tag @therecipemasterblog on Instagram and hashtag it with #therecipemaster
Like this recipe?
Follow @therecipemasterblog on Pinterest
Follow us on Facebook!
Follow The Recipe Master on Facebook
Use Fresh or Reserved Clam Juice
The liquid you add to the breadcrumb mixture makes all the difference. Fresh clam juice or the liquid from canned clams adds a briny depth that water or broth can’t replicate. Add just enough to moisten the breadcrumbs so they hold together when pressed, but not so much that the mixture becomes soggy. The stuffing should feel like wet sand that clumps when squeezed.
Sauté the Aromatics Until Soft
Cooking the onions, celery, and garlic in butter before mixing them into the breadcrumbs removes their raw bite and concentrates their flavor. This step also infuses the butter with aromatics, which then coats the breadcrumbs and helps them crisp in the oven. Don’t rush this step; the vegetables should be translucent and fragrant, which takes about five minutes over medium heat.
Pack the Filling Firmly
When you spoon the stuffing into the clam shells, press it down gently with the back of the spoon. This helps the filling hold its shape and prevents it from drying out during baking. A loosely packed filling will crumble apart and lose moisture quickly, while a firmly packed one stays cohesive and develops a better crust on top.
Drizzle Butter Over the Top Before Baking
A small drizzle of melted butter over each stuffed clam before it goes into the oven encourages the top layer to brown and crisp. The butter also keeps the surface from drying out while the interior stays moist. This is the step that gives you that golden, slightly crunchy topping that contrasts with the tender clam and soft stuffing underneath.
Bake at 375°F for Even Browning
Baking stuffed clams at 375°F gives the breadcrumbs enough time to toast without drying out the clam meat. The filling should be heated through and the top should turn golden brown, which usually takes 20 to 25 minutes. If the tops aren’t browning by the 20-minute mark, you can switch the oven to broil for the last minute or two, but watch closely to avoid burning.
Common Mistakes When Making Stuffed Clams
Adding Too Much Liquid to the Filling
When the breadcrumb mixture is too wet, it steams instead of crisping, and the stuffing becomes mushy. This happens when you add clam juice or broth too quickly without checking the texture. The fix is to add liquid a tablespoon at a time, mixing after each addition, until the mixture just holds together. If you’ve already added too much, stir in extra breadcrumbs to absorb the excess moisture.
Skipping the Sauté Step
Raw onions and garlic in the stuffing will taste harsh and won’t soften enough during the short baking time. Sautéing them first mellows their flavor and ensures they blend seamlessly into the filling. If you’re short on time, you can microwave the butter and aromatics together for about two minutes, stirring halfway through, but sautéing on the stovetop gives better flavor.
Overcooking the Clams
Clams become rubbery when baked too long or at too high a temperature. Since the clam meat is already cooked (whether fresh or canned), the baking step is really about heating the filling and crisping the top. If you’re using fresh clams, steam them just until they open, then remove the meat immediately. During the final bake, 20 to 25 minutes at 375°F is enough to warm everything through without toughening the clams.
Using Stale or Overly Fine Breadcrumbs
Fine breadcrumbs can turn pasty, while stale breadcrumbs won’t absorb the butter and clam juice properly. Fresh or lightly toasted coarse breadcrumbs give the best texture. If you only have fine breadcrumbs, toast them lightly in a dry skillet before mixing them into the filling to help them hold their structure.
Ways to Customize Your Stuffed Clams
Add Chorizo or Bacon
For a richer, smokier flavor, cook diced chorizo or bacon until crispy, then mix it into the breadcrumb filling. The rendered fat replaces some of the butter, and the meat adds a savory depth that pairs beautifully with the briny clams. Use about a quarter cup of cooked, crumbled meat per batch.
Make It Spicy
A pinch of red pepper flakes or a dash of hot sauce in the breadcrumb mixture gives the stuffing a subtle kick without overpowering the clam flavor. You can also add finely diced jalapeño to the sautéed aromatics for a fresher heat.
Use Panko for Extra Crunch
Swapping regular breadcrumbs for panko creates a lighter, crunchier topping. Panko breadcrumbs have a coarser texture that crisps more aggressively in the oven. If you use panko, you may need slightly less liquid since it absorbs moisture differently than traditional breadcrumbs.
Try a Gluten-Free Version
Replace the breadcrumbs with gluten-free breadcrumbs or crushed gluten-free crackers. The texture will be slightly different, but the flavor remains just as satisfying. Make sure the crackers or breadcrumbs are well seasoned, since gluten-free versions can sometimes taste bland on their own.
Nutrition in Stuffed Clams
Stuffed clams are relatively high in protein thanks to the clam meat, which is also a good source of iron and vitamin B12. The breadcrumb filling adds carbohydrates, and the butter contributes fat, making each serving moderately calorie-dense. One stuffed clam typically contains around 120 to 150 calories, depending on the size of the shell and the amount of butter used.
If you’re looking to reduce the fat content, you can use olive oil in place of some of the butter, or reduce the amount of butter drizzled on top before baking. The clams themselves are low in fat and high in lean protein, so the majority of the calories come from the breadcrumb mixture and added fats. Adding extra vegetables like bell peppers or zucchini to the filling can increase the fiber and nutrient density without significantly changing the flavor.
How to Serve Stuffed Clams
Stuffed clams work best as an appetizer, served hot from the oven with lemon wedges on the side. The acidity from the lemon brightens the richness of the butter and complements the briny clam flavor. You can also serve them as part of a seafood platter alongside grilled lobster tails with garlic butter, shrimp cocktail, or oysters on the half shell.
For a more casual meal, serve them with a simple green salad and crusty bread to soak up any butter that pools on the plate. They also pair well with white wine, particularly a crisp Sauvignon Blanc or a dry Riesling. If you’re serving them at a party, arrange the clams on a large platter lined with rock salt or coarse sea salt to keep them stable and add a decorative touch.
How to Store Leftover Stuffed Clams
Store leftover stuffed clams in an airtight container in the refrigerator for up to two days. The breadcrumb topping will lose some of its crispness, but the flavor remains good. To reheat, place the clams on a baking sheet and warm them in a 350°F oven for about 10 minutes, or until heated through. Avoid microwaving, as it will make the filling soggy and the clams rubbery.
You can also freeze unbaked stuffed clams for up to one month. Arrange them on a baking sheet and freeze until solid, then transfer to a freezer-safe bag or container. When you’re ready to bake them, place the frozen clams on a baking sheet and bake at 375°F for 25 to 30 minutes, adding a few extra minutes to account for the frozen filling. This makes them a convenient make-ahead option for parties or weeknight dinners.
Frequently Asked Questions
Yes, canned minced clams work well in this recipe. Drain them and reserve the liquid to use in place of fresh clam juice. The texture will be slightly softer than fresh clams, but the flavor is still excellent.
Crumple aluminum foil or parchment paper and arrange it on the baking sheet to create small nests for each shell. This keeps them stable and prevents the filling from spilling out during baking.
Yes, you can assemble the stuffed clams up to 24 hours in advance. Cover them tightly with plastic wrap and refrigerate. When ready to serve, remove the plastic wrap, drizzle with butter, and bake as directed. You may need to add a few extra minutes to the baking time if they’re cold from the fridge.
Coarse or fresh breadcrumbs give the best texture. Panko breadcrumbs create a lighter, crunchier topping, while traditional breadcrumbs offer a denser, more cohesive filling. Avoid overly fine breadcrumbs, as they can turn pasty when mixed with the clam juice and butter.



Leave a Reply