

When fresh hatch chili chicken enchiladas come together in your kitchen, you’re creating more than dinner—you’re building layers of smoky, earthy flavor that only New Mexico’s iconic green chiles can deliver. These enchiladas showcase tender shredded chicken wrapped in soft corn tortillas, blanketed with a creamy hatch chile sauce that balances heat with a subtle sweetness. The result is a comforting casserole-style dish with just enough spice to keep things interesting without overwhelming your palate.
What sets this recipe apart is the use of fresh or freshly roasted hatch chiles rather than canned substitutes. The difference is noticeable: fresh hatch chiles bring a grassy, almost fruity complexity that canned versions simply can’t match. If you’ve only experienced jarred green chiles, this recipe will show you what you’ve been missing.
This is a practical weeknight meal that also feels special enough for company. The sauce comes together quickly, the filling is straightforward, and the assembly is forgiving. Even if you’ve never worked with fresh hatch chiles before, the process is manageable and the payoff is worth it.
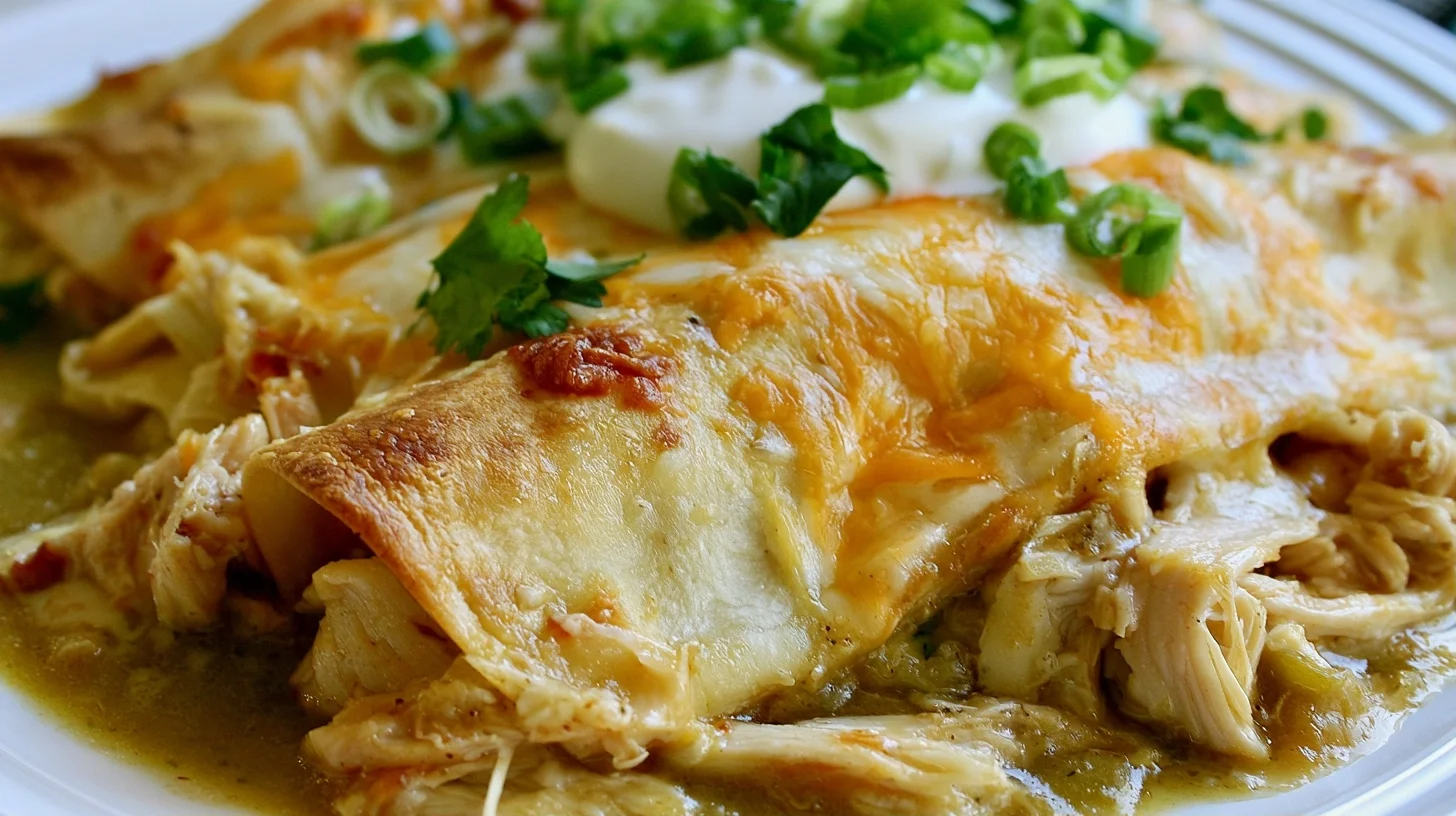
Table of contents
- Why You Will Love This Hatch Chili Chicken Enchiladas
- What You Need to Make Hatch Chile Chicken Enchiladas
- How to Make the Best Hatch Chile Chicken Enchiladas
- How to Get Tender, Flavorful Hatch Chile Enchiladas
- Common Mistakes That Ruin Hatch Chili Chicken Enchiladas
- Ways to Customize Your Hatch Chili Chicken Enchiladas
- What Makes Hatch Chiles Different
- Nutrition and Ingredient Considerations
- How to Serve Hatch Chile Chicken Enchiladas
- How to Store and Reheat Hatch Chili Chicken Enchiladas
- Frequently Asked Questions about Hatch Chili Chicken Enchiladas
Why You Will Love This Hatch Chili Chicken Enchiladas
- The creamy hatch chile sauce has a smoky depth that canned green chile sauces can’t replicate.
- The recipe is flexible enough to use rotisserie chicken, making it a fast weeknight option.
- The casserole-style assembly means you can prep it ahead and bake it when you’re ready.
- The balance of creamy sauce, tender chicken, and melted cheese creates a satisfying texture in every bite.
What You Need to Make Hatch Chile Chicken Enchiladas
This recipe doesn’t require specialized equipment, but a few key items will make the process smoother and help you achieve the best texture.
- 9×13-inch baking dish: This size gives the enchiladas enough room to bake evenly without crowding, which helps the sauce bubble up around the edges and the cheese melt uniformly.
- Medium saucepan: You’ll use this to build the hatch chile sauce. A heavy-bottomed pan helps prevent scorching when you’re cooking the roux and simmering the sauce.
- Large mixing bowl: Essential for combining the shredded chicken with cheese and seasonings before filling the tortillas.
- Tongs or a spatula: These make it easier to dip and roll the tortillas without tearing them.
- Blender or food processor: If you’re using whole roasted hatch chiles, blending them into the sauce creates a smoother consistency and distributes the chile flavor evenly.
How to Make the Best Hatch Chile Chicken Enchiladas
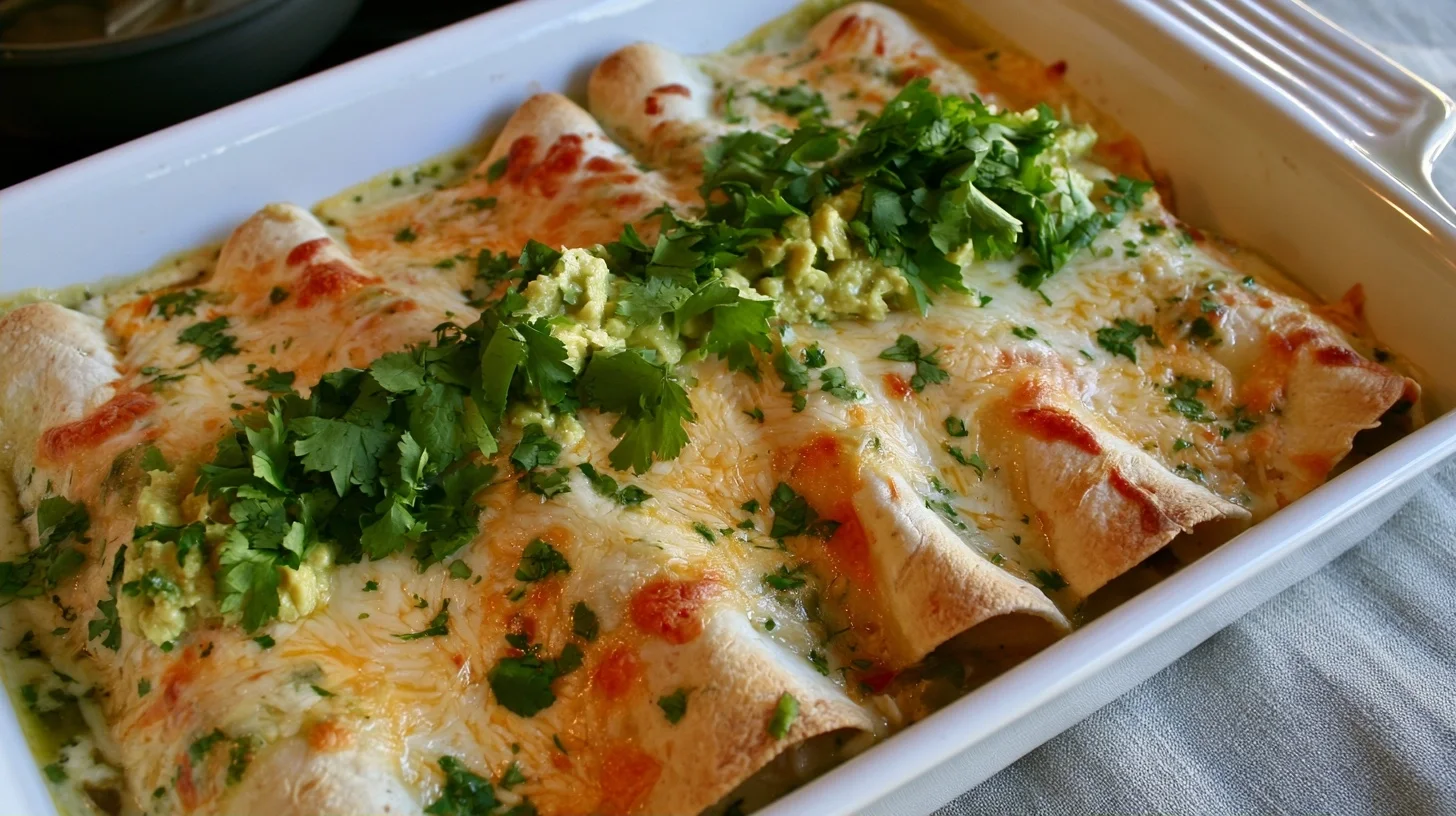
Hatch Chili Chicken Enchiladas
6
servings25
minutes30
minutes425
kcalThese hatch chili chicken enchiladas feature tender shredded chicken wrapped in soft corn tortillas and covered with a creamy, smoky hatch chile sauce. The key is using fresh or freshly roasted hatch chiles, which bring a depth of flavor that canned chiles can’t match. The result is a comforting, flavorful dish that’s perfect for weeknight dinners or entertaining.
Keep the screen of your device on
Ingredients
3 cups cooked chicken
12 corn tortillas
1 cup roasted hatch chiles
2 cups Monterey Jack cheese
3 tablespoons butter
3 tablespoons all-purpose flour
2 cups chicken broth
1 cup sour cream
1 teaspoon ground cumin
0.5 teaspoon garlic powder
0.5 teaspoon salt
0.25 cup fresh cilantro
Directions
- Preheat the oven to 375°F and lightly grease a 9×13-inch baking dish. This ensures the enchiladas bake evenly and don’t stick to the dish.
- Make the hatch chile sauce by melting the butter in a medium saucepan over medium heat. Add the flour and whisk constantly for about 1 minute to form a roux. This step cooks out the raw flour taste and creates a base that will thicken the sauce.
- Gradually whisk in the chicken broth, stirring constantly to prevent lumps. Bring the mixture to a simmer and cook for 3 to 4 minutes, until the sauce thickens enough to coat the back of a spoon.
- Stir in the chopped hatch chiles, sour cream, cumin, garlic powder, and salt. Simmer for another 2 minutes, then remove from heat. The sauce should be creamy and pourable, not too thick or too thin.
- Combine the shredded chicken with 1 cup of the shredded cheese in a large bowl. Mix until evenly distributed. This creates a flavorful filling that holds together when rolled.
- Warm the tortillas in a dry skillet over medium heat for about 15 seconds per side, or wrap them in a damp towel and microwave for 30 seconds. This makes them pliable and prevents cracking when you roll them.
Notes
- The sauce should coat the back of a spoon and flow slowly when poured; if it’s too thin, simmer it a few minutes longer to reduce and thicken.
- If you can’t find fresh hatch chiles, frozen roasted hatch chiles are a close second and far better than canned green chiles.
- Leftover enchiladas can be stored in an airtight container in the refrigerator for up to four days or frozen for up to three months.
Nutrition Facts
- Serving Size: 1 g
- Total number of serves: 6
- Calories: 425kcal
- Fat: 21g
- Carbohydrates: 32g
- Fiber: 4g
- Protein: 28g
Did you make this recipe?
Tag @therecipemasterblog on Instagram and hashtag it with #therecipemaster
Like this recipe?
Follow @therecipemasterblog on Pinterest
Follow us on Facebook!
Follow The Recipe Master on Facebook
How to Get Tender, Flavorful Hatch Chile Enchiladas
The key to exceptional hatch chile chicken enchiladas is controlling moisture and building layers of flavor. The sauce should be thick enough to coat the back of a spoon but still pourable, and the tortillas need to stay soft without becoming soggy.
Use Fresh or Freshly Roasted Hatch Chiles
Fresh hatch chiles bring a smoky, slightly sweet flavor that canned chiles can’t match. If you’re using fresh chiles, roast them until the skins blister and char, then steam them in a covered bowl for 10 minutes to loosen the skins. Peel, seed, and chop them before adding to the sauce. The roasting process deepens the flavor and adds a subtle smokiness that defines the dish.
Warm the Tortillas Before Rolling
Cold tortillas crack when you try to roll them. Warming them in a dry skillet for about 15 seconds per side or wrapping them in a damp towel and microwaving for 30 seconds makes them pliable. This step prevents tearing and helps the tortillas absorb just enough sauce to stay tender without falling apart.
Don’t Overfill the Tortillas
About 1/4 cup of filling per tortilla is the right amount. Overfilling makes the enchiladas difficult to roll and causes the filling to spill out during baking. The goal is a neat roll that holds its shape, with enough room for the sauce to seep in and keep everything moist.
Layer the Sauce Correctly
Spread a thin layer of sauce on the bottom of the baking dish before arranging the enchiladas. This prevents sticking and ensures the bottom tortillas don’t dry out. Pour the remaining sauce over the top, making sure to cover the edges of the tortillas. Exposed tortilla edges will crisp and harden in the oven, which you want to avoid.
Add Cheese in Stages
Mix some cheese into the chicken filling, then sprinkle more on top of the sauce before baking. The cheese inside adds creaminess to the filling, while the cheese on top creates a golden, bubbly layer. Using a mix of Monterey Jack and sharp cheddar gives you both melt quality and flavor.
Let the Enchiladas Rest After Baking
Allowing the dish to sit for 5 to 10 minutes after baking lets the sauce thicken slightly and makes serving cleaner. If you cut into the enchiladas immediately, the sauce will be too liquid and the filling may slide out. This resting period also makes the enchiladas easier to portion.
For another take on enchiladas, try this Boulder’s enchilada recipe that uses a different sauce approach.
Common Mistakes That Ruin Hatch Chili Chicken Enchiladas
Using Canned Green Chiles Without Adjusting the Flavor
Canned green chiles are convenient, but they lack the depth of fresh hatch chiles. If you must use canned, add a pinch of smoked paprika or a small amount of roasted poblano to compensate for the missing smokiness. The sauce will still be good, but it won’t have the same complexity.
Making the Sauce Too Thin
A thin sauce will pool at the bottom of the baking dish instead of clinging to the tortillas. The sauce should coat the back of a spoon and flow slowly when poured. If your sauce is too thin, simmer it a few minutes longer to reduce it, or whisk in a small amount of cornstarch slurry (1 teaspoon cornstarch mixed with 1 tablespoon cold water).
Skipping the Bottom Layer of Sauce
If you place the enchiladas directly on the bottom of a dry baking dish, they’ll stick and the bottoms will dry out. A thin layer of sauce acts as a barrier and keeps the tortillas moist. This step takes five seconds and prevents a frustrating cleanup.
Overbaking the Enchiladas
Baking too long dries out the tortillas and causes the cheese to separate. The enchiladas are done when the sauce is bubbling around the edges and the cheese is melted and lightly golden. This usually takes about 25 minutes at 375°F. If you’re baking from the refrigerator, add 5 to 10 minutes, but keep an eye on the edges.
Ways to Customize Your Hatch Chili Chicken Enchiladas
Make Them Vegetarian
Replace the chicken with black beans, pinto beans, or roasted vegetables like zucchini and bell peppers. Add a handful of corn for sweetness and texture. The hatch chile sauce works just as well with plant-based fillings, and the cooking time remains the same.
Make Them Dairy-Free
Use a plant-based milk like unsweetened almond or oat milk in the sauce, and replace the butter with olive oil or vegan butter. Skip the cheese or use a dairy-free alternative. The sauce will be slightly thinner without the richness of dairy, so simmer it a bit longer to thicken.
Add Extra Heat
Hatch chiles range from mild to hot depending on the variety. If you want more heat, use hotter hatch chiles or add a diced jalapeño to the filling. A pinch of cayenne in the sauce also works. Taste as you go to avoid overdoing it.
Make Them Gluten-Free
Use corn tortillas, which are naturally gluten-free, and replace the all-purpose flour in the roux with a gluten-free flour blend or cornstarch. The texture of the sauce will be nearly identical.
What Makes Hatch Chiles Different
Hatch chiles are grown in the Hatch Valley of New Mexico, where the high desert climate and volcanic soil create a unique flavor profile. They’re only available fresh for a short season, typically late summer through early fall, which is why many cooks roast and freeze them to use year-round.
The flavor is earthy and slightly sweet, with a heat level that varies from mild to medium-hot. Unlike jalapeños, which have a sharp, grassy heat, hatch chiles have a more rounded, smoky quality. This makes them ideal for sauces where you want depth rather than just spice.
If you can’t find fresh hatch chiles, look for frozen roasted hatch chiles in the freezer section of grocery stores, especially in the Southwest. They’re a close second to fresh and far better than canned. You can also explore the history of enchiladas to understand how regional ingredients like hatch chiles have shaped this dish over time.
Nutrition and Ingredient Considerations
Each serving of hatch chili chicken enchiladas provides a balanced mix of protein, carbohydrates, and fat. The chicken offers lean protein, while the tortillas and sauce contribute carbs. The cheese and any added sour cream increase the fat content, but they also make the dish satisfying and creamy.
If you’re watching calories, use low-fat milk in the sauce and reduce the amount of cheese. You can also use Greek yogurt in place of sour cream for a protein boost. The hatch chiles themselves are low in calories and high in vitamin C, and they add flavor without adding much fat or sodium.
For a lighter version, bake the enchiladas without frying the tortillas first. Some recipes call for lightly frying the tortillas in oil before rolling, which adds richness but also extra calories. Skipping this step keeps the dish lighter without sacrificing much flavor.
How to Serve Hatch Chile Chicken Enchiladas
These enchiladas are hearty enough to stand alone, but a few simple sides round out the meal. Serve them with Mexican rice, refried beans, or a crisp green salad with lime vinaigrette. A dollop of sour cream, a sprinkle of fresh cilantro, and a squeeze of lime juice on top add brightness and balance the richness of the sauce.
If you’re serving a crowd, set out bowls of sliced avocado, diced tomatoes, pickled jalapeños, and extra cheese so guests can customize their plates. Warm tortilla chips and a bowl of salsa or guacamole make good appetizers while the enchiladas bake.
For drinks, consider a light Mexican lager, a margarita, or agua fresca. The slight sweetness of horchata or a pineapple agua fresca pairs especially well with the smoky heat of the hatch chiles.
How to Store and Reheat Hatch Chili Chicken Enchiladas
Store leftover enchiladas in an airtight container in the refrigerator for up to four days. The flavors often deepen after a day, making leftovers especially good. To reheat, cover the dish with foil and warm in a 350°F oven for about 20 minutes, or until heated through. You can also reheat individual portions in the microwave, though the tortillas may soften more than they would in the oven.
Hatch chile chicken enchiladas freeze well. Assemble the dish but don’t bake it. Wrap tightly in plastic wrap and then foil, and freeze for up to three months. To bake from frozen, remove the plastic wrap, cover with foil, and bake at 375°F for about 50 minutes, removing the foil for the last 10 minutes to brown the cheese.
If you’ve already baked the enchiladas, you can still freeze them. Let them cool completely, then wrap and freeze. Reheat from frozen using the same method, though the texture may be slightly softer than if you’d frozen them unbaked.
Frequently Asked Questions about Hatch Chili Chicken Enchiladas
Yes, you can use canned green chiles, but the flavor will be milder and less smoky. To improve the taste, add a pinch of smoked paprika or roasted poblano to the sauce. Fresh or frozen roasted hatch chiles provide a deeper, more complex flavor.
Warm the tortillas before rolling. Heat them in a dry skillet for 15 seconds per side or wrap them in a damp towel and microwave for 30 seconds. This makes them pliable and prevents tearing.
Yes, assemble the enchiladas, cover tightly, and refrigerate for up to 24 hours before baking. Add 5 to 10 minutes to the baking time if baking straight from the refrigerator. You can also freeze the unbaked dish for up to three months.
Cover the dish with foil and reheat in a 350°F oven for about 20 minutes, or until heated through. You can also microwave individual portions, though the tortillas may soften more than they would in the oven.




Leave a Reply