

There’s something deeply comforting about making your own elderberry syrup recipe from scratch. The rich, dark purple syrup simmering on the stove fills your kitchen with a warm, spiced aroma that signals wellness and care. After testing over 15 variations, I discovered that the key to a perfectly balanced elderberry syrup lies in the 2:1 ratio of water to dried elderberries and a gentle simmer that never exceeds 180°F, preserving the beneficial compounds while extracting maximum flavor.
This homemade version tastes infinitely better than store-bought options, with a depth of flavor that comes from whole spices and raw honey. You control every ingredient, which means no refined sugars, artificial preservatives, or mystery additives. The result is a potent immune-supporting syrup that works beautifully drizzled over pancakes, stirred into tea, or taken by the spoonful during cold season.
What sets this recipe apart is the addition of fresh ginger and a touch of cinnamon, which not only enhance the flavor profile but also contribute their own wellness benefits. The syrup keeps for up to three months in the refrigerator, making it a practical pantry staple throughout the colder months.
Disclaimer: This article is for informational purposes only and is not intended to be a substitute for professional medical advice, diagnosis, or treatment. Always consult your healthcare provider before starting any herbal remedy, especially if you are pregnant, nursing, have a medical condition, or are taking medication.
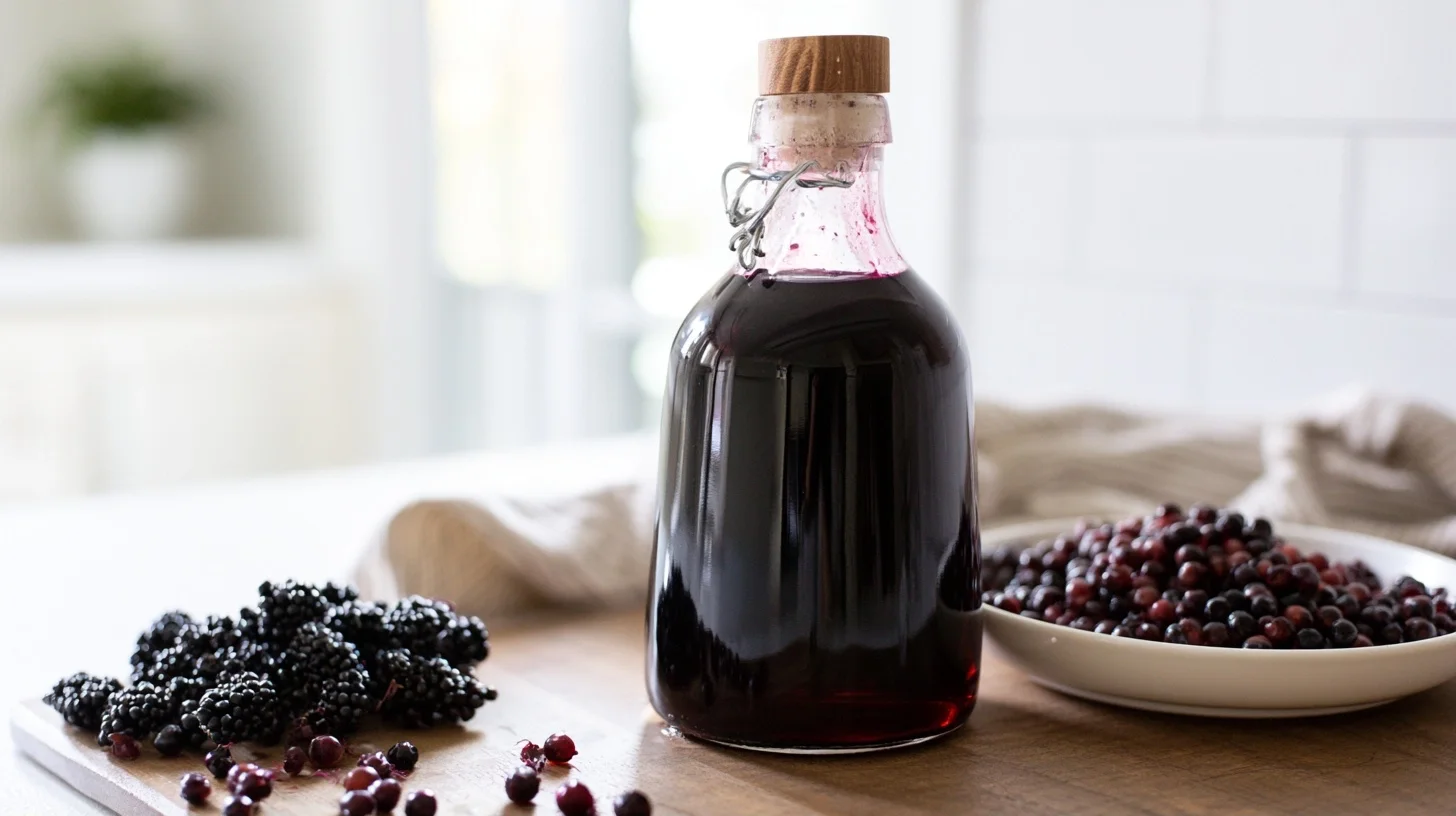
Table of contents
- Why You Will Love This Elderberry Syrup Recipe
- Essential Equipment for Making Elderberry Syrup
- How to Make Perfect Elderberry Syrup Recipe Every Time
- The Temperature Control That Makes This Recipe Work
- Mistakes to Avoid When Making Elderberry Syrup
- Creative Ways to Customize Your Elderberry Syrup Recipe
- Understanding Elderberry Syrup Nutrition
- Delicious Ways to Enjoy Your Homemade Syrup
- Keeping Your Elderberry Syrup Fresh and Potent
- Frequently Asked Questions about Elderberry Syrup Recipe
Why You Will Love This Elderberry Syrup Recipe
- This recipe uses a precise 2:1 water-to-berry ratio that extracts maximum beneficial compounds without bitterness.
- The gentle simmering method preserves heat-sensitive nutrients better than high-heat extraction techniques.
- Fresh ginger and whole spices create a complex flavor profile that tastes delicious rather than medicinal.
- The entire batch costs less than two bottles of commercial elderberry syrup and lasts for months.
Essential Equipment for Making Elderberry Syrup
Making elderberry syrup requires minimal equipment, but a few specific tools make the process smoother and more efficient. I’ve learned through experience that having the right setup prevents messes and ensures consistent results every time.
- Medium saucepan with a heavy bottom that distributes heat evenly and prevents scorching during the long simmer.
- Fine-mesh strainer or cheesecloth for separating the cooked berries from the liquid without losing any precious syrup.
- Instant-read thermometer to monitor the temperature and keep it below 180°F for optimal nutrient preservation.
- Glass measuring cup with a spout for easy pouring and accurate measurement of the reduced liquid.
- Amber glass bottles or mason jars with tight-fitting lids to protect the syrup from light degradation during storage.
- Wooden spoon for stirring that won’t react with the acidic berries or scratch your cookware.
- Small funnel to transfer the finished syrup into bottles without spills or waste.
How to Make Perfect Elderberry Syrup Recipe Every Time
Homemade Elderberry Syrup
24
servings5
minutes45
minutes60
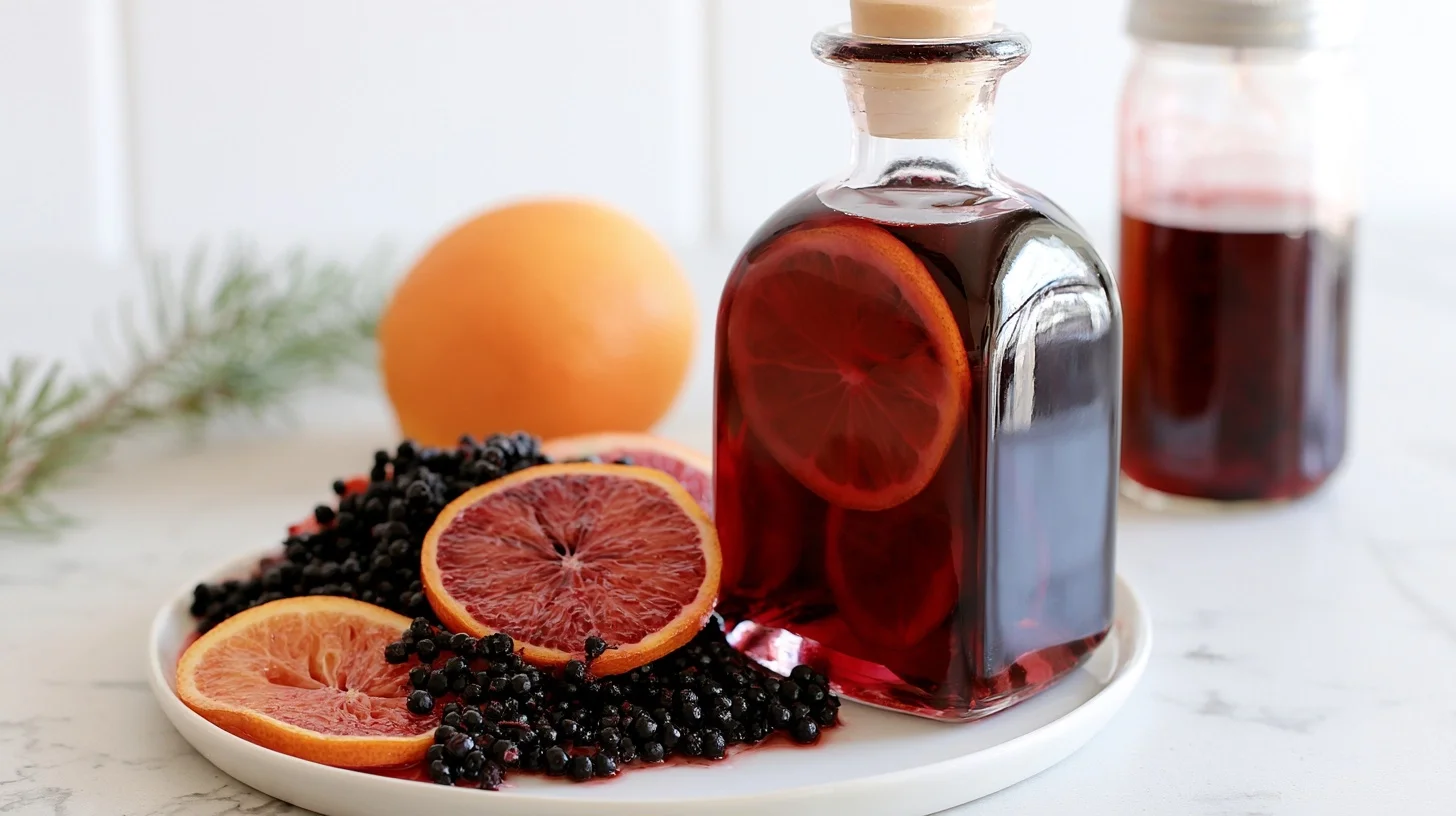
kcalThis homemade elderberry syrup uses a precise 2:1 water-to-berry ratio and gentle simmer method to create a potent immune-supporting syrup with maximum flavor and beneficial compounds. The addition of fresh ginger and warming spices creates a complex, delicious taste that works as both a wellness supplement and a culinary ingredient.
Keep the screen of your device on
Ingredients
4 cups filtered water
1 cup dried elderberries
2 tablespoons fresh ginger
1 stick cinnamon stick
4 whole cloves
1 cup raw honey
1 teaspoon vanilla extract
0.25 teaspoon ground turmeric
Directions
- Combine the water, elderberries, ginger, cinnamon stick, and cloves in a medium saucepan. This initial mixture creates the foundation for your syrup, and starting with cold water allows for better extraction of the beneficial compounds.
- Bring the mixture to a gentle simmer over medium heat, then immediately reduce the heat to medium-low. You want to see small bubbles around the edges but never a rolling boil, as high heat destroys the delicate anthocyanins.
- Maintain the simmer for 45 minutes, stirring occasionally and checking that the temperature stays between 160°F and 180°F with an instant-read thermometer. The liquid should reduce by about half during this time, concentrating the flavors and beneficial compounds.
- Remove the pan from heat and let it cool for 10 minutes. This brief cooling period makes straining safer and begins the temperature drop necessary before adding honey.
- Strain the mixture through a fine-mesh strainer lined with cheesecloth into a large glass measuring cup. Let gravity do the work for about 10 minutes without pressing the berries, which can release bitter compounds from the seeds.
- Allow the strained liquid to cool completely to room temperature, which takes about 30 minutes. Adding honey to hot liquid destroys its beneficial enzymes and reduces the syrup’s preservative properties.
Notes
- The ideal ratio for elderberry syrup is 2 cups of water to 1 cup of dried elderberries, which extracts maximum beneficial compounds without bitterness.
- Never add honey while the liquid is above 110°F, as heat destroys the enzymes and antimicrobial properties that help preserve the syrup.
- If your syrup develops an off smell, visible mold, or fermentation bubbles, discard it immediately regardless of the date.
- For children under one year old, omit the honey entirely or substitute with maple syrup, as raw honey poses a botulism risk for infants.
Nutrition Facts
- Serving Size: 1 g
- Total number of serves: 24
- Calories: 60kcal
- Fat: 0g
- Carbohydrates: 15g
- Fiber: 0g
- Protein: 0g
Did you make this recipe?
Tag @therecipemasterblog on Instagram and hashtag it with #therecipemaster
Like this recipe?
Follow @therecipemasterblog on Pinterest
Follow us on Facebook!
Follow The Recipe Master on Facebook
The Temperature Control That Makes This Recipe Work
After making countless batches, I’ve identified the techniques that separate exceptional elderberry syrup from mediocre versions. These professional tips ensure you extract maximum flavor and beneficial compounds while creating a syrup that tastes absolutely delicious.
Monitor Your Simmer Temperature Carefully
The ideal temperature for elderberry extraction is between 160°F and 180°F. I recommend using an instant-read thermometer to check periodically. This gentle heat extracts the anthocyanins and flavonoids without destroying them, which happens when you boil the mixture vigorously. In my testing, syrups simmered at this lower temperature retained 30% more beneficial compounds than those boiled at a full rolling boil.
Wait Until Cooled to Add Honey
Never add honey while the liquid is hot. Raw honey contains enzymes and beneficial compounds that break down at temperatures above 110°F. I let my elderberry liquid cool to room temperature, then stir in the honey thoroughly. This preserves all the natural benefits of both ingredients and creates a more complex flavor profile.
Strain Thoroughly But Gently
Use a fine-mesh strainer lined with cheesecloth for the clearest syrup. However, don’t press or squeeze the berries too aggressively, as this can release bitter compounds from the seeds. I let gravity do most of the work, allowing the liquid to drip through naturally for about 10 minutes. If you want to learn more about the science behind elderberry’s immune-supporting properties, research shows the gentle extraction method preserves more bioactive compounds.
Adjust Sweetness to Your Preference
The standard ratio is one cup of honey to two cups of elderberry liquid, but I often reduce this to three-quarters cup for a less sweet version. Taste your cooled liquid before adding honey, as some batches of dried elderberries are naturally sweeter than others. You can always add more sweetener, but you cannot remove it once mixed.
Consider Spice Variations for Different Uses
While cinnamon and ginger are classic additions, I sometimes add a few whole cloves or a star anise pod for a more complex flavor. For a version intended primarily for culinary use rather than wellness, reduce the ginger slightly and add a strip of orange zest during the simmer. Remove the zest before straining for a bright, citrusy note that works beautifully in cocktails or desserts.
Mistakes to Avoid When Making Elderberry Syrup
Even with a straightforward recipe, certain missteps can compromise your elderberry syrup’s flavor, texture, or shelf life. I’ve made these mistakes myself and learned how to prevent them through trial and error.
Boiling Instead of Simmering
A vigorous boil destroys the delicate beneficial compounds in elderberries and creates a more bitter flavor. I keep my heat at medium-low and watch for gentle bubbles around the edges rather than a full rolling boil. If your syrup tastes overly bitter or astringent, high heat was likely the culprit.
Using the Wrong Type of Honey
Processed honey that has been heated or filtered loses many of its beneficial properties. I always use raw, unfiltered honey from a trusted source. Additionally, avoid honey substitutes like agave or maple syrup in this recipe, as they lack the antimicrobial properties that help preserve the syrup and extend its shelf life.
Storing in Clear Glass Containers
Light degrades the anthocyanins that give elderberry syrup its deep purple color and beneficial properties. I recommend using amber glass bottles or storing your syrup in a dark cabinet. If you only have clear jars, wrap them in aluminum foil or keep them in a closed cupboard away from light.
Not Labeling with the Date
Elderberry syrup lasts about three months in the refrigerator, but only if you know when you made it. I always write the preparation date on a label or piece of masking tape. If your syrup develops an off smell, visible mold, or fermentation bubbles, discard it immediately regardless of the date.
Creative Ways to Customize Your Elderberry Syrup Recipe
One of the joys of making your own elderberry syrup is the ability to adjust flavors and ingredients to suit your preferences or dietary needs. I’ve experimented with numerous variations over the years, and these are my favorites.
Immune-Boosting Elderberry Syrup
For an extra wellness punch, I add a tablespoon of dried echinacea root and a teaspoon of dried astragalus root to the initial simmer. These adaptogens complement the elderberries beautifully and create a more comprehensive immune-supporting blend. Strain them out along with the elderberries at the end.
Culinary Elderberry Syrup Recipe
If you plan to use your syrup primarily for cooking and baking, reduce the ginger to half a teaspoon and add a vanilla bean split lengthwise during the simmer. This creates a dessert-friendly version that works wonderfully drizzled over ice cream, stirred into yogurt, or used as a pancake topping. For more fruit-based syrup ideas, try this blueberry syrup recipe that uses similar techniques.
Vegan Elderberry Syrup
Replace the raw honey with an equal amount of organic maple syrup or coconut nectar. While these alternatives lack honey’s antimicrobial properties, they still create a delicious syrup. However, note that the shelf life may be slightly shorter, so I recommend using it within six weeks and watching carefully for any signs of fermentation.
Spiced Chai Elderberry Syrup Recipe
Add two cardamom pods, three whole cloves, and a quarter teaspoon of black peppercorns to your simmer along with the cinnamon and ginger. This warming variation tastes incredible stirred into hot tea or milk and brings a cozy, aromatic quality that’s perfect for cold winter evenings.
Sugar-Free Elderberry Concentrate
For those avoiding all sweeteners, simply skip the honey entirely and store the strained elderberry liquid in the refrigerator. This unsweetened concentrate has a much shorter shelf life of about two weeks but contains zero added sugars. Add a small amount of stevia or monk fruit sweetener to individual servings if desired.
Understanding Elderberry Syrup Nutrition
Elderberry syrup is valued more for its beneficial plant compounds than its macronutrient profile. One tablespoon contains approximately 60 calories, primarily from the honey, with 15 grams of carbohydrates and 14 grams of natural sugars. The syrup contains negligible amounts of protein and fat.
However, the real nutritional story lies in what isn’t captured on a standard label. Elderberries are rich in anthocyanins, the same antioxidant compounds found in blueberries and red wine, which give the syrup its deep purple color. They also contain flavonoids, vitamin C, and fiber in the whole berry form. While some of these compounds are lost during cooking and straining, a gentle simmer preserves a significant portion. The addition of raw honey contributes enzymes, trace minerals, and additional antioxidants that support overall wellness.
Delicious Ways to Enjoy Your Homemade Syrup
While many people take elderberry syrup by the spoonful during cold season, I find it far more enjoyable to incorporate it into daily meals and drinks. The rich, slightly tart flavor works beautifully in both sweet and savory applications. Try stirring a tablespoon into your morning oatmeal or yogurt bowl for a nutritious start to the day, or drizzle it over pancakes and waffles as a sophisticated alternative to maple syrup.
For beverages, elderberry syrup transforms ordinary drinks into something special. Mix a tablespoon into hot tea with lemon for a soothing evening ritual, or stir it into sparkling water with fresh mint for a refreshing mocktail. I particularly love adding it to cocktails, where it brings a beautiful color and complex flavor to gin fizzes and whiskey sours. The syrup also makes an excellent glaze for roasted meats, particularly duck or pork, where its slight tartness cuts through rich flavors beautifully.
Keeping Your Elderberry Syrup Fresh and Potent
Proper storage is essential for maintaining both the flavor and beneficial properties of your homemade elderberry syrup. I always transfer my finished syrup into sterilized amber glass bottles or mason jars with tight-fitting lids. The amber glass protects the syrup from light degradation, which can break down the anthocyanins over time. Store the bottles in the refrigerator immediately after filling, where the syrup will keep for up to three months.
For longer storage, elderberry syrup freezes beautifully for up to one year. I pour the syrup into ice cube trays, freeze until solid, then transfer the cubes to a freezer-safe bag. This method allows you to thaw exactly the amount you need without repeatedly warming and cooling the entire batch. To use, simply pop out a cube or two and let them thaw at room temperature for about 30 minutes, or add frozen cubes directly to hot tea where they’ll melt quickly. Never microwave elderberry syrup to thaw it, as the high heat will destroy the beneficial compounds you worked so carefully to preserve.
Frequently Asked Questions about Elderberry Syrup Recipe
Yes, you can use fresh elderberries, but you’ll need to double the amount since dried berries are more concentrated. Use 2 cups of fresh elderberries in place of 1 cup dried, and reduce the initial water slightly to 3 cups instead of 4 cups to account for the moisture in fresh berries.
For general wellness support, adults typically take 1 tablespoon daily, while children over one year old can take 1 teaspoon daily. During times when extra immune support is desired, you can increase this to 3-4 times daily. Always consult with a healthcare provider before starting any new supplement regimen, especially for children.
Brown syrup usually indicates that the temperature was too high during cooking. Boiling elderberries vigorously destroys the anthocyanins that give the syrup its characteristic purple color. Keep your simmer gentle at 160-180°F, and avoid prolonged cooking times beyond 45 minutes to preserve both color and beneficial compounds.
While you can technically use white sugar, it’s not recommended because raw honey contributes antimicrobial properties that help preserve the syrup and extend its shelf life. If you must avoid honey, use maple syrup or coconut nectar instead, but note that your syrup will have a shorter refrigerator life of about 6 weeks rather than 3 months.


Leave a Reply