

- Generous 1:1.5 streusel-to-filling ratio yields the perfect creamy and crunchy balance everyone will love.
- Use plain pumpkin puree not pie filling, and keep butter cold so the streusel stays crumbly and crispy.
- Bake at 350°F until the center still slightly jiggles, then cool at least two hours before serving for perfect texture.
There’s something magical about the moment you pull a golden, bubbling pumpkin pie crisp from the oven. The buttery streusel topping crackles under your spoon, giving way to a silky, spiced pumpkin filling that tastes like autumn in every bite. After testing twelve variations, I discovered that the secret to a truly exceptional pumpkin pie crisp lies in the ratio of streusel to filling: a generous 1:1.5 proportion creates the perfect balance of creamy and crunchy textures that keeps everyone coming back for seconds.
This dessert combines the best of both worlds. You get all the warm spices and creamy custard of classic pumpkin pie, but with a delightfully crunchy oat and pecan topping that adds texture and richness. It’s easier to make than traditional pie because there’s no crust to roll or crimp, yet it looks just as impressive on your holiday table.
I love serving this at Thanksgiving because it feeds a crowd beautifully and can be made ahead. However, it’s become such a family favorite that we now make it throughout fall and winter whenever we crave something cozy and comforting. The aroma alone fills your kitchen with cinnamon, nutmeg, and brown sugar warmth that makes everyone gather around.
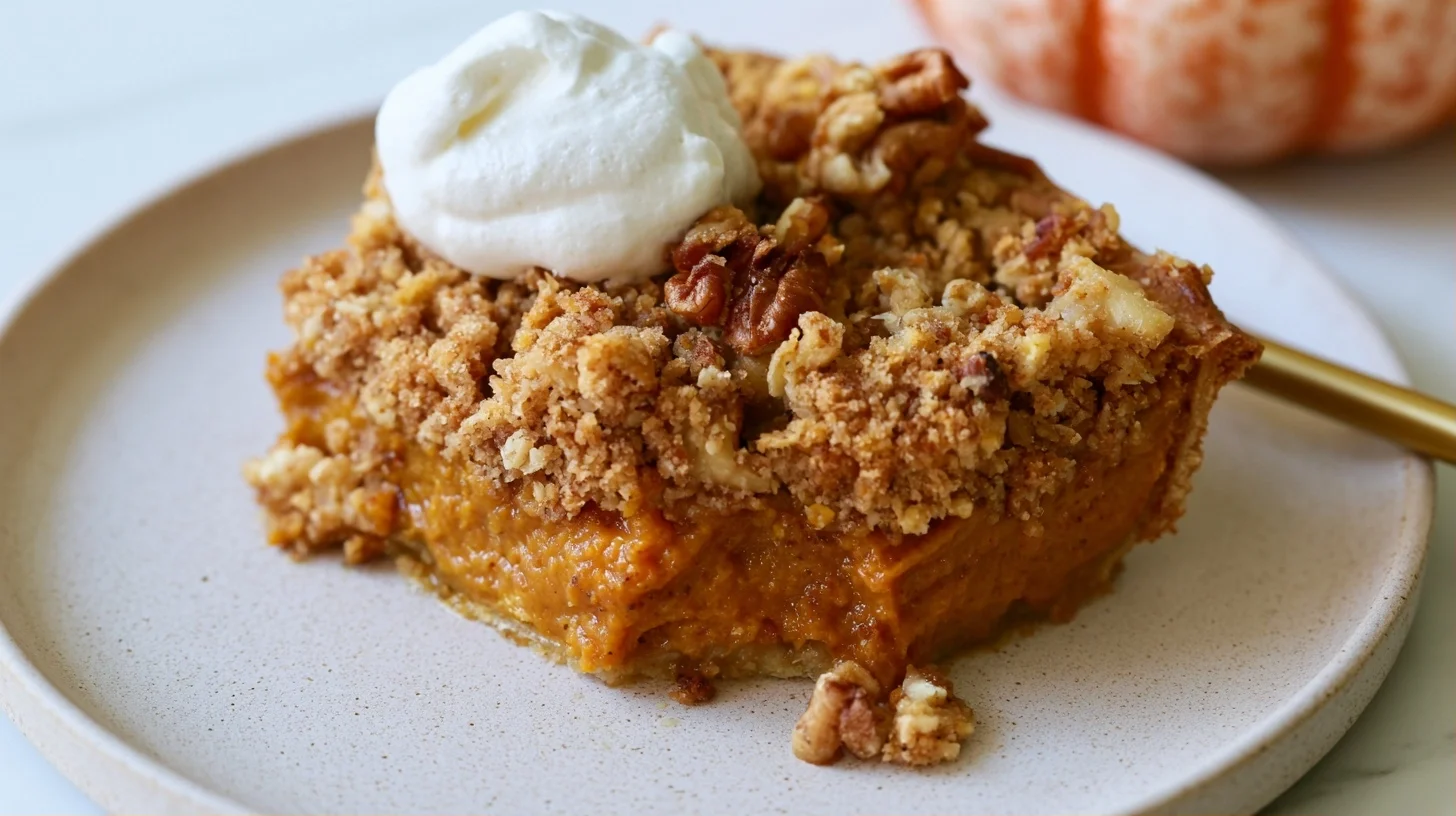
Table of contents
- Why You Will Love This Pumpkin Pie Crisp
- How to Make the Best Pumpkin Pie Crisp
- Expert Tips That Make This Pumpkin Pie Crisp Perfect
- Mistakes to Avoid When Making Pumpkin Pie Crisp
- Creative Ways to Customize Your Pumpkin Pie Crisp
- Understanding the Nutrition in Pumpkin Pie Crisp
- Delicious Ways to Serve Pumpkin Pie Crisp
- Keeping Your Pumpkin Pie Crisp Fresh
- Frequently Asked Questions
Why You Will Love This Pumpkin Pie Crisp
- This dessert delivers all the classic pumpkin pie flavor with a fraction of the effort since there’s no pie crust to make or blind bake.
- The buttery streusel topping adds a delightful crunch and nutty richness that traditional pumpkin pie simply can’t match.
- You can assemble the entire dish up to 24 hours ahead and bake it just before serving, making holiday meal prep stress-free.
- It feeds a crowd beautifully and looks stunning presented in a clear baking dish so guests can see the gorgeous layers.
How to Make the Best Pumpkin Pie Crisp
Pumpkin Pie Crisp
12
servings20
minutes45
minutes285
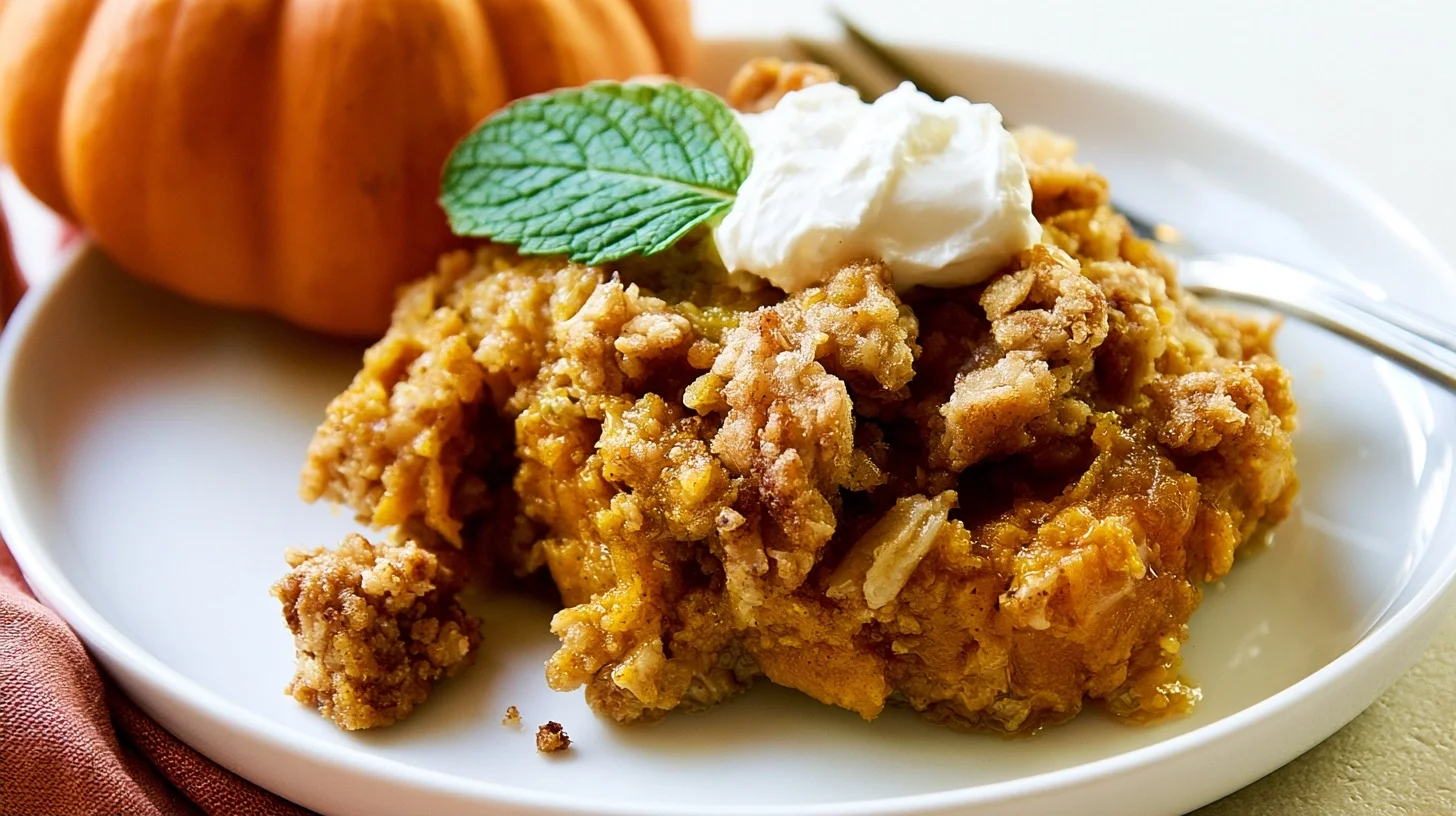
kcalThis pumpkin pie crisp delivers all the warm spices and creamy custard of classic pumpkin pie with a buttery, crunchy streusel topping. The secret is the 1:1.5 ratio of streusel to filling that creates perfect texture balance in every bite.
Keep the screen of your device on
Ingredients
2 cups pumpkin puree
3 large eggs
1 cup evaporated milk
0.75 cup granulated sugar
1.5 teaspoons ground cinnamon
0.5 teaspoon ground ginger
0.25 teaspoon ground nutmeg
0.25 teaspoon ground cloves
0.5 teaspoon salt
1 cup old-fashioned oats
0.75 cup all-purpose flour
0.75 cup packed brown sugar
Directions
- Preheat your oven to 350°F and lightly grease a 9×13-inch baking dish with butter or cooking spray. This prevents sticking and ensures easy serving later.
- Whisk together the pumpkin puree, eggs, evaporated milk, granulated sugar, cinnamon, ginger, nutmeg, cloves, and salt in a large bowl until completely smooth with no lumps. The mixture should be silky and well combined.
- Pour the pumpkin filling into the prepared baking dish and spread it evenly with a spatula. Let it sit for 5 minutes while you prepare the streusel topping, which allows the surface to firm up slightly.
- Combine the oats, flour, and brown sugar in another large bowl and stir to mix. This dry mixture forms the base of your crunchy topping.
- Cut the cold butter into the flour mixture using a pastry cutter or fork until the mixture resembles coarse crumbs with pea-sized butter pieces still visible. Cold butter is essential for achieving that perfect crumbly texture.
- Stir in the toasted chopped pecans until evenly distributed throughout the streusel mixture. The nuts add richness and extra crunch to every bite.
Notes
- The ideal ratio of streusel to filling is 1:1.5 by volume, which creates the perfect balance of creamy and crunchy textures.
- Always use pure pumpkin puree, not pumpkin pie filling, which contains added sugars and spices that will throw off the flavor balance.
- Toast your pecans in a dry skillet for 3 to 4 minutes before chopping to intensify their flavor and add deeper nutty notes to the topping.
- The filling will continue to set as it cools, so remove it from the oven when the center still has a slight jiggle to prevent overcooking the edges.
Nutrition Facts
- Serving Size: 1g
- Total number of serves: 12
- Calories: 285kcal
- Fat: 13g
- Carbohydrates: 38g
- Fiber: 3g
- Protein: 4g
Did you make this recipe?
Tag @therecipemasterblog on Instagram and hashtag it with #therecipemaster
Like this recipe?
Follow @therecipemasterblog on Pinterest
Follow us on Facebook!
Follow The Recipe Master on Facebook
Expert Tips That Make This Pumpkin Pie Crisp Perfect
After making countless batches, I’ve learned exactly what separates a good pumpkin pie crisp from an exceptional one. These techniques ensure your dessert has the ideal texture, flavor balance, and presentation every single time.
Use Pure Pumpkin Puree, Not Pie Filling
The optimal moisture content for pumpkin pie crisp is achieved with plain pumpkin puree, not pre-spiced pie filling. I always check the label carefully because pie filling contains added sugars and spices that throw off the balance. Choosing the right pumpkin variety makes a noticeable difference in both flavor and texture.
Keep Your Butter Cold for the Streusel
Cold butter is the secret to achieving those perfect crumbly clusters in your topping. I cut my butter into small cubes and chill them for 10 minutes before mixing. When you work it into the flour mixture, it should resemble coarse crumbs with pea-sized pieces still visible. If the butter melts during mixing, the streusel will turn greasy rather than crispy.
Toast Your Nuts Before Adding Them
I always toast pecans or walnuts in a dry skillet for 3 to 4 minutes before chopping them for the streusel. This simple step intensifies their flavor and adds a deeper, nuttier dimension to the topping. Just watch them carefully because nuts can go from perfectly toasted to burnt in seconds.
Don’t Overmix the Pumpkin Filling
The ratio of eggs to pumpkin for a silky custard texture is 3 large eggs to 2 cups of pumpkin puree. I whisk just until the ingredients are combined and smooth. Overmixing incorporates too much air, which can cause the filling to puff up during baking and then collapse as it cools, creating an uneven surface.
Check for Doneness at the Center
The filling should still have a slight jiggle in the very center when you remove it from the oven. It will continue to set as it cools, and this prevents the edges from becoming overcooked and grainy. I test by gently shaking the pan rather than inserting a knife, which can create cracks in the surface.
Mistakes to Avoid When Making Pumpkin Pie Crisp
Even experienced bakers can run into trouble with this recipe if they skip certain steps. I’ve made these mistakes myself, so I know exactly how to help you avoid them and achieve perfect results every time.
Adding the Streusel Too Early
One common error is adding the streusel topping before the filling has had time to set slightly. If you add it immediately, the topping can sink into the wet filling and become soggy instead of crispy. I recommend spreading the filling first, then letting it sit for 5 minutes while you prepare the streusel. This brief rest allows the surface to firm up just enough to support the topping.
Baking at Too High a Temperature
Baking at temperatures above 350°F causes the edges to overcook while the center remains underdone. I always bake at 350°F for even heat distribution. If your oven runs hot, reduce the temperature by 25 degrees and add 5 to 10 minutes to the baking time. An oven thermometer is invaluable for accuracy.
Skipping the Cooling Time
Cutting into the crisp while it’s still hot results in a runny, soupy mess. The filling needs at least 2 hours at room temperature to fully set into that perfect custard texture. I know it’s tempting to dig in right away, but patience here makes all the difference in presentation and texture.
Using a Pan That’s Too Small
If you use an 8×8 or 9×9 pan instead of a 9×13, the filling will be too deep and won’t cook through properly. The center will remain jiggly even after extended baking, and the topping may burn before the filling sets. Stick with the recommended pan size for the best results.
Creative Ways to Customize Your Pumpkin Pie Crisp
I love experimenting with different flavor combinations and dietary adaptations for this recipe. These variations keep the dessert interesting and allow you to accommodate various preferences and restrictions without sacrificing flavor or texture.
Maple Pecan Variation
Replace half the brown sugar in the streusel with pure maple sugar, and increase the chopped pecans to 1 cup. Add 2 tablespoons of maple syrup to the pumpkin filling for a deeper, more complex sweetness. This version pairs beautifully with bourbon whipped cream.
Gluten-Free Pumpkin Pie Crisp
Substitute the all-purpose flour in both the filling and topping with a 1:1 gluten-free baking blend. I recommend adding 1/4 teaspoon of xanthan gum to the streusel if your blend doesn’t already contain it. Use certified gluten-free oats to keep the entire dessert safe for those with celiac disease.
Dairy-Free Version
Replace the butter with coconut oil that’s been chilled until solid, and use full-fat coconut milk instead of evaporated milk in the filling. The coconut flavor is subtle and actually complements the pumpkin spices beautifully. Make sure to chill the coconut oil thoroughly so it creates the same crumbly texture as butter.
Chocolate Chip Addition
For a fun twist that kids especially love, sprinkle 1/2 cup of semi-sweet chocolate chips over the pumpkin filling before adding the streusel. The chocolate melts slightly during baking and creates pockets of rich, gooey sweetness throughout the dessert. If you enjoy creative pumpkin desserts, you might also love this pumpkin oatmeal cream pie recipe that combines similar autumn flavors in a handheld treat.
Spiced Rum Variation
Add 2 tablespoons of dark rum to the pumpkin filling along with an extra 1/4 teaspoon of cinnamon. The rum enhances the warm spices without making the dessert taste boozy. This adult-friendly version is perfect for holiday gatherings.
Understanding the Nutrition in Pumpkin Pie Crisp
Each serving of this pumpkin pie crisp contains approximately 285 calories, making it a reasonable indulgence for special occasions. The dessert provides about 4 grams of protein from the eggs and nuts, along with 38 grams of carbohydrates that give you energy. You’ll get 13 grams of fat per serving, primarily from the butter and pecans in the streusel topping.
The pumpkin itself contributes valuable nutrients including vitamin A, fiber, and antioxidants. While this is definitely a treat rather than health food, the pumpkin filling offers more nutritional value than many other desserts. If you’re watching your sugar intake, you can reduce the brown sugar in the filling by 2 tablespoons without significantly affecting the texture or flavor.
Delicious Ways to Serve Pumpkin Pie Crisp
I always serve this dessert slightly warm with a generous dollop of freshly whipped cream or a scoop of vanilla ice cream. The contrast between the warm, spiced filling and cold cream creates an irresistible combination. For an extra special presentation, drizzle each serving with salted caramel sauce and sprinkle with a few extra toasted pecans.
This pumpkin pie crisp shines at holiday gatherings, potlucks, and casual family dinners alike. I like to bring it to Thanksgiving in the baking dish and serve it straight from the pan for a rustic, homey presentation. For more formal occasions, you can plate individual portions in shallow bowls and garnish with a cinnamon stick or a dusting of powdered sugar. It pairs wonderfully with hot apple cider, spiced coffee, or a glass of dessert wine.
Keeping Your Pumpkin Pie Crisp Fresh
Store leftover pumpkin pie crisp covered tightly with plastic wrap or aluminum foil in the refrigerator for up to 4 days. The streusel topping will soften slightly during storage, but it still tastes delicious. I find that the flavors actually deepen and meld together beautifully after a day or two in the fridge.
You can freeze this dessert for up to 2 months if you want to make it well ahead. Let it cool completely, then wrap the entire baking dish in two layers of plastic wrap followed by a layer of heavy-duty aluminum foil. Thaw overnight in the refrigerator before serving. To reheat, place individual portions in the microwave for 30 to 45 seconds, or warm the entire dish covered with foil in a 300°F oven for 15 to 20 minutes until heated through.
Frequently Asked Questions
Yes, you can use fresh pumpkin puree. Roast a sugar pumpkin, scoop out the flesh, and blend until smooth. You’ll need about 2 cups of puree. Make sure to drain any excess liquid through cheesecloth because fresh pumpkin contains more moisture than canned.
A watery crisp usually means it wasn’t baked long enough or wasn’t allowed to cool and set properly. The filling needs at least 2 hours at room temperature to firm up into a custard texture. Also check that you used pumpkin puree and not pumpkin pie filling, which has higher moisture content.
Yes, you can assemble the entire dish up to 24 hours ahead. Cover it tightly with plastic wrap and refrigerate, then bake it just before serving. You can also bake it completely up to 2 days ahead and reheat individual portions in the microwave for 30 seconds.
Pumpkin pie has a pastry crust on the bottom, while pumpkin pie crisp has no bottom crust and features a crunchy streusel topping made with oats, flour, butter, and nuts. The crisp is easier to make because you skip the crust-making step entirely.





Leave a Reply